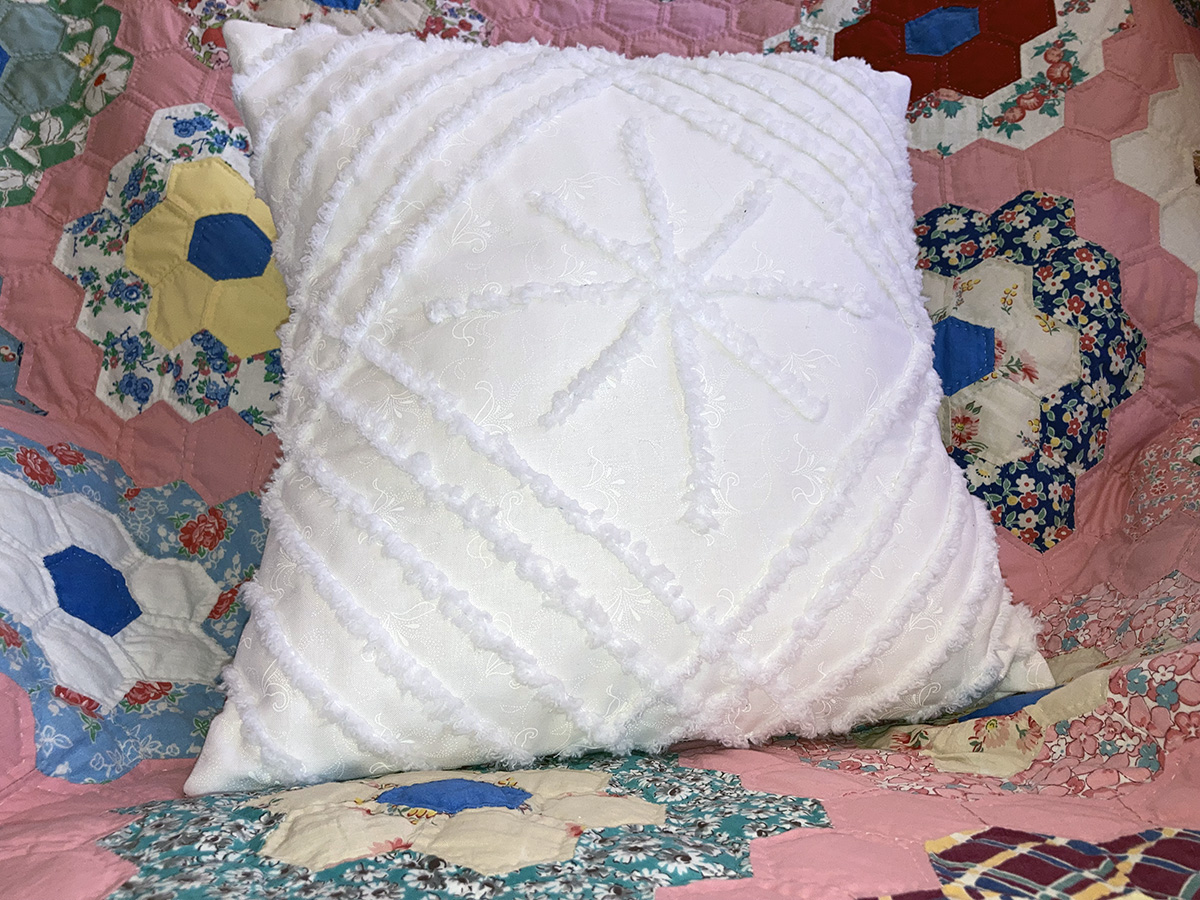
Do you love the look of vintage chenille bedspreads? Let me show you how easy it is to recreate this look using the BERNINA Adjustable Ruler Foot #72 and the Couching Inserts. Creating this 16” square pillow is a great way to learn the technique, and you can easily adjust to the size of pillow that you want to make.

I used my BERNINA Q20 Table model to quilt and couch my pillow. The built-in Stitch Regulator kept my stitches even and there was plenty of space to maneuver around. This project can also be done on your domestic machine.
Machine and Accessories Featured
- BERNINA Q 20 Table Model
- Sewing machine (I used the BERNINA 880 PLUS)
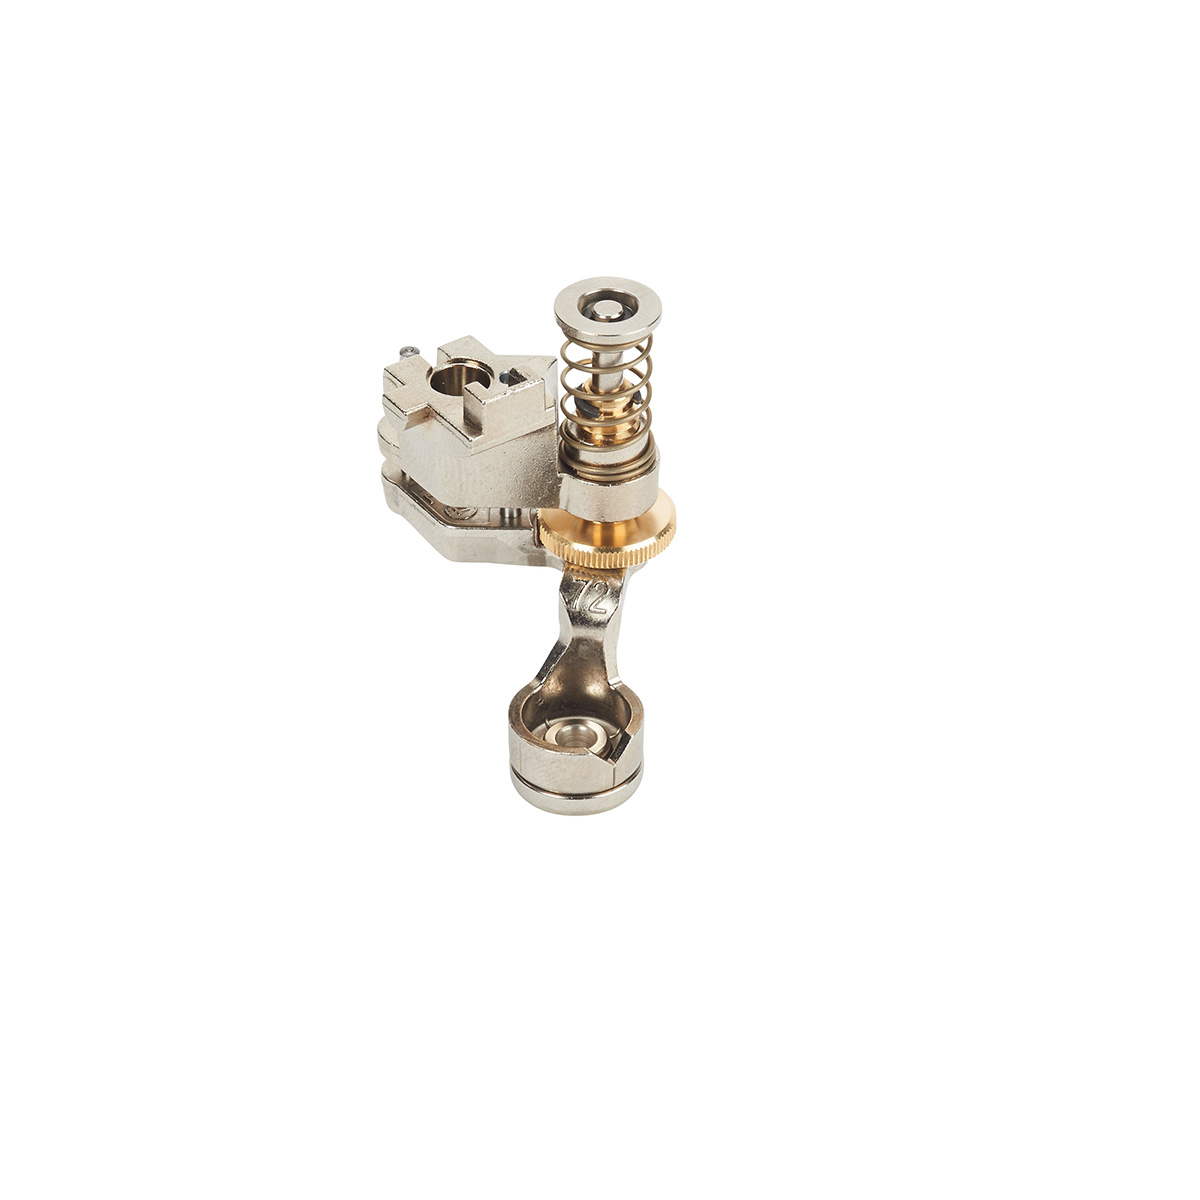
- Adjustable Ruler Foot #72/Adjustable Ruler Foot with Slit #72S
- Couching Inserts
- Reverse Pattern Foot #1/1C/1D
- Straight edge rulerwork ruler (I used Long Arm Every Angle Ruler by Amanda Murphy)
Supplies to Make a Chenille Pillow with Rulerwork
- 18” square of white or white tone-on-tone cotton fabric for the pillow front
- 20” square of white cotton fabric or muslin for the pillow front lining
- 16” x 20” rectangles of cotton print for the pillow back (x2)
- 20” square of thin cotton batting
- Bernat Pipsqueak Baby Yarn in your desired color for the pillow front (I used white)
- 16” pre-made pillow form
- Cotton thread top and bobbin to match yarn
- Basic sewing supplies
The inspiration for this pillow came from a Pinterest post (click on the image in Pinterest to access the blog post by Amy, @intovintage), and some soft yarn I spied at BERNINA of Chattanooga. It reminded me of the chenille bedspreads my grandmother had…so soft and comforting.
Steps to Make a Chenille Pillow with Rulerwork
Quilting the Chenille Design
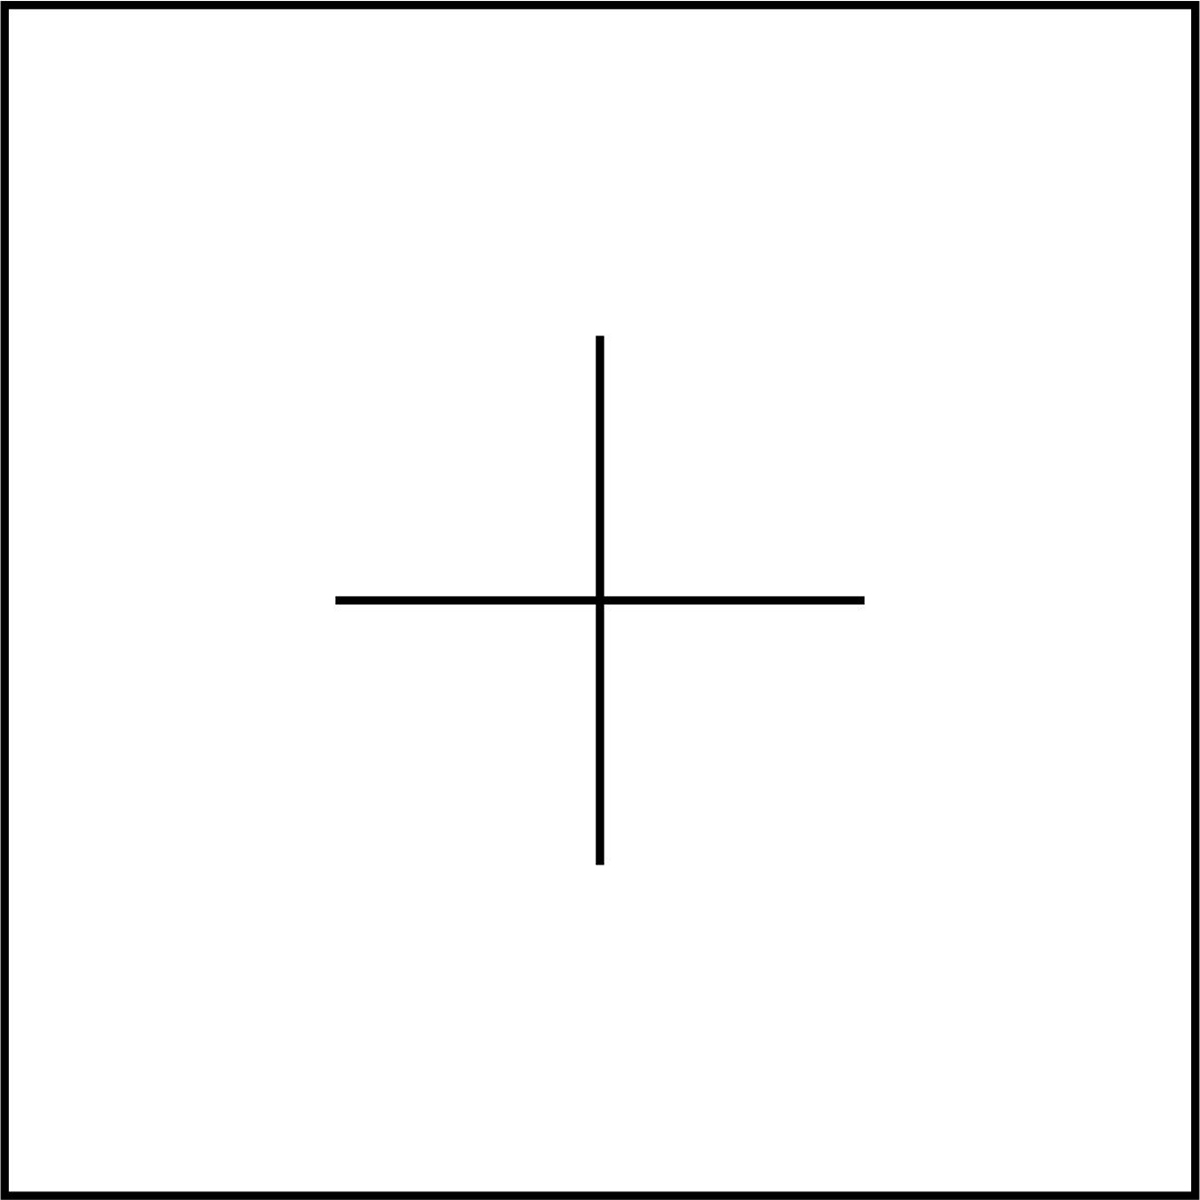
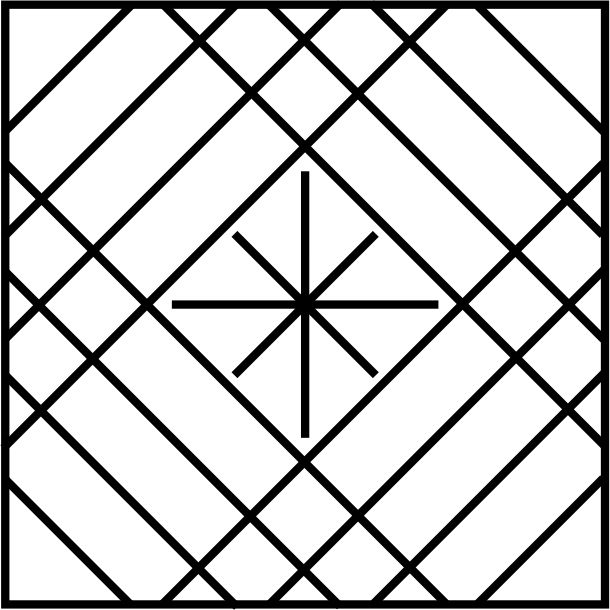
- Using a wash-away or air-erasable fabric marking pen, make a “plus” on the right side of the 18” white square intersecting through the center. Each line should be 8” long.
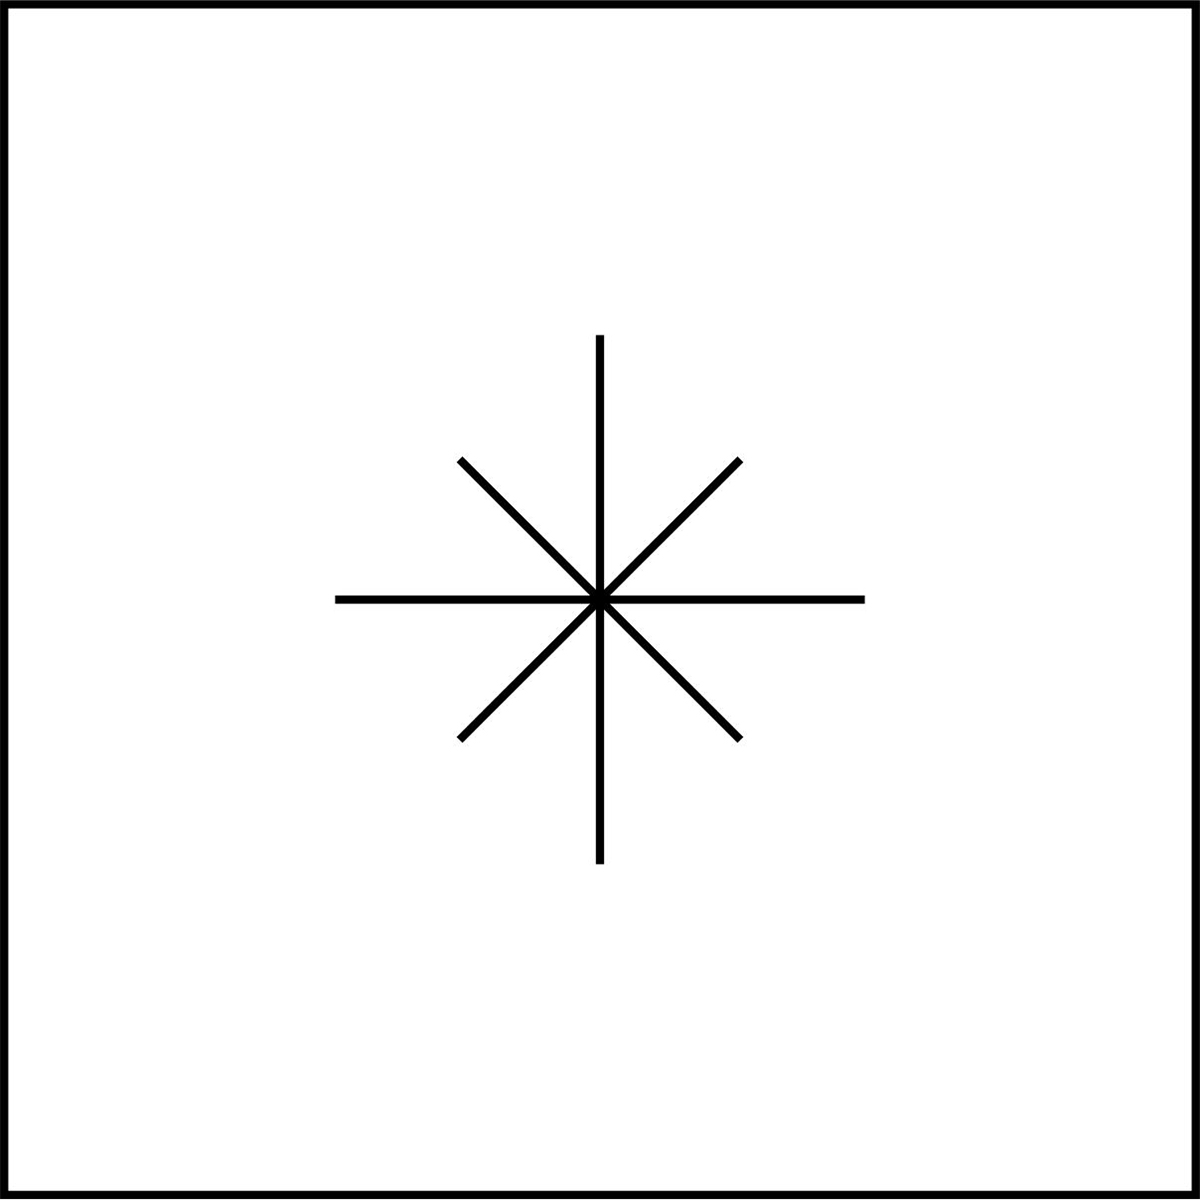
- Make an “X” intersecting through the center. Each line should be 6” long.
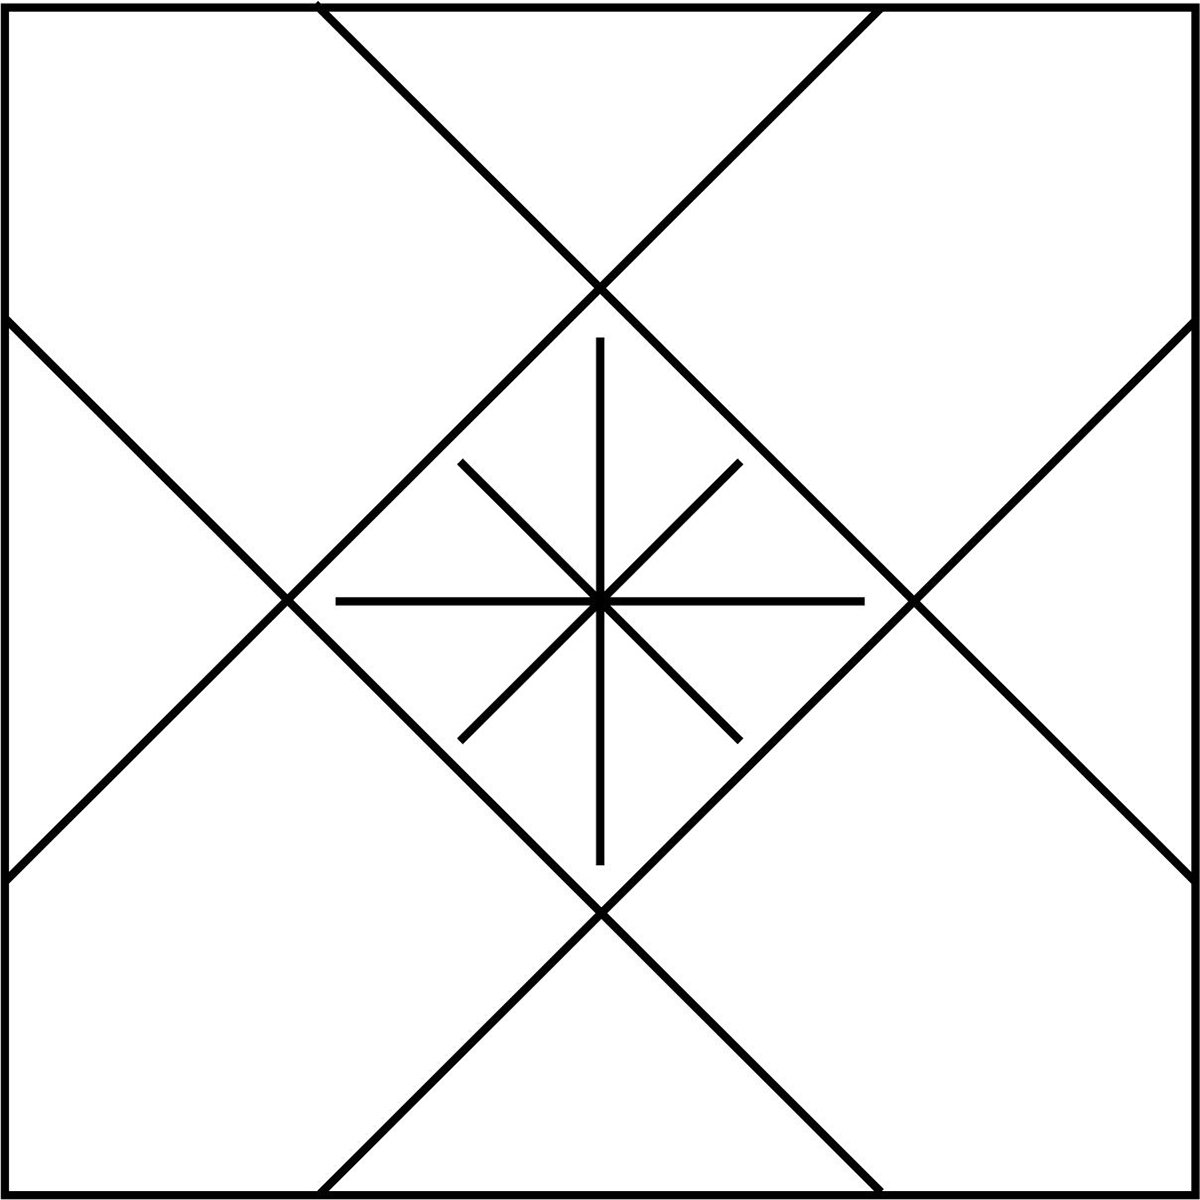
- Mark four long lines as shown. Each line is 1” away from the ends of the lines drawn through the center.
- Make a quilt sandwich using the other white square and batting. Baste as desired. I found temporary basting spray to be adequate.
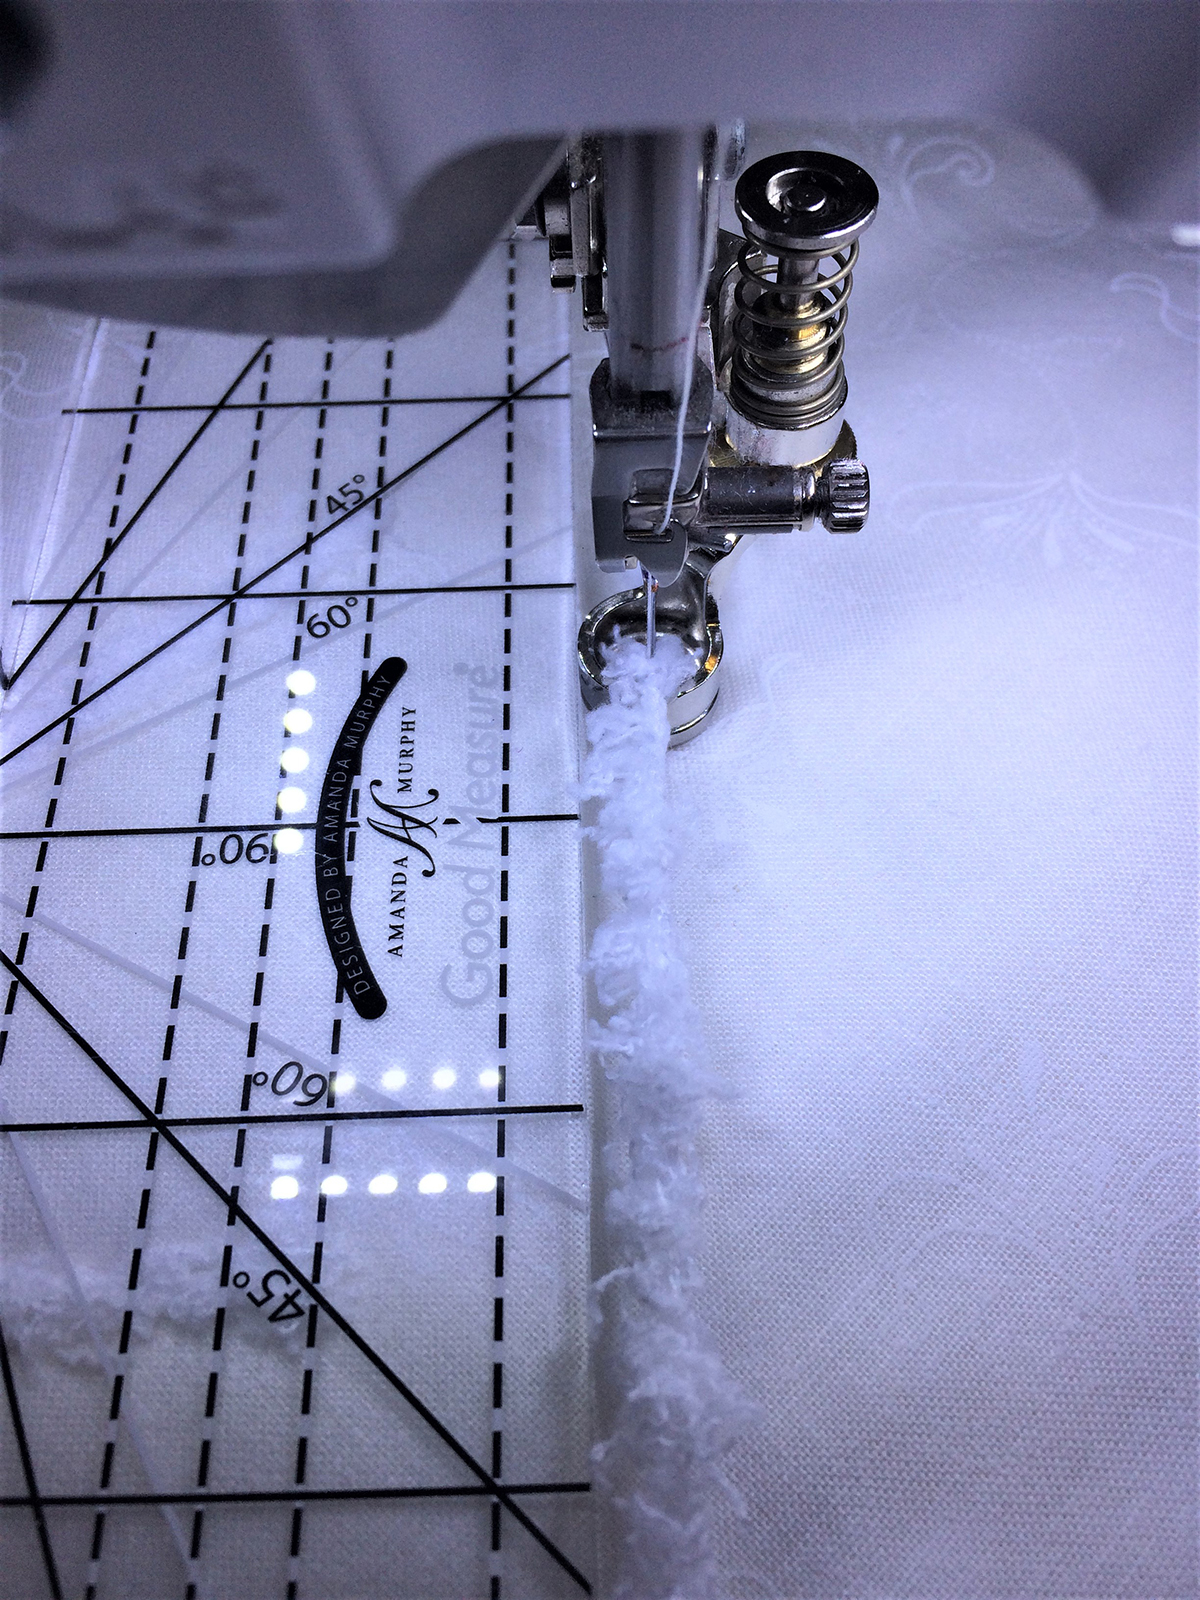
- With the couching inserts, you can easily add texture to your project and quilt at the same time. You can either quilt with a ruler or do free-motion stitching. There are three inserts in a set that accommodate thin, medium and thick cords. Choose the insert size that allows your cord to feed easily. With the yarn I selected, I used the largest insert.

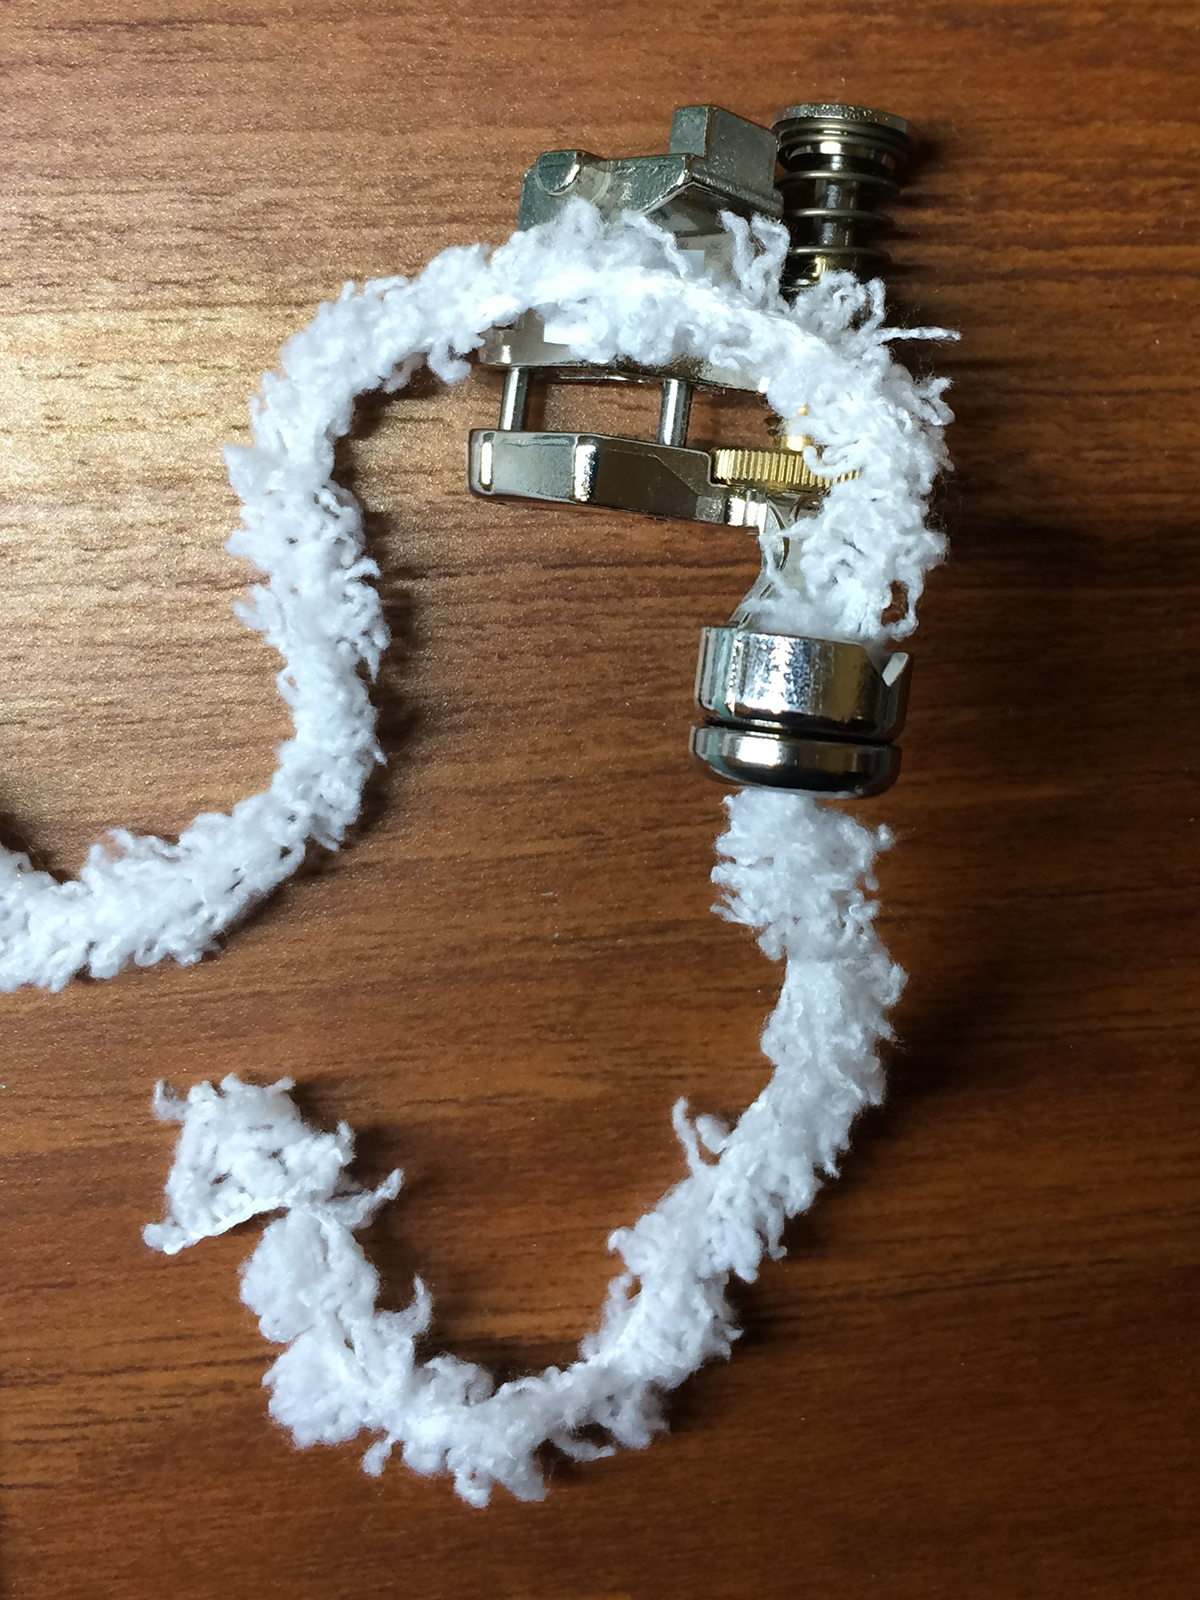
- Attach the couching insert to the bottom of the Adjustable Ruler Foot #72/Adjustable Ruler Foot with Slit #72S.
- Thread the yarn through the insert from top to bottom. The inserts will make the foot a little thicker, so adjust the height of the foot to the minimum before attaching to the machine so that it is just skimming across the top of your fabric when the foot is down. Be sure to keep plenty of yarn loose to move through the foot.
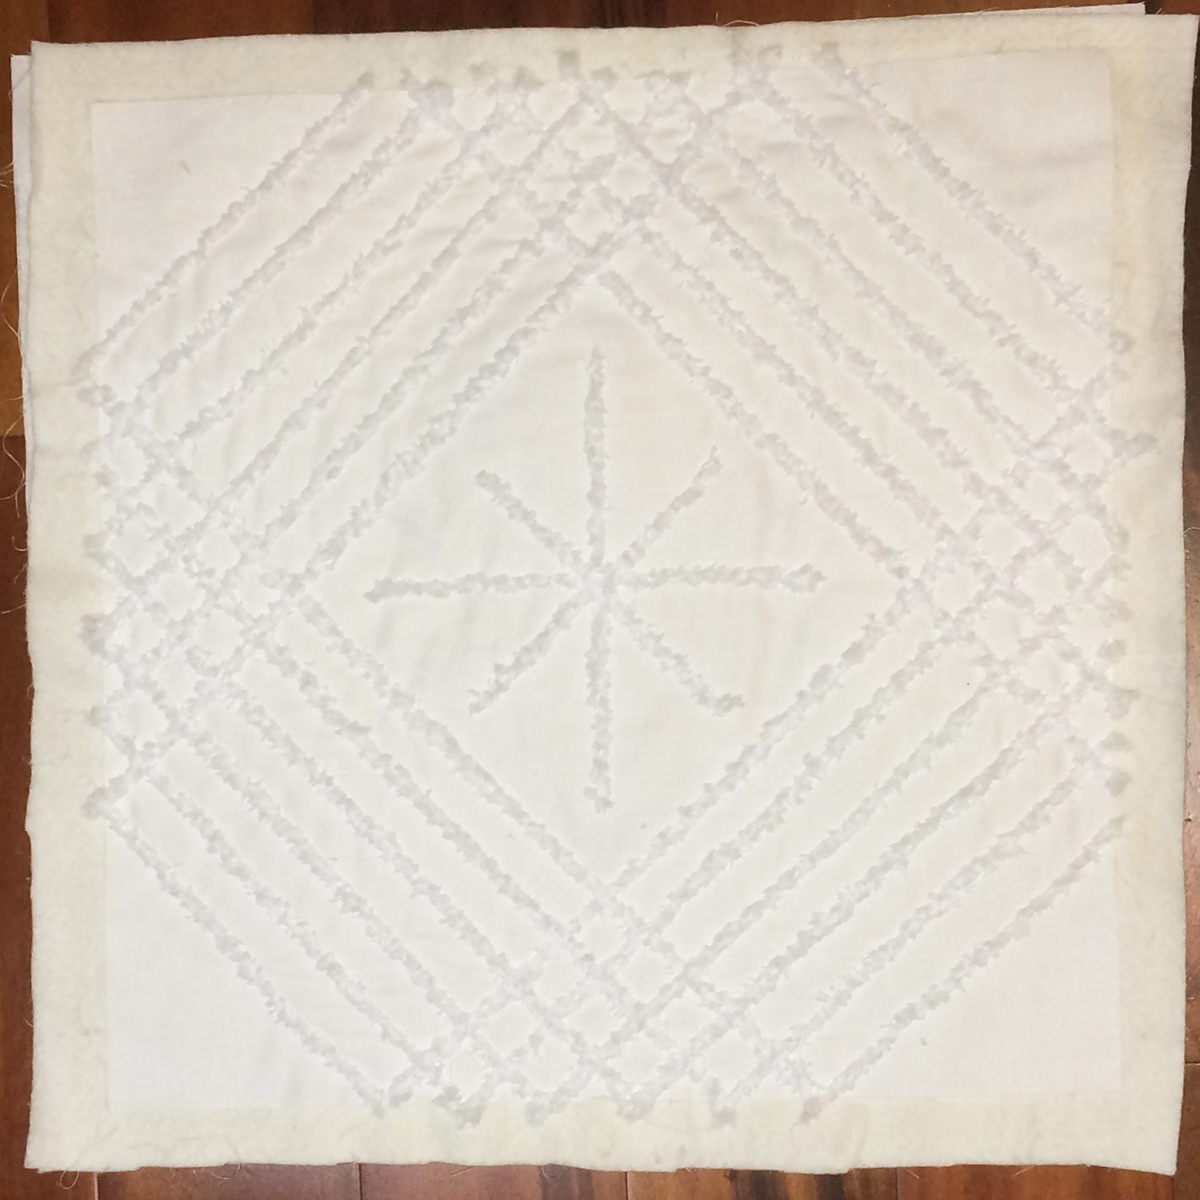
- Stitch the star pattern in the middle of the pillow first. Begin by pulling up the bobbin thread and taking a couple of stitches in place to secure. At the end of the line again take a couple of stitches to secure and then bring up the bobbin thread and trim. Trim the yarn tails close to the stitching. Repeat until the star pattern is complete. Guide your foot along the edge of the straight-edge ruler to keep your lines of stitching straight. Always lower your foot first and then position the ruler.
- Stitch the remaining four drawn lines
- Now you will add more rows of couching away from the center 1″ apart
- Position the ruler so that the edge of the ruler is 3/4″ away from the first stitching. The additional 1/4″ is added by the edge of the foot.
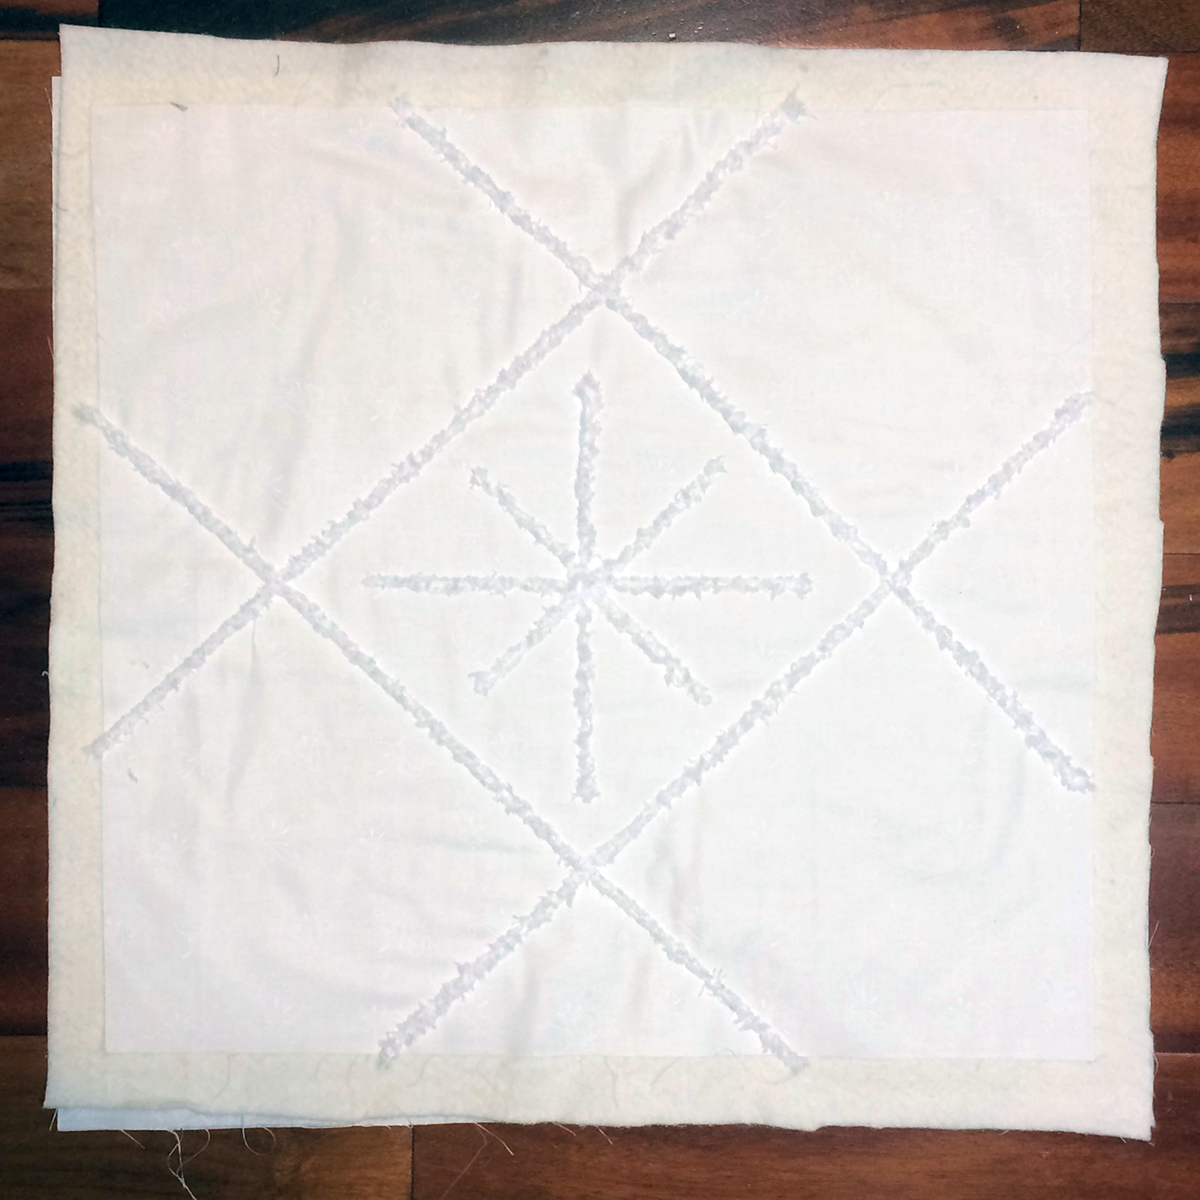
- Continue adding lines of couching until your pillow front looks like the photo. You may have more or less lines, depending on your pillow size. I stitched the lines closest to the center on all four sides and then worked around the pillow to give a woven effect at the intersections.
- If any of your markings are showing when done, spritz with water and let dry.
- Trim the pillow to the desired size. The 16″ pillow form I used was not particularly plump, so I squared my quilted piece slightly smaller to get a snug fit. I cut my fabric to 16″ square and with a 1/2″ seam allowance it will end up being 15″ square…nice and snug.

Assemble the Pillow
- Press the two cotton prints in half, wrong sides together, so they measure 16” x 10”.
- Place the cotton prints on the right side of the pillow lining up the raw edges and overlapping the folds.
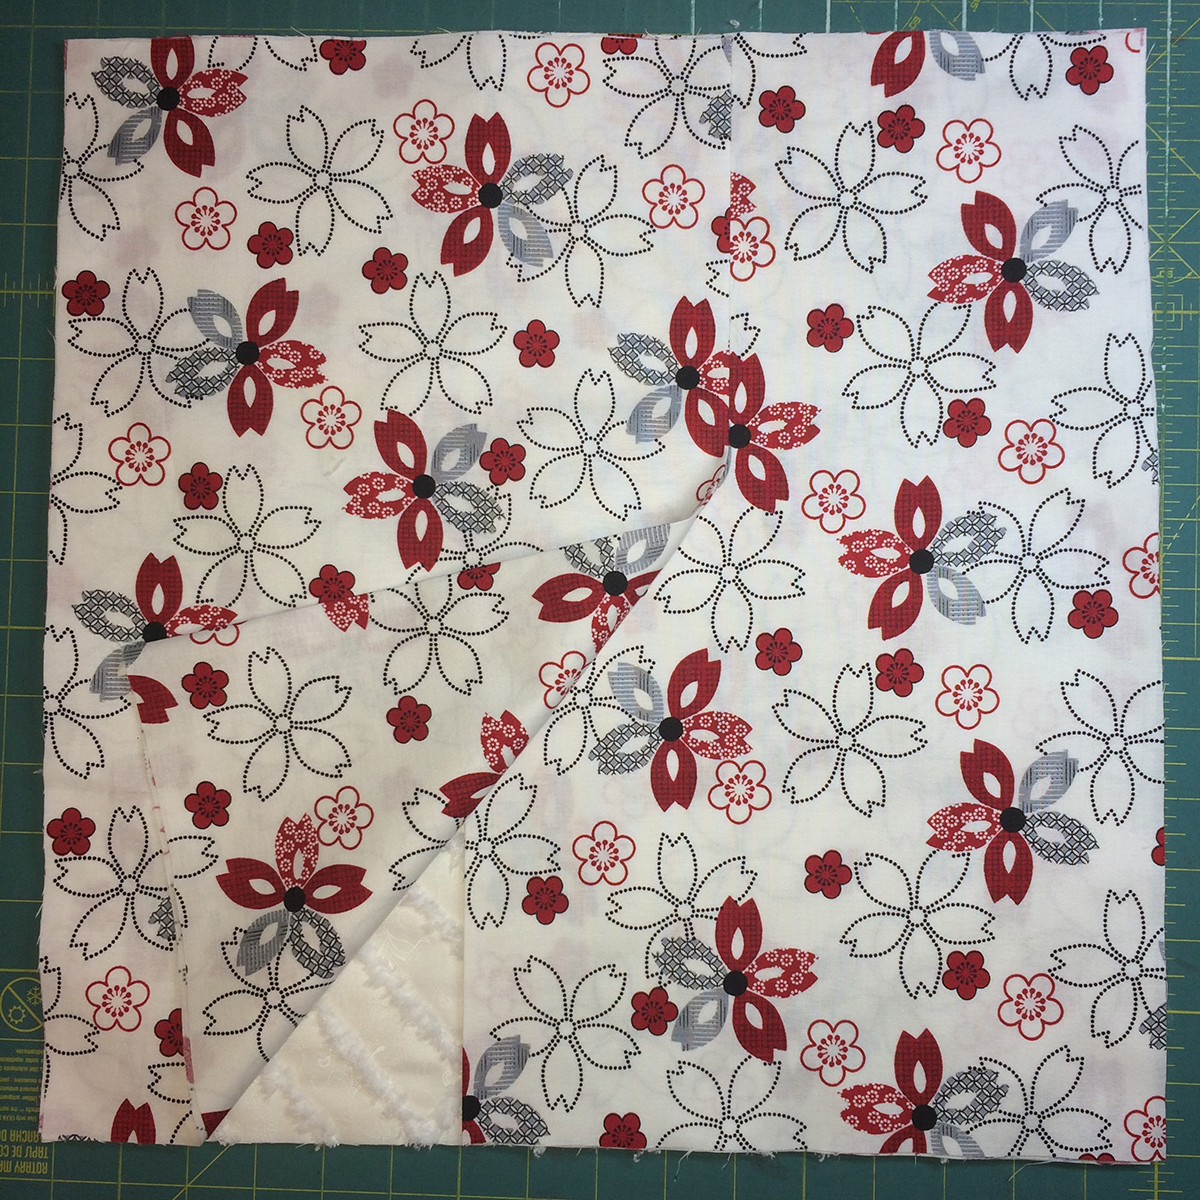
- Pin or clip around the pillow.
- At your sewing machine use the Reverse Pattern Foot #1/1C/1D and stitch all four sides of the pillow using a 1/2″ seam allowance.
- Clip the corners and turn right side out.
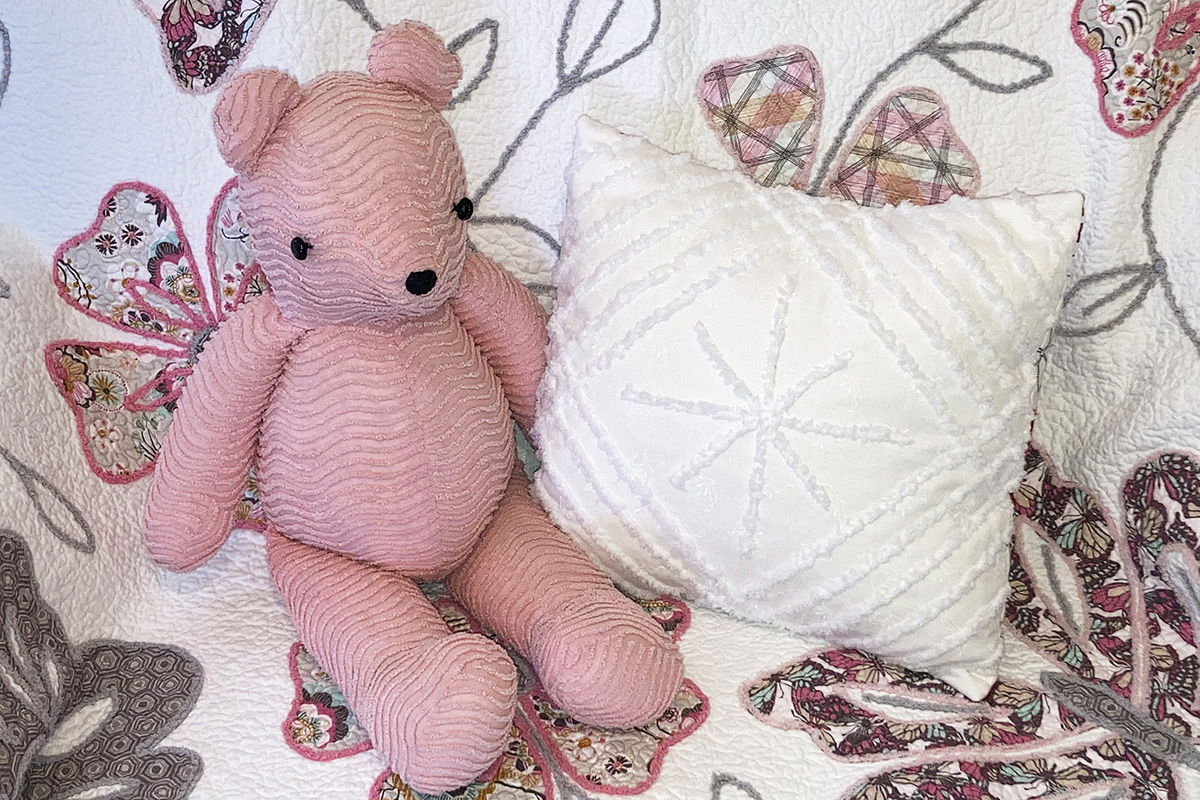
- Insert your pillow form and enjoy your new vintage chenille pillow!