


Looking for something special for your autumn or holiday decor? Here’s a fun in-the-hoop project from Lisa Archer of Pickle Pie Designs. Happy stitching!
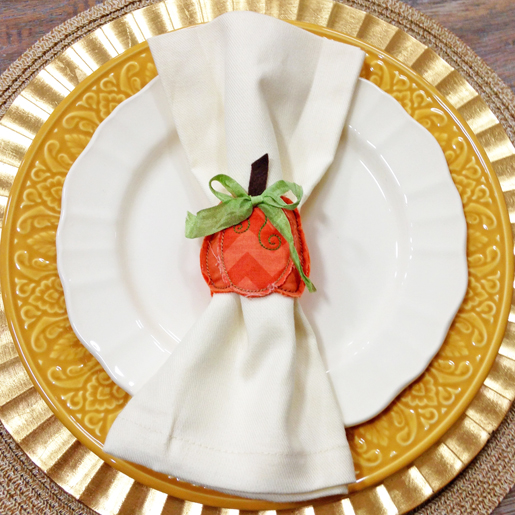
I love decorating for the holidays and including festive touches on my dinner table. I especially love when I can stitch a project and add a creative, homemade dimension to my holiday décor. I created these fun, festive and FAST Napkin Rings for Thanksgiving, and I’m thrilled to be able to share them with you. They’re made, start to finish, in the hoop of your embroidery machine with no additional sewing required, so you can stitch them for all of your Thanksgiving guests in no time at all! You can add a monogram using your BERNINA Embroidery Software, and send each guest home with a personalized memento of the holiday. Choose fabrics to match your décor for unique place settings on your Thanksgiving table!
Supplies
- Tear-away stabilizer
- 3-1/2″ square of coordinating cotton fabric for the right and left sides of the pumpkin (Fabric 1)
- 3-1/2″ square of cotton fabric for the center of the pumpkin (Fabric 2)
- Two 3-1/2” squares of orange wool blend felt to match your fabrics
- Scrap of brown felt
- Microtex Sharp needle, size 80/12
- Bobbin loaded with thread to match the larger squares of felt
- Ribbon for bow (optional)
- Fabric glue (optional)
- Washi tape or other low-tack adhesive tape
step 1) Load the design on your embroidery machine.
Download the free embroidery file from bernina.com – click HERE for link.
Save the design on your computer.
Open the design in embroidery software, such as BERNINA ArtLink 7. Click HERE for free download.
Select Write to Card/Machine and select the appropriate option for your machine from the list.
Click OK.
Move to your embroidery machine and open the design.
step 2) Make the pumpkin stem.
Hoop a piece of tear-away stabilizer and place the hoop on your embroidery machine.
Using thread to coordinate with your fabric, Sew Stitch Sequence 1 to create placement lines on the stabilizer.
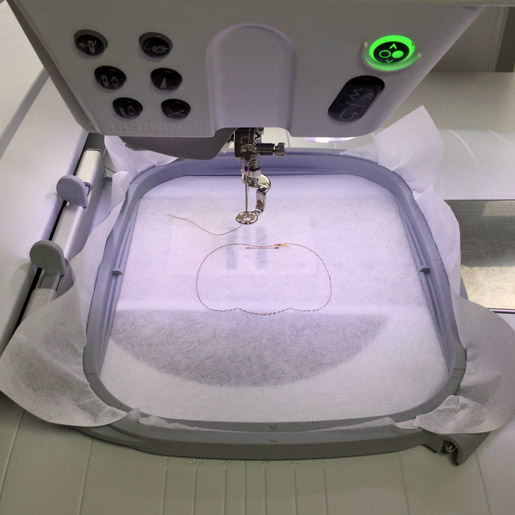
Trim the scrap of brown felt into a stem shape, about 1.5″ tall.
Place the bottom of the felt stem over the straight placement line. Tape in place outside of the placement lines. Sew Stitch Sequence 2 to tack down the felt.

step 3) Stitch the pumpkin body.
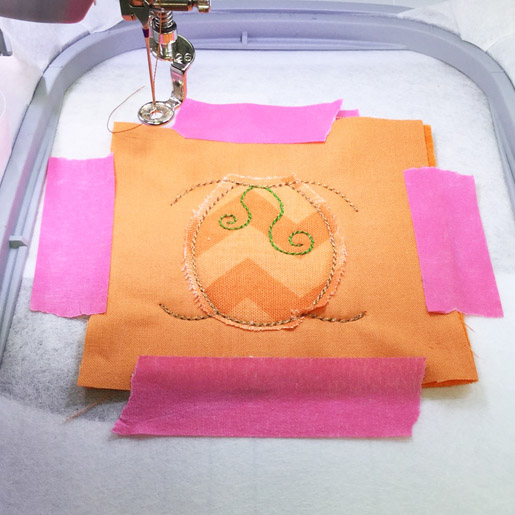
Center one piece of orange felt over the pumpkin placement line. Center Fabric 1 over the felt. Center Fabric 2 over Fabric 1. Tape all layers down along the edges to hold them to the stabilizer.
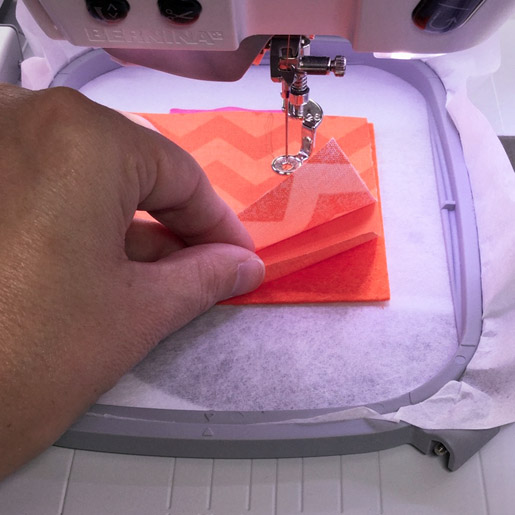
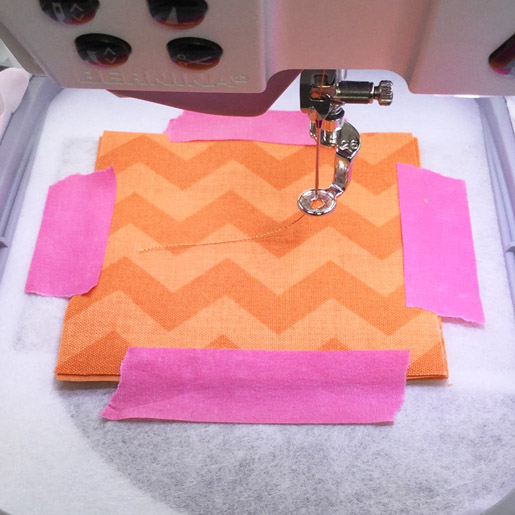
Sew Stitch Sequence 3 to create a cutting line.
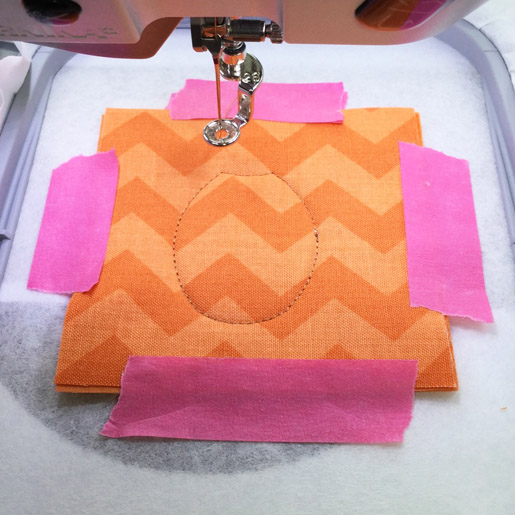
Remove the hoop from your machine and trim just Fabric 2 around the outside of the cutting line, leaving a small seam allowance.
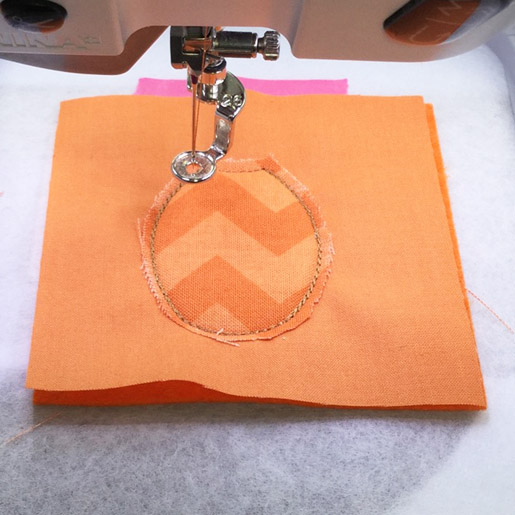
Replace the hoop on your machine. Change thread color to green. Sew Stitch Sequence 4 to create the swirls.
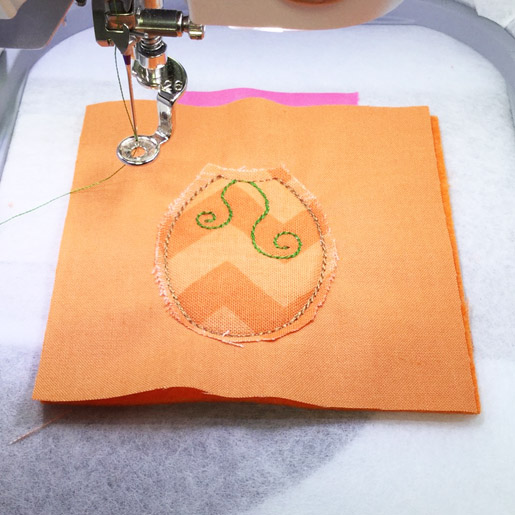
Change thread color back to original color. Sew Stitch Sequence 5 to start the final pumpkin outline.
step 4) Complete the napkin ring.
Remove the hoop from your machine and turn it over to the back. Place the final piece of felt over the pumpkin placement lines. Tape in place.
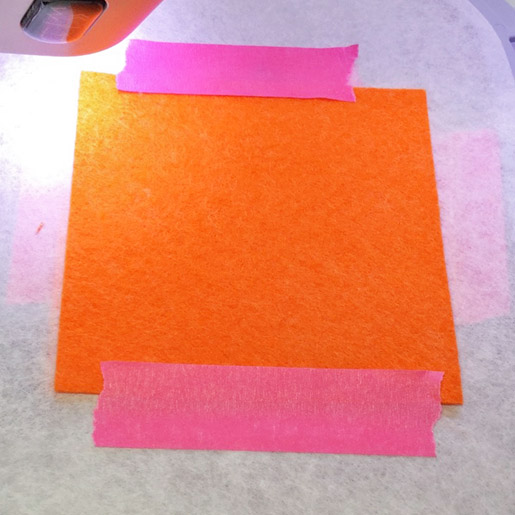
Replace the hoop on your machine and sew Stitch Sequence 6 to complete the pumpkin outline.

Remove the hoop from your machine and remove the project from hoop.
Tear the excess stabilizer from around the pumpkin.
Trim the excess fabric and felt from around the pumpkin, leaving a small seam allowance, and being careful not to cut off the stem when working at the top of the pumpkin.
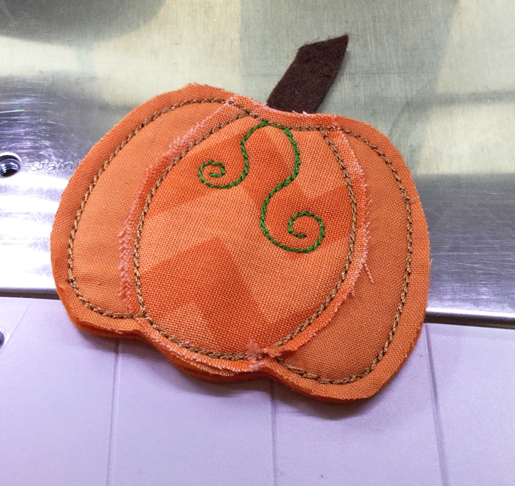
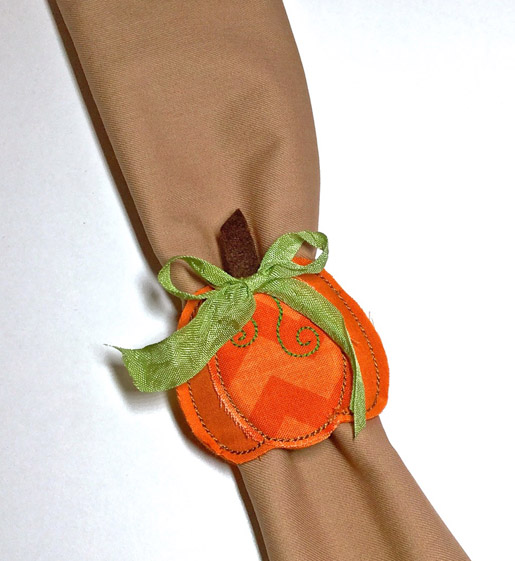
Glue on a bow, if desired, then slide a napkin through the (magic!) opening in the back.
Enjoy your festive Thanksgiving table!

For additional in-the-hoop pumpkin table decor, visit Lisa at Pickle Pie Designs.

