


![]()
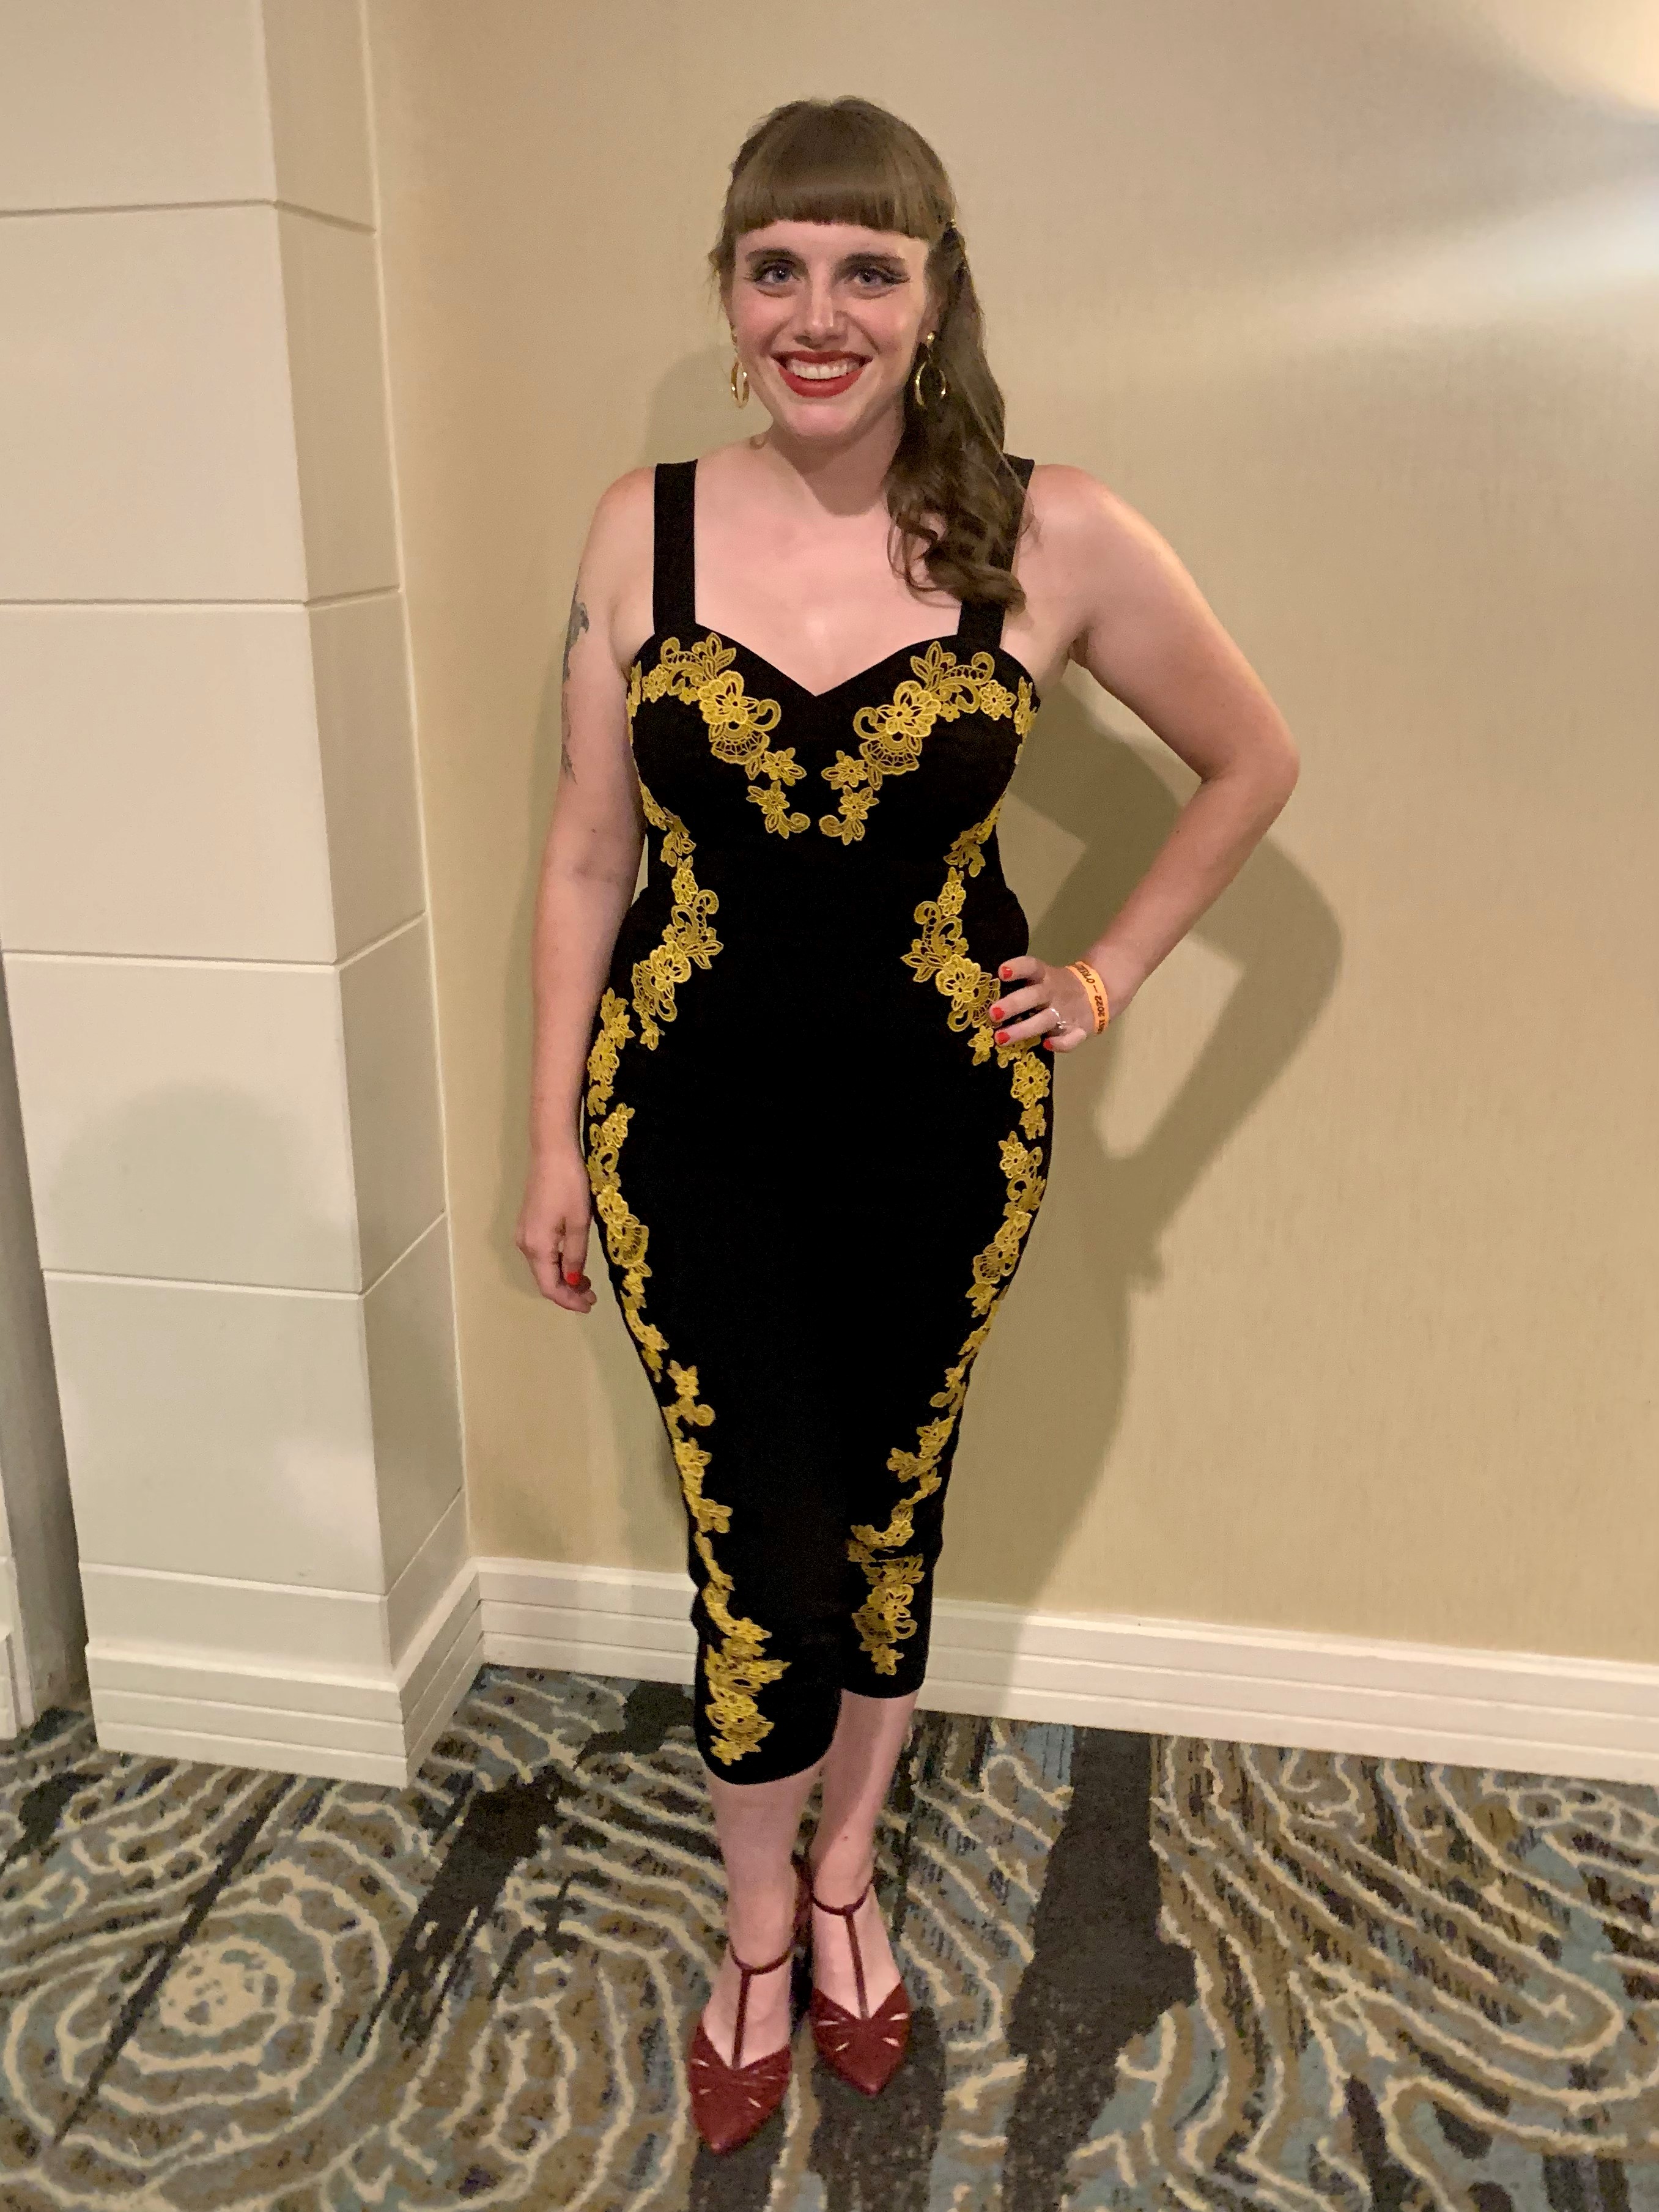
There are so many ways to add machine embroidery to garments and in this post I’m showing you how I used free standing lace to create a vintage inspired jumpsuit. I was heavily inspired by Ceeb of Miami jumpsuits that feature gold, strategically placed applique. This technique could be used to make a stand-out garment with head to toe applique or you could use a few pieces to embellish a basic top. The possibilities are endless!
Supplies Needed for Free Standing Lace Applique:
- OESD BadgeMaster Stabilizer
- OESD AquaMesh WashAway Stabilizer
- Embroidery Thread
- Embroidery Hoop (I used the Large Oval Embroidery Hoop)
- Drop-Shaped Embroidery Foot #26
- Straight-Stitch Plate
- T-Pins
- Garment to attach applique
- Hand-Sewing Needle
For my jumpsuit, I used multiple Free Standing Lace designs from OESD’s Chic Lace Collection and Isacord thread in Antique (0721) and Star Gold (0622). The jumpsuit was made using the Jane Set from Charm Patterns.
How to Make Free Standing Lace Applique:
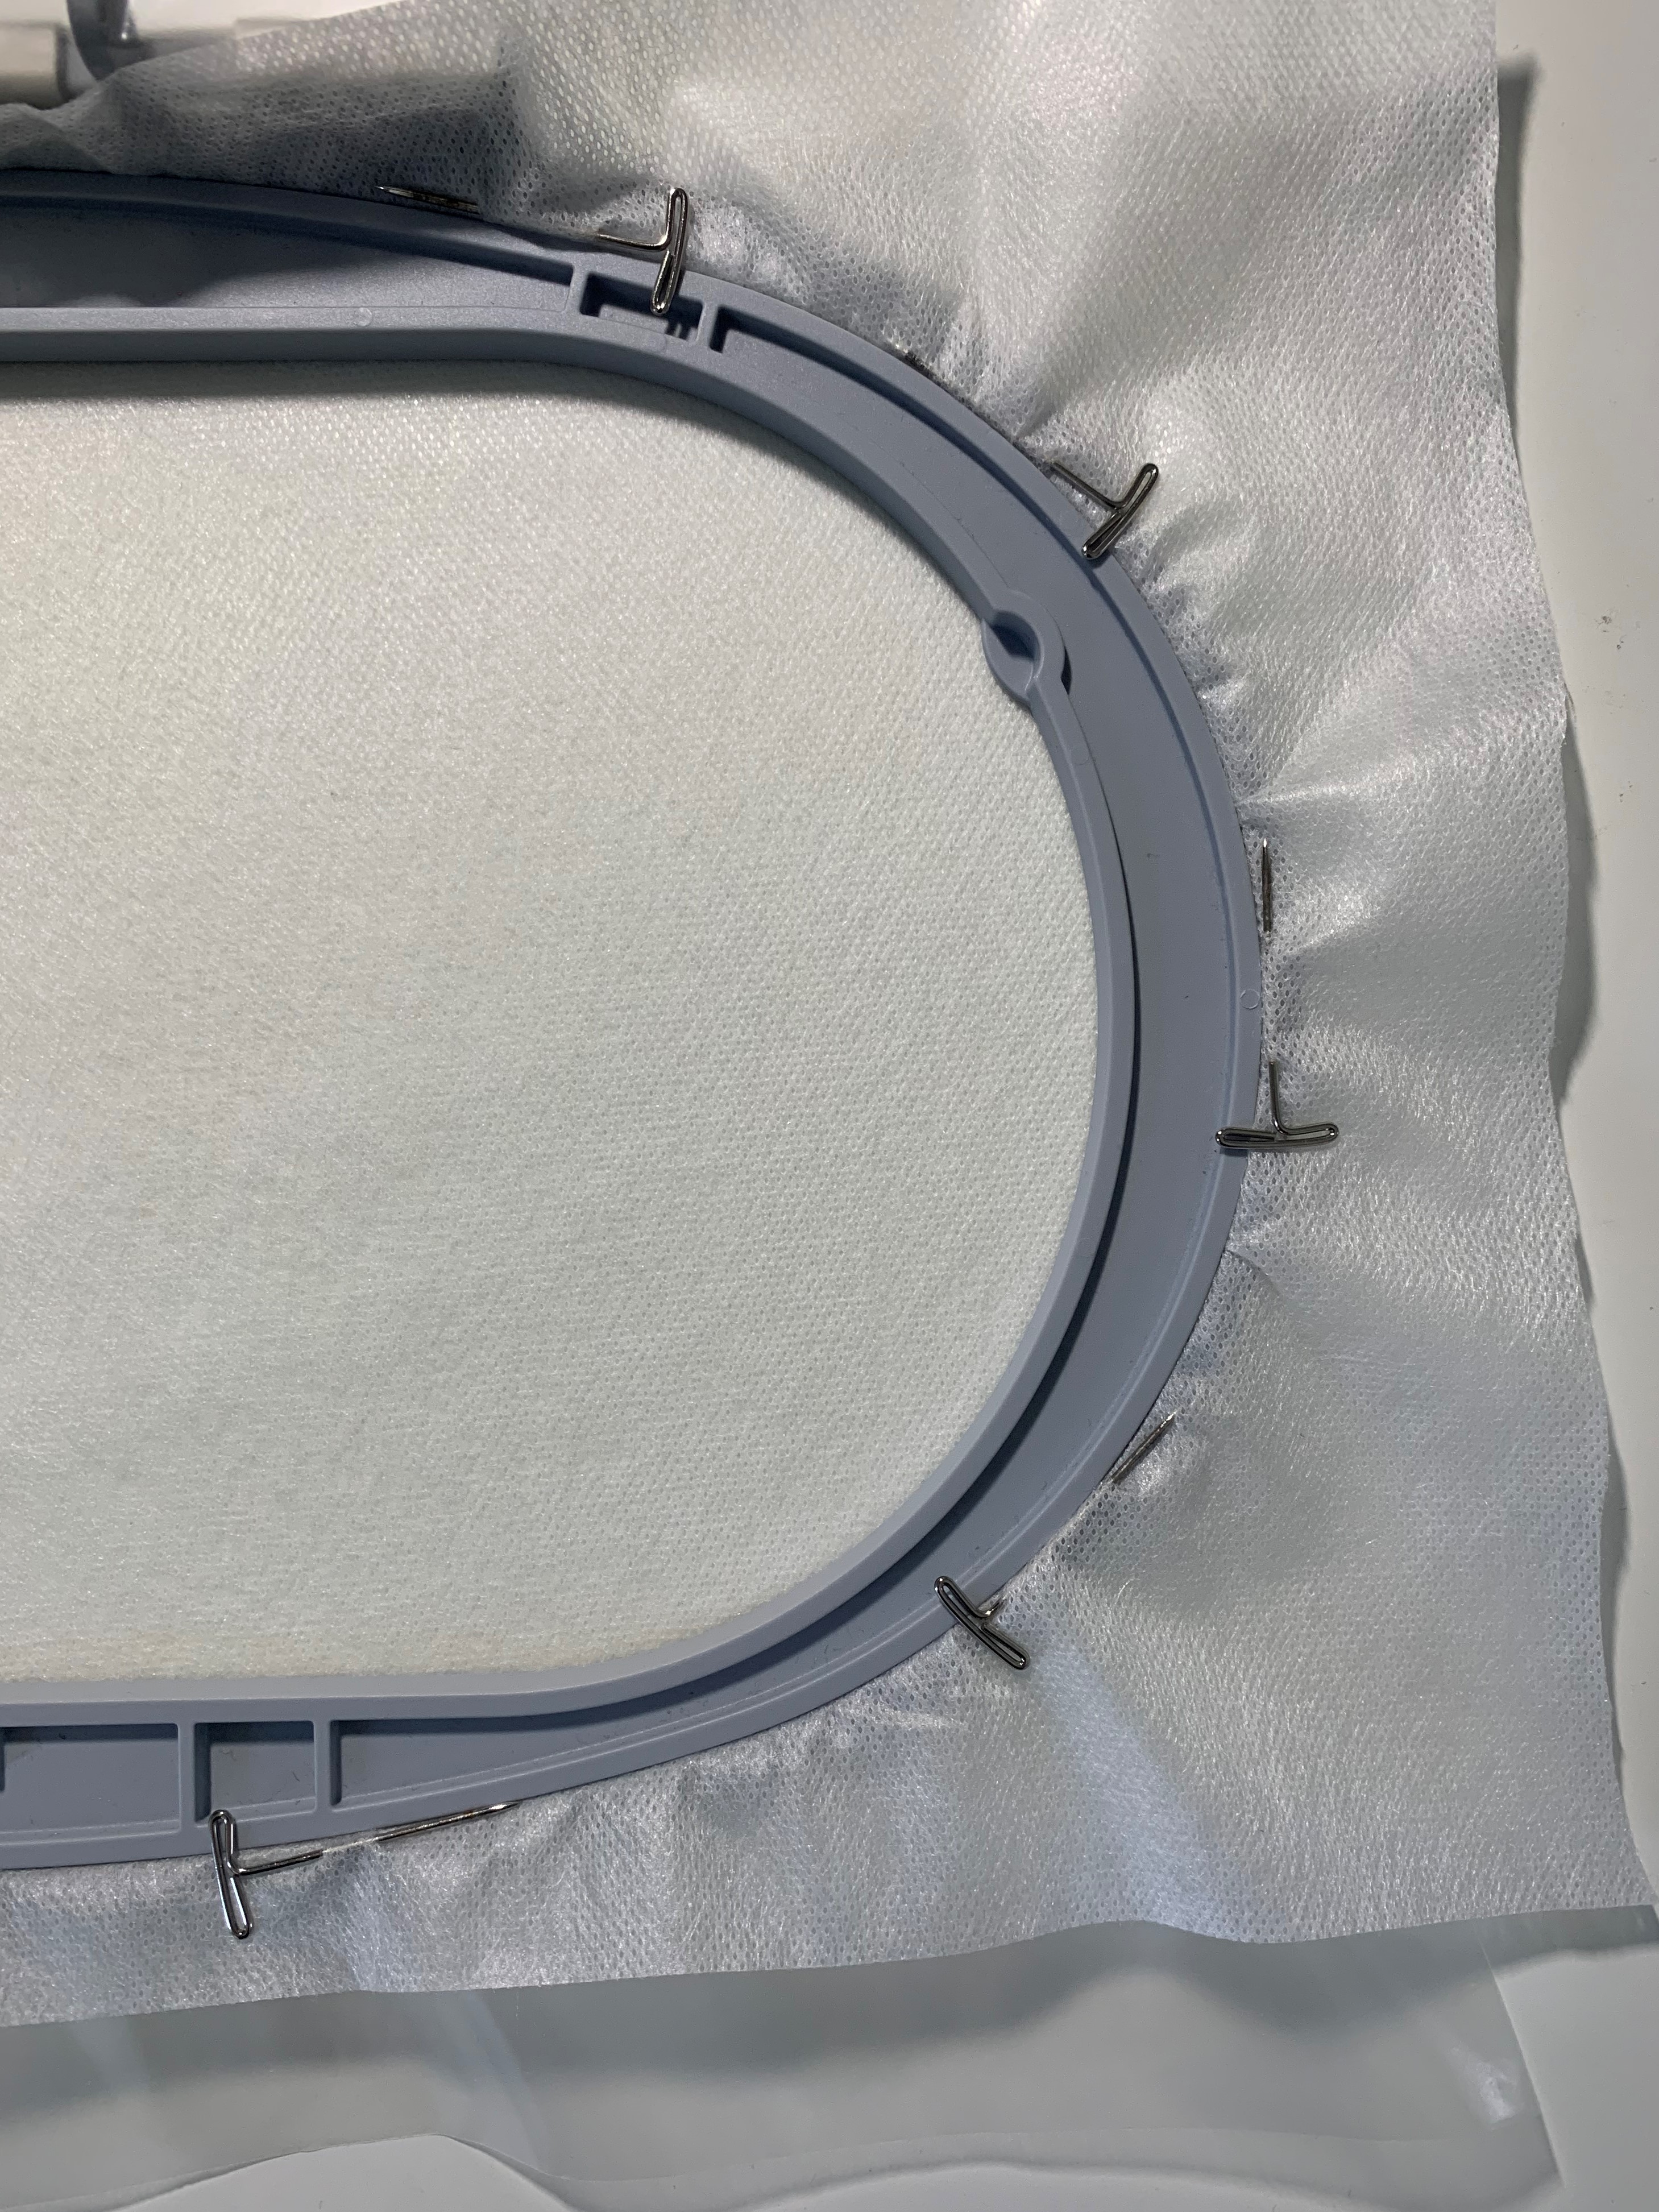
1. Adding Stabilizer to Your Embroidery Hoop
For free standing lace, you’ll want to use a wash away stabilizer. I used one layer of OESD BadgeMaster underneath one layer of OESD AquaMesh WashAway and hooped them together. I then stablized them in my hoop using T-pins like Kate describes in this post on machine embroidered jewelry.
2. Setting Up Your Machine
When creating free standing lace, you’ll want to thread your machine and the bobbin with your desired embroidery thread. I also used the Drop-Shaped Embroidery Foot #26 and a Straight-Stitch Plate.
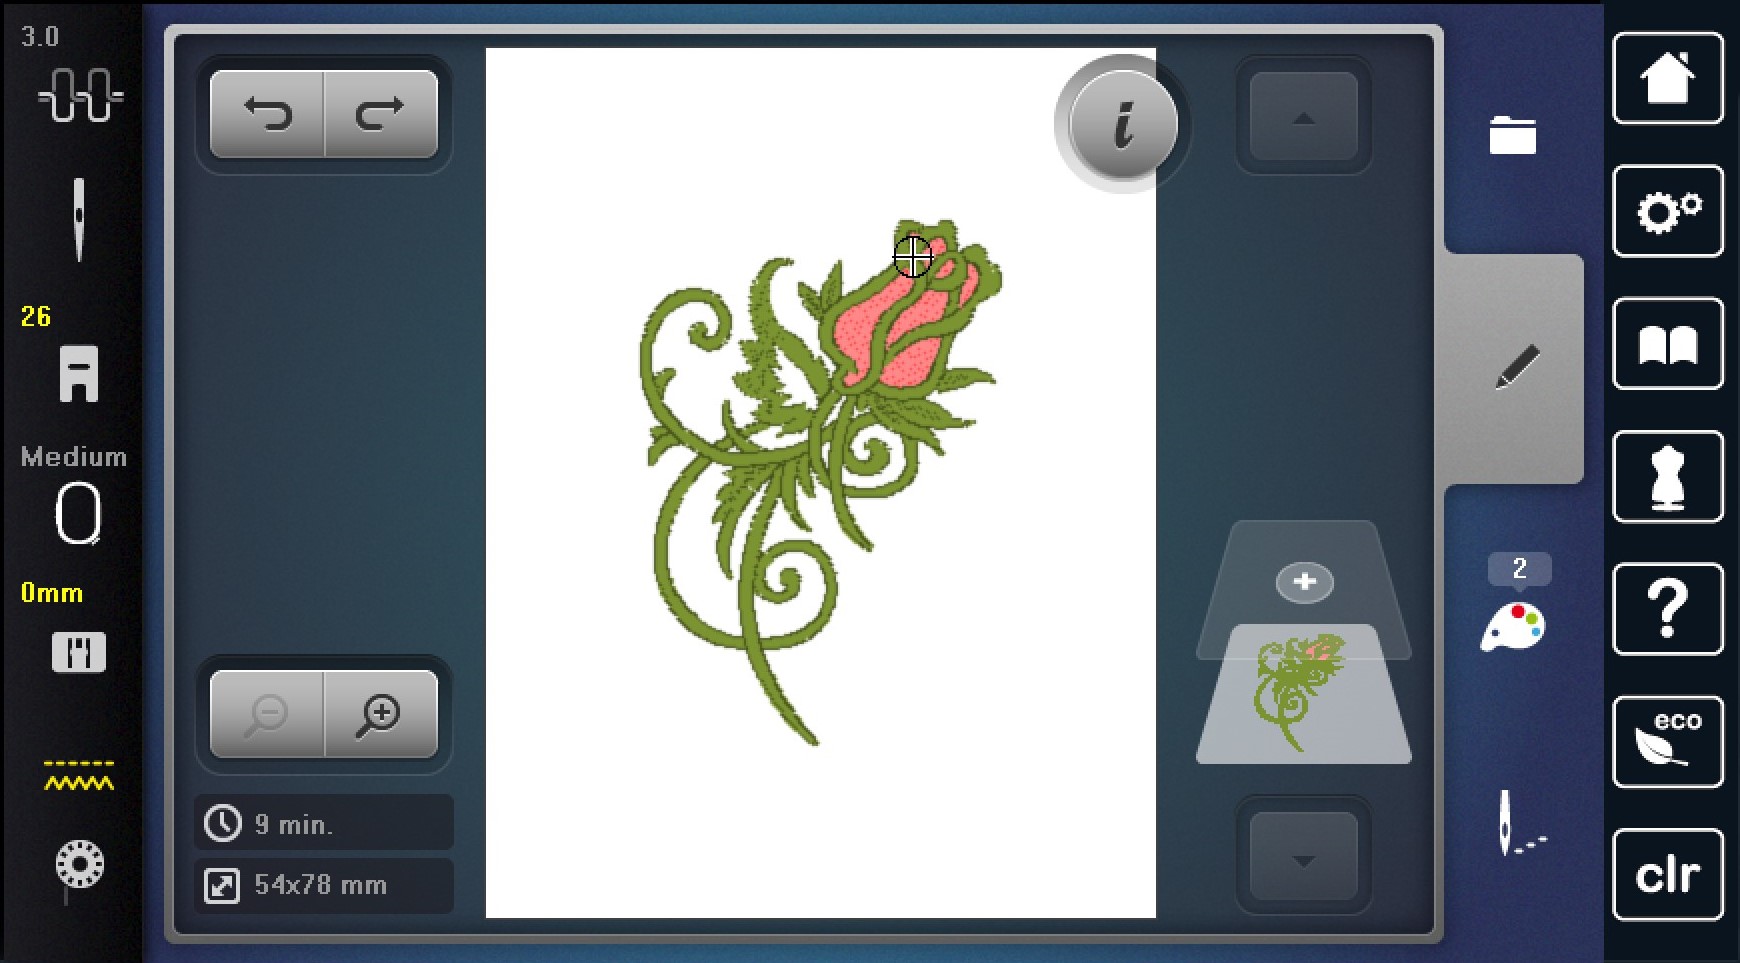
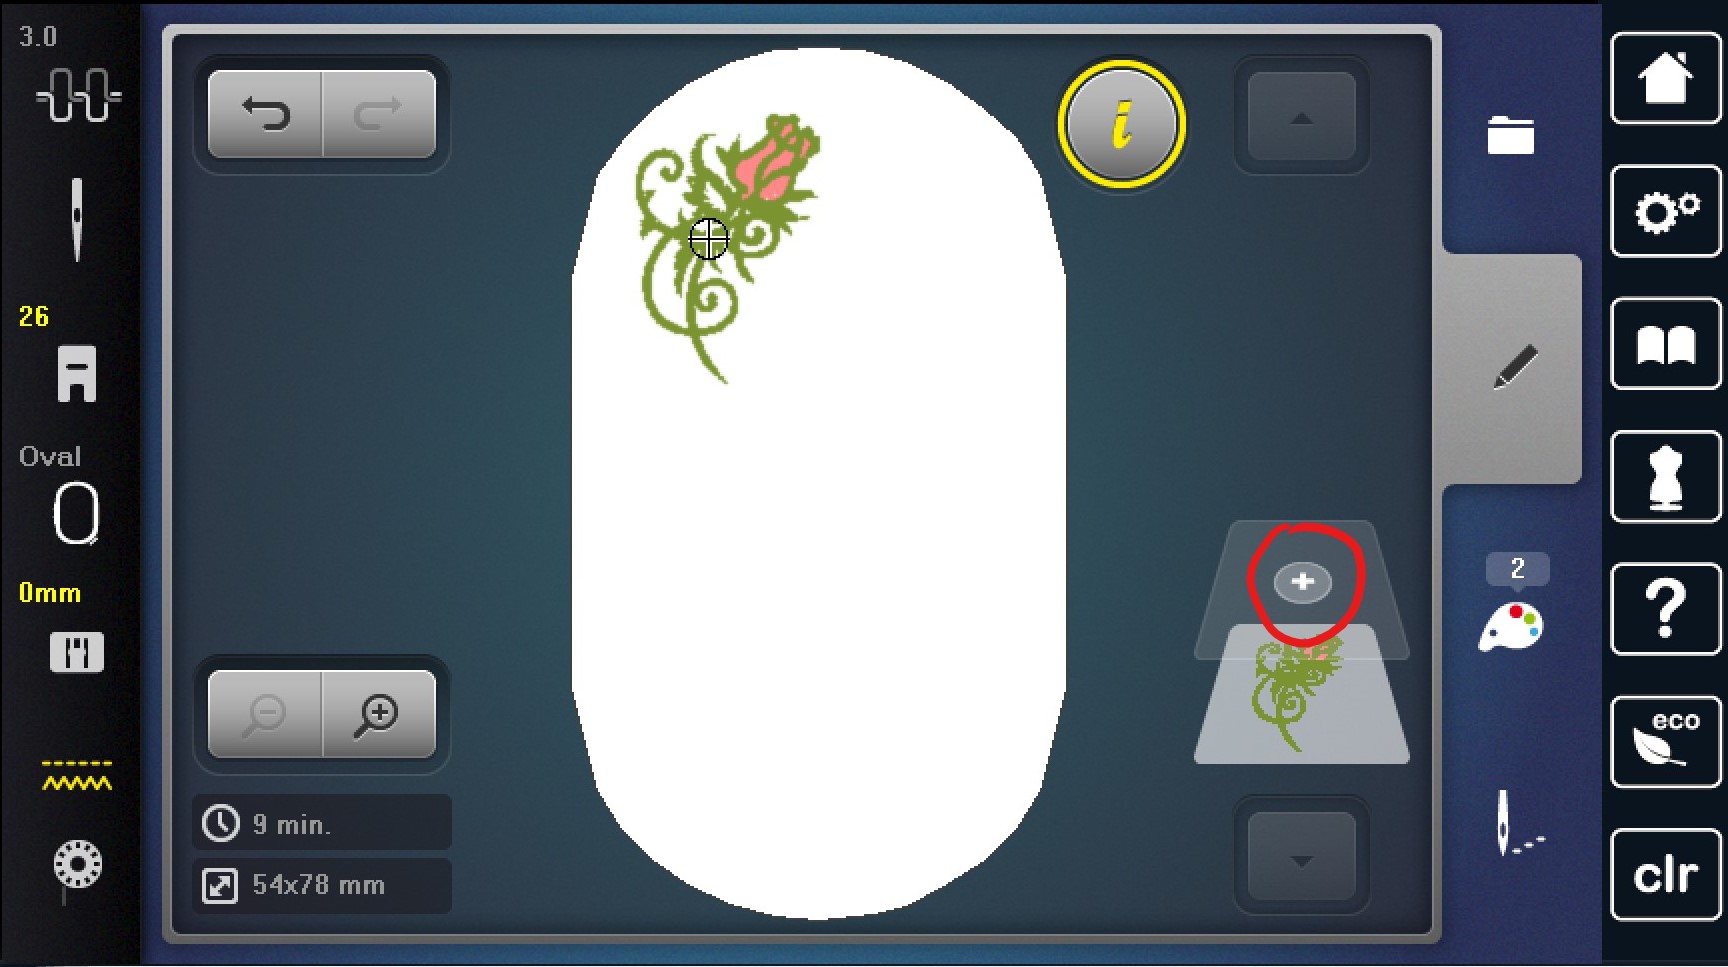
When you’ve decided on a free standing lace design, open it on your machine. Your machine will automatically pick an appropriate hoop size for the design (the medium hoop below).
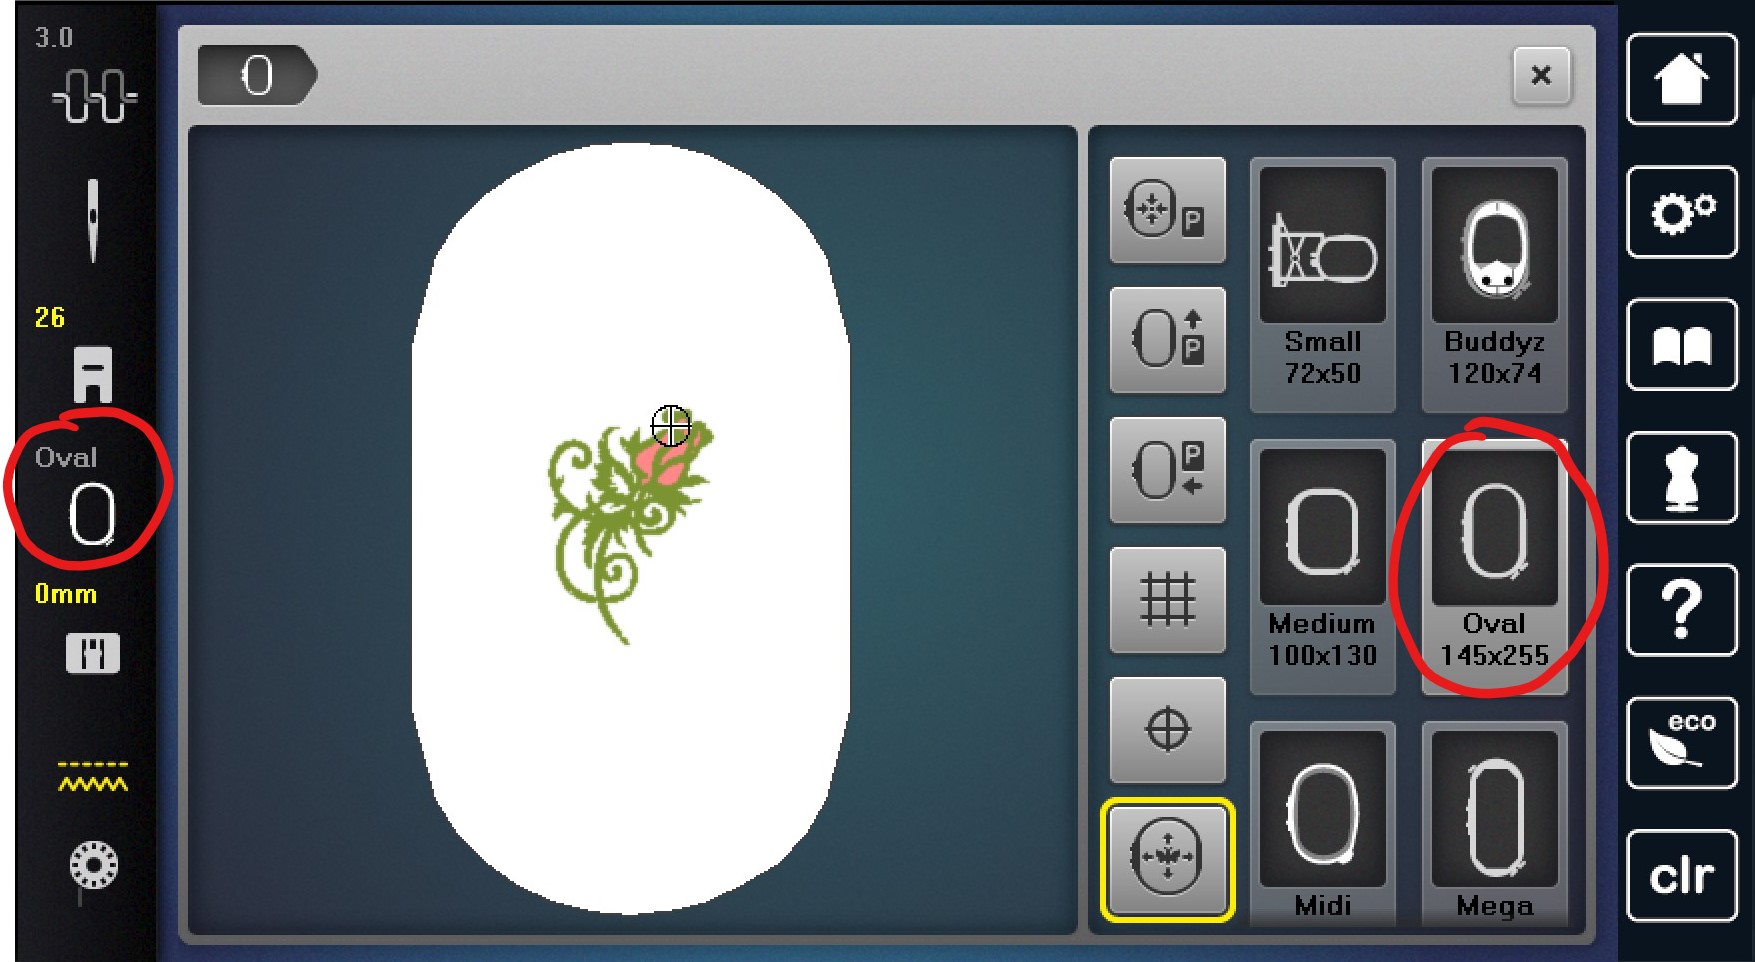
When I made my applique, I was making a lot of different pieces, so I wanted to stitch in a larger hoop to create more than one design at a time. You can change the hoop size (I used the Large Oval Embroidery Hoop) to the hoop the best fits your needs.
After you change the hoop size, you can move your motif to best fit multiple designs. In order to add another motif, you can click the Add Motif + and add another design of your choice.
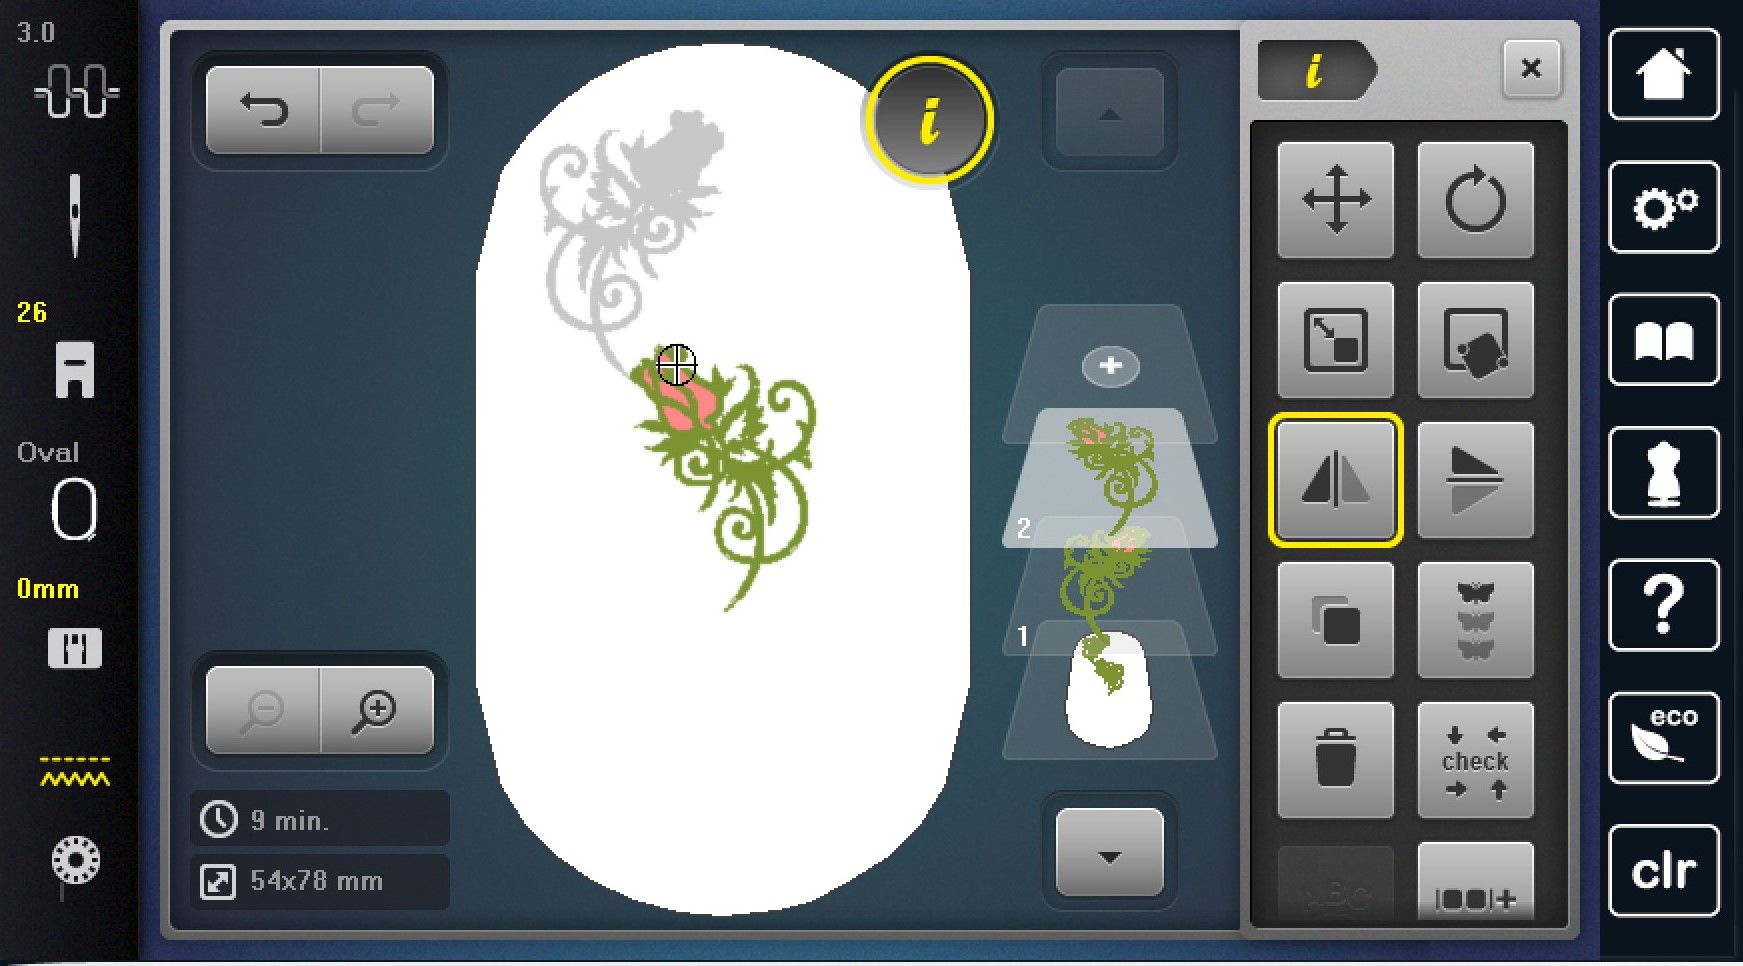
With my jumpsuit, I was adding the same applique to both sides, but the pieces needed to be mirrored. With each motif I also stitched one mirrored left/right to ensure I had free standing lace for both sides of my jumpsuit.
You can then fill your hoop with as many free standing lace designs as you’d like. Play with the position to fit them into your hoop like a game of Tetris. Make sure none of your designs overlap.
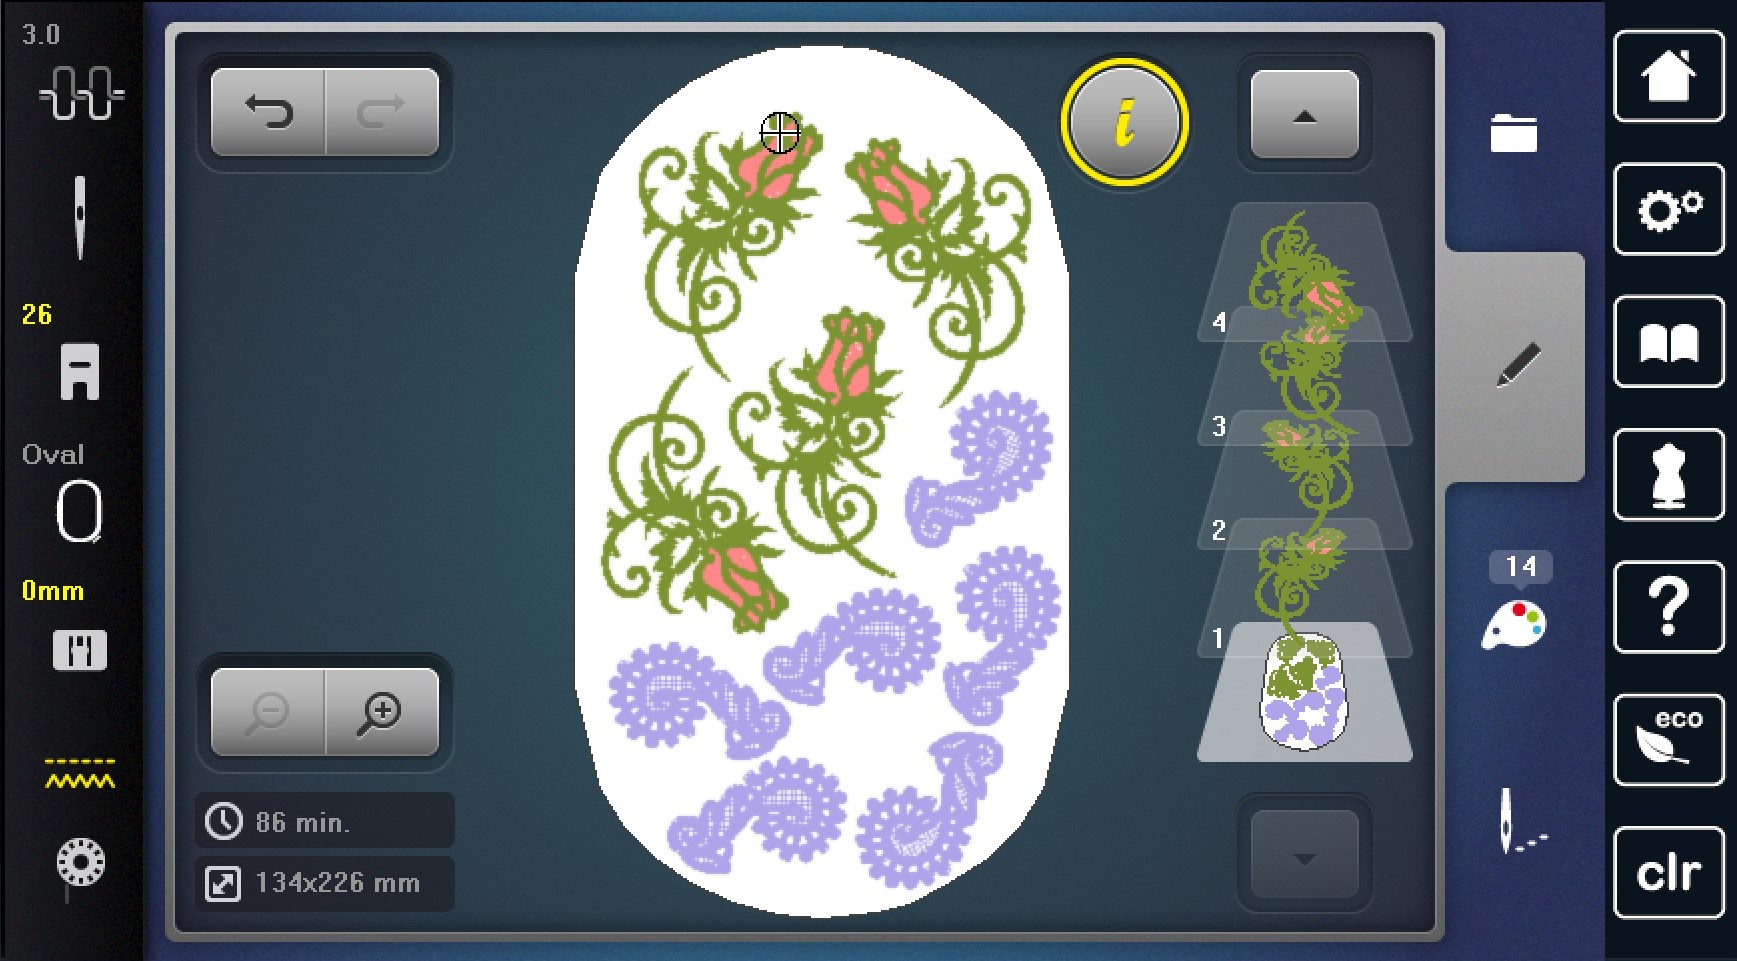
If you’d like, you can group all the motifs together. This makes it a little easier for me to deal with visually.
Before stitching your design, you can adjust the colors of your free standing lace to match the colors you’ll be using. I used two different shades of gold Isacord thread in my jumpsuit. In this example, I changed the purple design to match the green of the flowers. There are lots of color options to pick from, so have fun playing with the options!
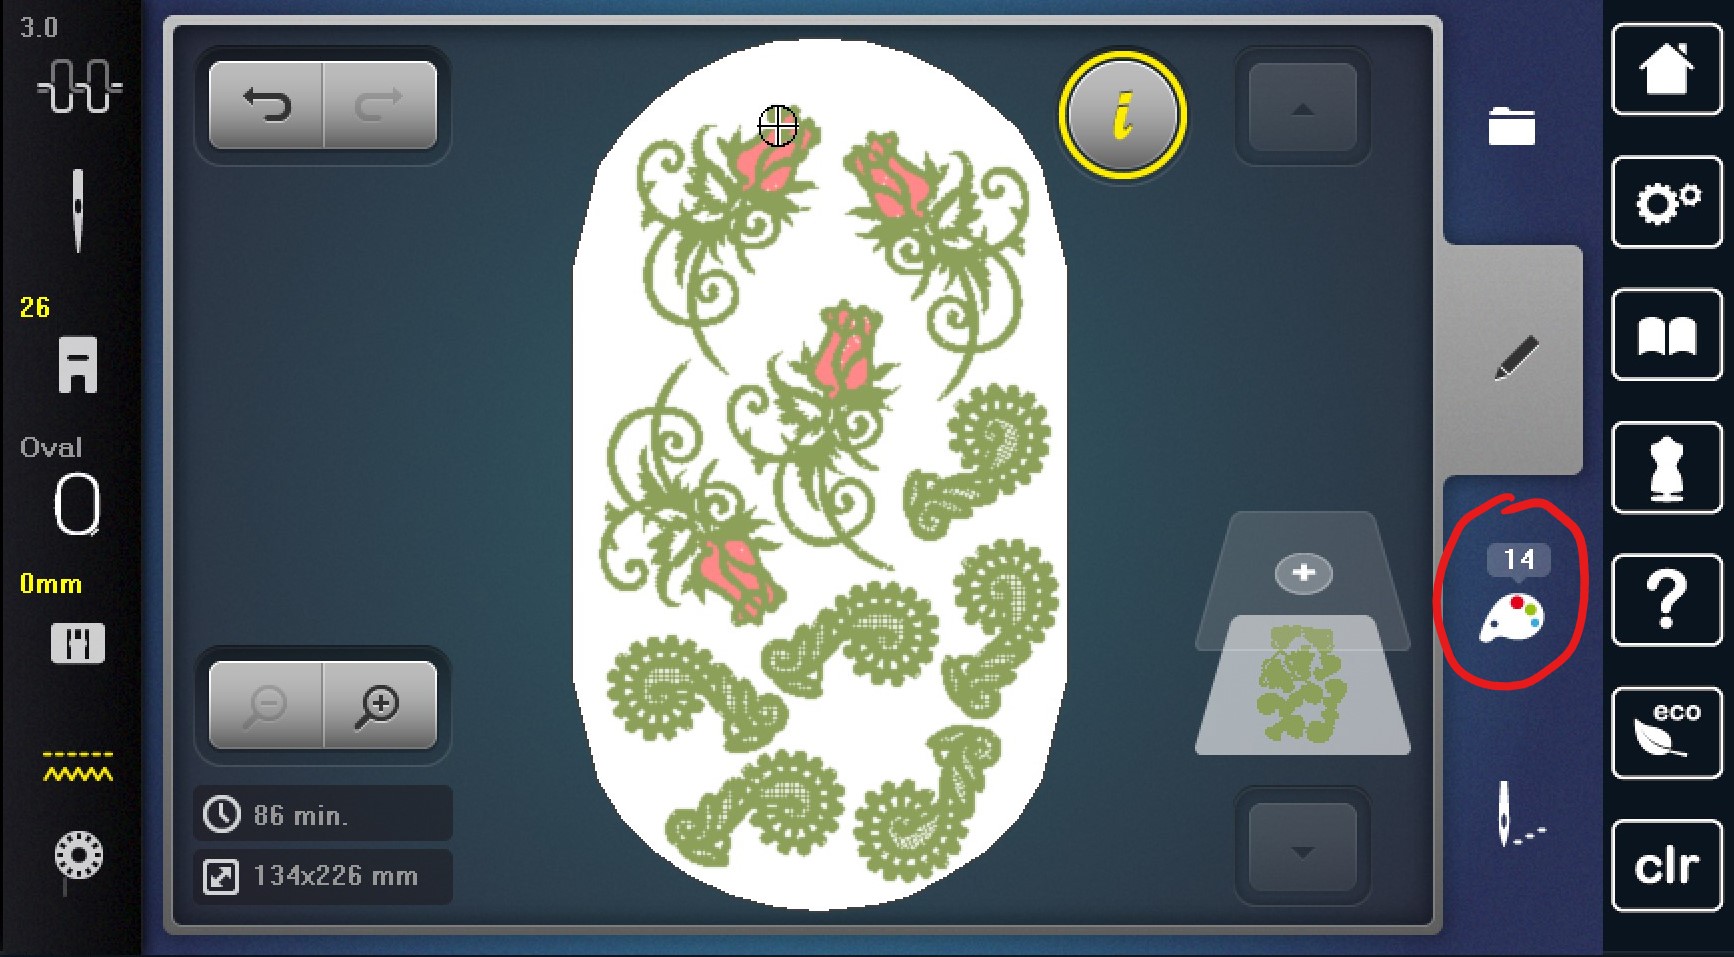
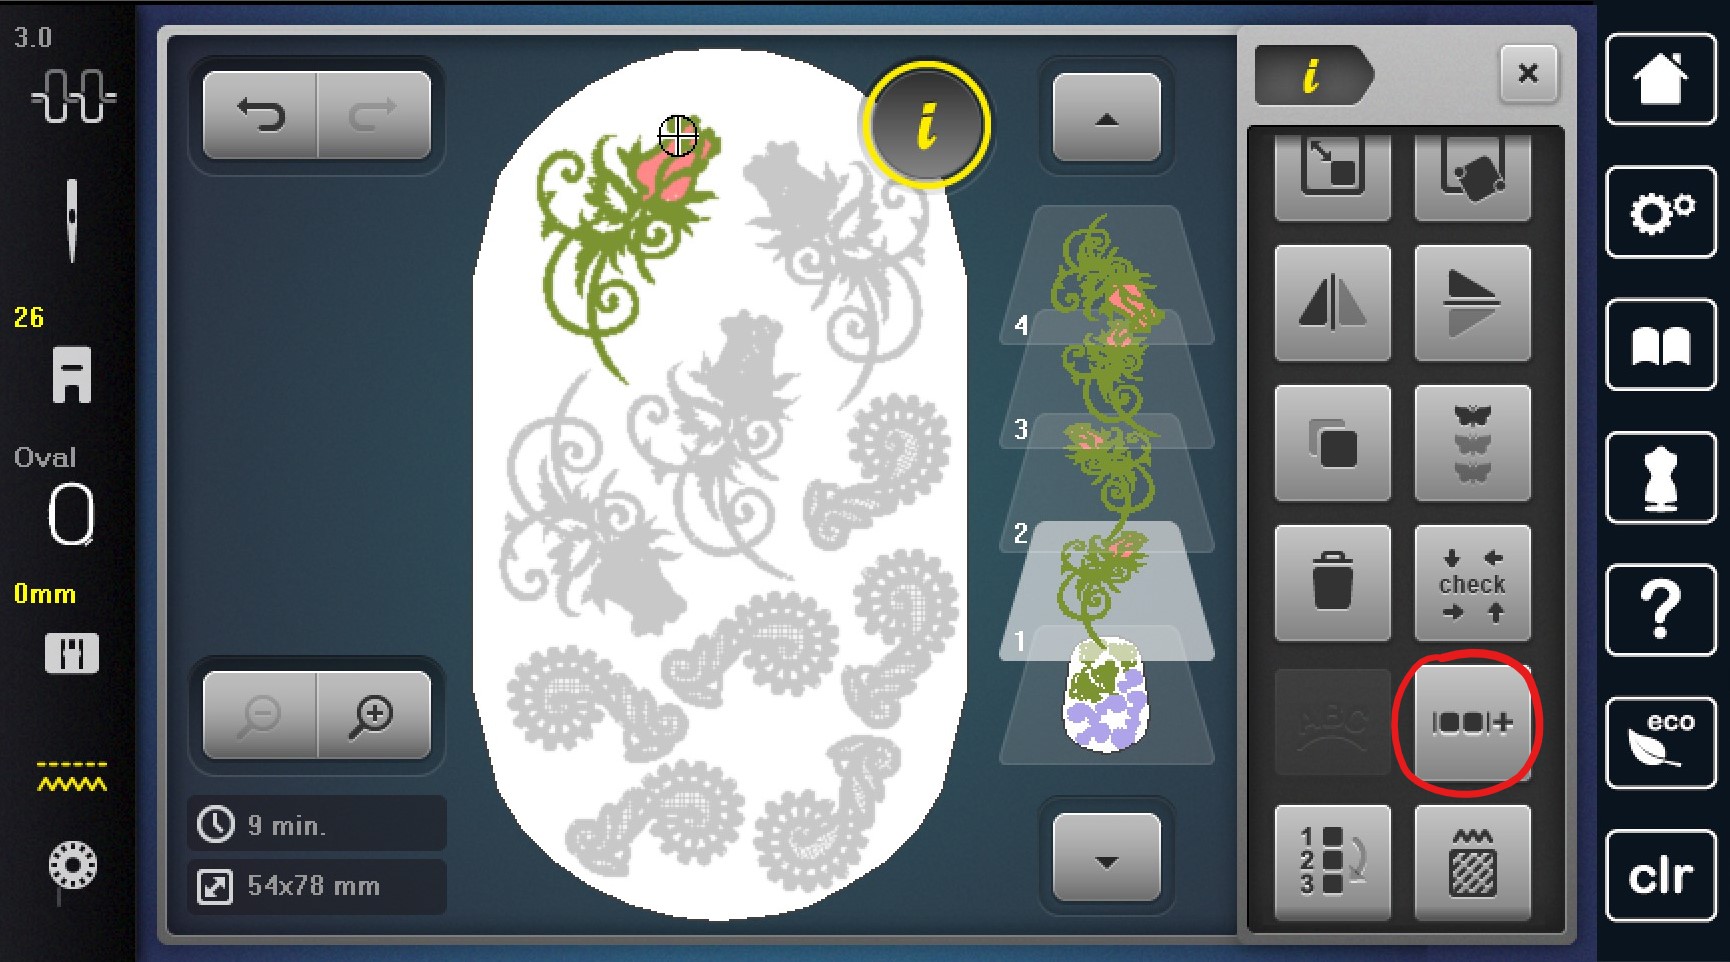
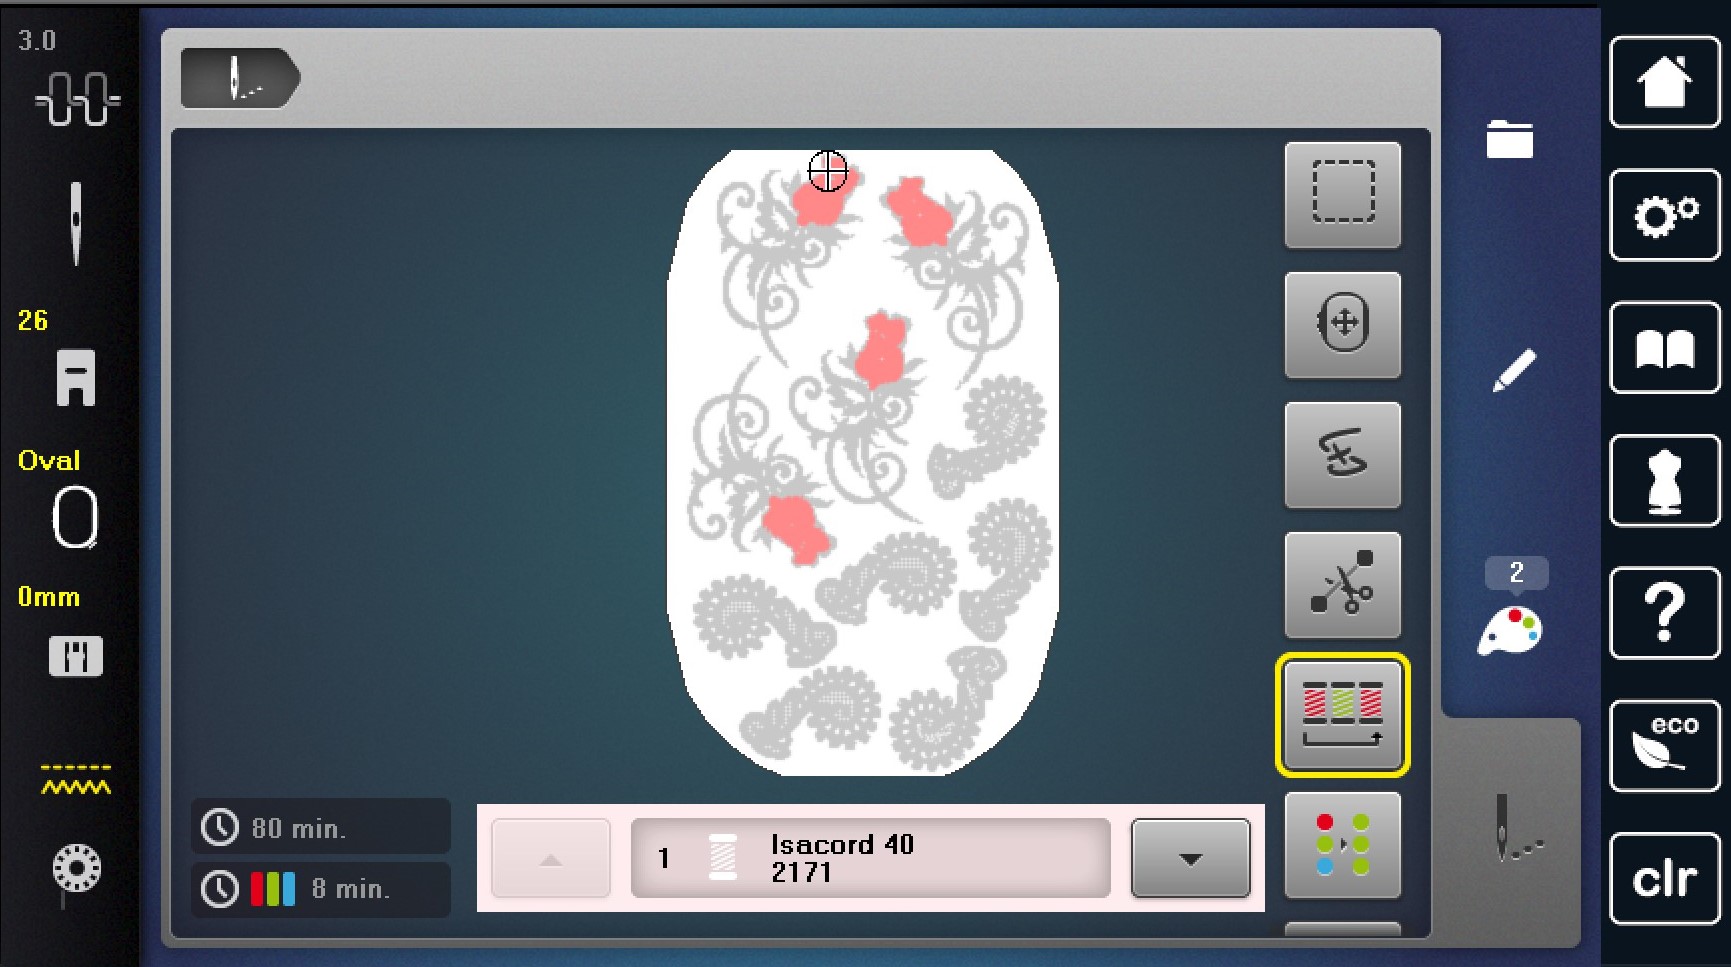
In my example above, it still says I have 14 colors even through there are only two colors in my overall design. This is because the machine is stitching each piece of free standing lace separately. When your ready to stitch, you can click on the color resequencing button in order to have your machine stitch one color before moving onto the next. This will minimize the amount of times you need to change thread colors. It works well for this free standing lace applique because we’re going to cut our designs apart when it is finished stitching.
3. Stitch your Design
When your happy with how it looks, stitch out your free standing lace applique. This is the fun part to watch your designs come to life. It is also less pressure then embroidering right onto an existing piece because you can always stitch on new stabilizer!

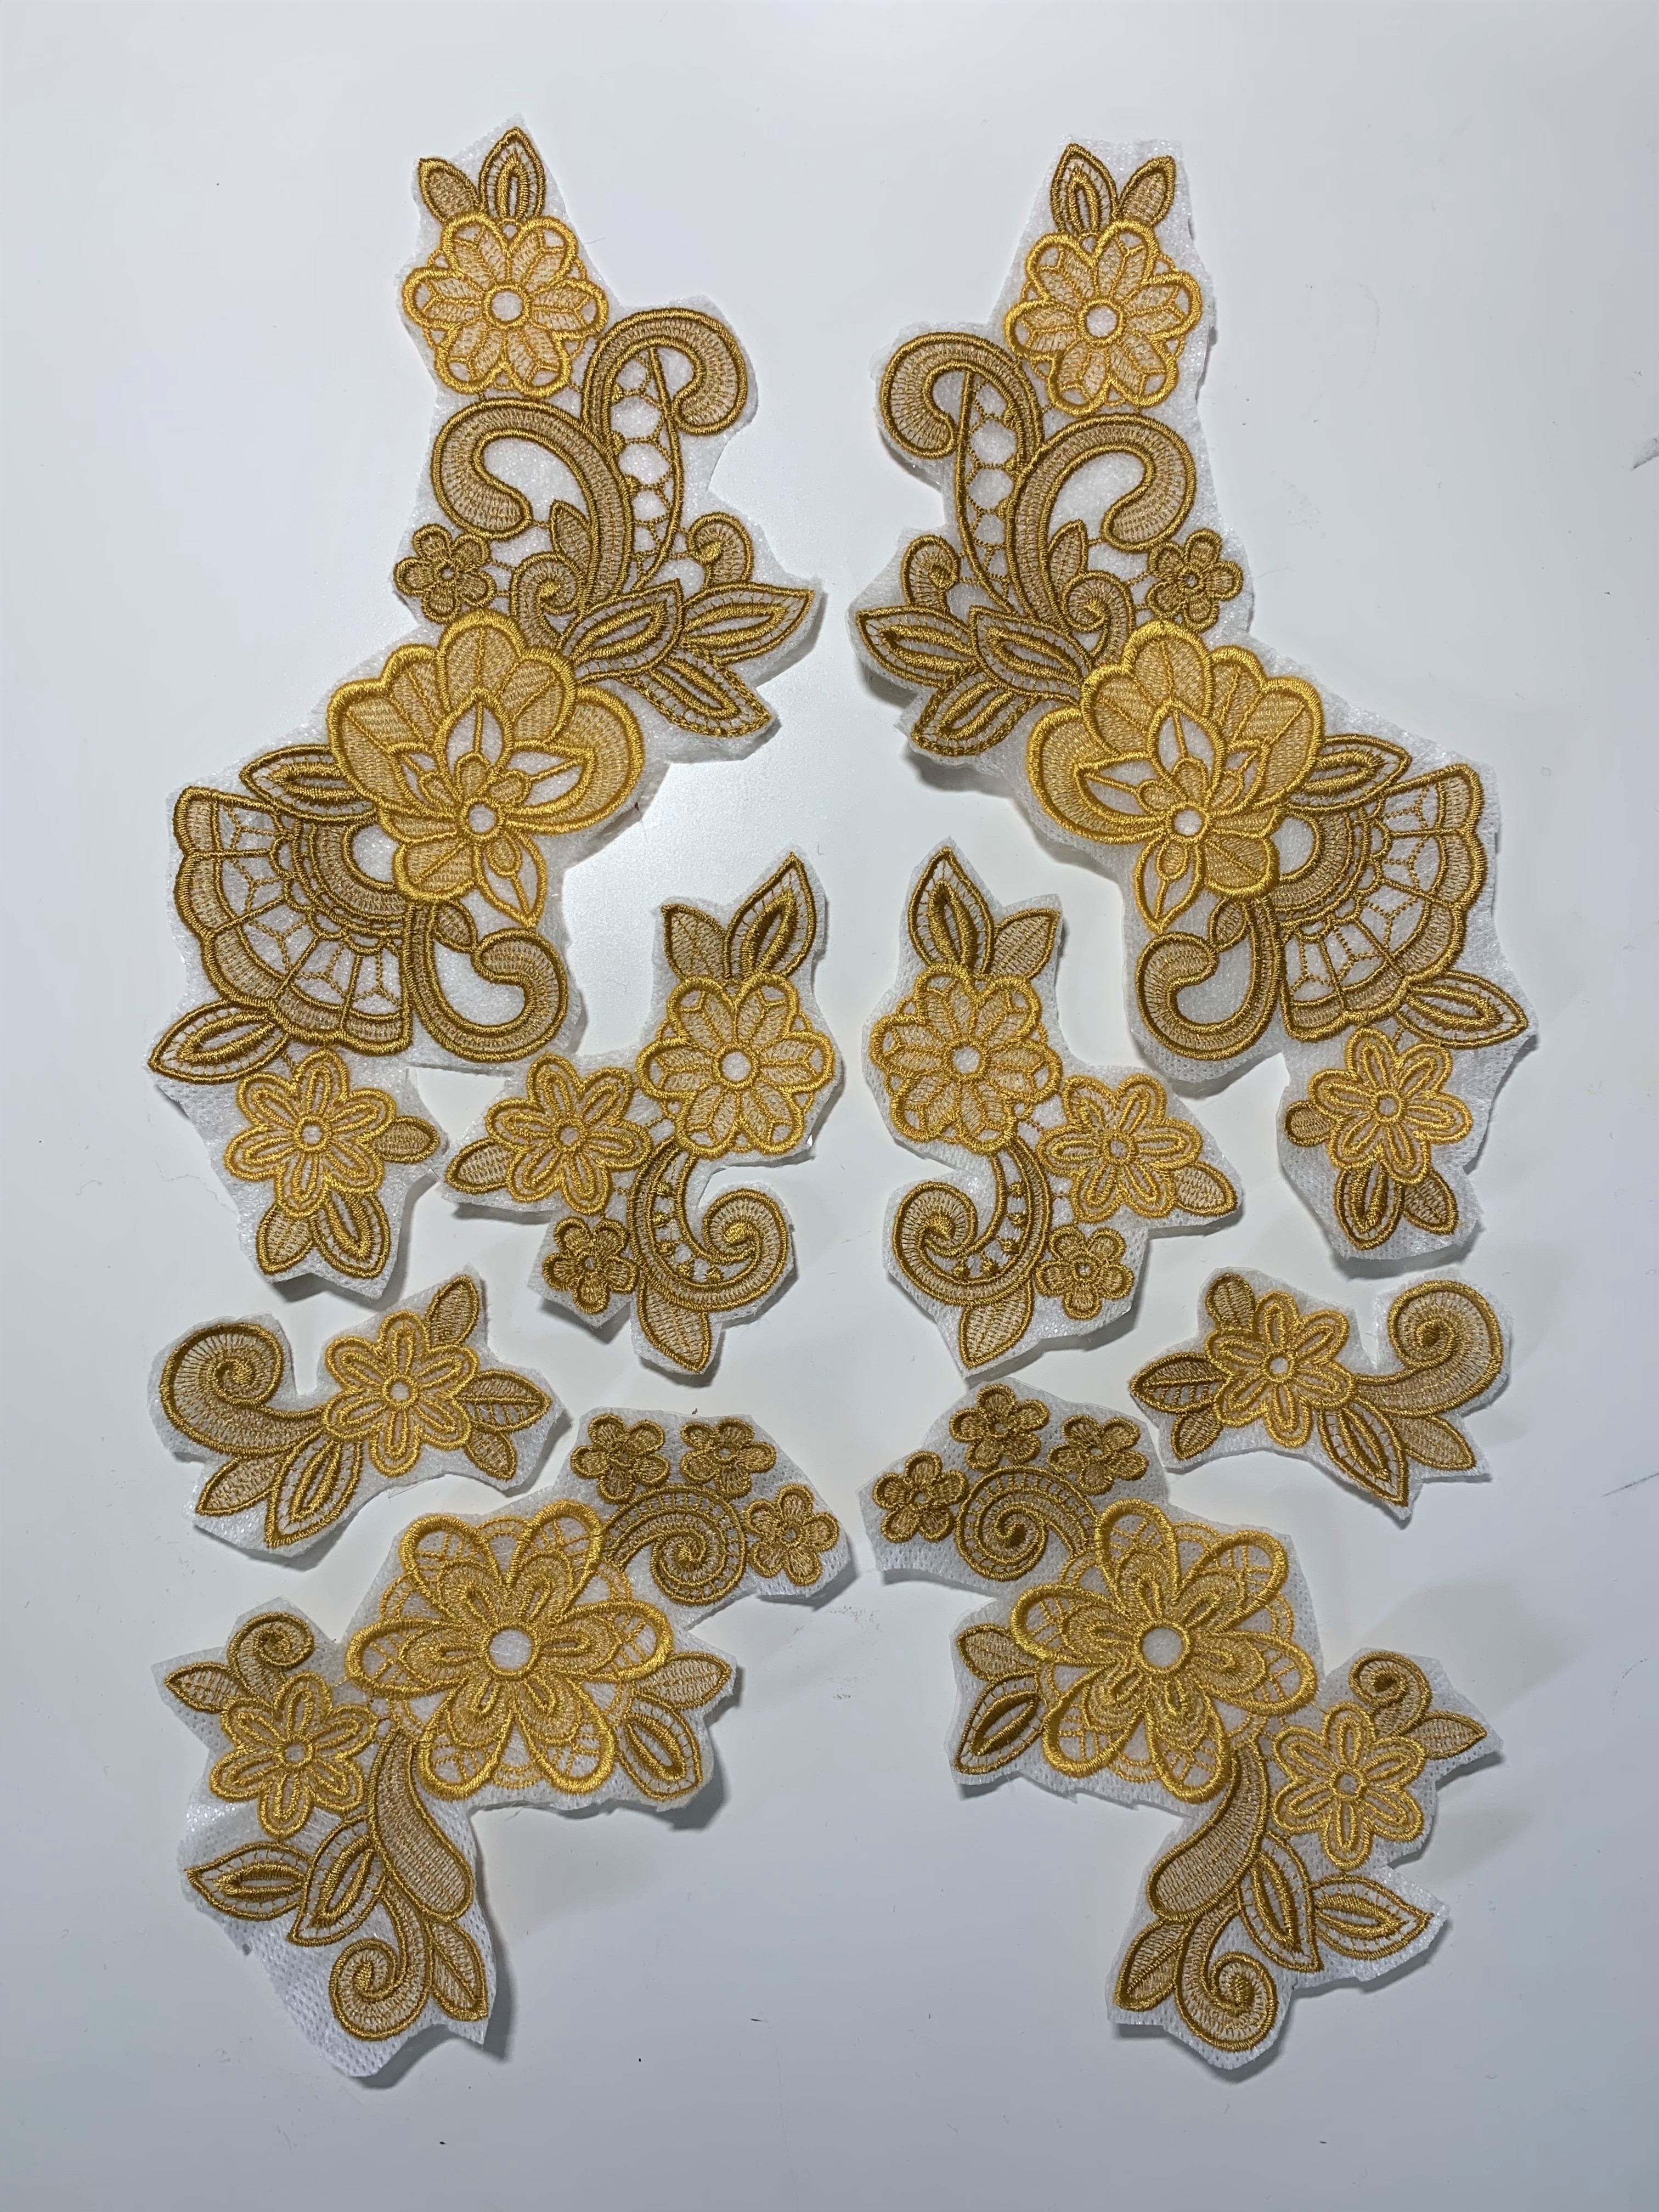
4. Cut Out Free Standing Lace and Remove Stabilizer
When your design is finished stitching, cut around each design to separate them. This doesn’t have to be perfect. When your designs are cut out, rinse them with water to remove the stabilizer and lay them flat to dry.
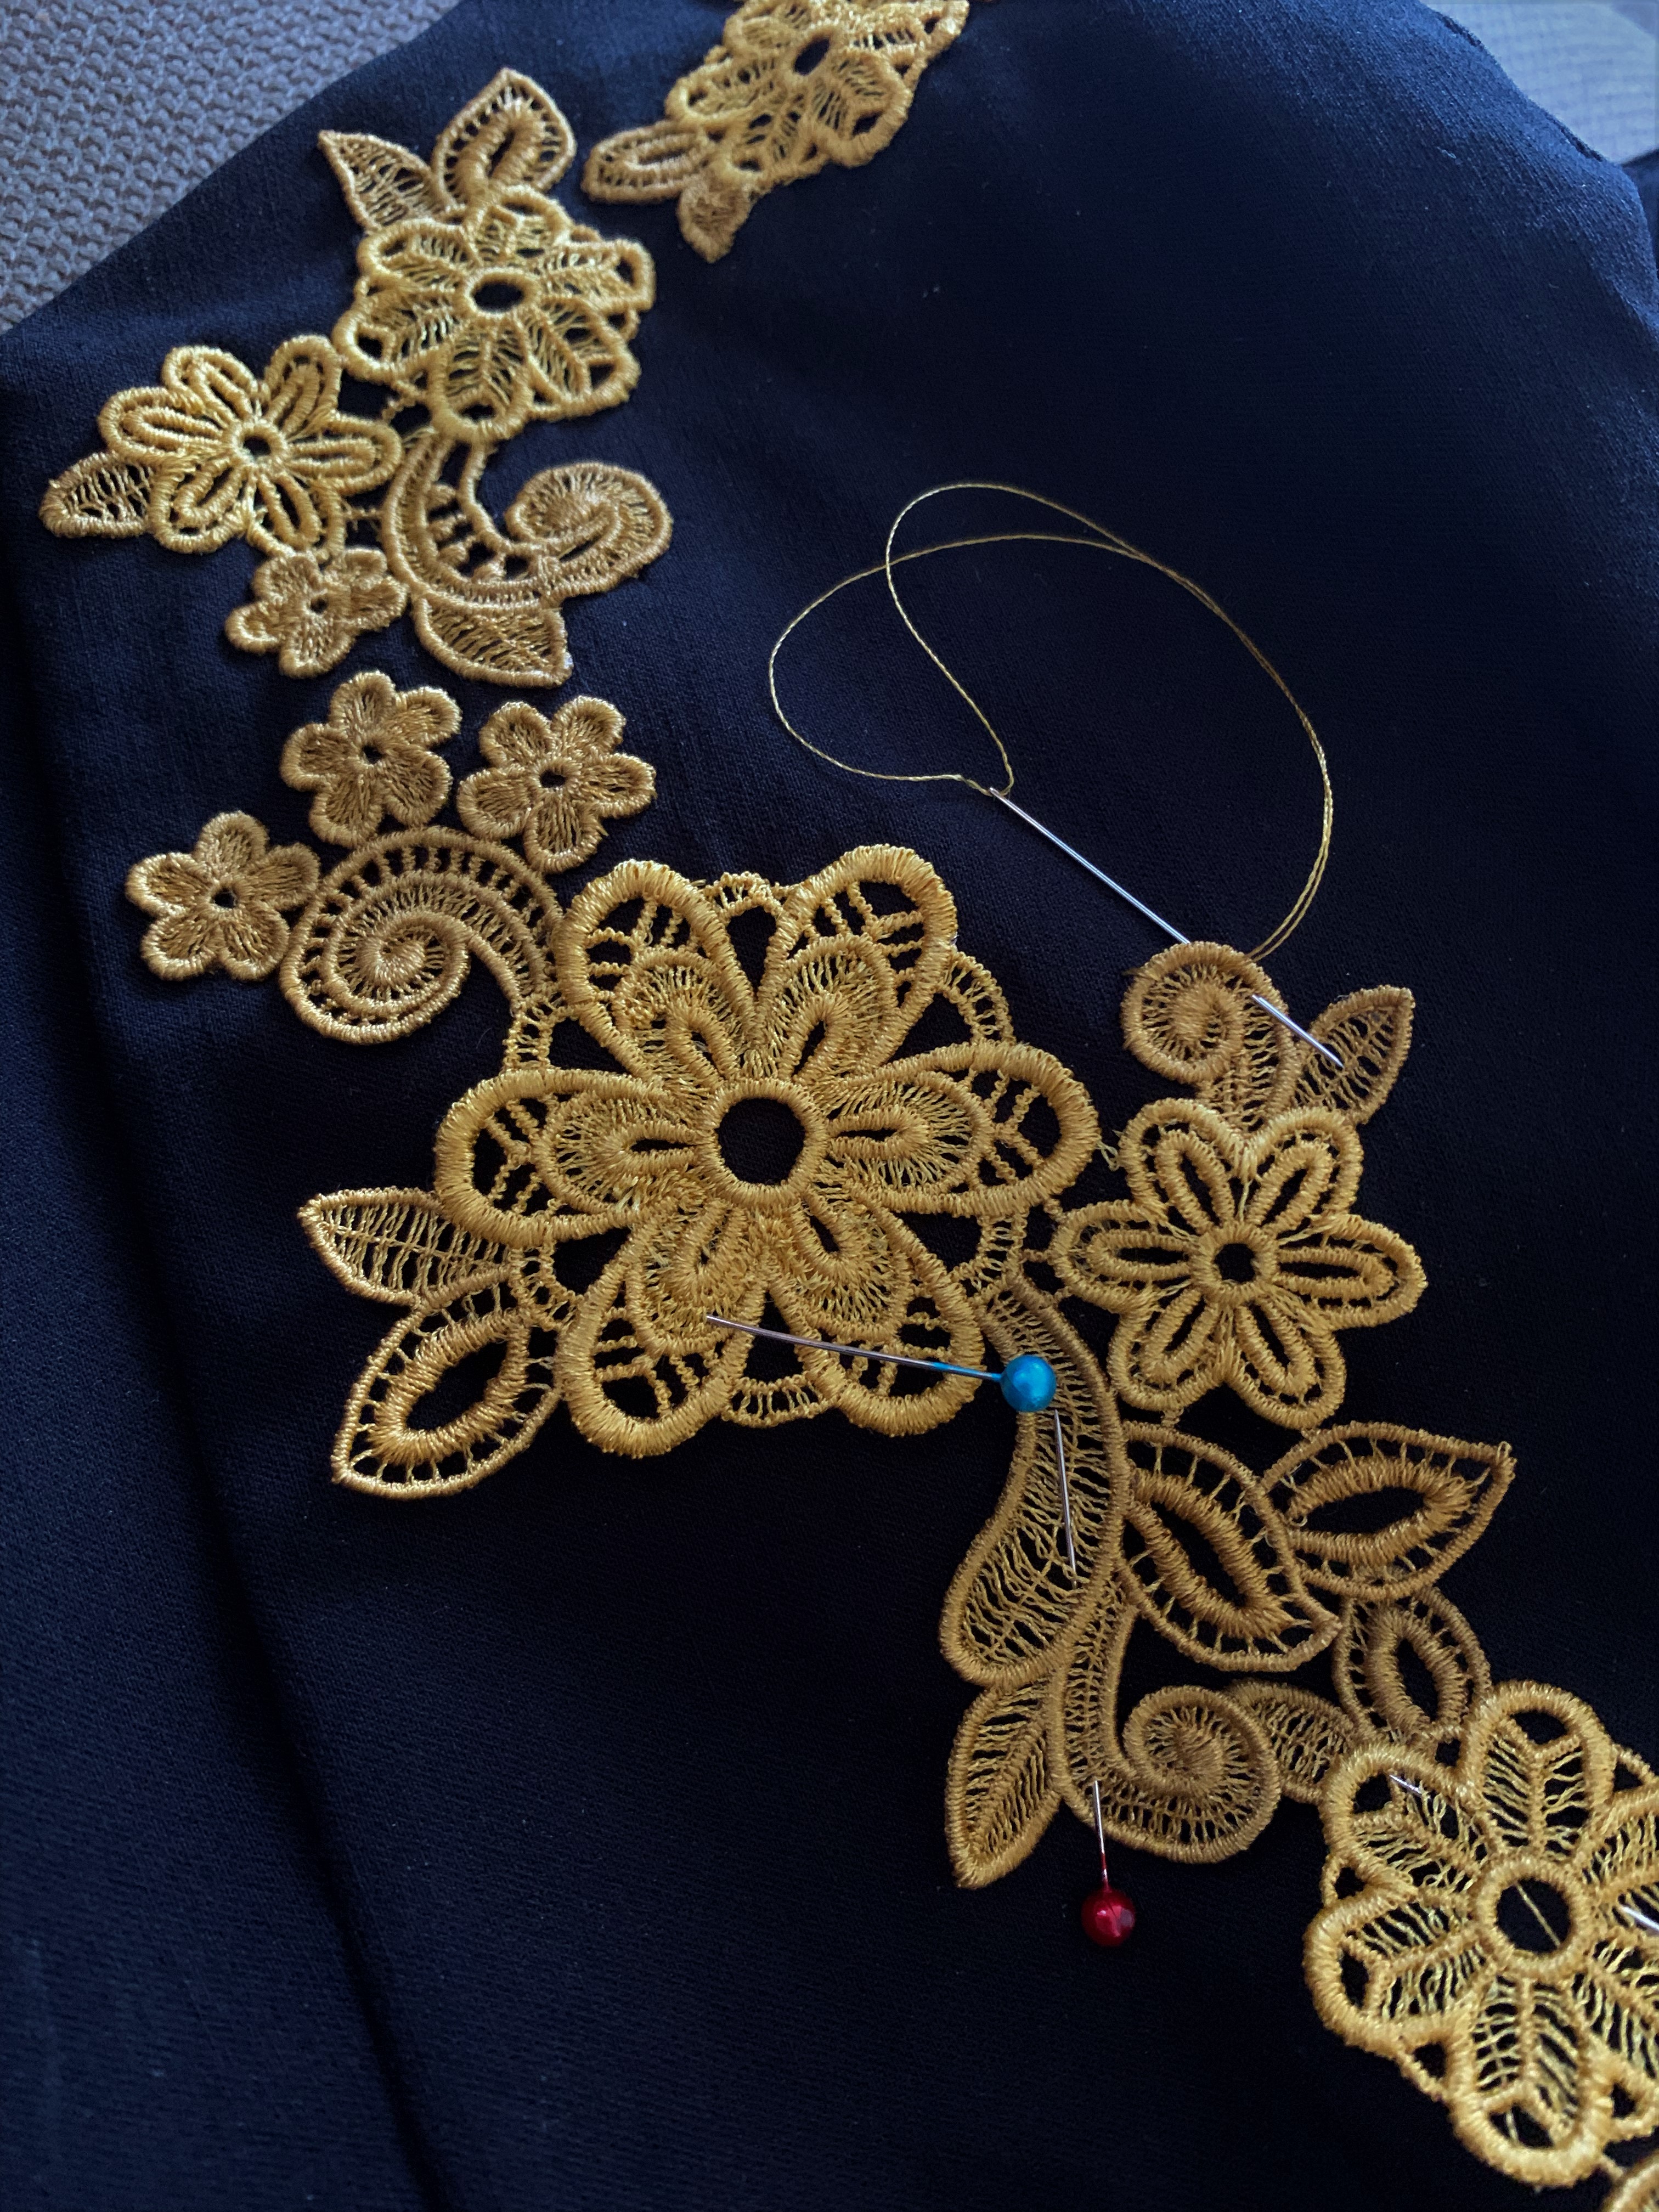
5. Pin Free Standing Lace Applique to Garment
Now it’s time to pin your free standing lace applique to your garment. For this jumpsuit I tried about a dozen different ways before deciding on the exact placement. Take your time and try your garment on to make sure you are happy with the placement of your free standing lace.

6. Attach The Free Standing Lace Applique
After you are happy with your applique placement, it’s time to stitch it in place. I attached mine by hand using the same thread I used for embroidery. This allowed me to really control the placement and make sure everything was just right.
Enjoy your finished garment that is totally unique to you! The possibilities are endless when you combine free standing lace with your favorite garment pattern or ready-to-wear piece.

