


JUNE 15, 2017 MELISSA MORTENSON
Hello WeAllSew Fans! My name is Melissa Mortenson and I’m proud to be one of BERNINA’s Brand Ambassadors. Most days you will find me busy working in my sewing room creating content for my blog the Polka Dot Chair. I’m also privileged to work as a fabric designer for Riley Blake Designs.
I have many men in my life that I love, and find myself at time stumped for gift ideas for them. I love to create handmade gifts, but find that at times when I’m making something for a guy it can be a bit more tricky coming up with projects to create. I also love a good challenge and thought that this year for Father’s Day I’d design a project that I could sew to give my husband.
Many times I have noticed that when I’m designing sewn gifts for guys, that I can use the same projects that I would for some of my best girlfriends. I just need to change out the fabrics a bit. I’ve noticed that when I sew for guys I tend to gravitate towards fabrics with more texture. I love to sew with canvas, leather, flannel and suiting materials when I create gifts for the guys in my life. That being said, you could make this project for anyone that you’d like! I’d love one for myself actually!
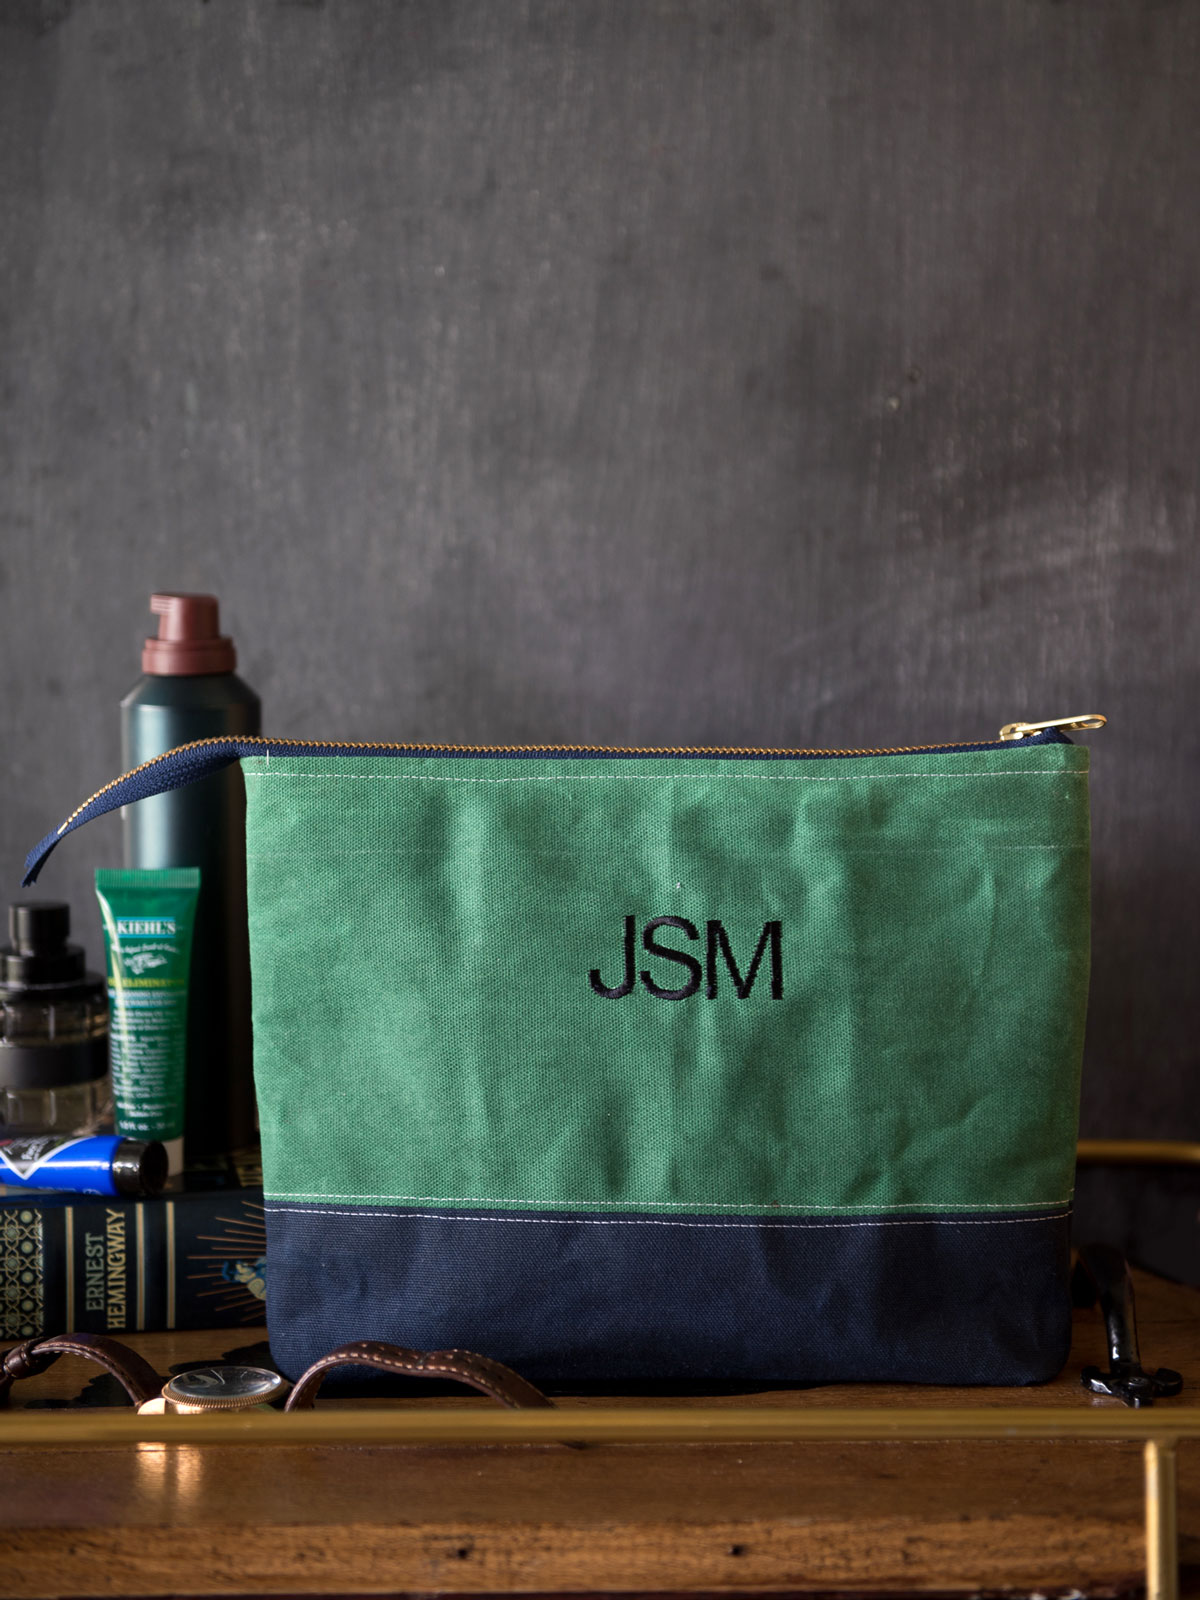
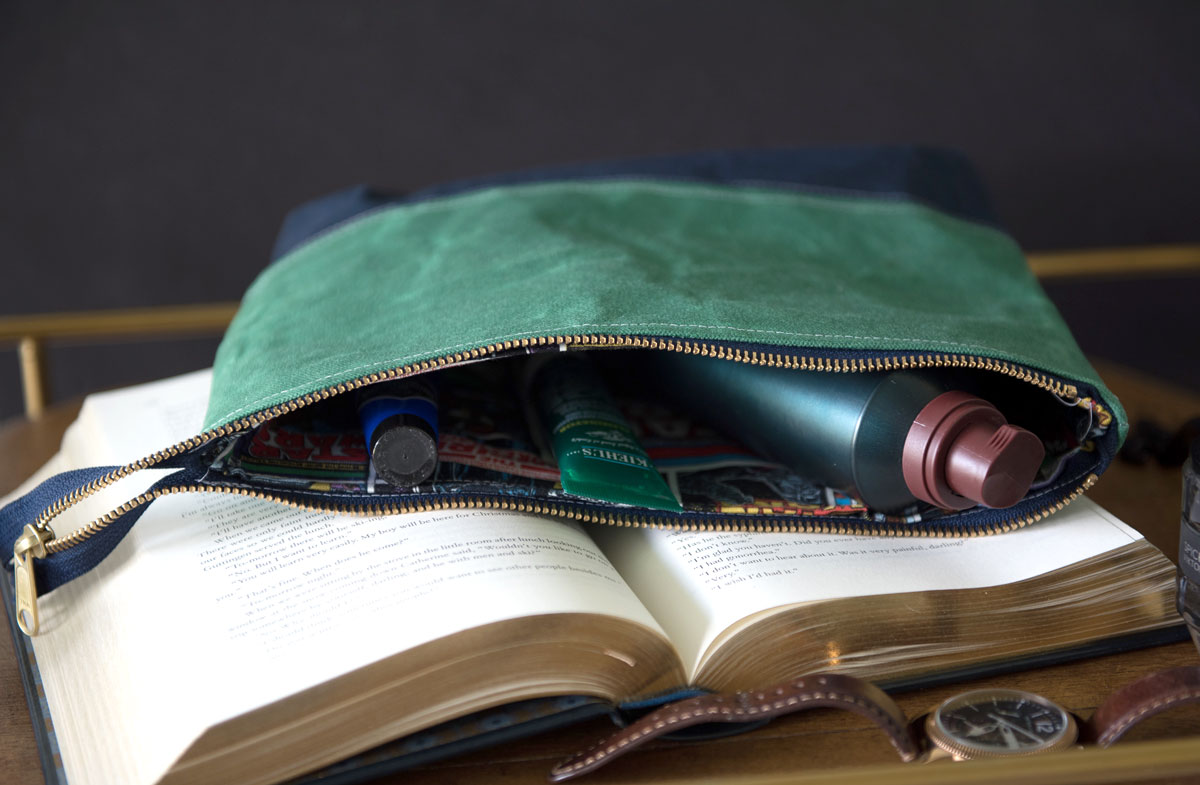
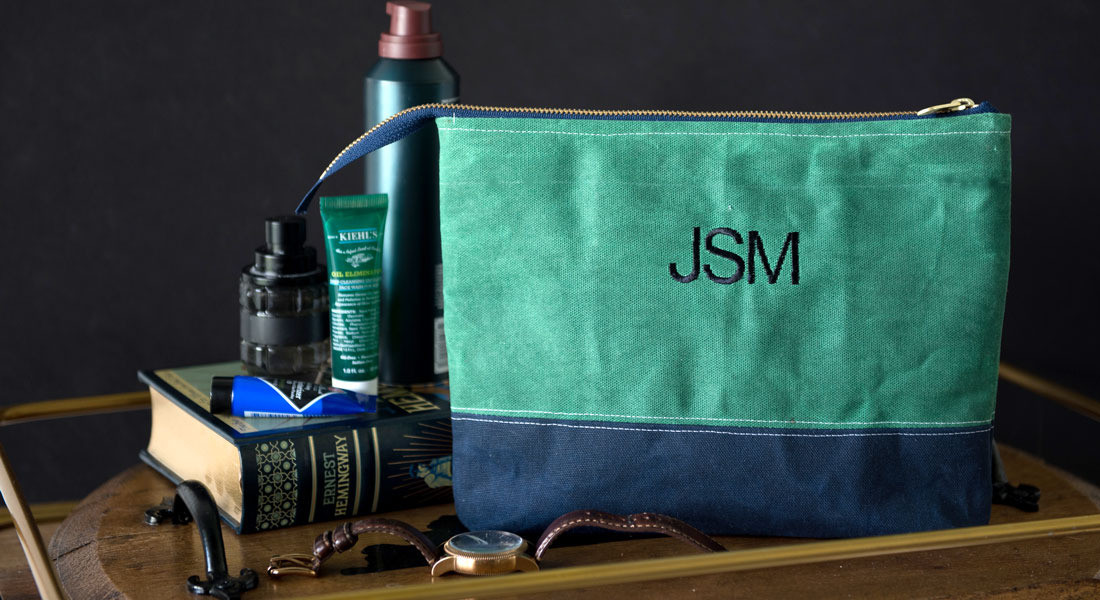
Today, I’m going to show you how to make this fun travel bag using waxed canvas. If you’re not familiar with it, waxed canvas is canvas that has had a wax coating applied to it. The wax coating makes the canvas thicker and somewhat water repellent (not waterproof). It’s great to use for projects that might take a bit of wear and tear.
You can pick up waxed canvas online, you can also wax it yourself. I don’t know how to do that, so we won’t delve into that step today!
The wax coating on the fabric also gives it a beautiful patina. As you work with the fabric you will notice that if it wrinkles it leave marks. This is one of the things that I love about waxed canvas. If you get to the point where you feel there are too many wrinkles, just press it with a no steam iron and a pressing cloth.
I found that my machine stitched though the waxed canvas beautifully and I didn’t need to make many adjustments.
Okay, are you ready to make one?
Materials to Make a Waxed Canvas Travel Bag
- 1/4 Yard of Waxed Canvas in Color 1
- 1/4 yard of Waxed Canvas in Color 2
- 1/2 yard of fabric for Lining
- 1/2 yard of Shape Flex Interfacing
- 16″ metal zipper
- Marking Chalk
- Pins
- Binding Clips
- Embroidery Sewing Machine, I sew on a BERNINA 770 QEE
- Medium Weight Tear Away Stabilizer
- Machine Safe Basting Spray
- Embroidery Bobbin Thread
- Embroidery Thread
- Reverse pattern foot #1D
- Zipper foot #4D
Step One: Create the Monogram
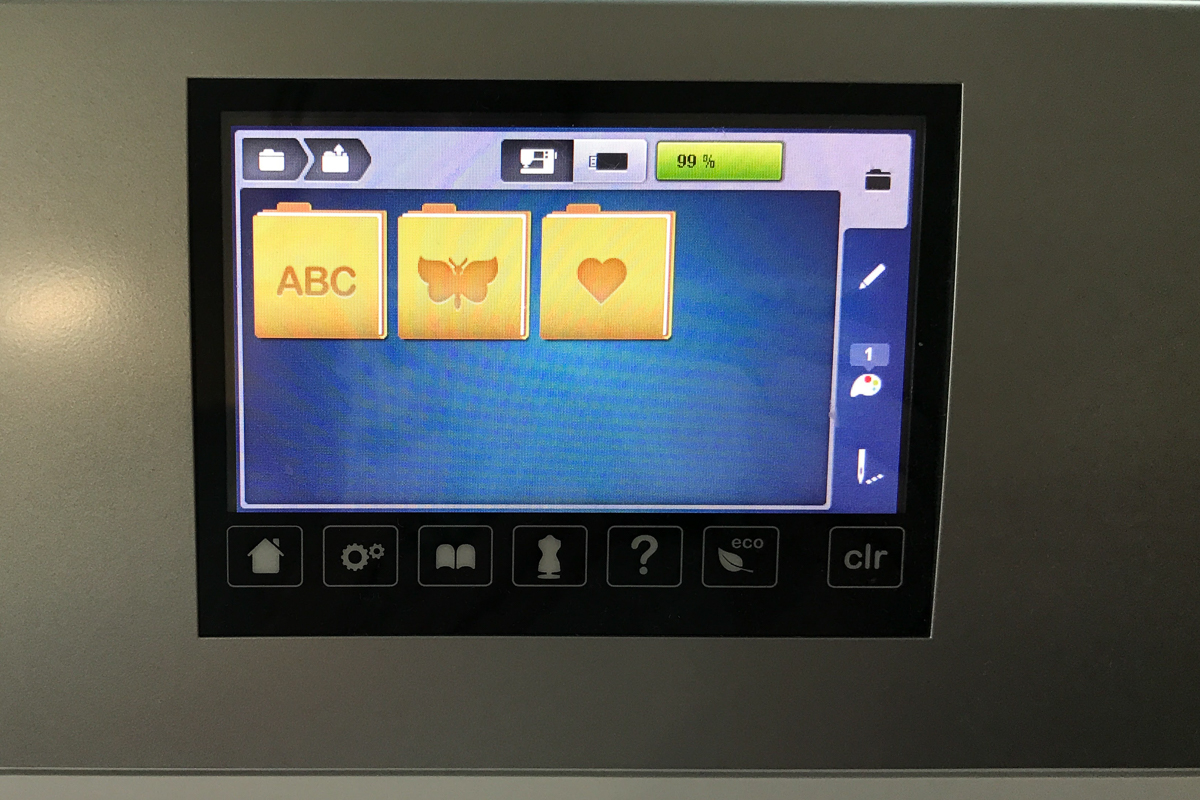
I am using a B 770 QEE for both embroidery and sewing. On your machine touch the home icon then select Embroidery.
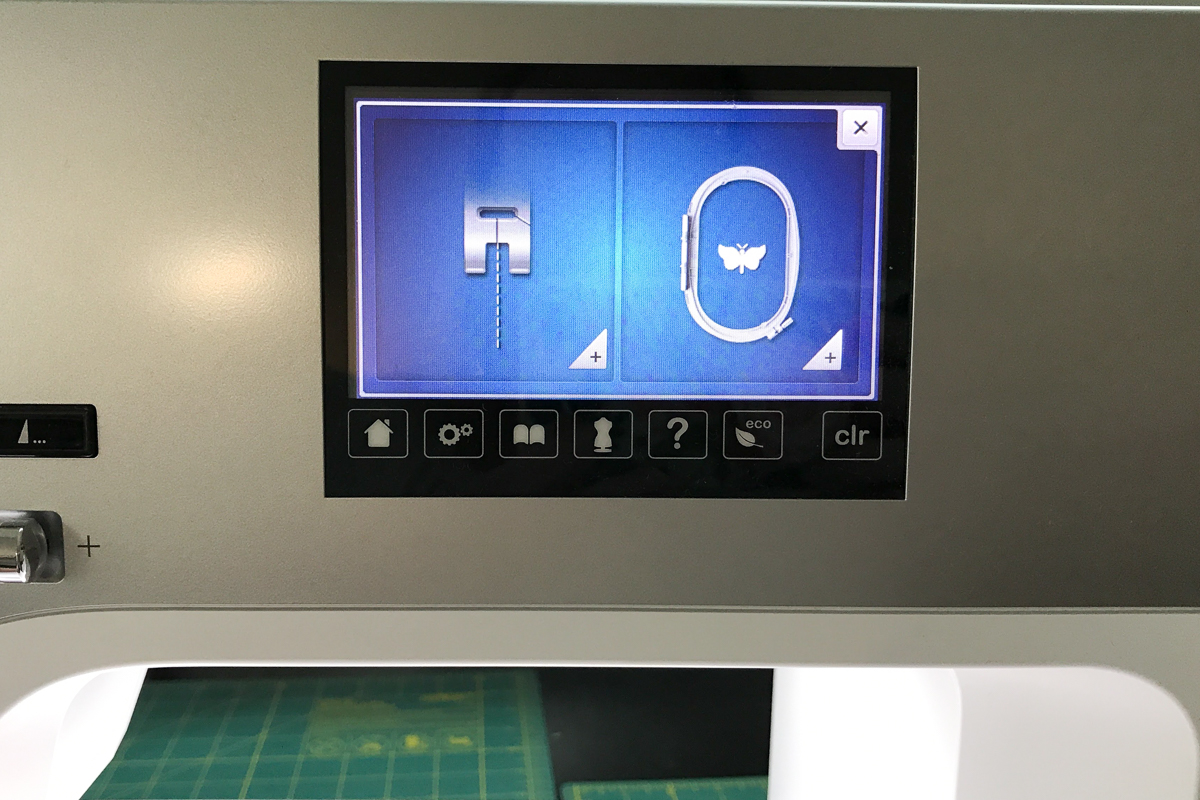
Next, select the ABC folder to access the built in alphabets.
Select the alphabet you’d like to work with.
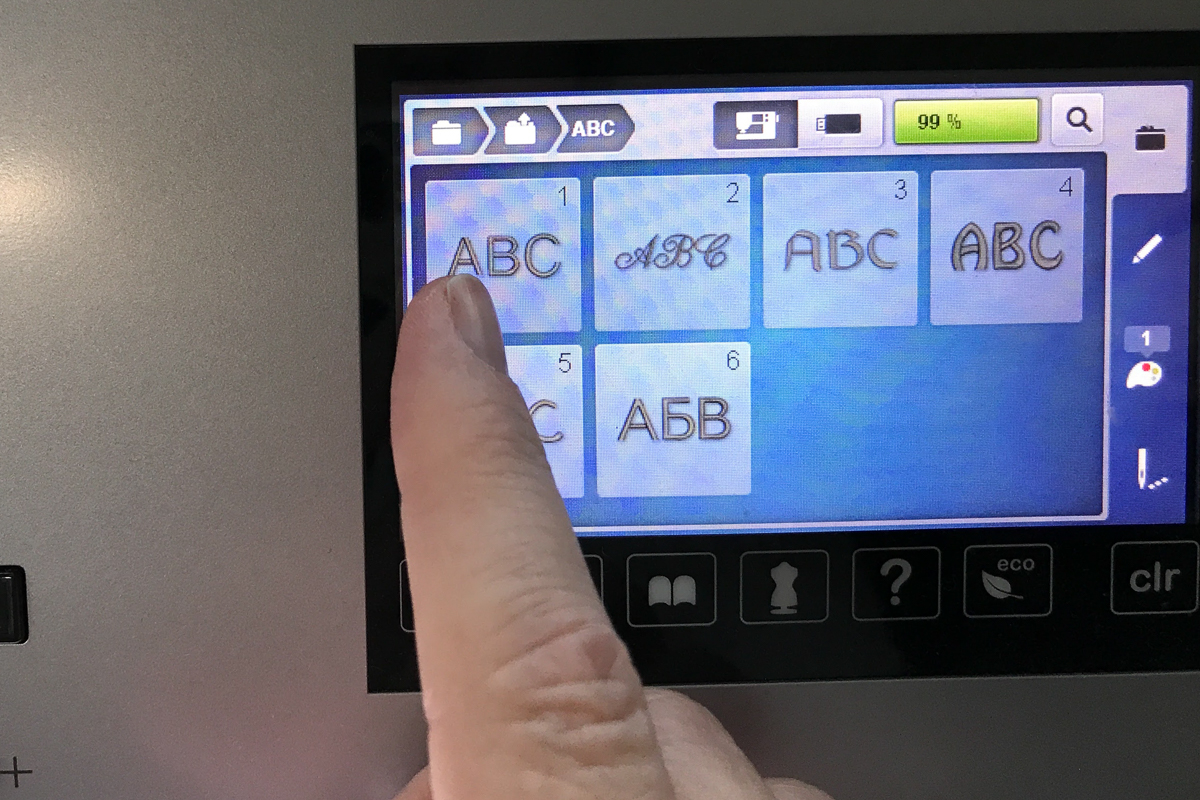
Type in your desired lettering. You can also add punctuation if you’d like, or combine upper and lower case letters. Once you have the text you want click the green check mark.

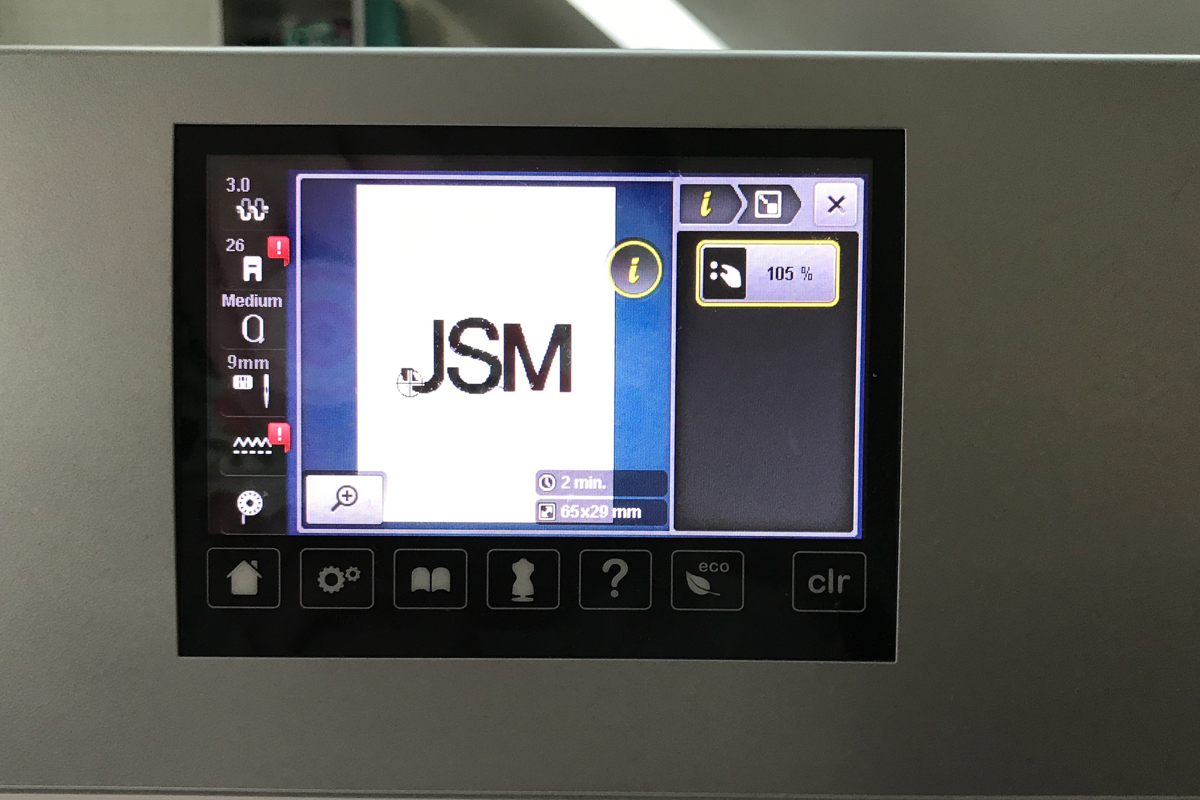
On the embroidery screen click the “i” in the circle to change a few of the settings.
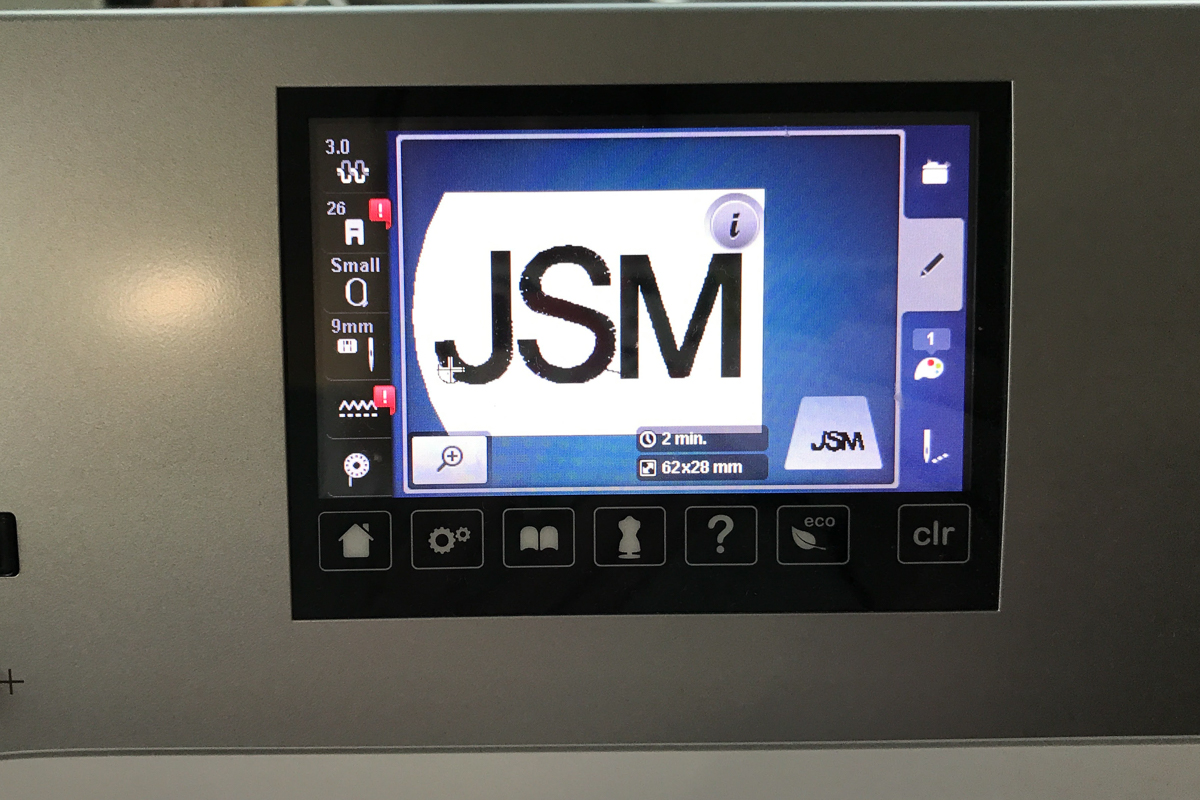
First, change the embroidery hoop size to MEDIUM.
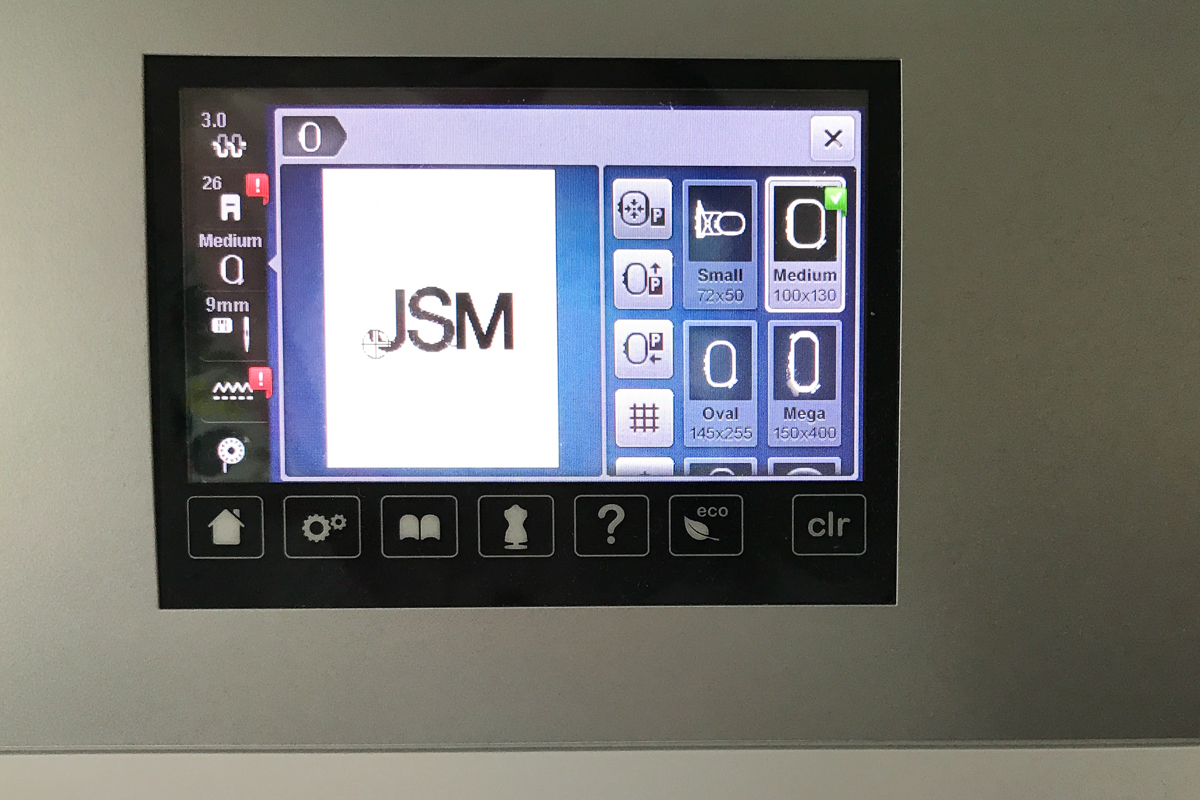
Next, select the resize proportionally button and scale the font up or down to your desired size. My design stitched out at 65mm wide.
Now check a few things:
1. That you have your embroidery unit properly installed.
2. That your feed dogs are down.
3. That you are using the straight stitch plate (and have noted that on the user interface).
4. That you have installed an embroidery foot.
5. That you are using a lightweight bobbin thread for the bobbin and embroidery thread on the top of the machine.
6. You have installed an embroidery needle.
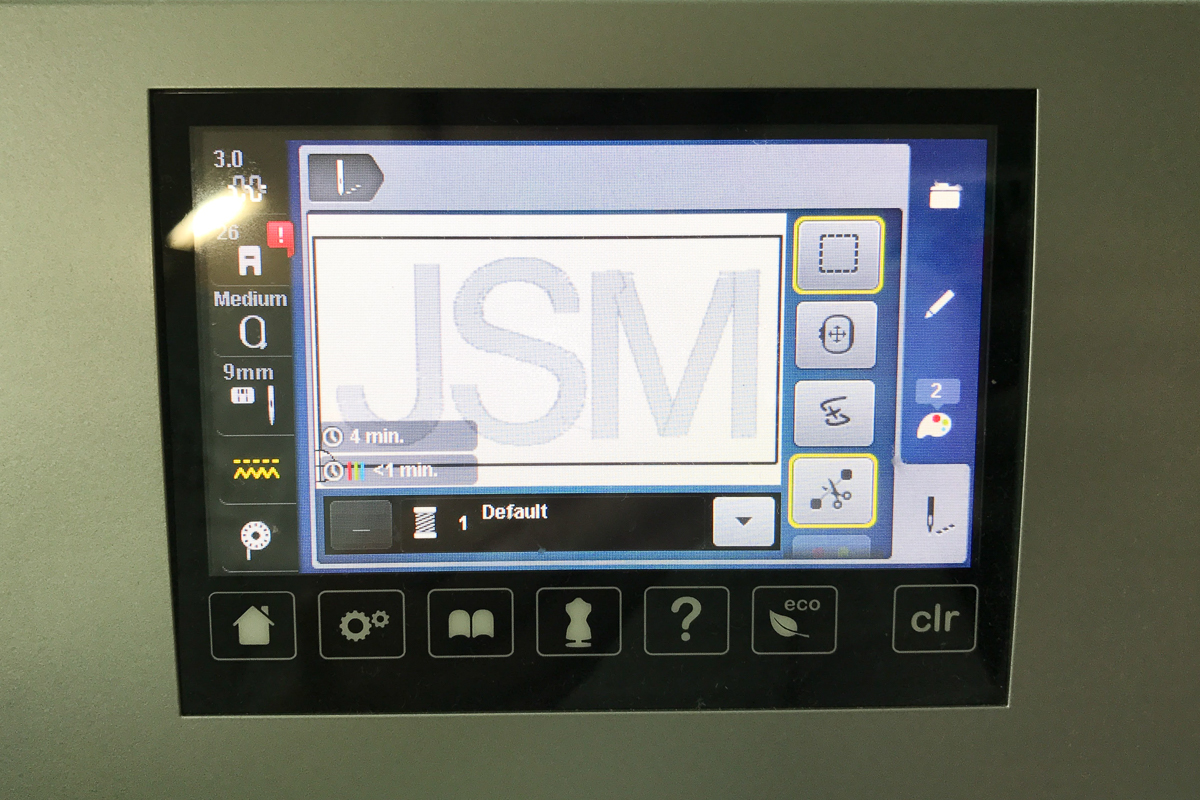
Next, select the top box—the one with a dashed line square in it. This is the basting feature. This will stitch a basting box around your design before it is stitched out.
The next thing you will want to do is to prep your fabric.
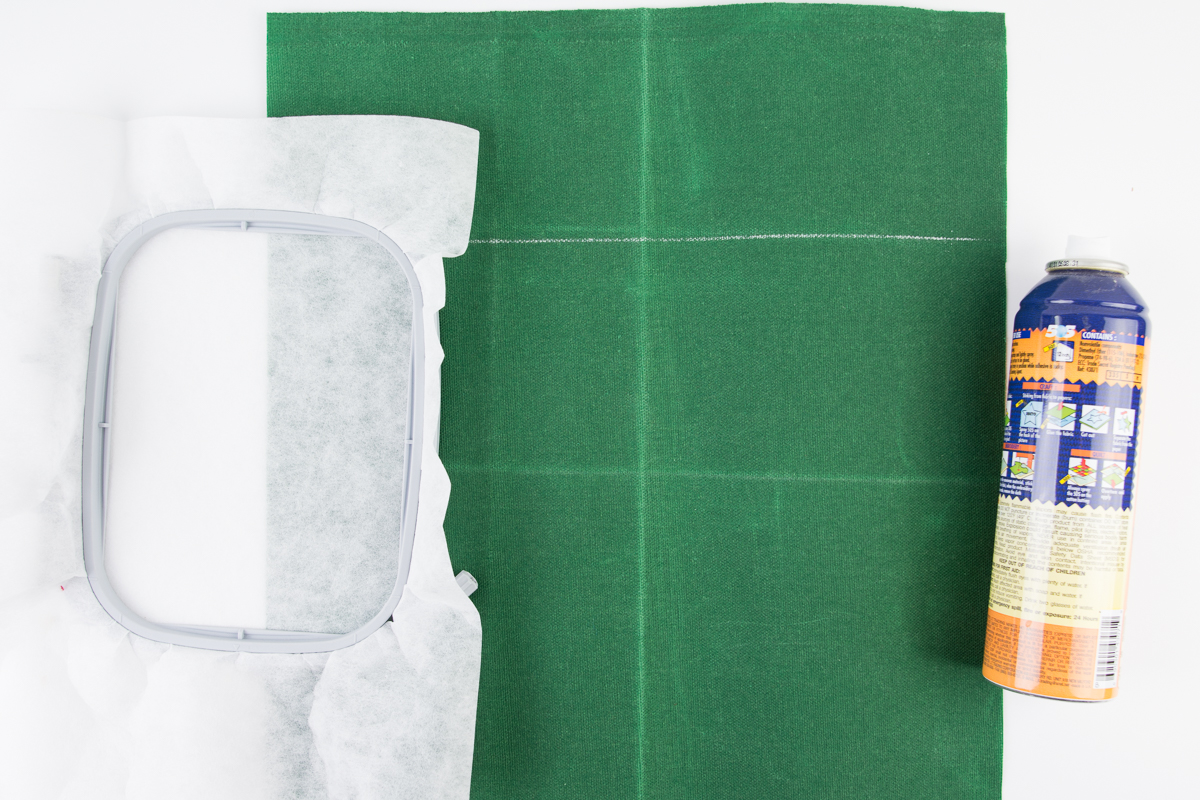
I found that the waxed canvas was too heavy to hoop, so I decided to use an alternative hooping method. I hooped the stabilizer, and then basted the canvas to the top. I’ll show you how to do that as we proceed through the tutorial.
NOTE: I like to cut my piece LARGER than I need it so that if for some reason my design is not perfectly square or centered I can trim it to fit. I like to use a piece of chalk and mark the vertical and horizontal centers of my fabric piece. This helps me when I’m aligning my fabric in the machine.
Next: Cut a piece of waxed canvas to 15″ x 10″ and mark the horizontal and vertical centers.
Place a mark on your waxed canvas approx 3″ down from the top edge of the fabric along the 15″ side. You want to try to have the top of your design at this mark. Don’t worry if it’s off by an inch or two, that is why you cut your fabric larger than you need.
Now, load the embroidery stabilizer into your embroidery hoop. Trim off any excess and spray with a machine safe basting spray.

Install the hoop in your machine.
Now, take your piece of waxed canvas and place it on top of the embroidery hoop and press it down firmly to attach it to the stabilizer (this is why you sprayed it with basting spray). You want to align your fabric so that the monogram stitches across the wider side of the fabric.
Click the green embroidery button to begin stitching your design. The machine will first lay down the basting box stitches.
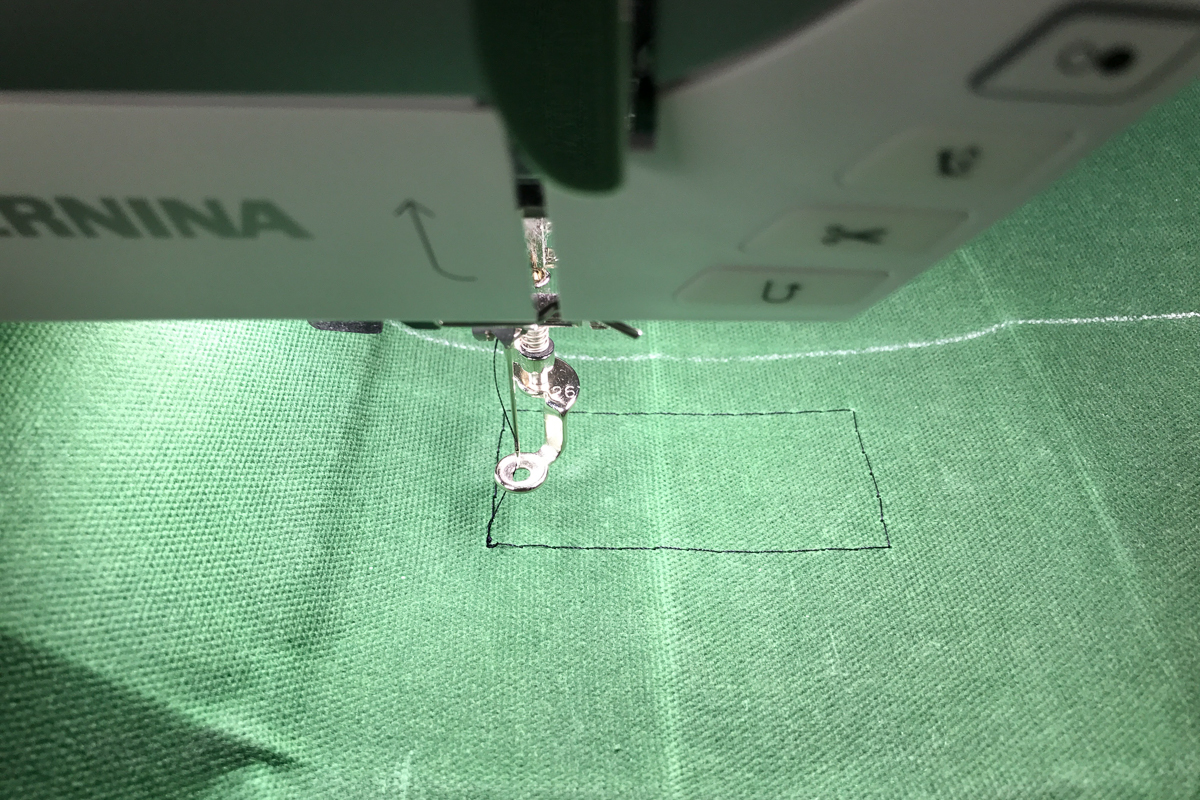
Since the waxed canvas is stiff, you’ll want to help to hold it in place while the machine stitches the box. After that your piece will be secure.
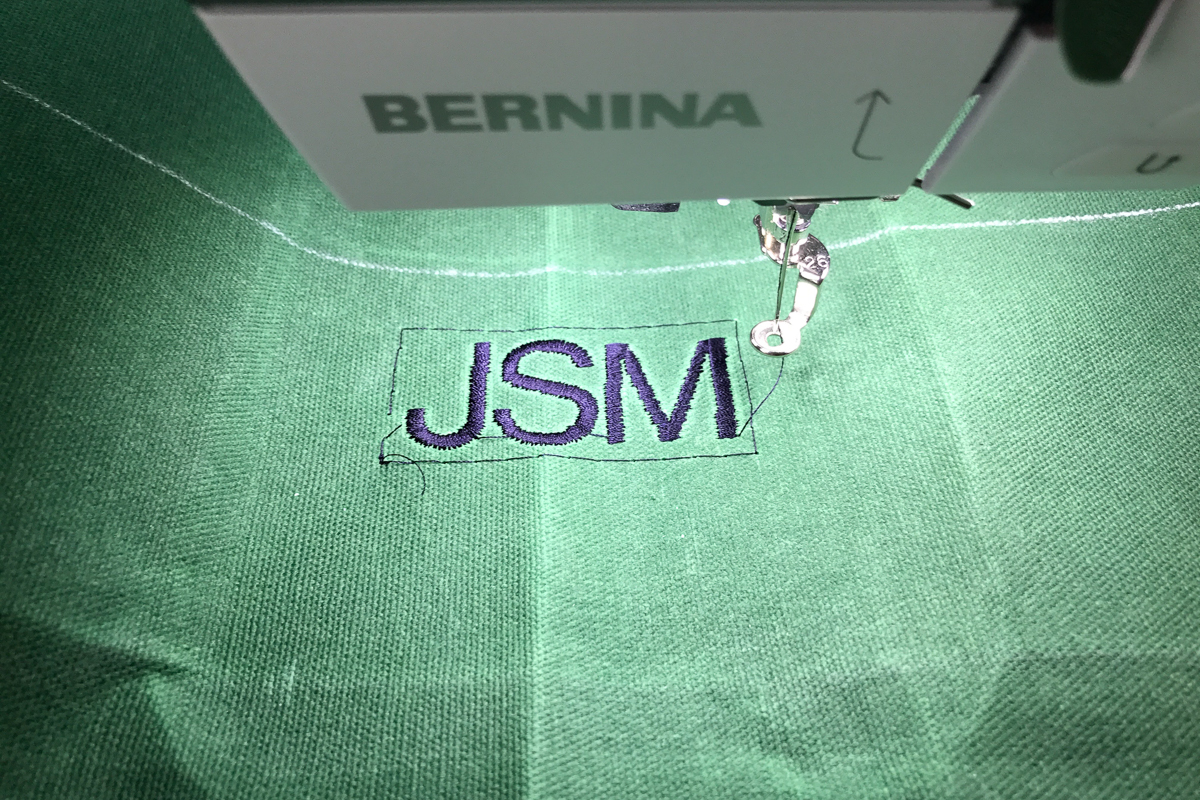
Allow the machine to finish stitching out the design. Remove the embroidery hoop from the machine, remove the excess stabilizer and the basting stitches.
Step Two: Construction
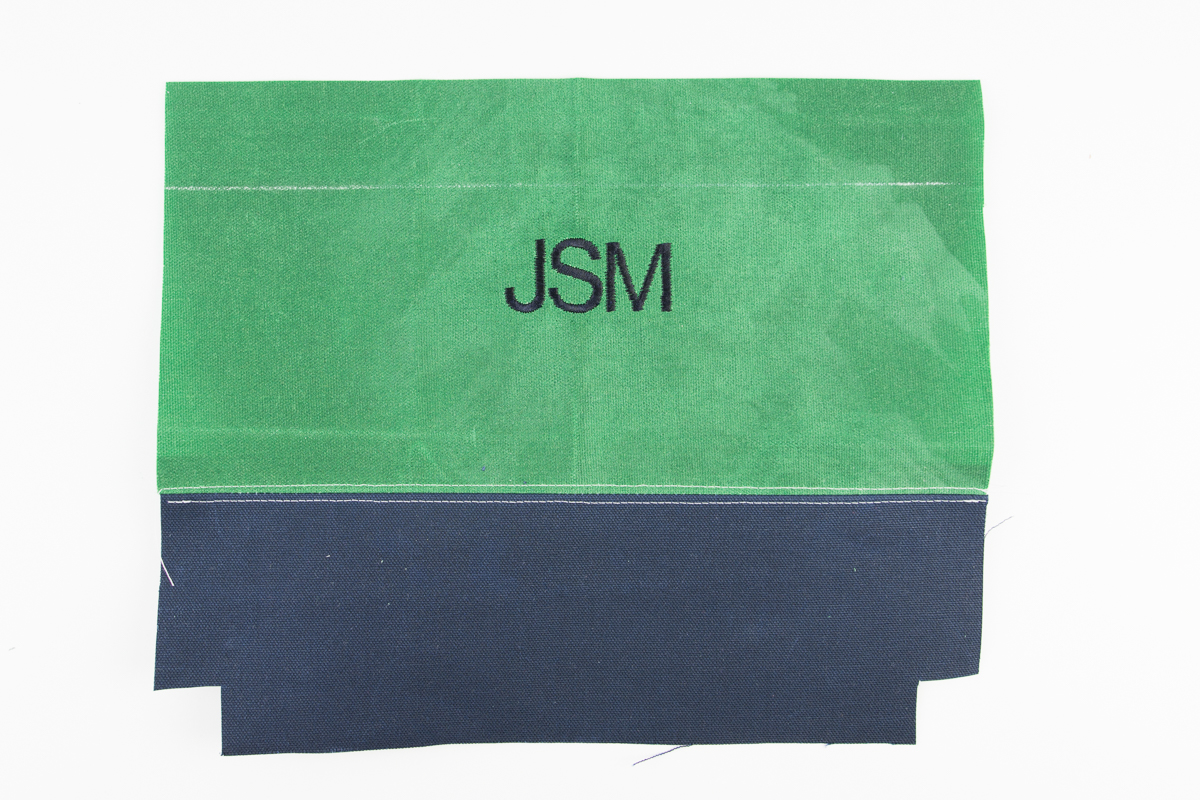
Trim your embroidered piece of fabric to 13″ x 7″. Ensure that the monogram is centered along the 13″ side and that the top of the monogram is 2 1/2″ down from the top edge of the piece.
Cut a second piece of waxed canvas in the same color to 7″ x 13″ – these will become your bag top pieces.
Cut two pieces of waxed canvas in a second color to 4 1/2″ x 13″. Cut a 1″ x 1″ square in the bottom two corners of these pieces. These will become your bag bottom pieces.
Set up your machine for sewing. On the sewing advisor select Woven Heavy, and Straight stitch. I recommend using a polyester thread in a contrasting color for the following steps. I used an 80 Universal needle and had no problems with the canvas.
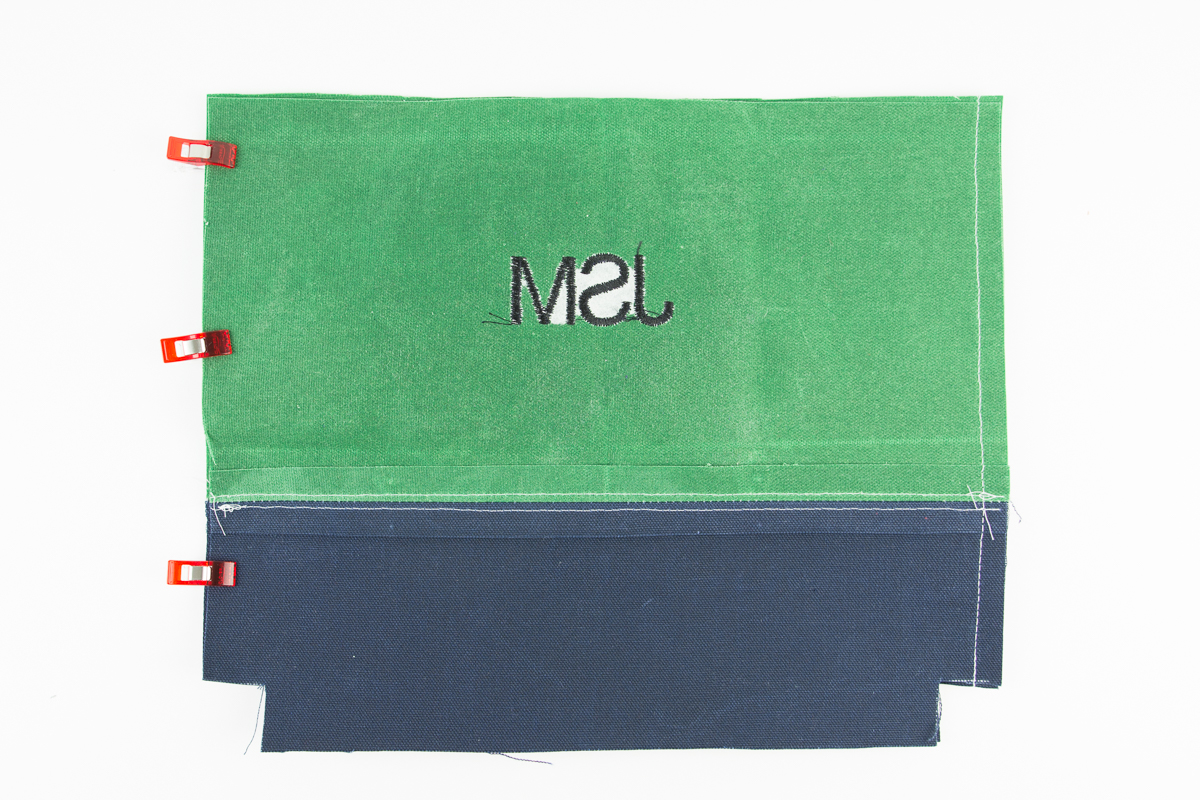
With the Reverse pattern foot #1D foot installed and Dual Feed engaged on your machine, stitch one bag top piece to one bag bottom piece using a 1/2″ seam allowance. Make sure that you lock your stitches.
Finger press the seams open and top stitch on both sides of the seam between the two pieces.
Repeat for the other bag top and bottom pieces.
A few things to note:
- While working with heavy fabrics like waxed canvas I find it helpful to use binding clips instead of pins whenever I can.
- When pressing waxed canvas be sure to use a pressing cloth so that the wax does not transfer to your iron.
Using the sewn bag outside pieces as a guide, cut 2 pieces from your lining fabric and 2 pieces from the Shape Flex interfacing.
All seam allowances are 1/2″
Place the two bag pieces together right sides facing, and stitch along the sides and bottom of the bag. Do not stitch in the square in the corner of the bag. Press seams open.
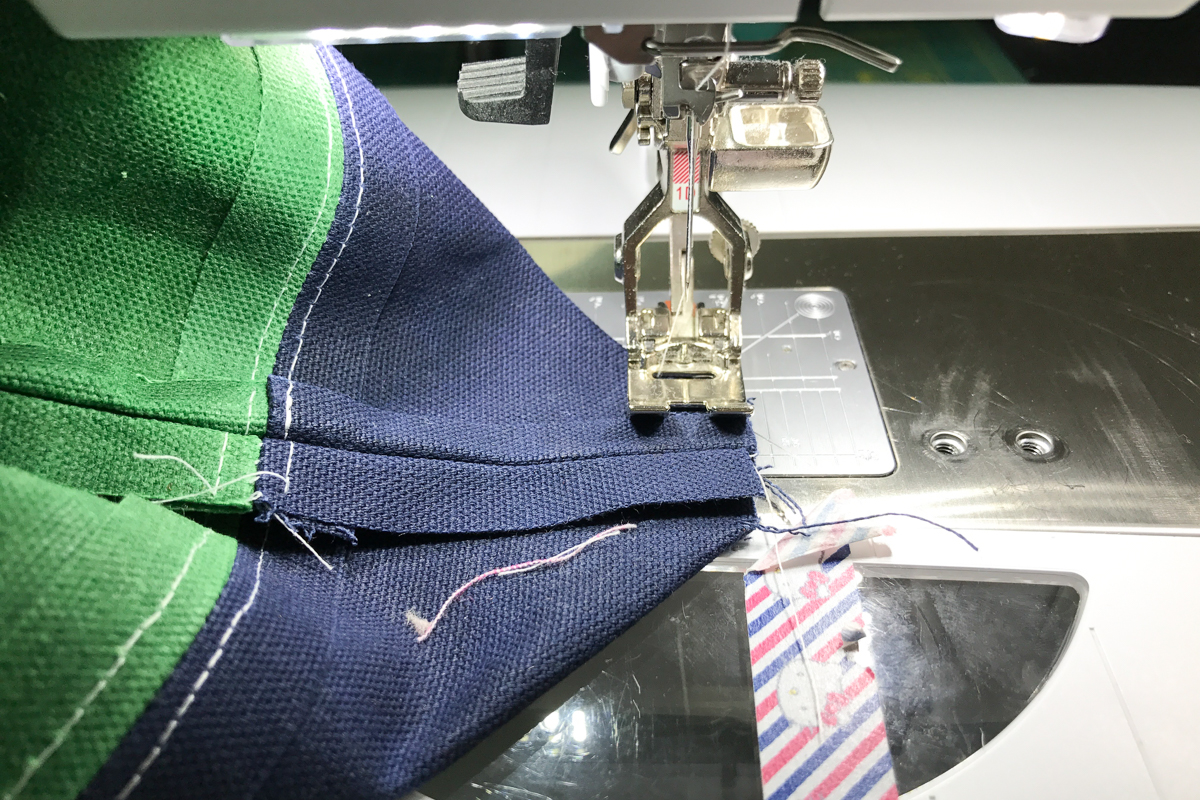
Pinch the bottom of the bag on one side so that the side and bottom seams are on top of each other. Stitch a seam here the width of your presser foot. Be sure to backstitch at the start and finish of the stitching line.
Repeat for the other bag bottom corner.

Turn the bag right side out.
Pin the zipper to one side of the bag outside. The right side of the sipper will be facing the right side of the bag and the raw edge of the bag will be flush with the tape edge of the zipper.
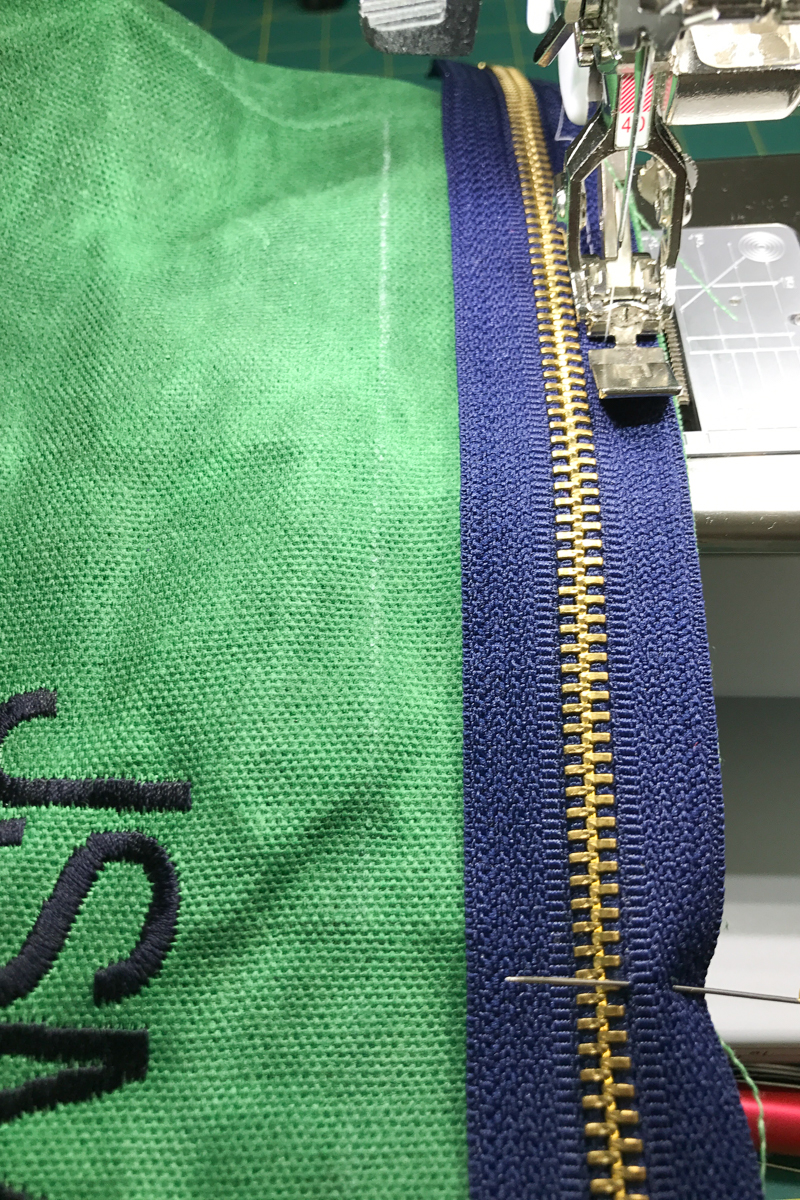
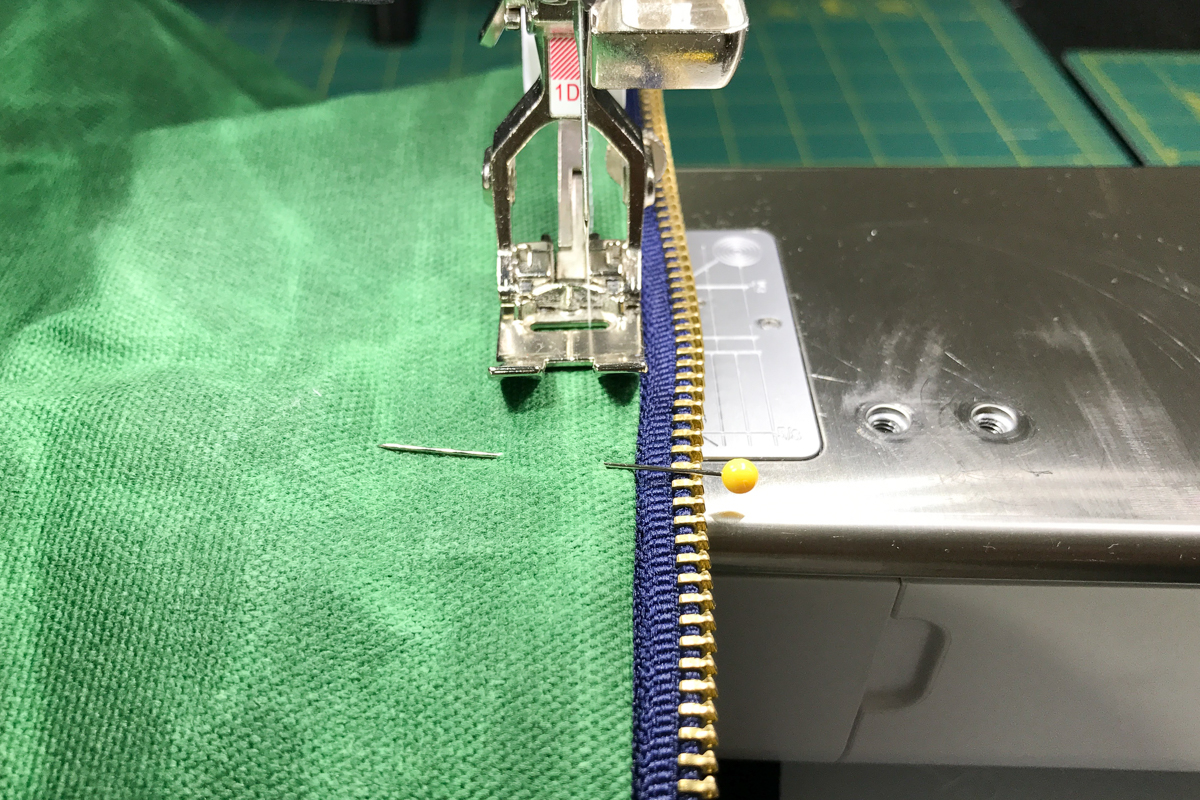
Install the Zipper foot #4D foot on your sewing machine with Dual Feed engaged and move your needle 3 by positions to the left. Stitch along the edge of the zipper. The zipper is longer than the bag, just stop stitching at the side seam of the bag.
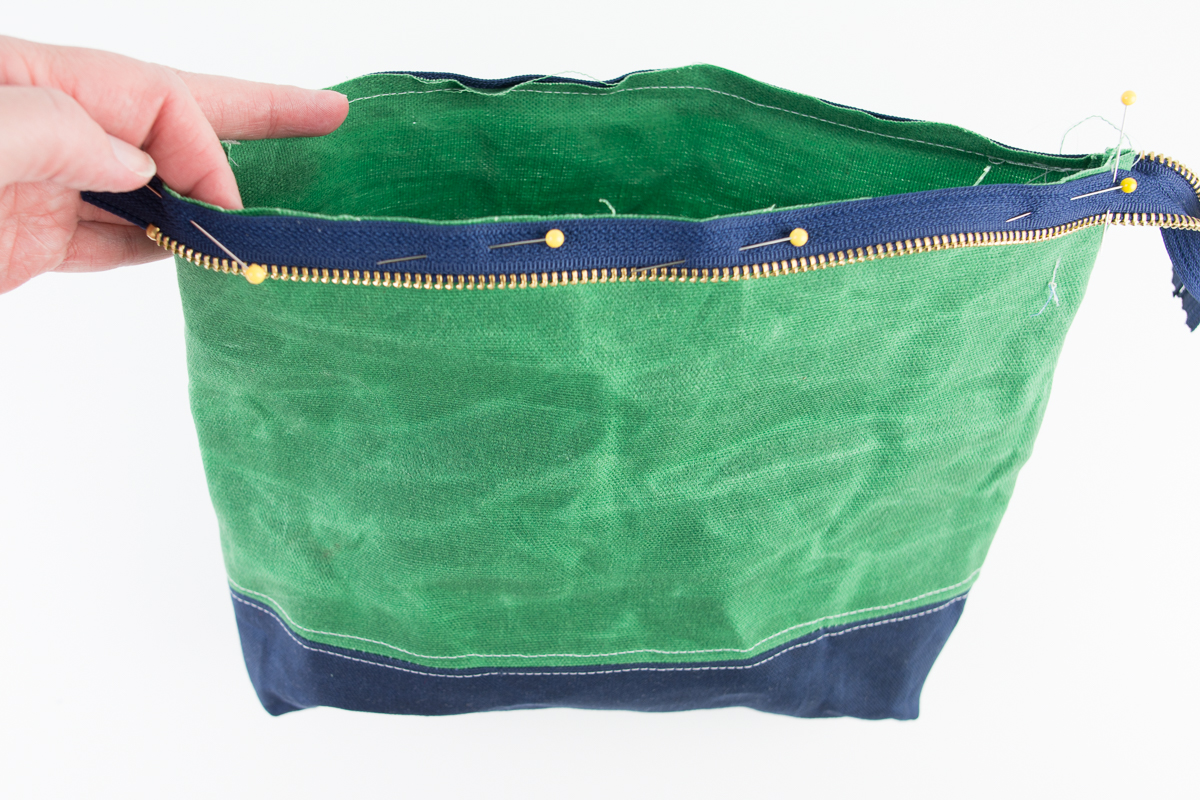
Next pin the other side of the zipper to the other side of the bag. You’ll want to make sure again that the right side of the zipper is facing the right side of the bag. You’ll need to do a little “flip” with the zipper to get it in the correct spot. Stitch the zipper in place, again, ending at the side seam of the bag. Fold the zipper up and test that it is working properly.
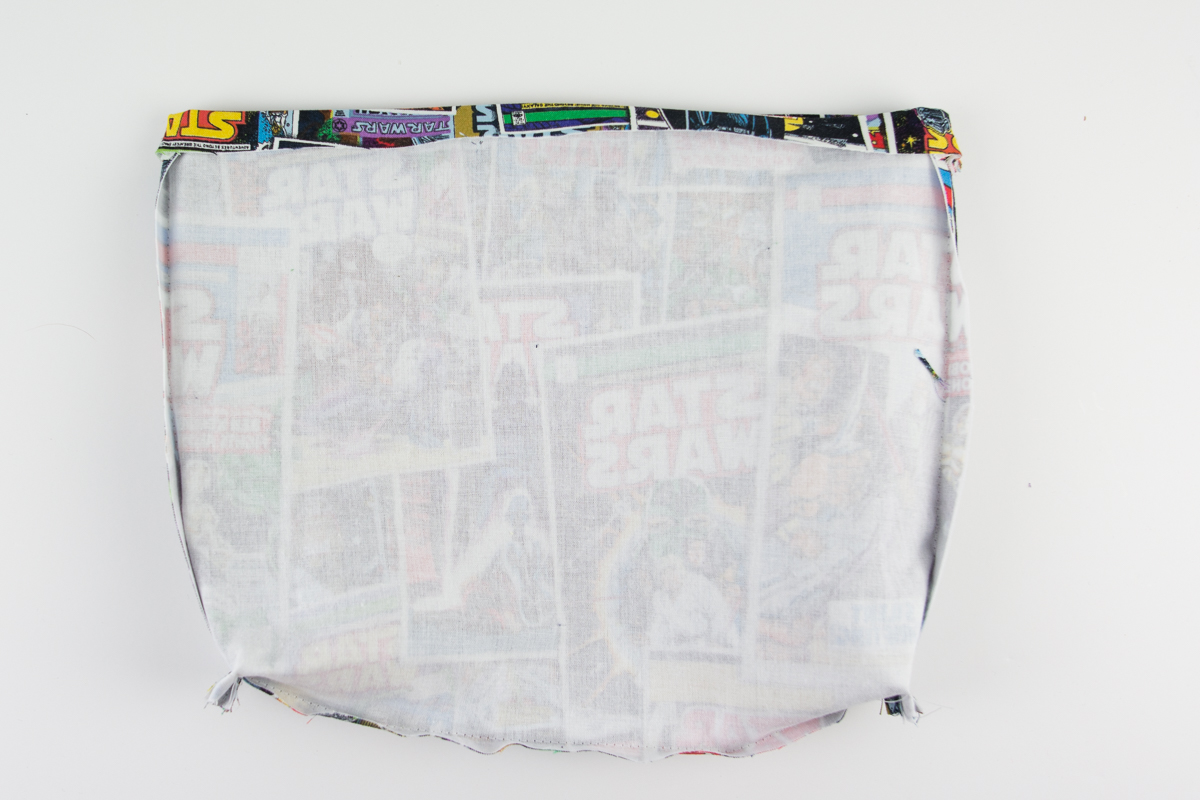
Apply the shape flex interfacing to the wrong side of the two bag lining pieces. Stitch the bag lining together the same way that you stitched the bag outside together.
Fold the top of the bag lining over 1/2″ and press.
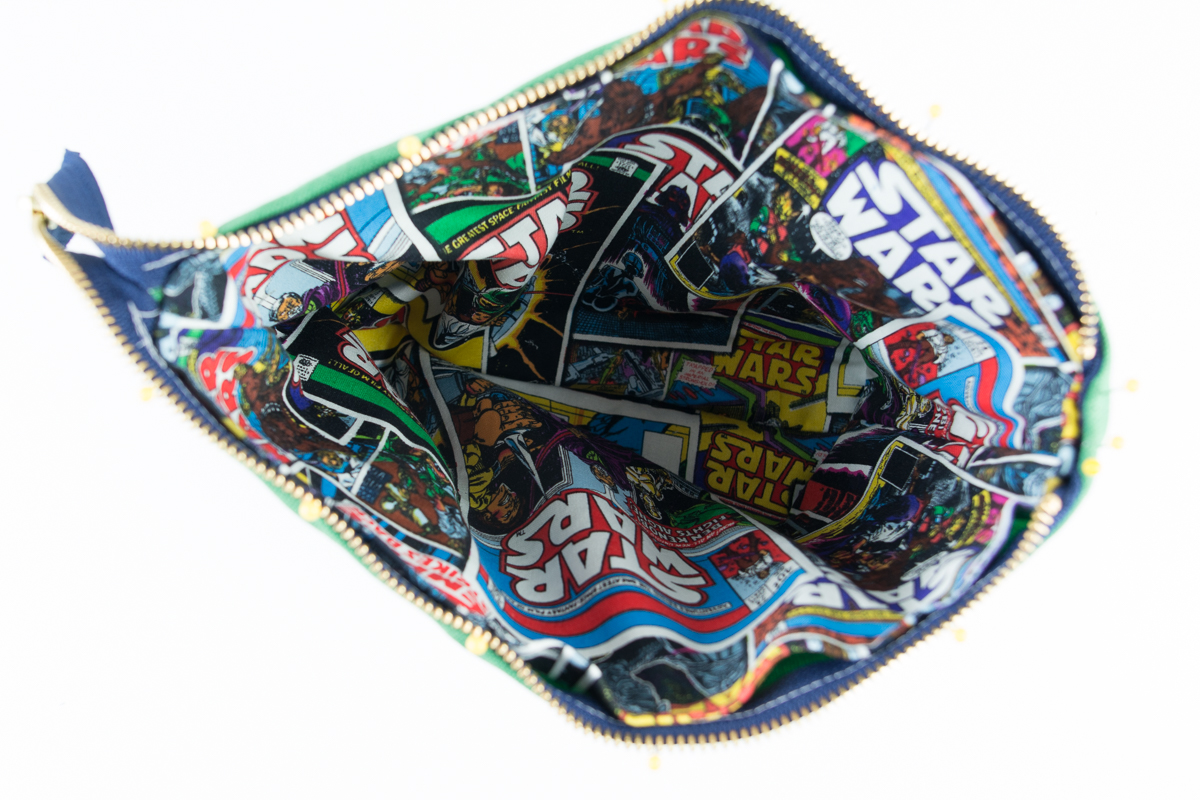
Slip the bag lining into the bag so that the folded edge of the lining is on top of the stitching line that you used to attach the zipper. Pin in place.
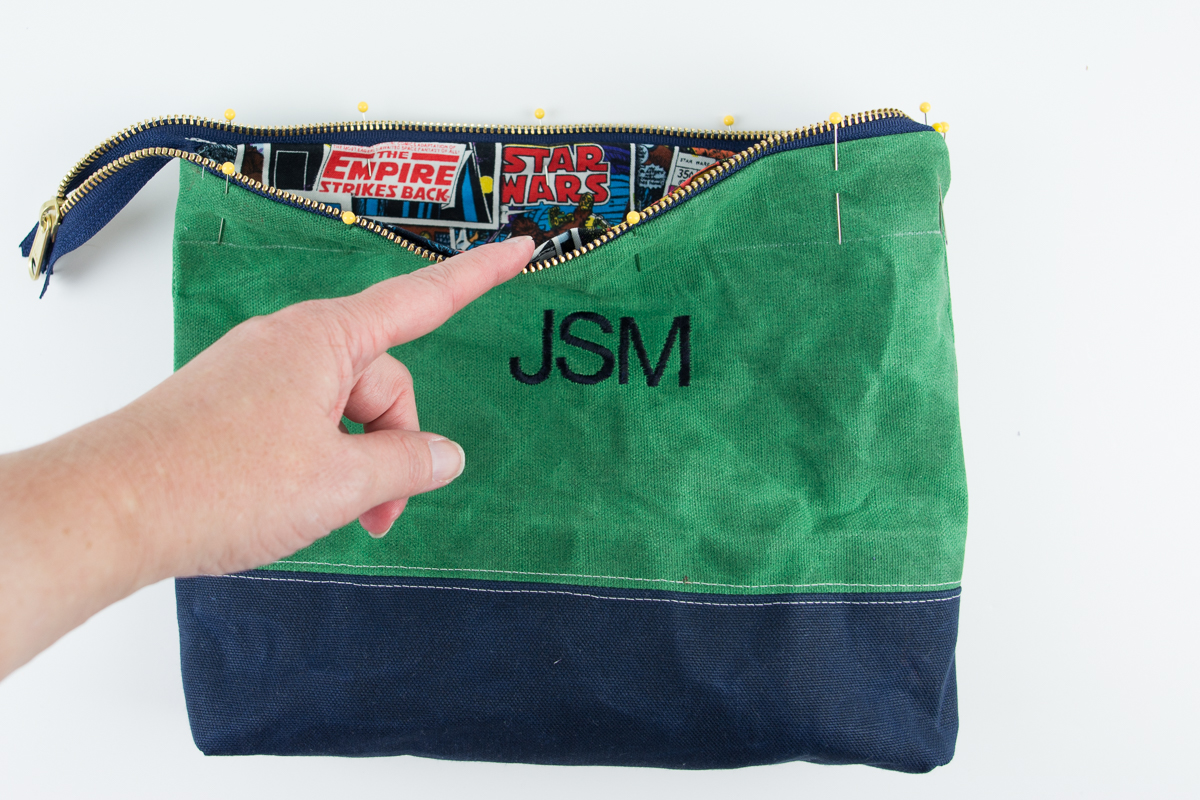
For this step you can use your Zipper foot #1D foot or whichever zipper foot you prefer. On the outside of the bag top stitch along the fabric close to the zipper. Make sure that you are catching the lining as you stitch.
Remove the bag from your machine and give it a good pressing. Be careful as the metal zipper can get very hot when it’s ironed. You’ll also want to use a damp cloth to remove the chalk lines.
Be sure to use a pressing cloth when your iron touches the waxed canvas. A final pressing will help to “seal up” any holes left in your fabric from pins or stitching.
That’s it!
Enjoy!

