


![]() ERIKA MULVENNA JUNE 4, 2018
ERIKA MULVENNA JUNE 4, 2018
In garment construction when you sew two pieces of fabric together the seam allowance is left on the inside of your garment (along with the raw edges of the fabric). Adding a finish to these seams will keep the fabric from fraying, give the seam a clean finished look, and add strength to the seam. Today let’s take a closer look at some of the most popular ways to complete your garment with seam finishes 3 ways.
About Seam Allowance
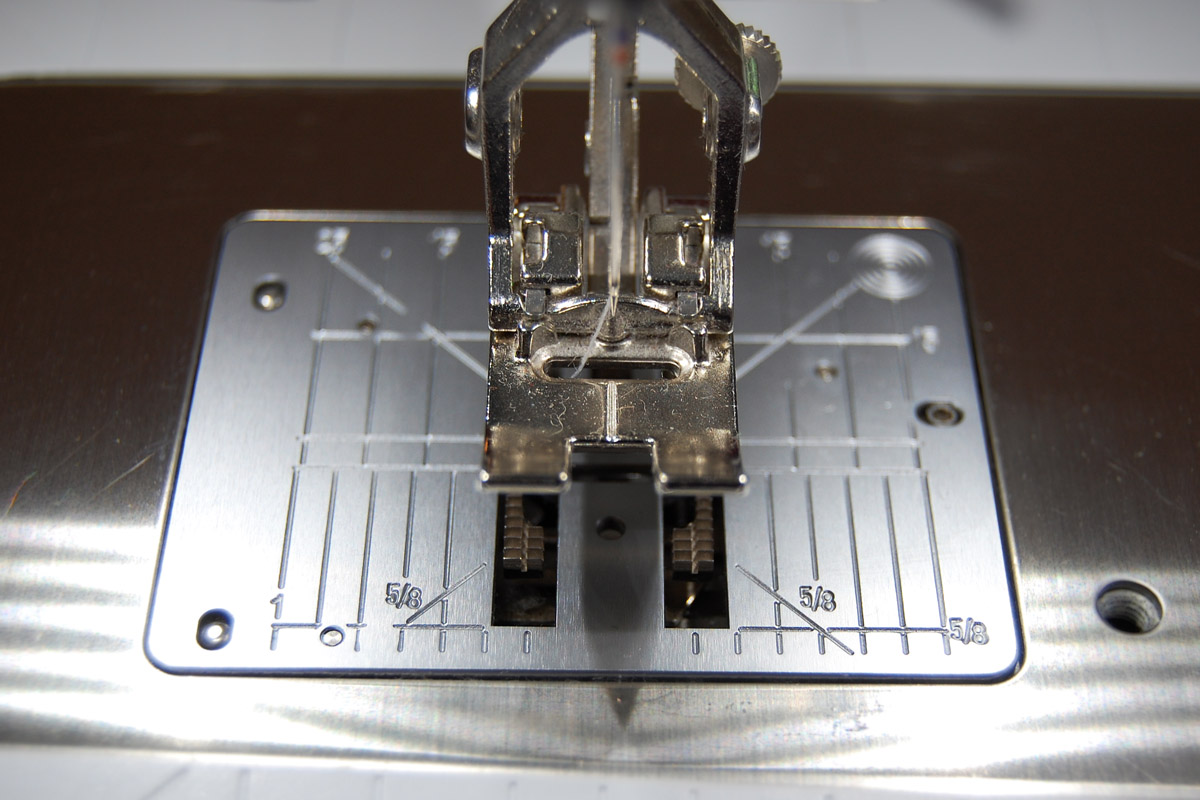
The seam allowance is the amount of fabric that the pattern allows for the seam and is usually 5/8″ in most patterns. Take a look at your stitch plate and you will see 5/8″ clearly marked. This is the line you will follow with the raw edges of your fabric when joining pattern pieces together to create your garment. All seam finishes here are presented with a 5/8″ seam.
Pinked Seam Finish
- You will need a pair of sharp pinking shears to use this technique
- This seam finish is perfect for any garment that will only see light use or not be washed often (like a costume)
- Works best with medium or heavyweight wovens
To add a pinked seam finish, first sew your garment as usual with a 5/8″ seam.
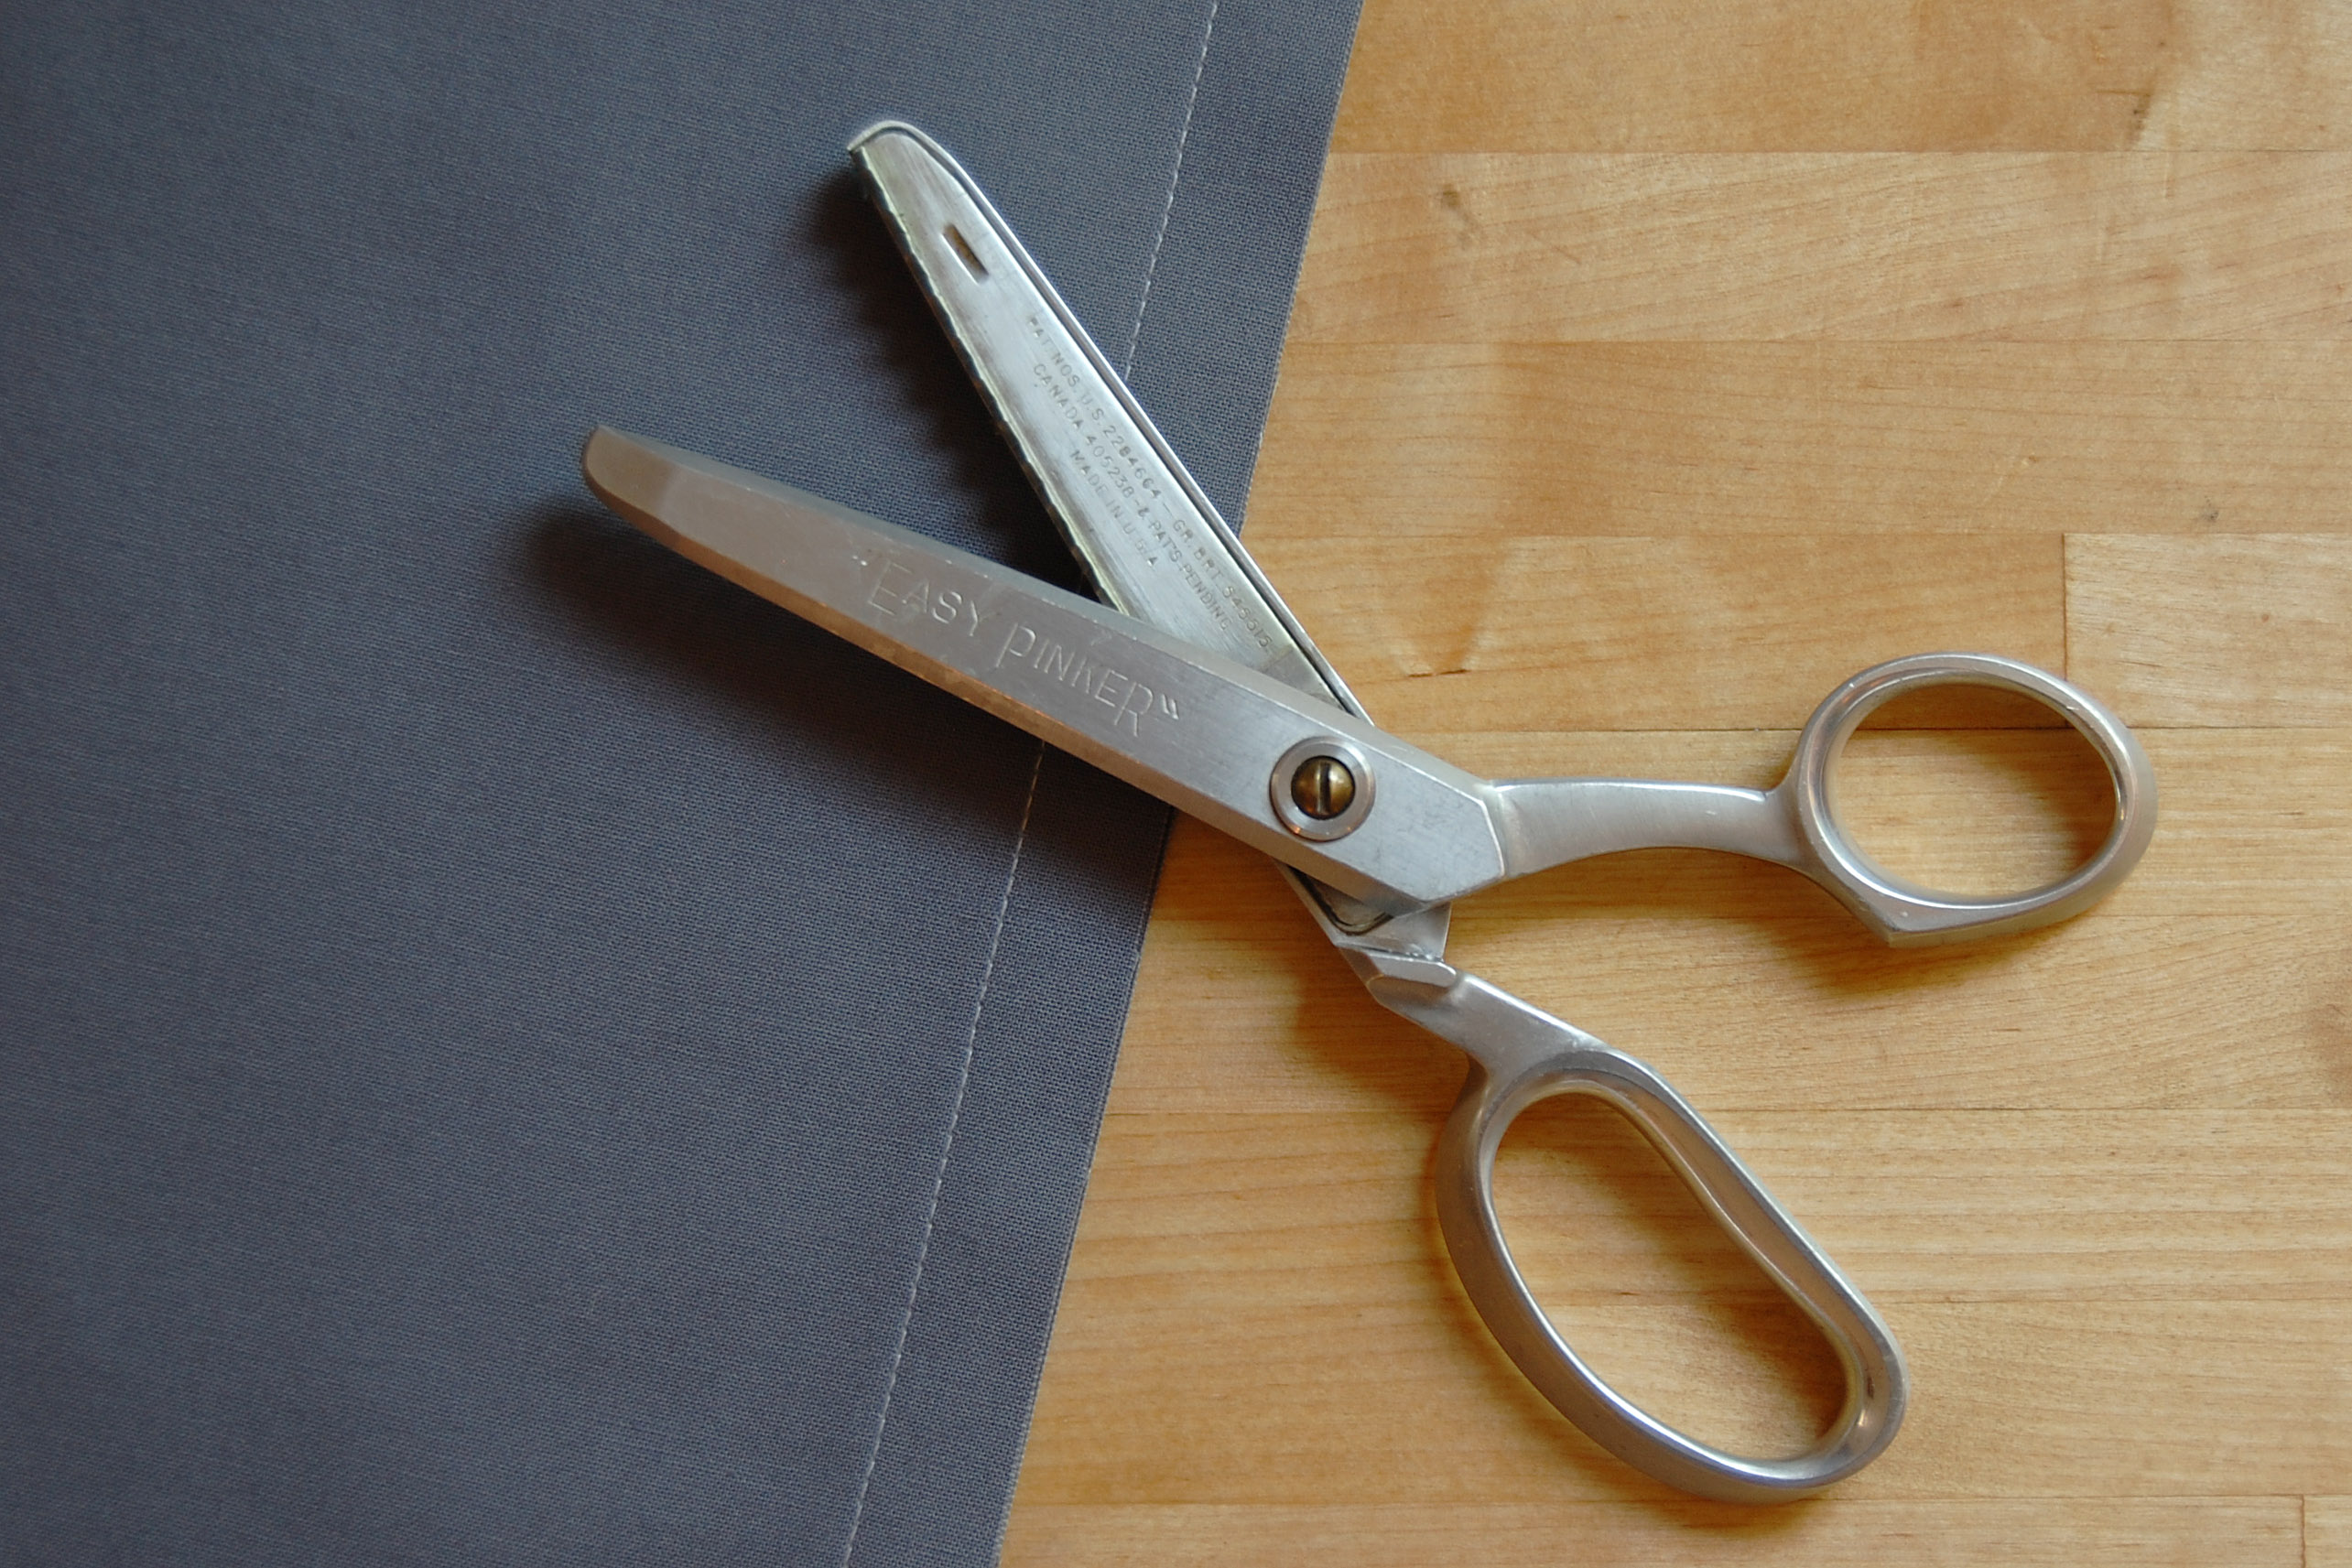
Next, grab your pair of sharp pinking shears.
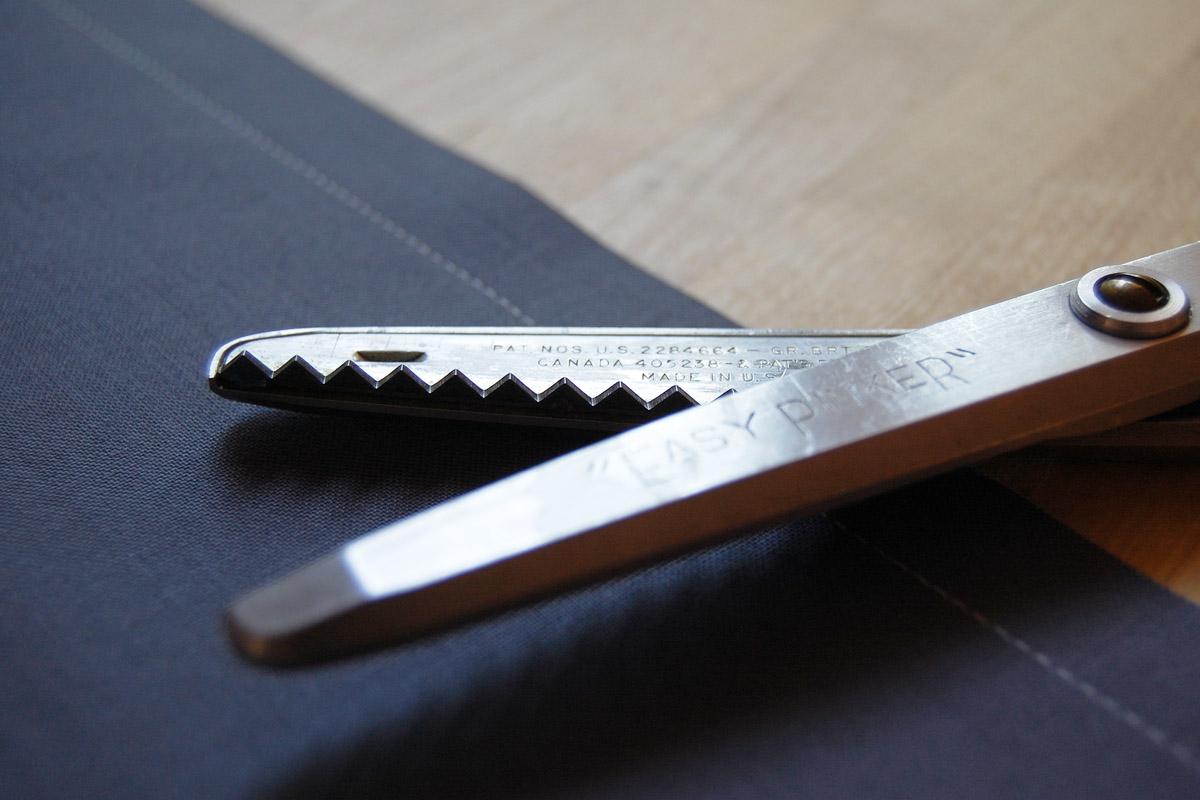
Pinking shears have a zig-zag edge and will cut a serrated edge on the fabric.
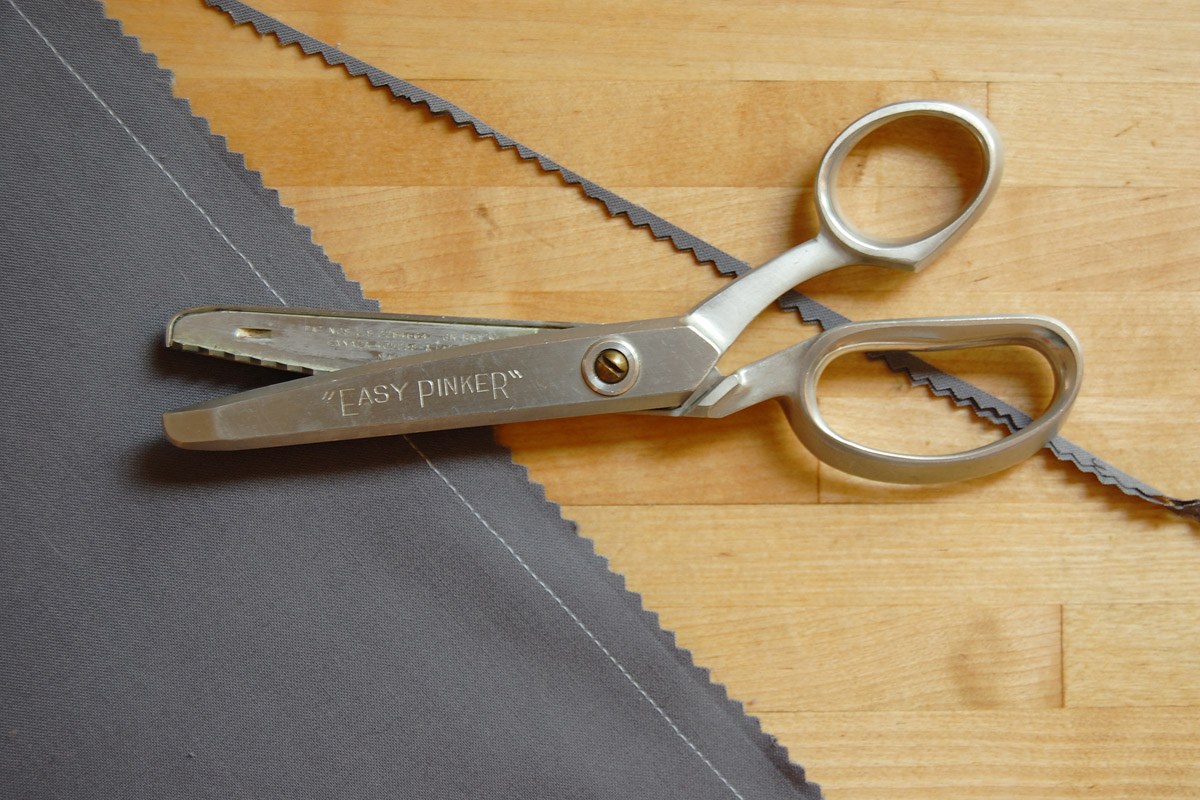
Cut through both layers of the seam allowance close to the raw edges of the fabric. Take long, full cuts with the shears.

This seam treatment when pressed open works well for any garment seam that needs to lie flat when worn (like a skirt seam, side seam in a shirt, or the center back seam of a dress).
While the zig-zag cut on the edge minimizes fabric fraying, it works best for garments that won’t see a lot of use or washing. Heavy wear or lots of washing will eventually lead to the pinked edges fraying away.
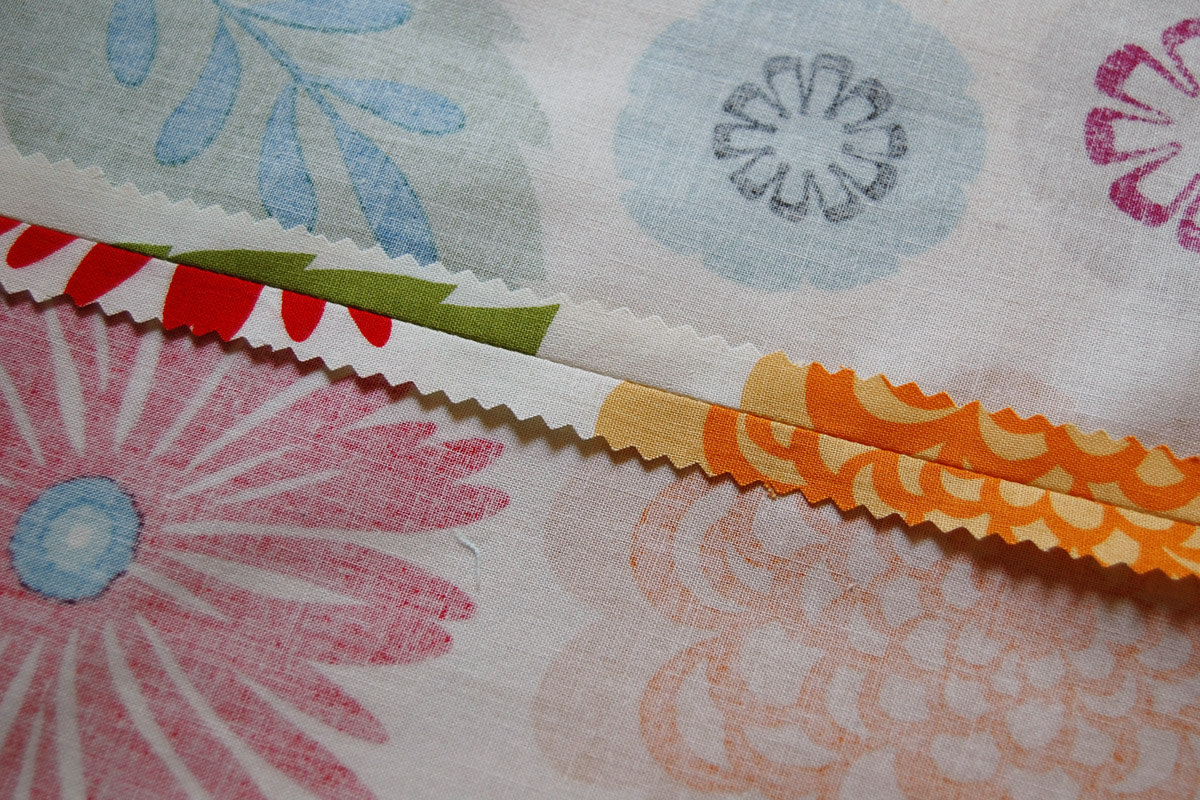
Here’s an example of a pinked seam finish on a medium weight cotton print, you can see the pinked edge on the inside of the garment above. The outside of the garment seen below lies nice and flat with the seam pressed open.

Overcast Seam Finish
- You will need the Overlock foot #2/#2A for this technique
- Create this seam finish 2 ways; in an open overcast seam or a closed overcast seam
- Adds a clean finish to garments that will see lots of wash and wear
- Works with light, medium, and heavyweight woven fabrics
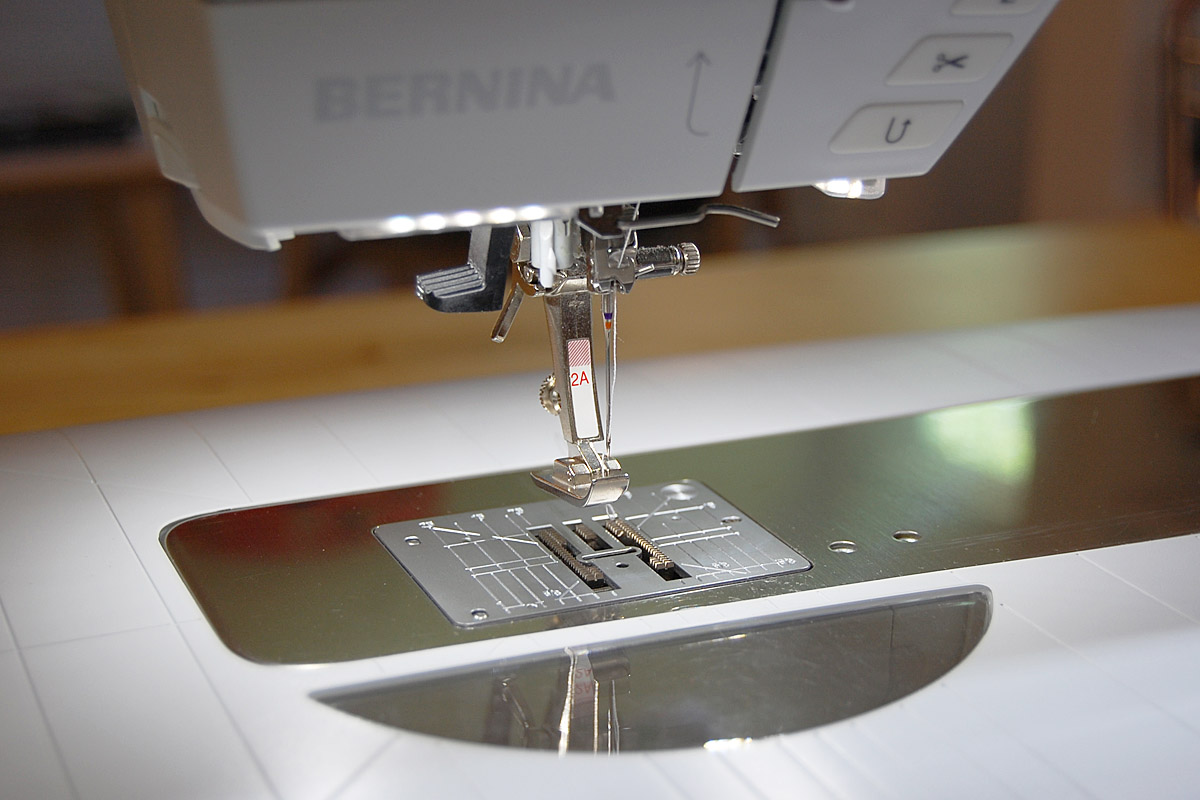
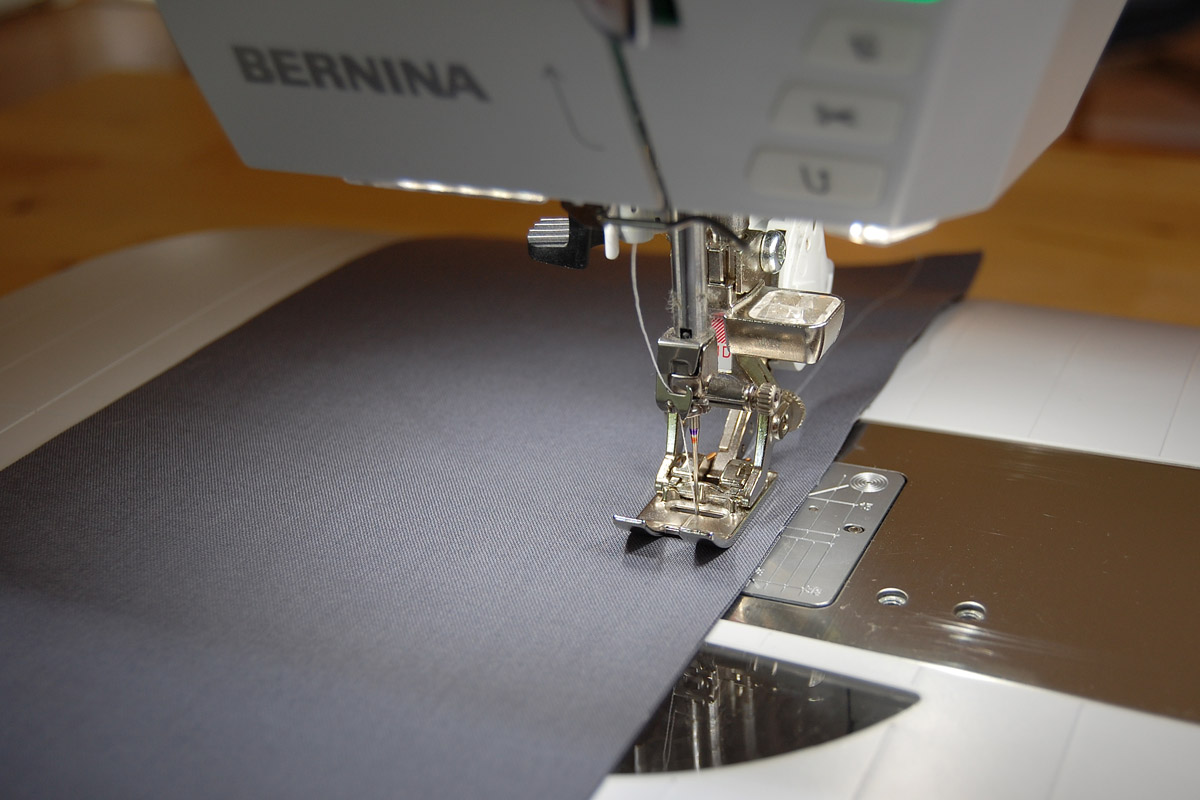
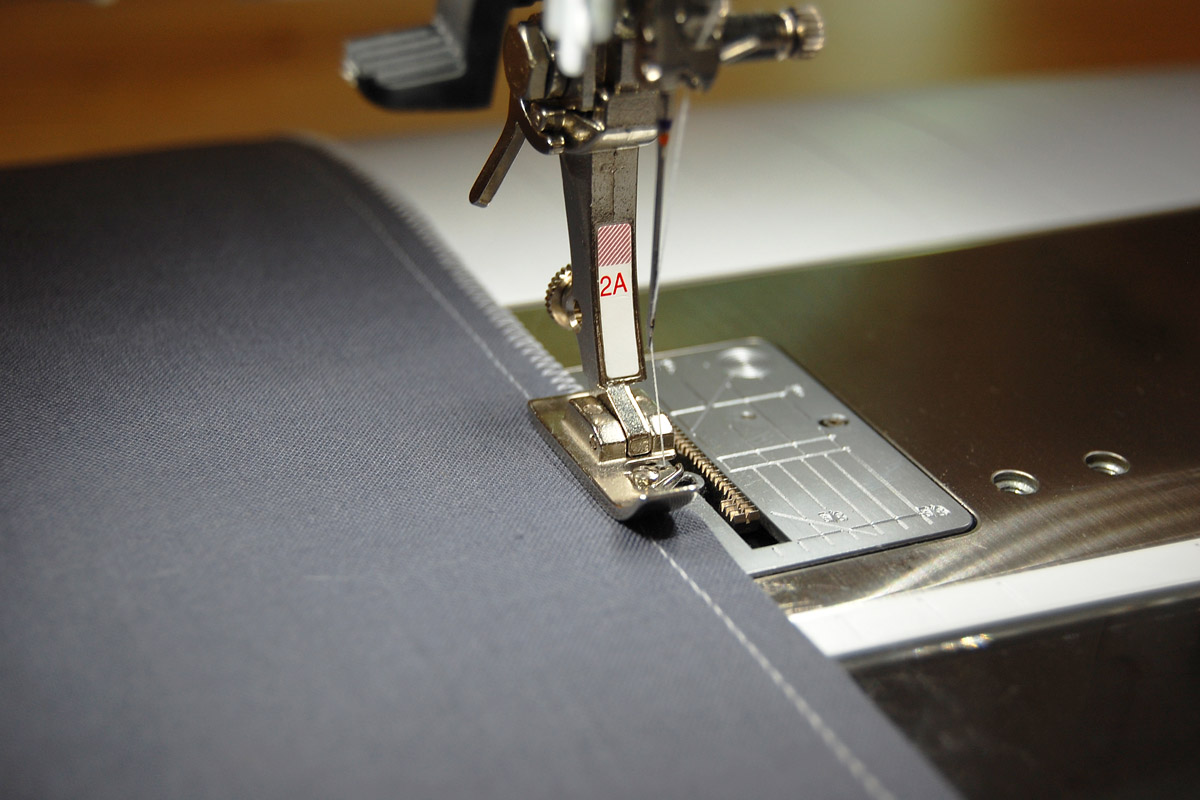
Use the Overlock foot #2/#2A for this technique. The Overcast foot includes a little finger on the right side that helps hold the edges of the fabric down while sewing an overlock stitch with a zig-zag to create smoothly finished overcast edges.
Open Overcast Seam Finish
To create an overcast seam finish pressed open, begin by sewing your garment as usual with a 5/8″ seam allowance. Press the seam open after stitching.
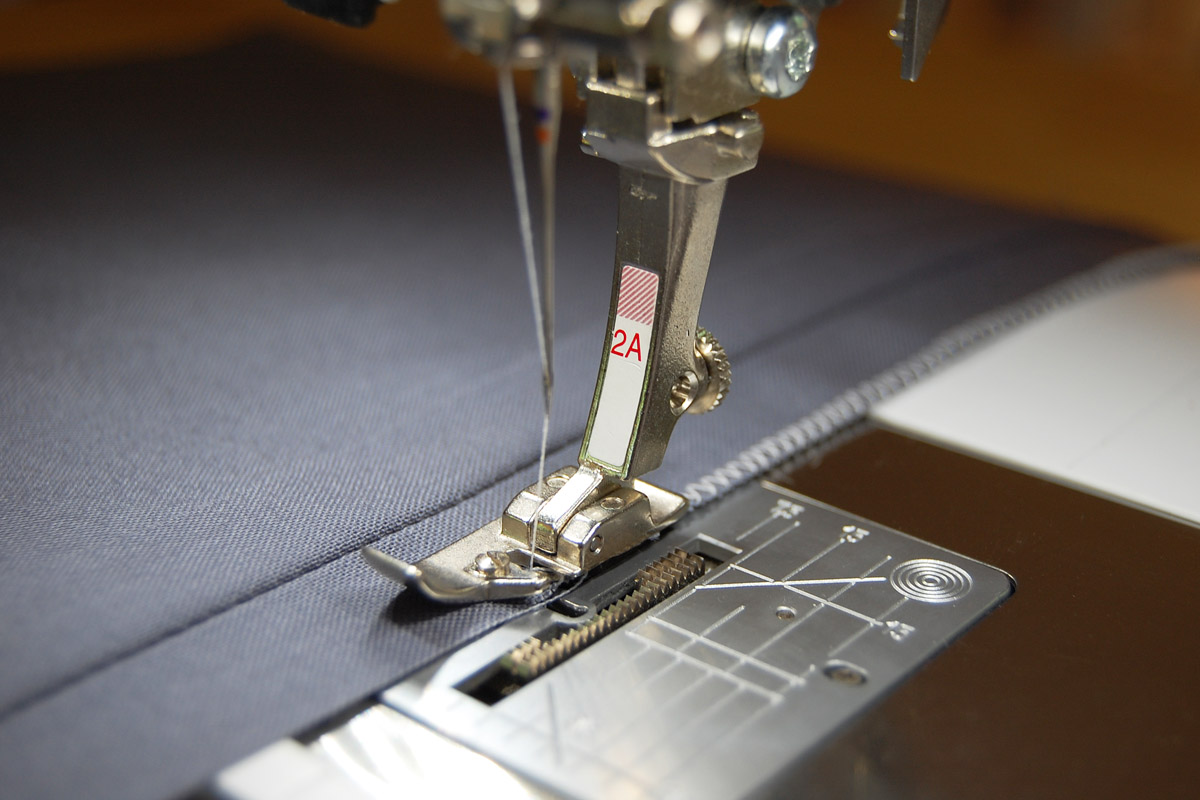
With the Overlock foot #2/#2A, set your sewing machine to sew a zig-zag stitch (and make sure you are using a zig-zag stitch plate before starting). Stitch along the raw edges of each seam allowance, lining up the raw edge with the pin at the right edge of the foot. You will see the needle swing to the outside of the pin in the process of sewing the zig-zag stitch.
By stitching a zig-zag over the raw edge, the overcast stitch locks the raw edge in place to prevent fraying while adding stability to the edge. When pressed open, this seam will stay nice and flat (like in a center skirt or dress seam).
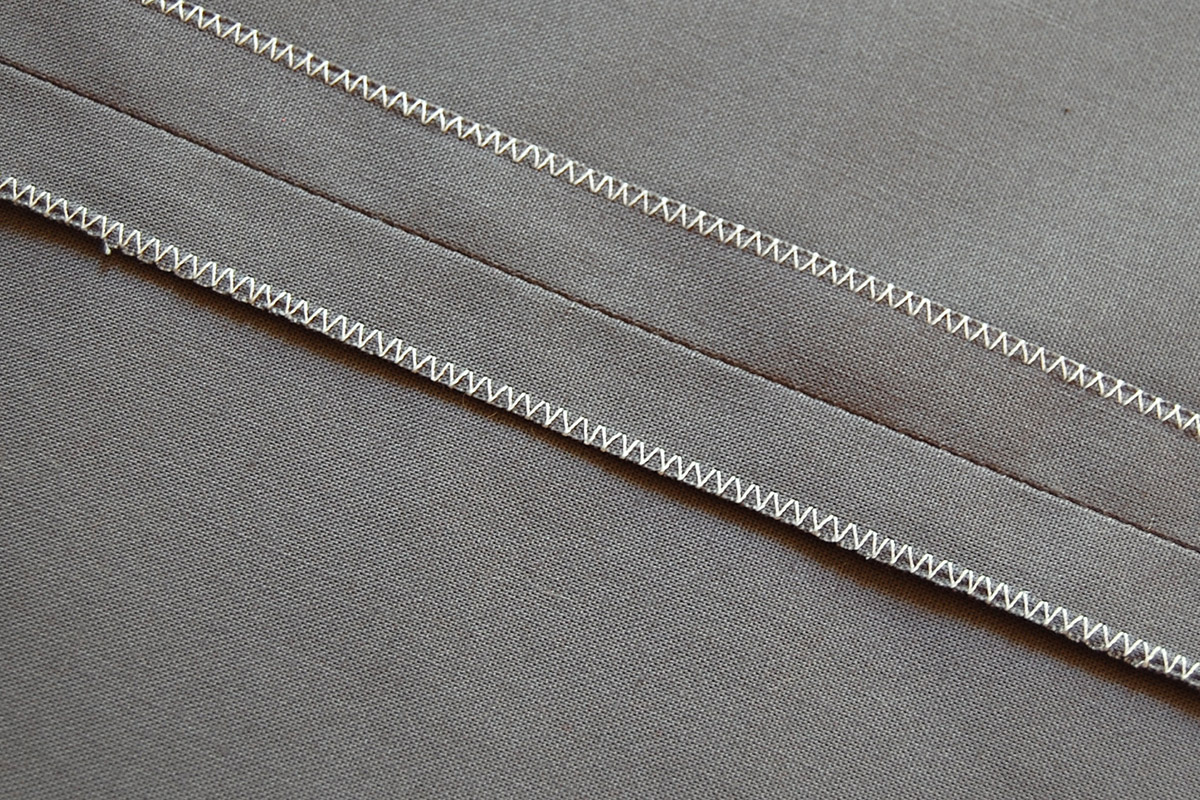
Here is an example of overcast edges with a pressed open seam in a medium weight woven cotton print.
The seam looks nice and crisp from the front side.
Closed Overcast Seam Finish
Begin by stitching your garment seam as usual with a 5/8″ seam allowance.

Using a sharp pair of fabric shears, cut the seam allowance to about 1/4″ from the stitched seam.
With Ovelock foot #2/#2A attached to your machine, select a zig-zag stitch. You will stitch both of the seam allowance edges together in this technique. Align the raw edges of the seam allowance with the little finger on the right side of the Overlock foot as you sew. The zig-zag stitch will catch the raw edges in a nice overlock, creating a clean finished edge.

Press the finished seam to one side. This type of finish is perfect for applications like skirt or pant seams that will get lots of wear.
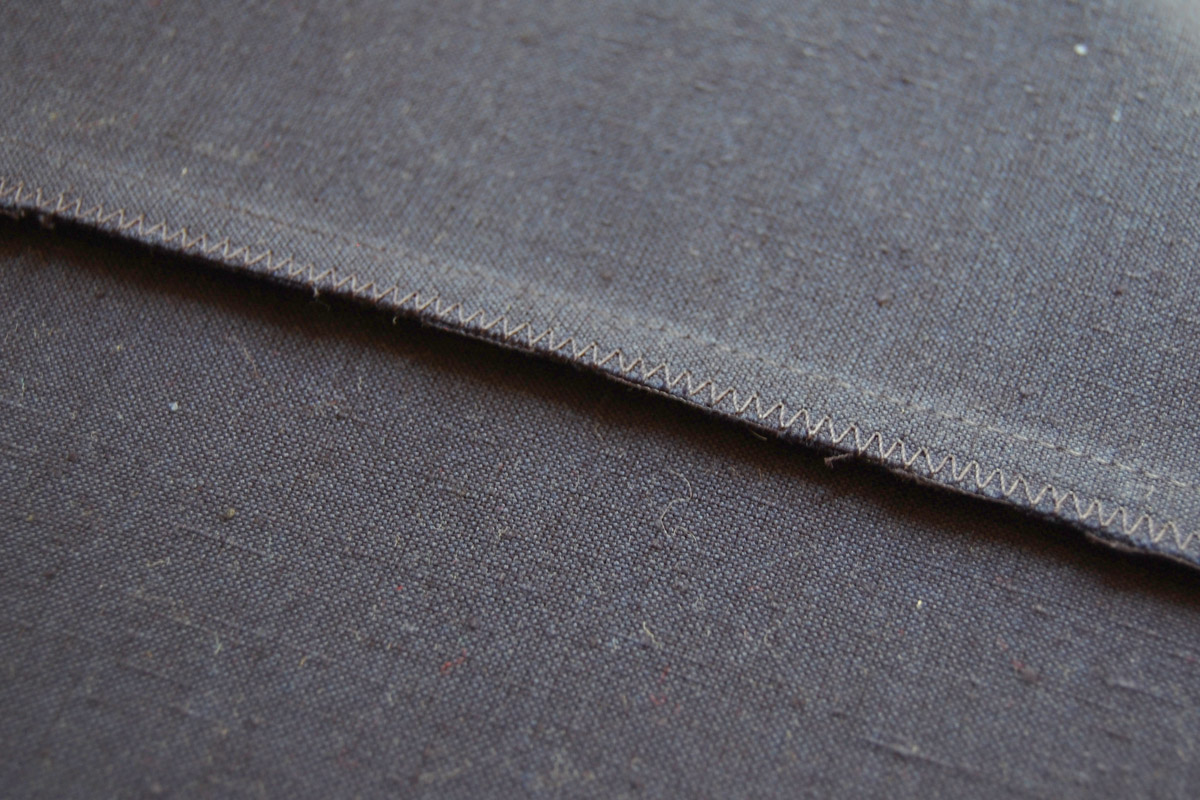
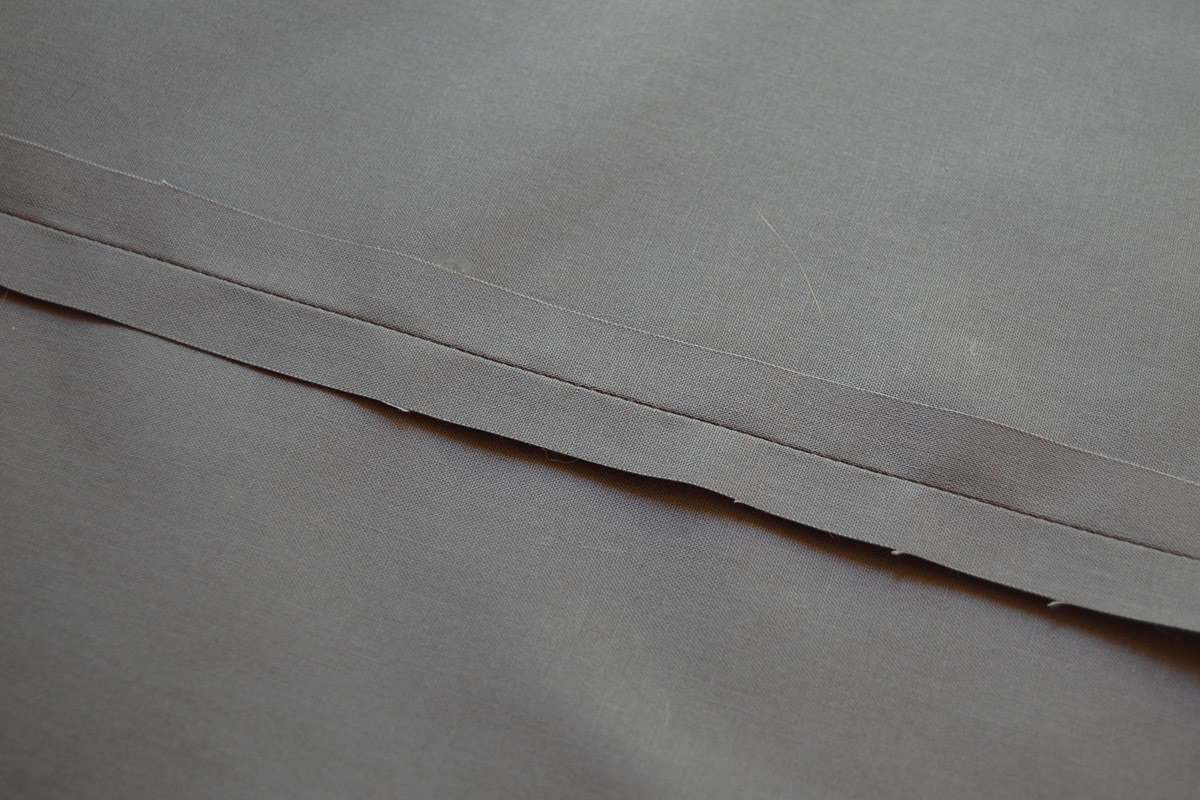
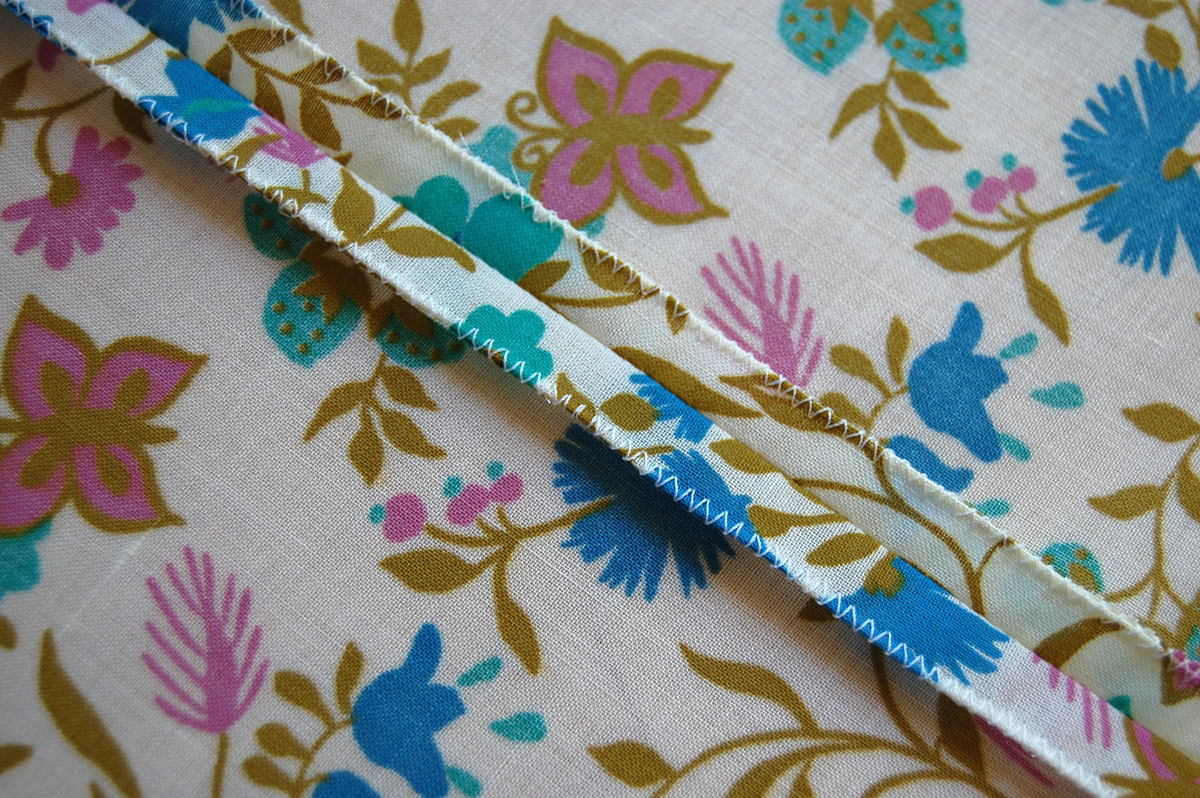
Here is an example of a closed overcast seam in a heavyweight woven linen fabric. Above you can see the raw edges caught in the overcast stitch. Look below to see the outside of the fabric with the overcast seam finish.

French Seam Finish
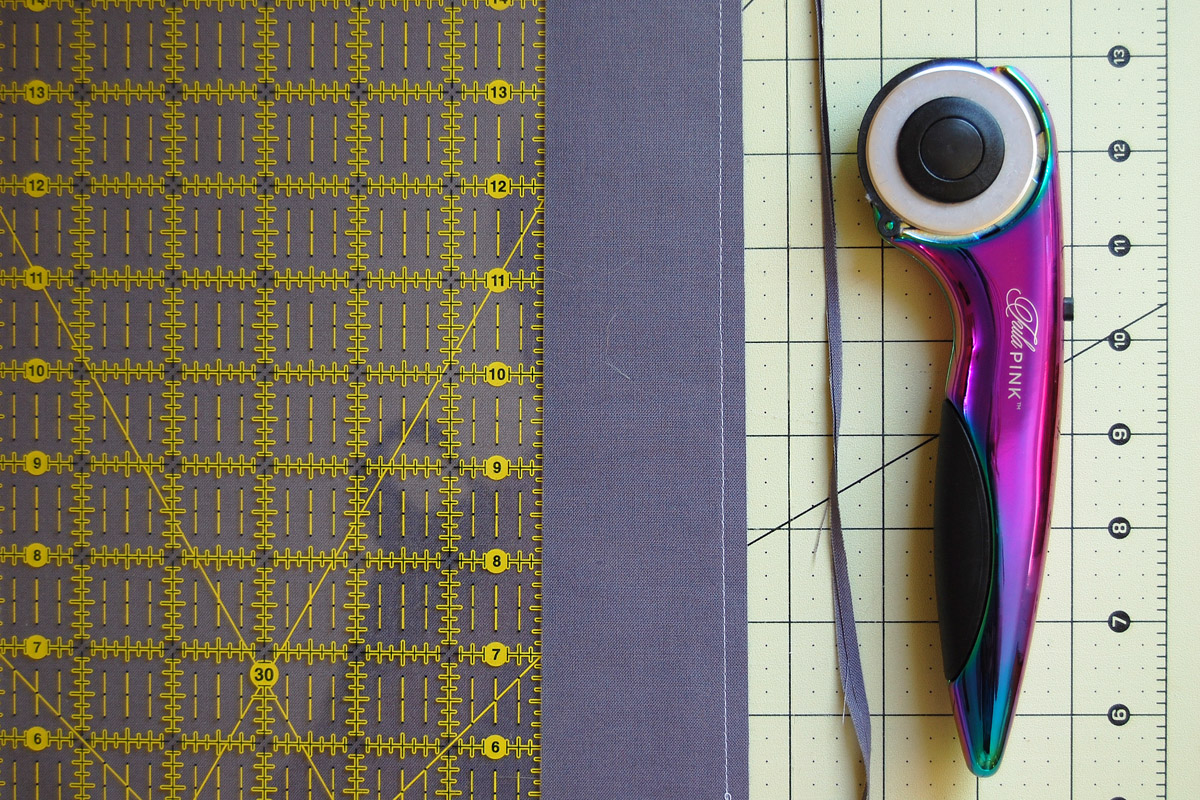
- You will need a rotary cutter, cutting mat and straight ruler for this technique
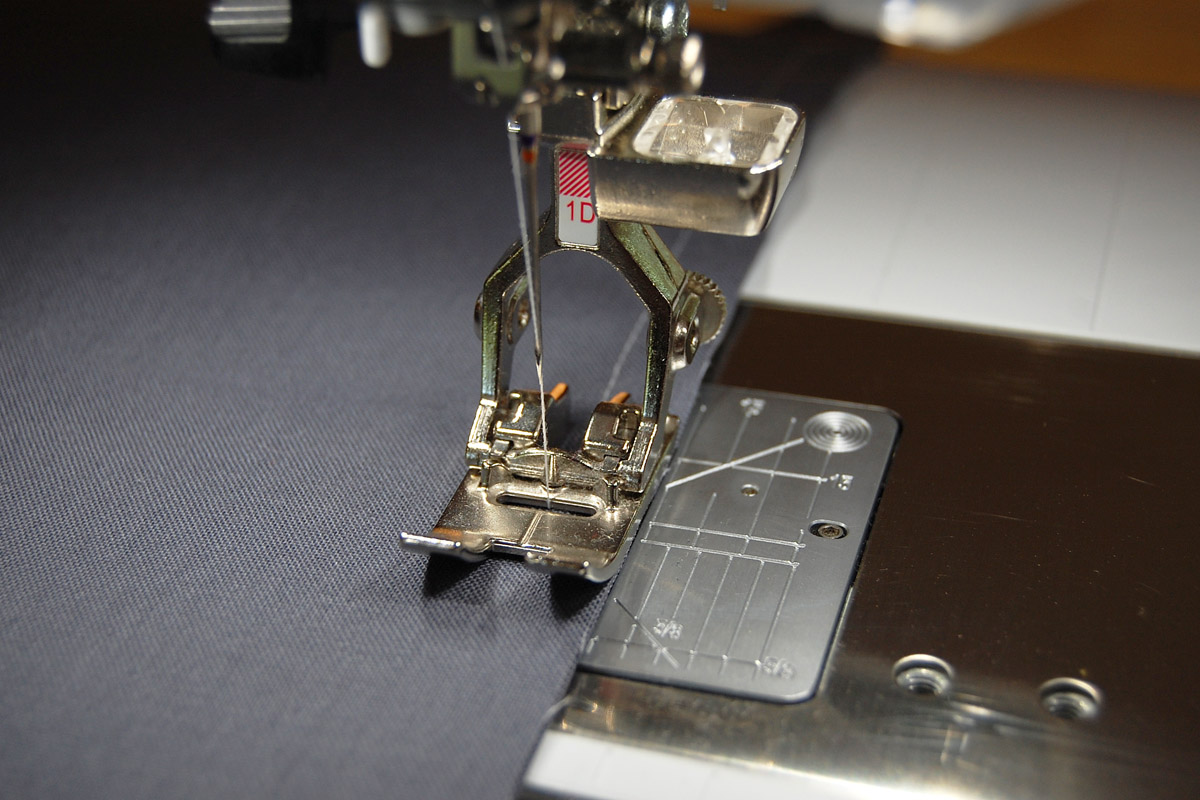
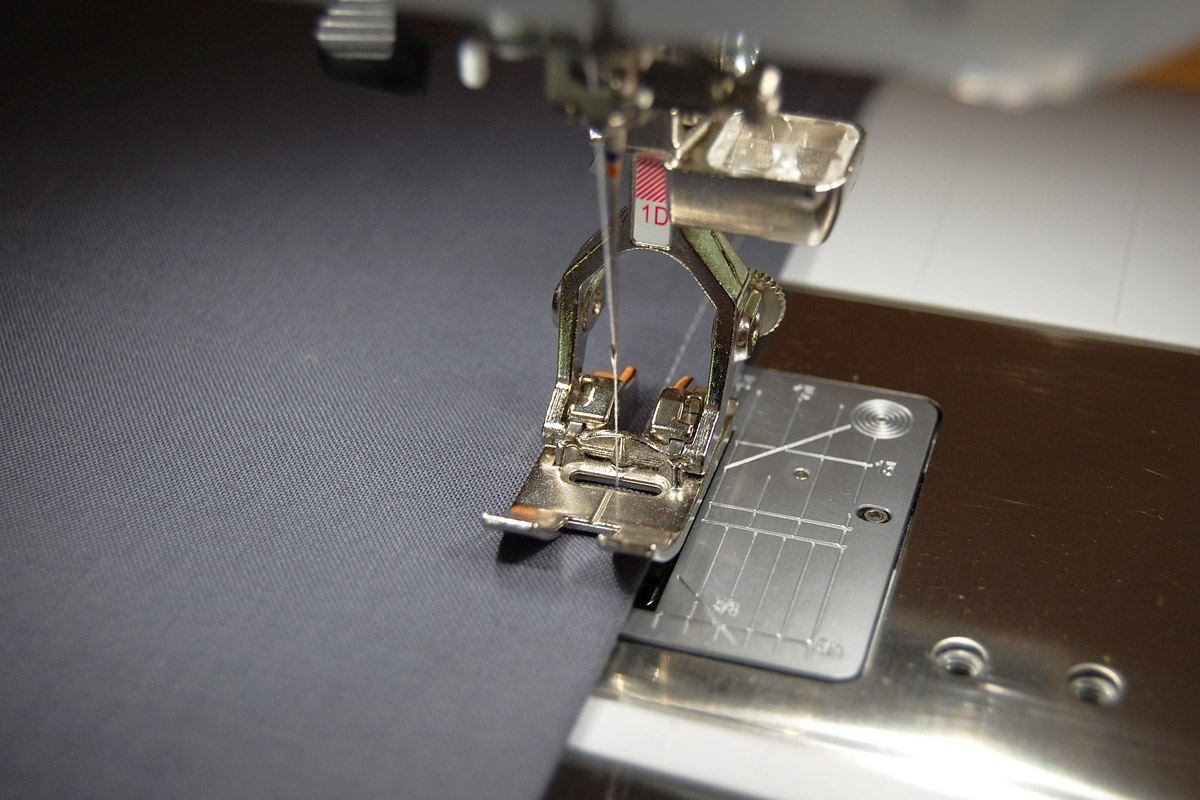
- Use either a zig-zag foot or straight stitch foot for this technique (such as Reverse pattern foot #1/#1C/#1D or Jeans foot #8/#8D)
- This technique works best in lightweight fabrics and creates a seam completely encased in fabric
- The most important step in this process is to begin by sewing your fabrics wrong sides together
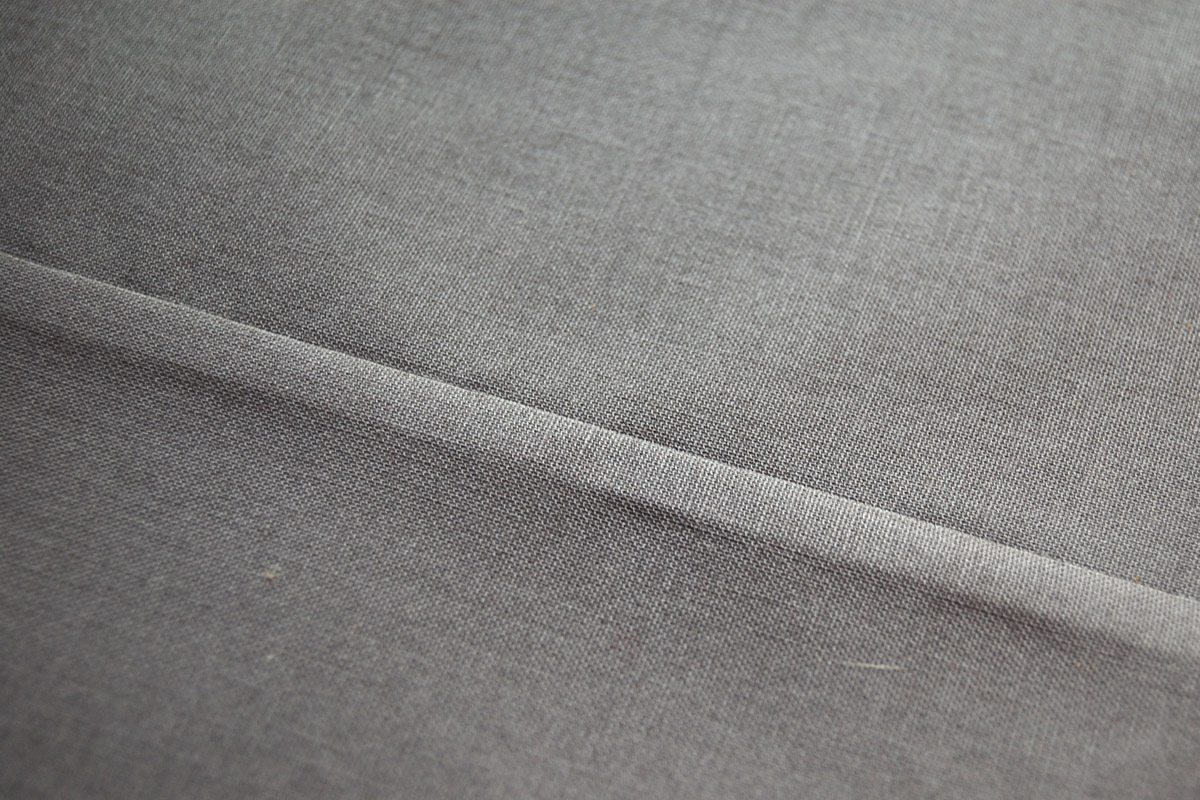
To create a French seam finish for a garment with 5/8″ seam allowance, follow these directions carefully. These sewing samples use a solid gray fabric and it’s hard to tell right side from wrong side. The first step in creating a French seam finish is to put your pattern pieces wrong sides together instead of the usual right sides together.
Once you have pinned your pieces wrong sides together, sew the seam at 3/8″ (not at the standard 5/8″). You can follow along with the 3/8 seam line on your stitch plate.
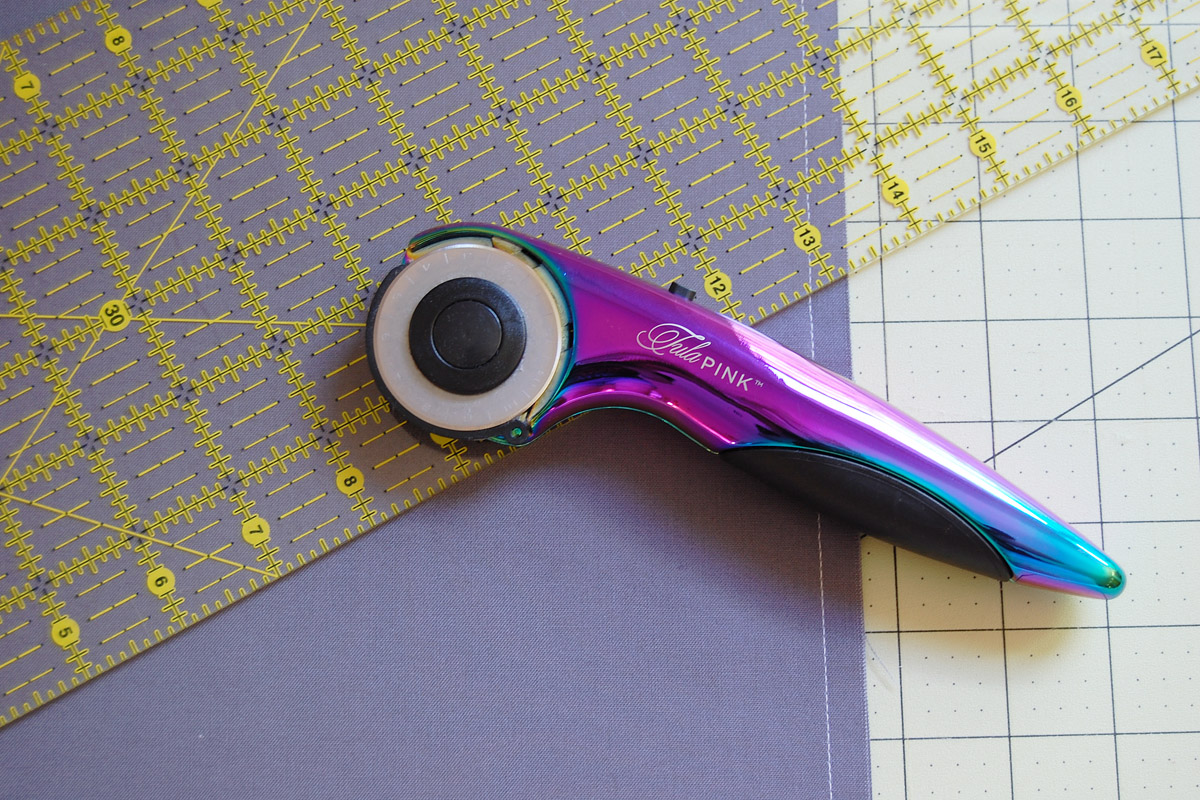
You will be trimming the seam allowance to just under 1/4″. Use a ruler to help accurately cut the seam allowance straight. Line up the 1/4″ mark to the other side of your stitching to cut the seam allowance down to a little less than 1/4″. As a reminder, you will see the right side of the fabric during this step because we started with sewing fabric pieces wrong sides together.
Press the cut seam to one side of the fabric.
Turn the fabric over at the seam and press well to create a folded edge at the seam. You want the edge to be as flat and crisp as possible.
Now you will notice that the fabric is wrong side out for this step, and the right sides are facing each other again.
Stitch down the folded edge with a 1/4″ seam allowance. The inside cut edges will be sewn inside this seam.

Press the finished seam to one side.
And you’ve completed the French seam finish.
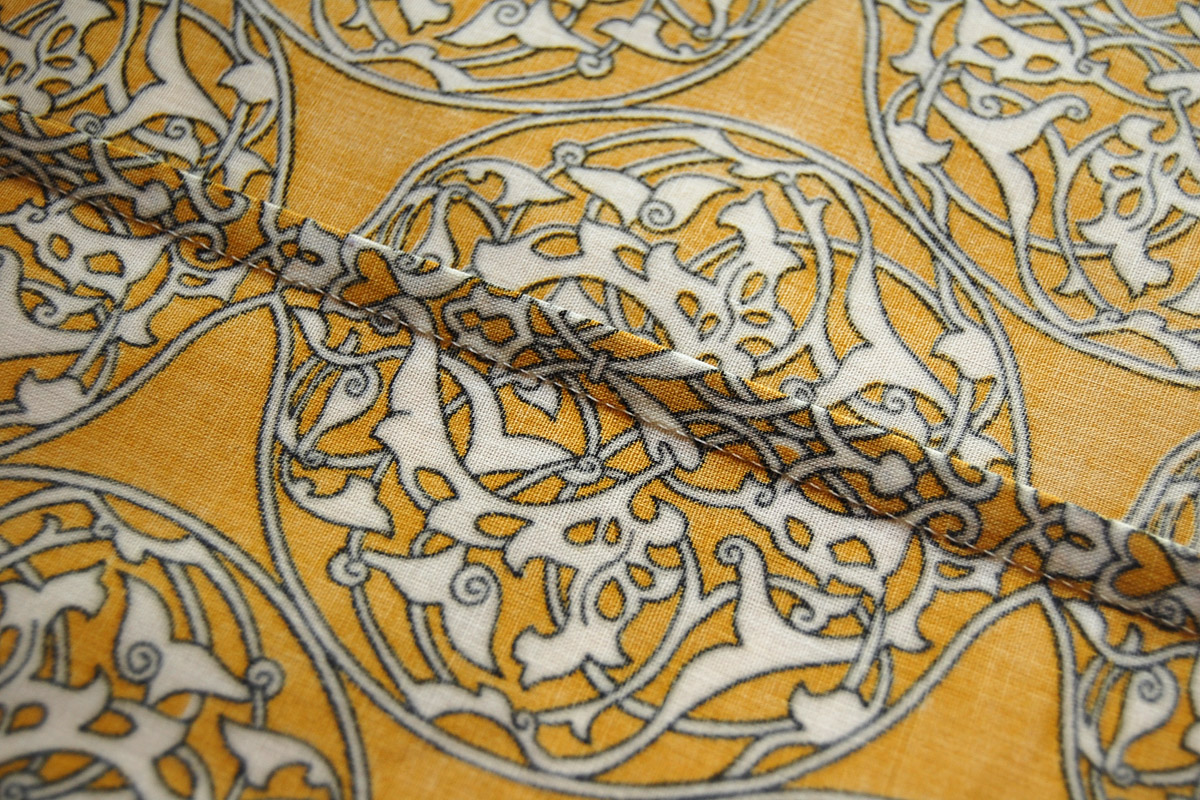
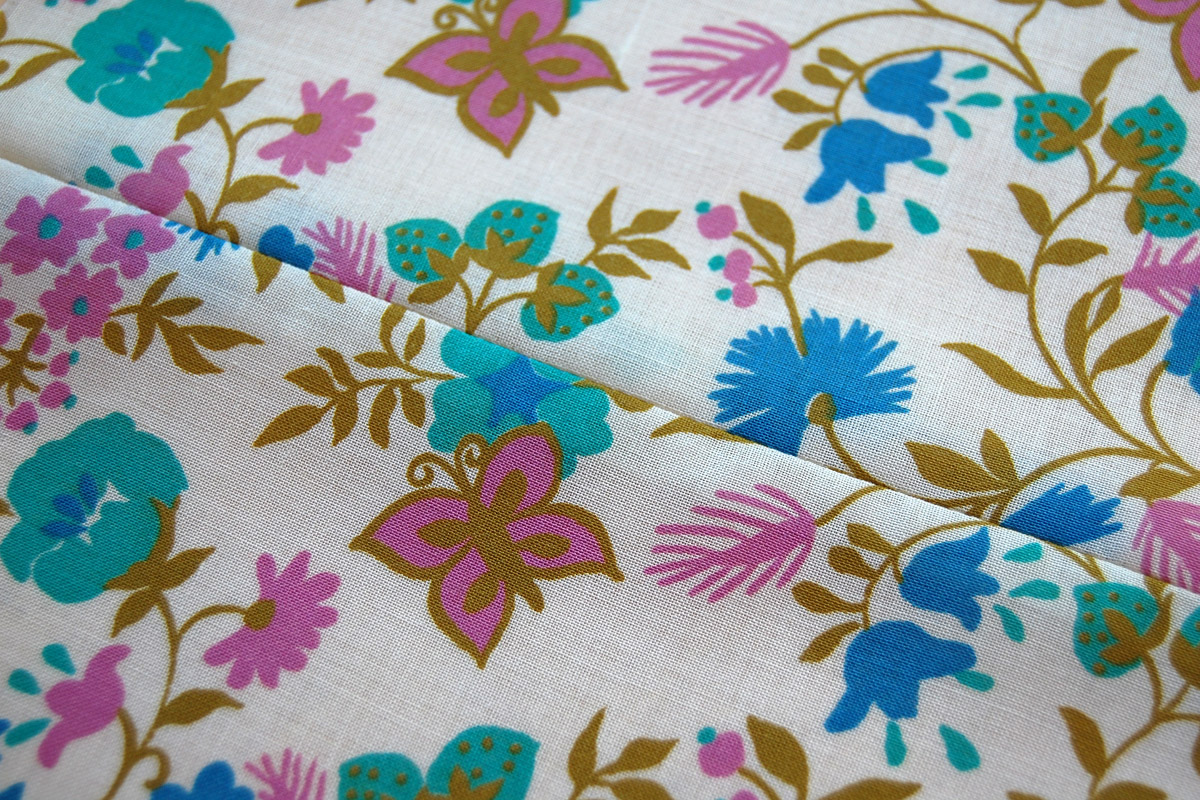
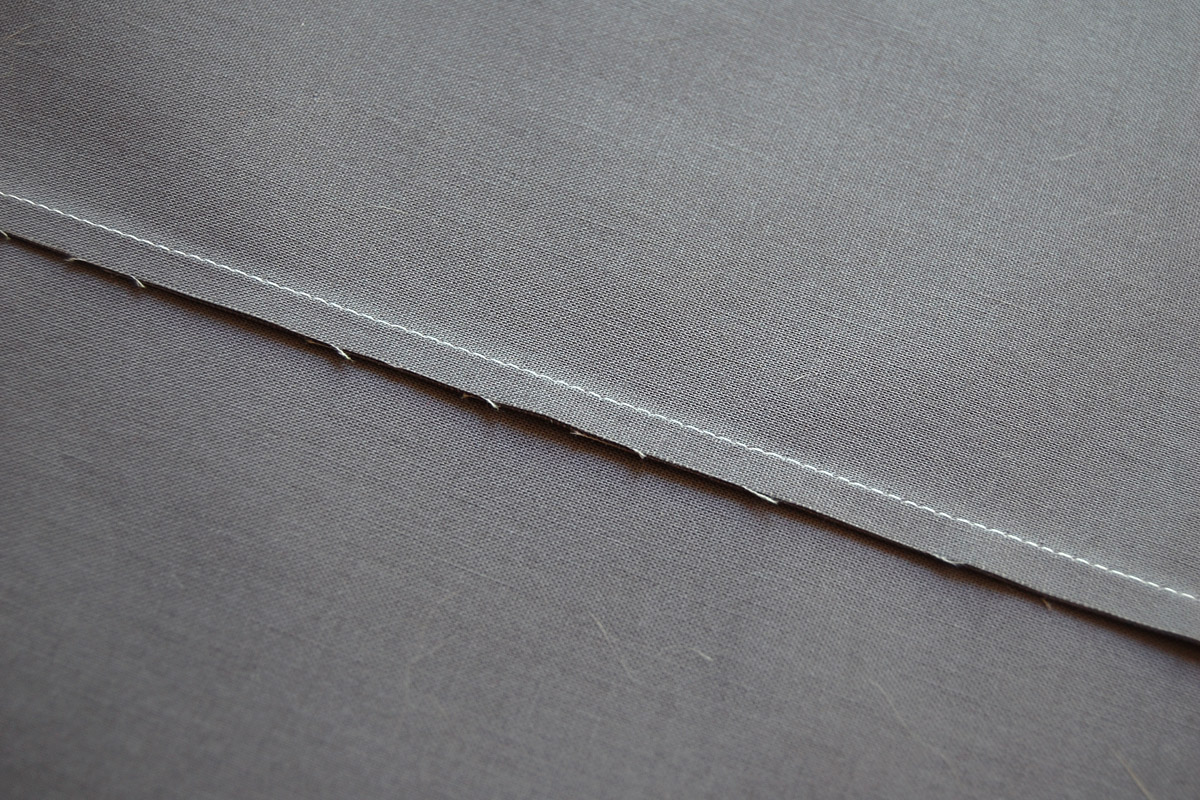
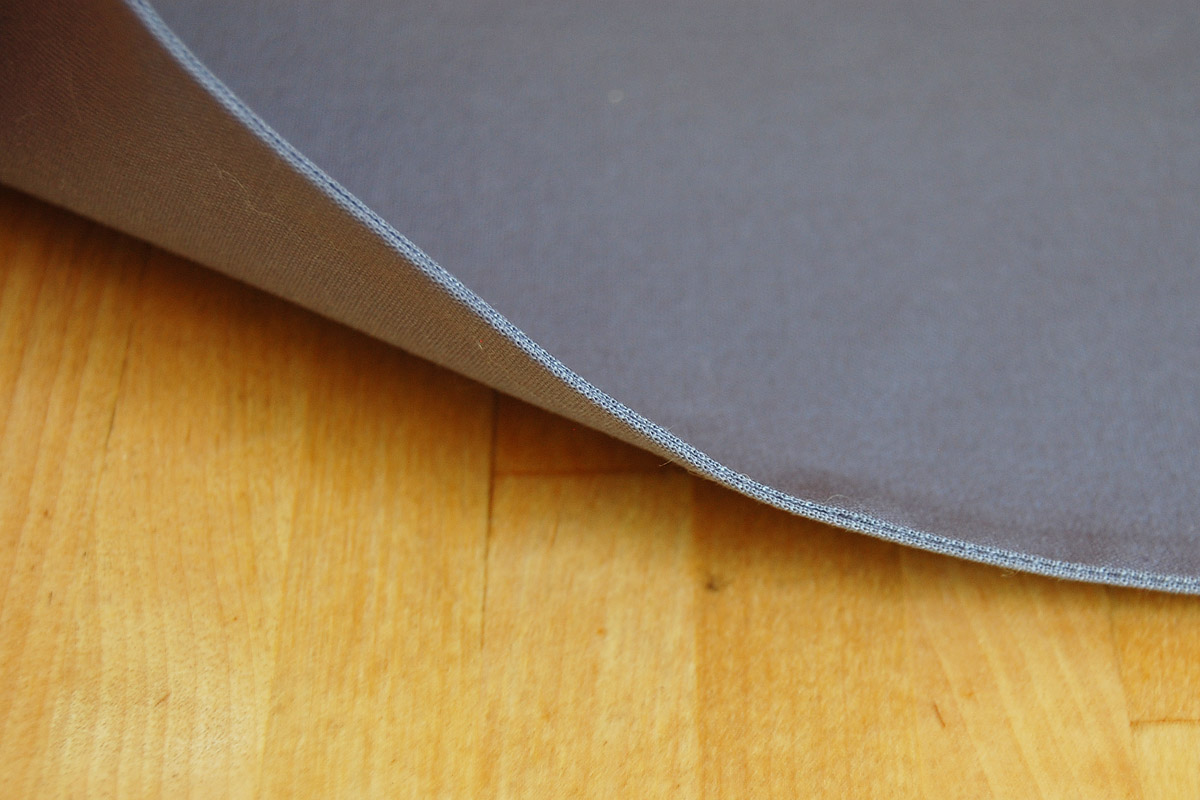
Here is an example of a French seam on a lightweight cotton woven fabric. On the inside you can see the neat finish with raw edges completely enclosed in the sewn fabric. On the outside of the fabric, the pattern has been matched and the seam becomes hard to detect.

We hope you have picked up a tip or two for finishing the seams in your next garment sewing project!

