


![]()
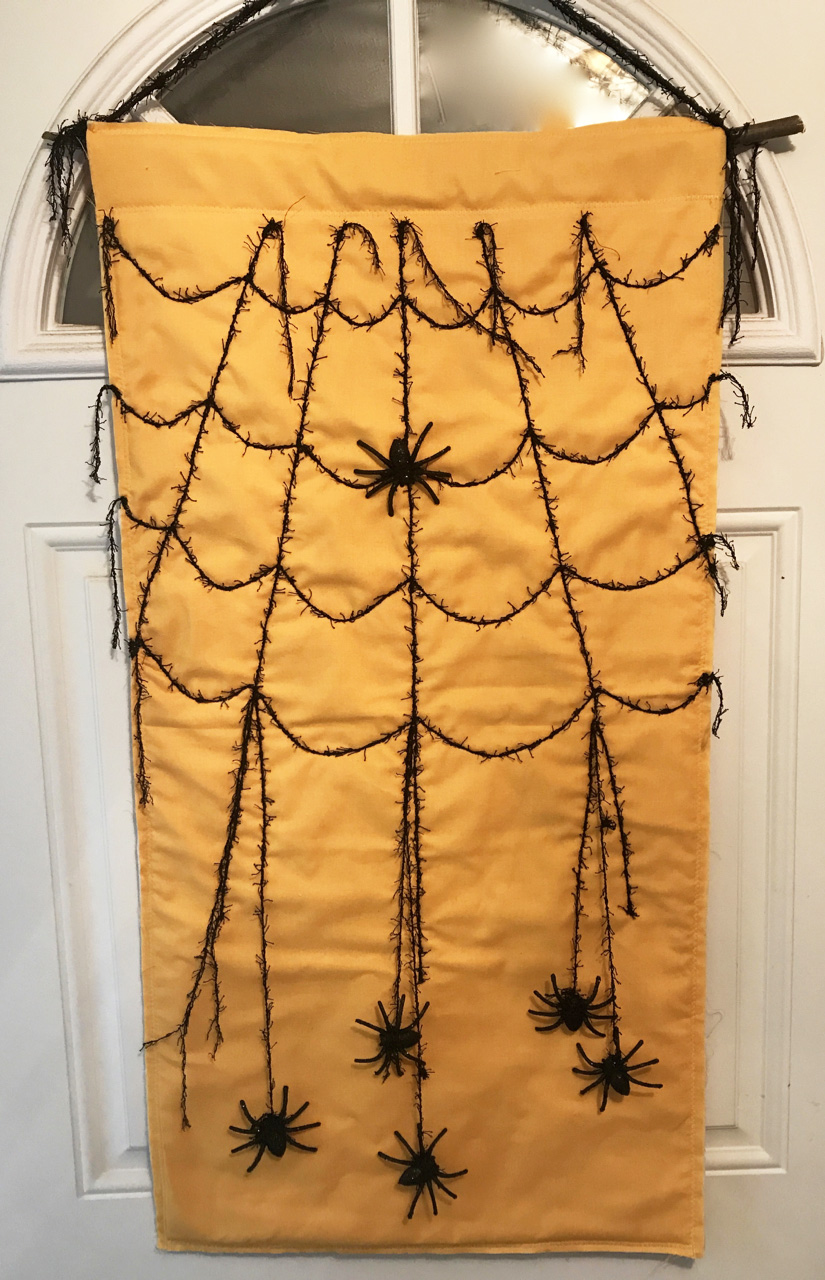
Hello from Joanne Sharpe. A recent trip to the craft store provided me with some spooky cute, sparkly inspiration for a Halloween door banner. The pack of glittery plastic spiders and some textured black “scrubby” novelty yarn would be the perfect embellishment to sew Halloween theme onto a simple cotton panel. Even with just days until Halloween, this is a quick and easy project to complete in just an hour or “sew”.
Supplies to Create a Spider Web Door Banner
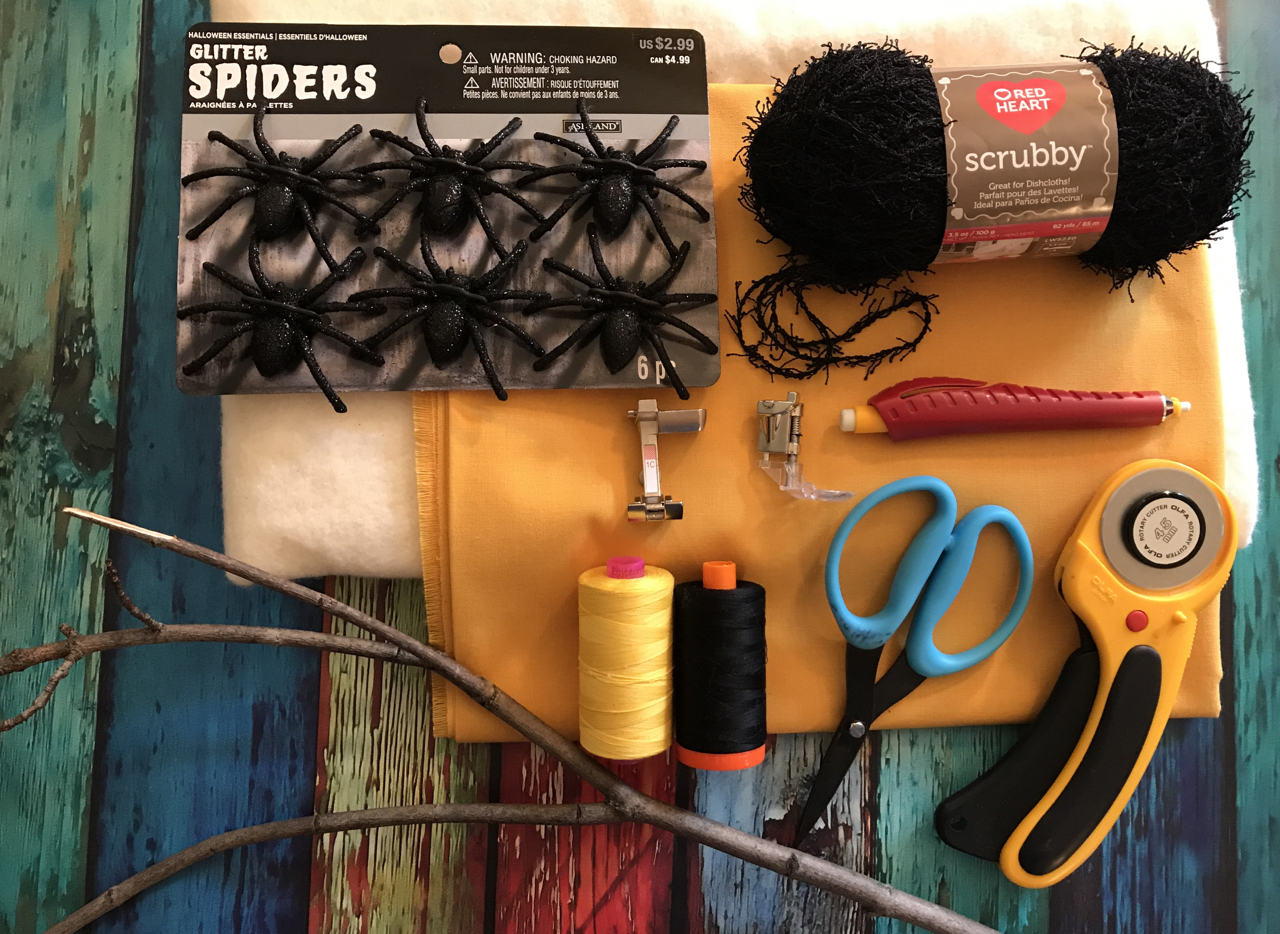
- 1 yard of cotton fabric in golden yellow for the banner background. Or choose your own favorite Halloween color like orange or lime green.
- 1 yard of cotton batting or fusible fleece to make a “quilt sandwich”.
- Black thread- 50wt cotton or poly is fine to sew the black yarn.
- Golden yellow thread- Have a thread color that will match your background fabric for the top pocket and side seams. I used golden yellow to match the fabric shown in the sample project.
- Black yarn- A fuzzy textured novelty yarn creates a fun effect.” I used the inexpensive “Scrubby” yarn from the craft store
- Decorative Spiders- Find any “spiders”, used for Halloween decorating or project embellishments at the craft store.
- Fabric chalk or disappearing ink pen for fabric.
- Machine presser feet- Straight foot and Couching foot- I used BERNINA straight foot #1C and couching foot #43.
- Sewing machine- This project was sewn on my BERNINA 570 QE.
- Stick- Rather than use an ordinary dowel, if possible, you can go out in your backyard find a simple stick to put through the top pocket seam to hang the banner over a door or on a wall.
- Scissors and rotary cutter
- Hand sewing needle and thread
Directions to Create a Spider Web Door Banner
Cut Fabric to Size
Cut the fabric to make a long vertical banner, approximately 18” wide x 43” long.
Make a Quilt Sandwich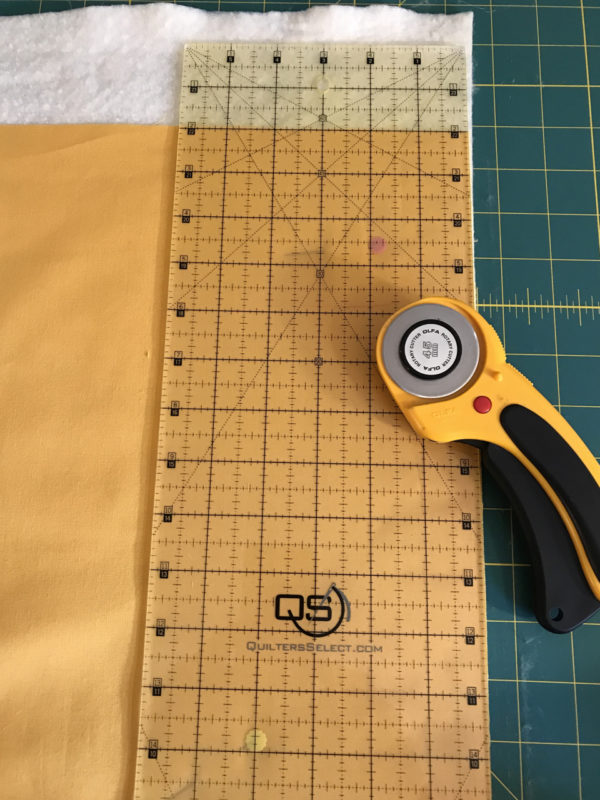

Size the batting flush to the 18”x34” background fabric.
Sew Top Pocket Seam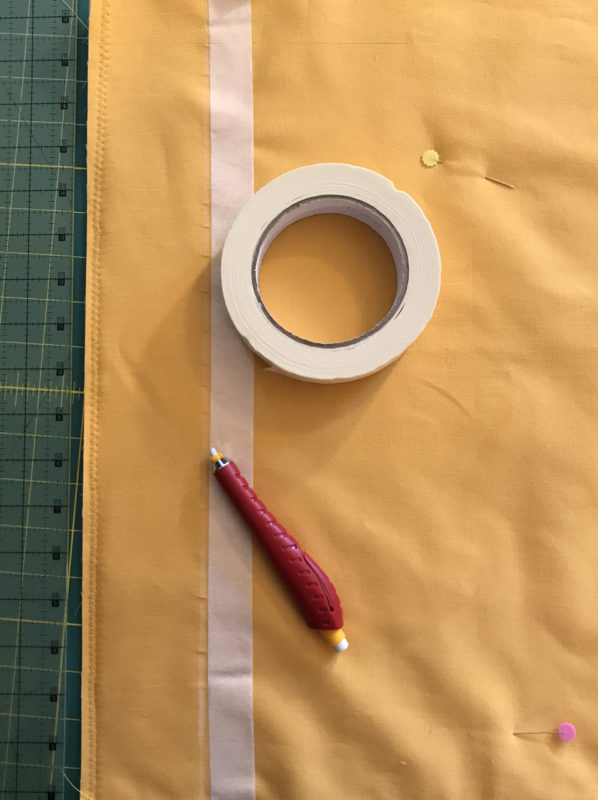

Keeping a raw edge at the top, sew a zigzag stitch ½” from straight across the top of the assembled quilt sandwich. Measure 2” down from the stitching and make a horizontal chalk line all the way across.
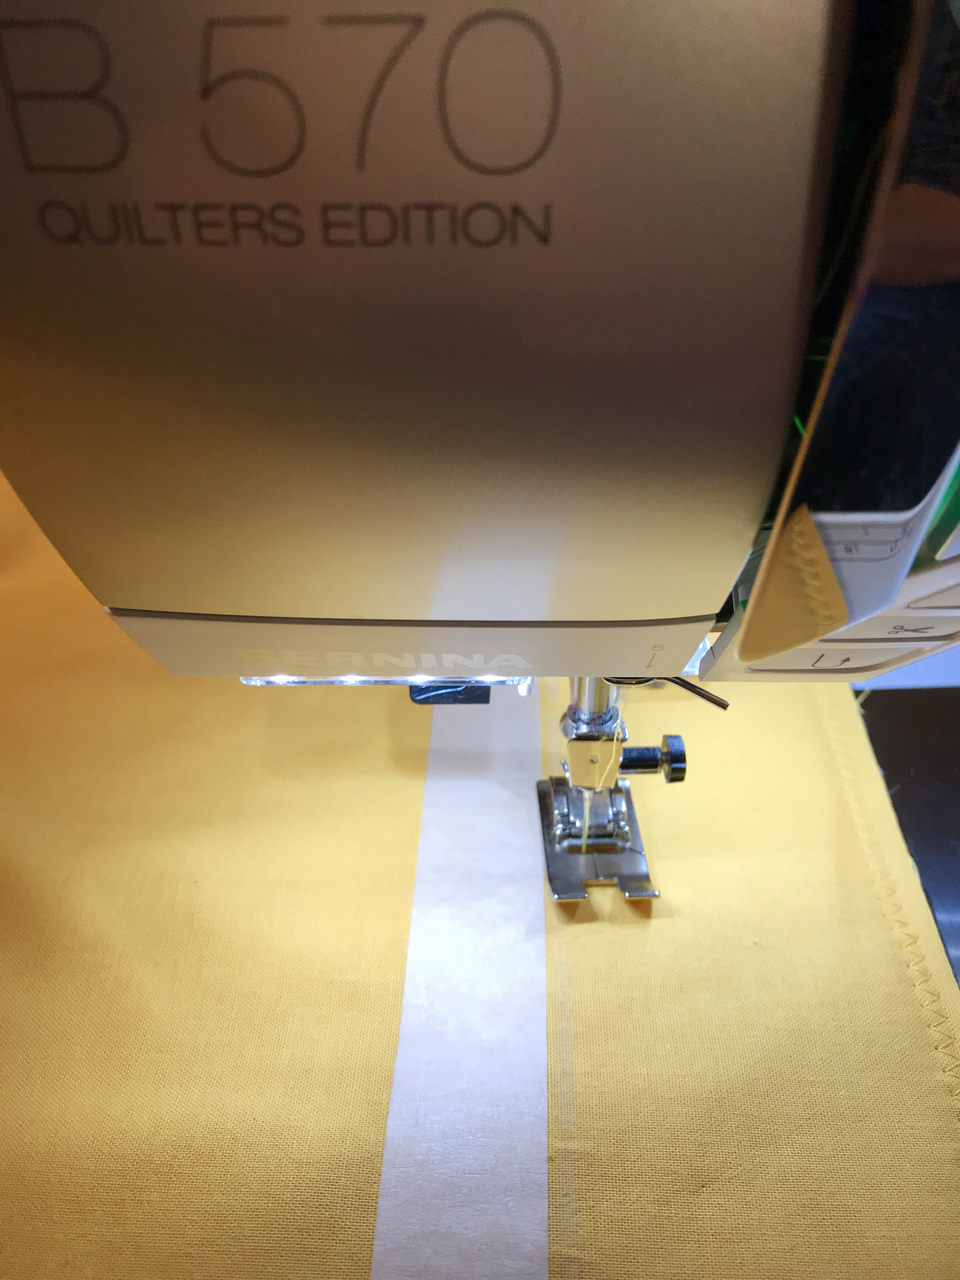

Line up a piece of masking tape to indicate the sewing edge line. Use a zigzag all the way across and remove the masking tape.
Draw The Spider Web
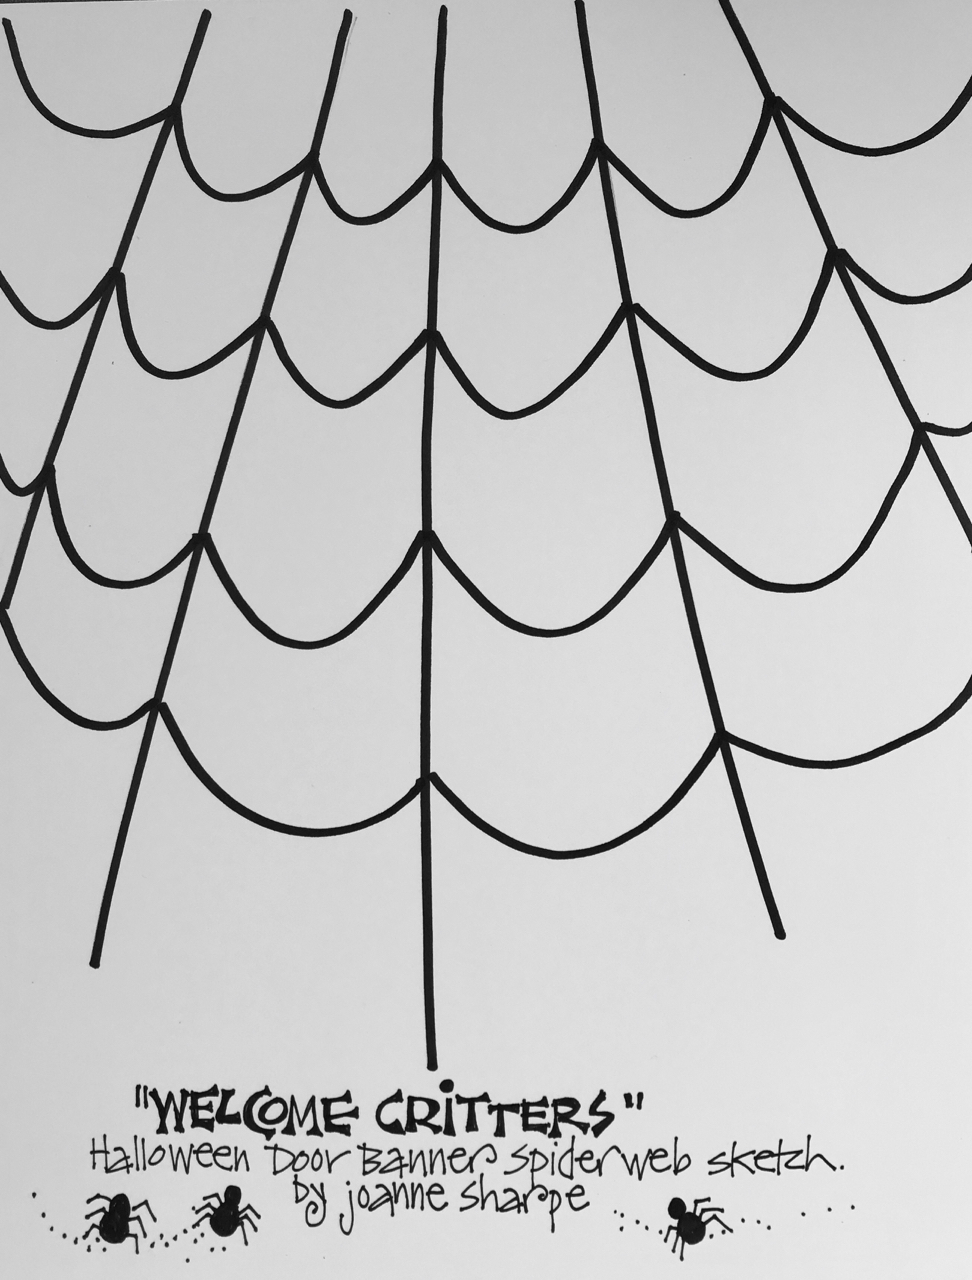
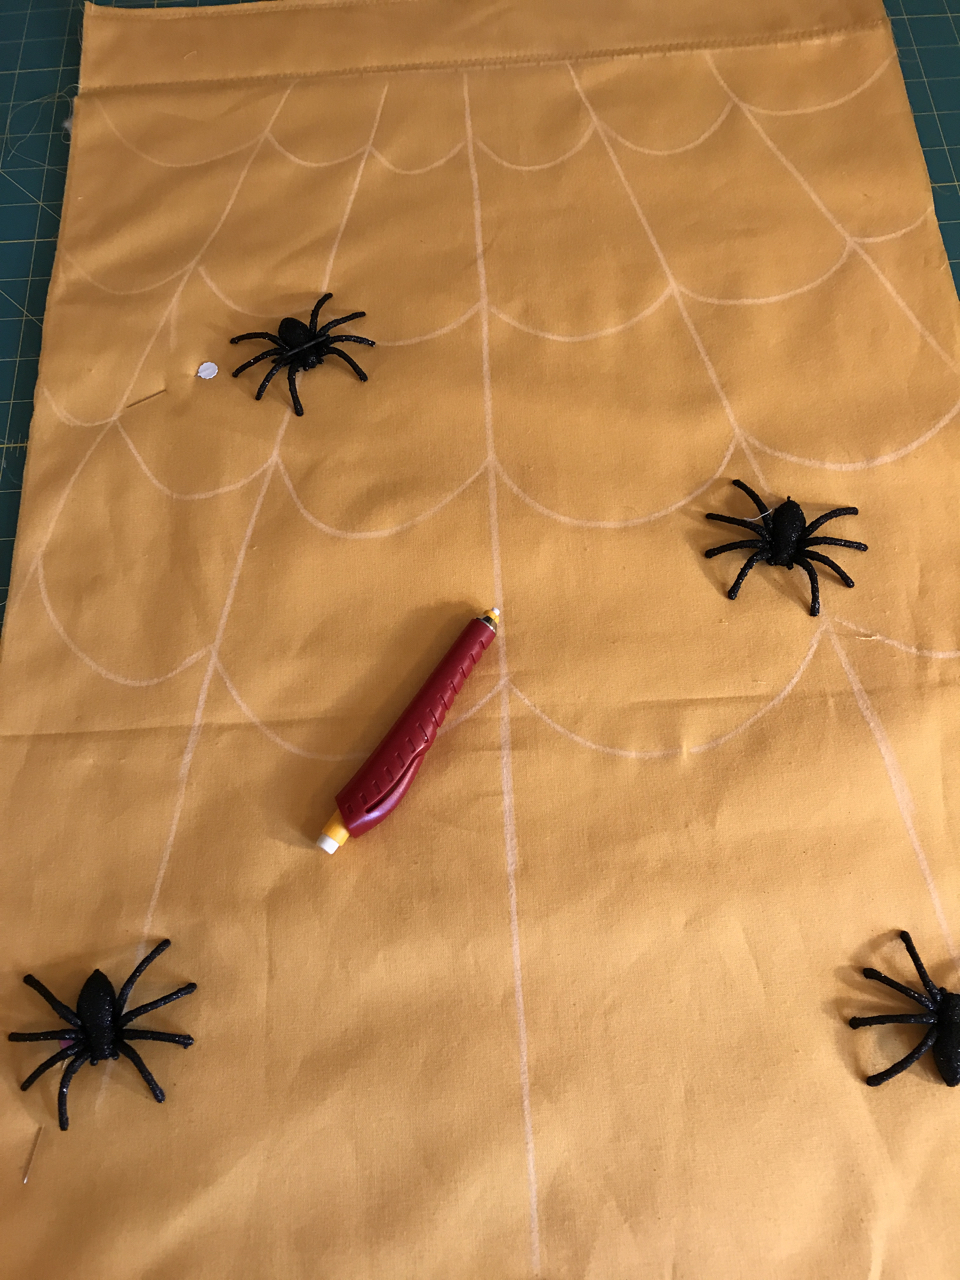
With fabric chalk or a disappearing fabric pen, use the reference the pattern provided in the photo to freehand sketch the spider web design directly onto the fabric. Don’t worry about making it perfect, the chalk can easily brush off!
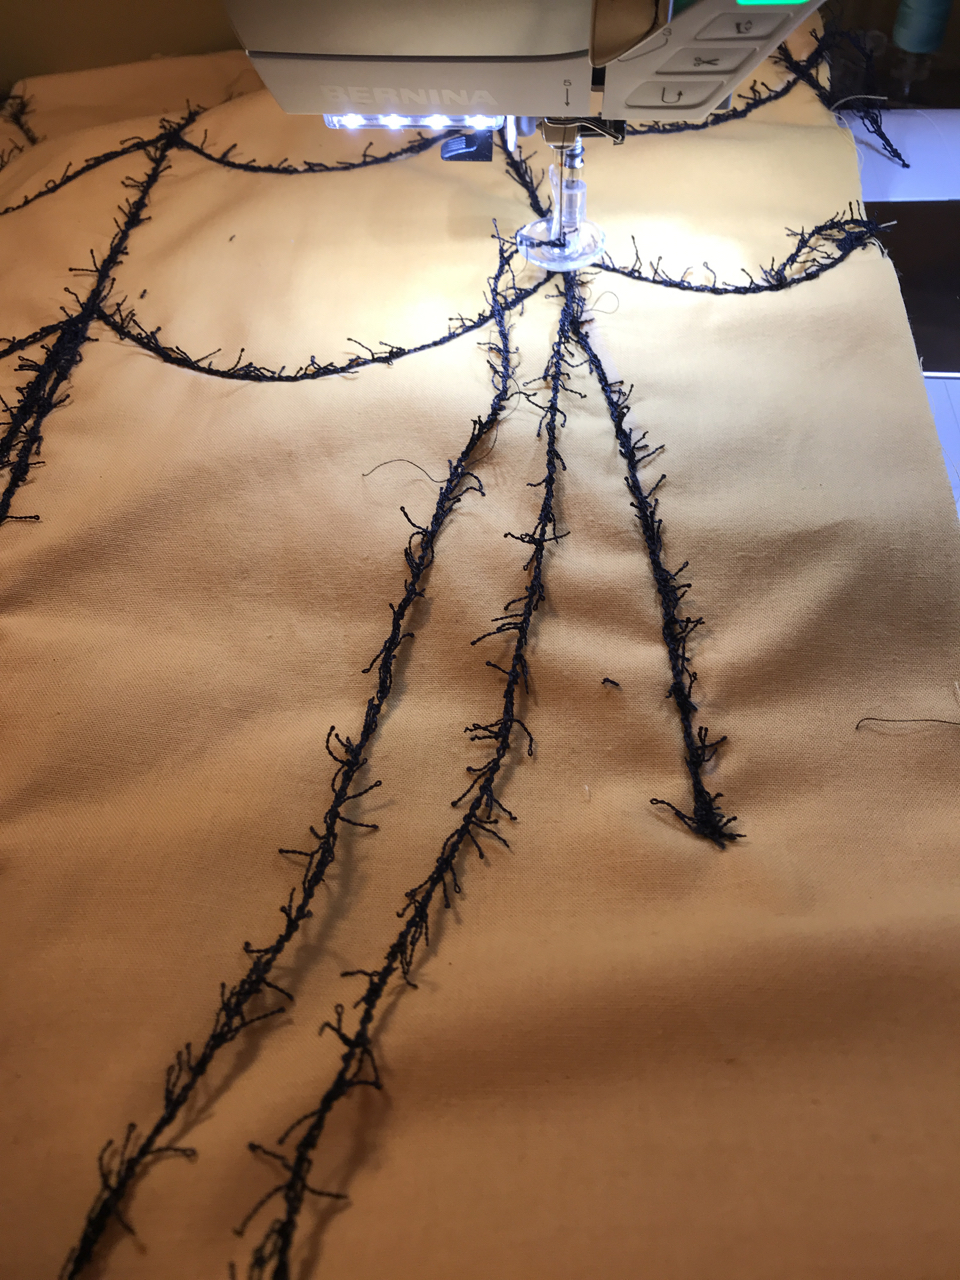
Sew Yarn Over Spider Web Sketch
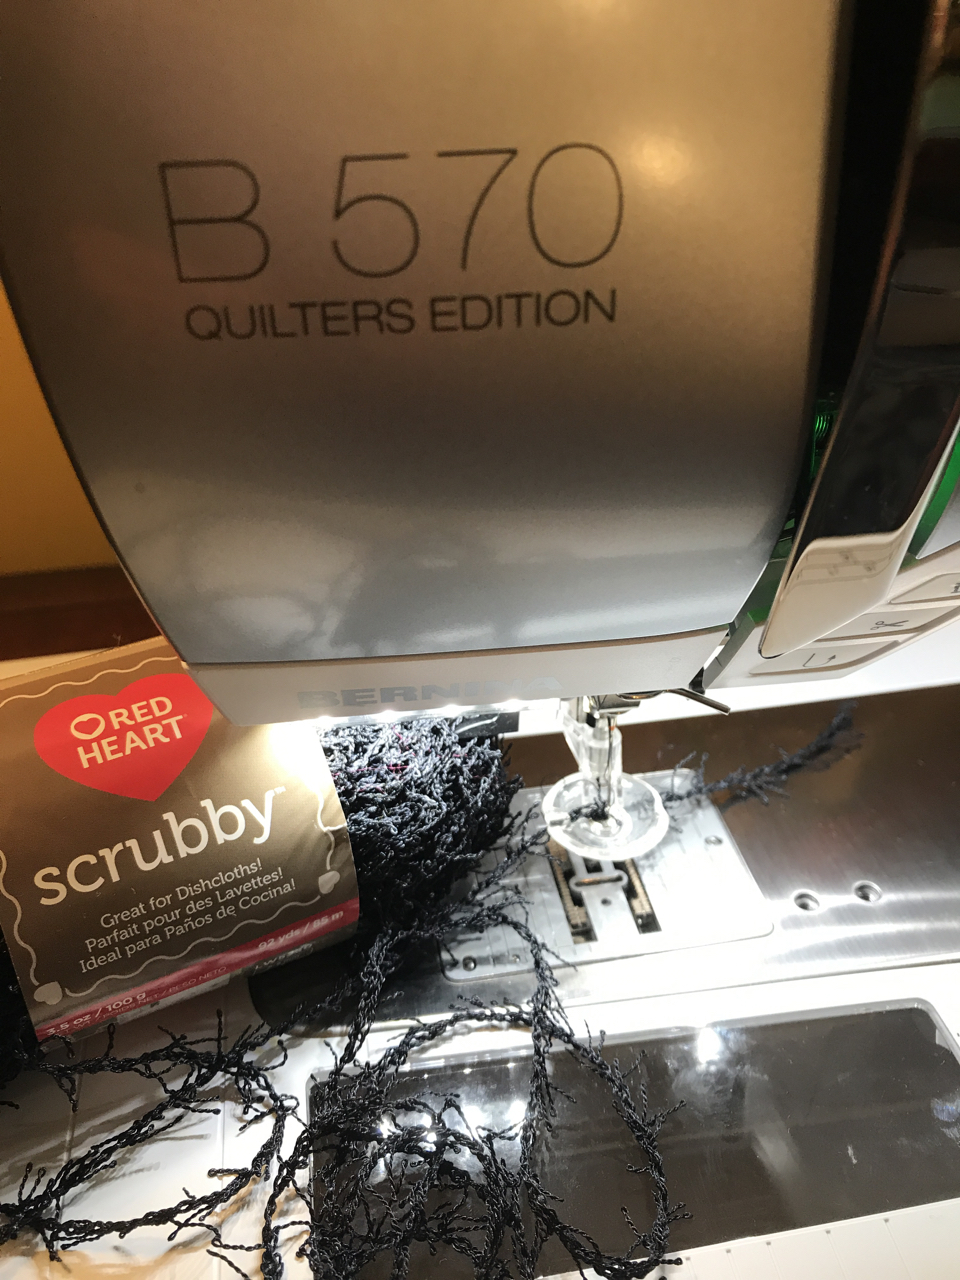
The couching foot is a dream! Using the couching foot makes it easy to guide the yarn and “draw” the specific pattern that has been drawn onto the fabric.

Before you go onto your banner, make a test piece with scrap fabric.
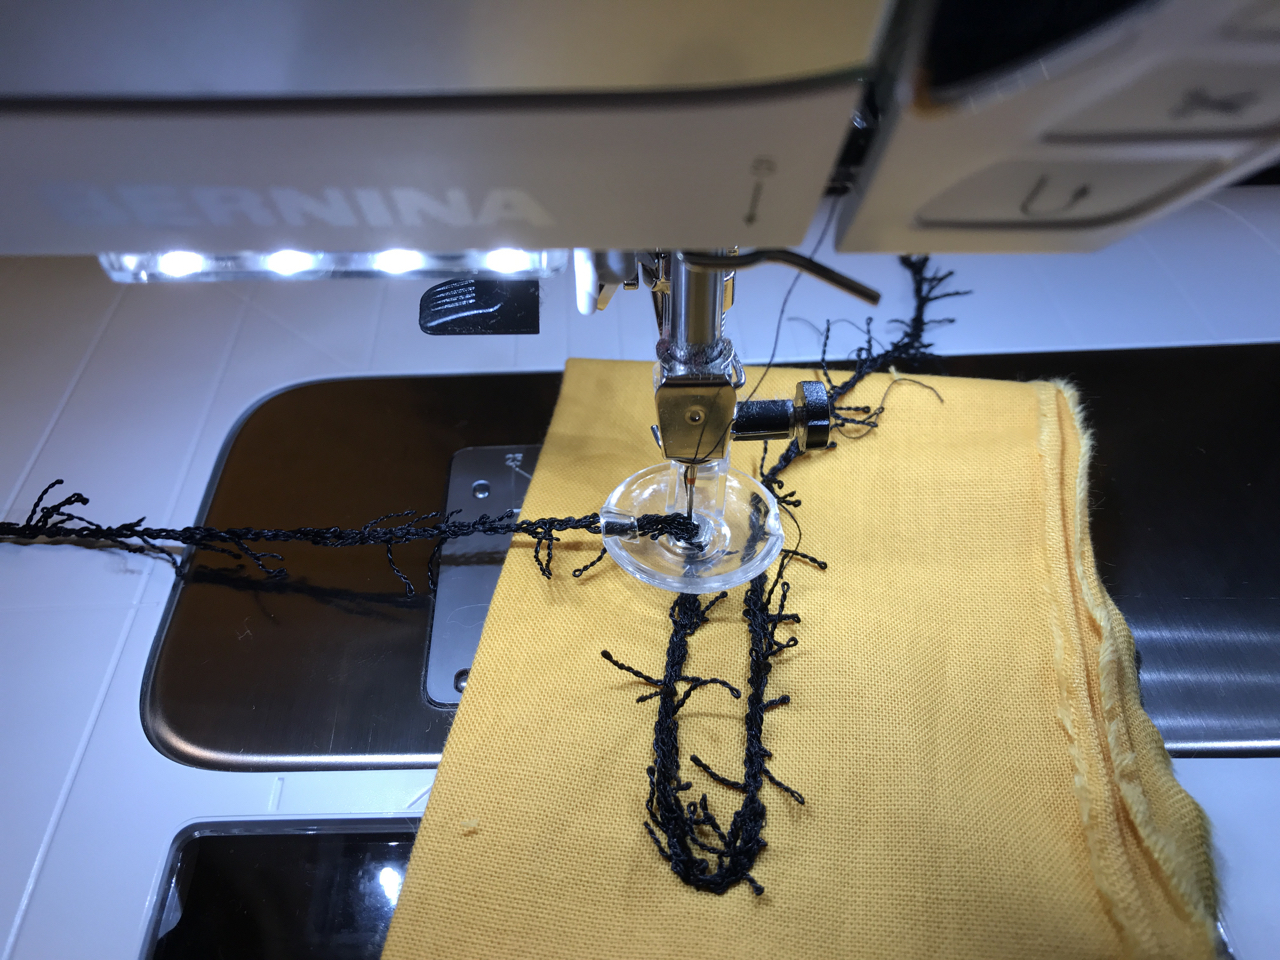
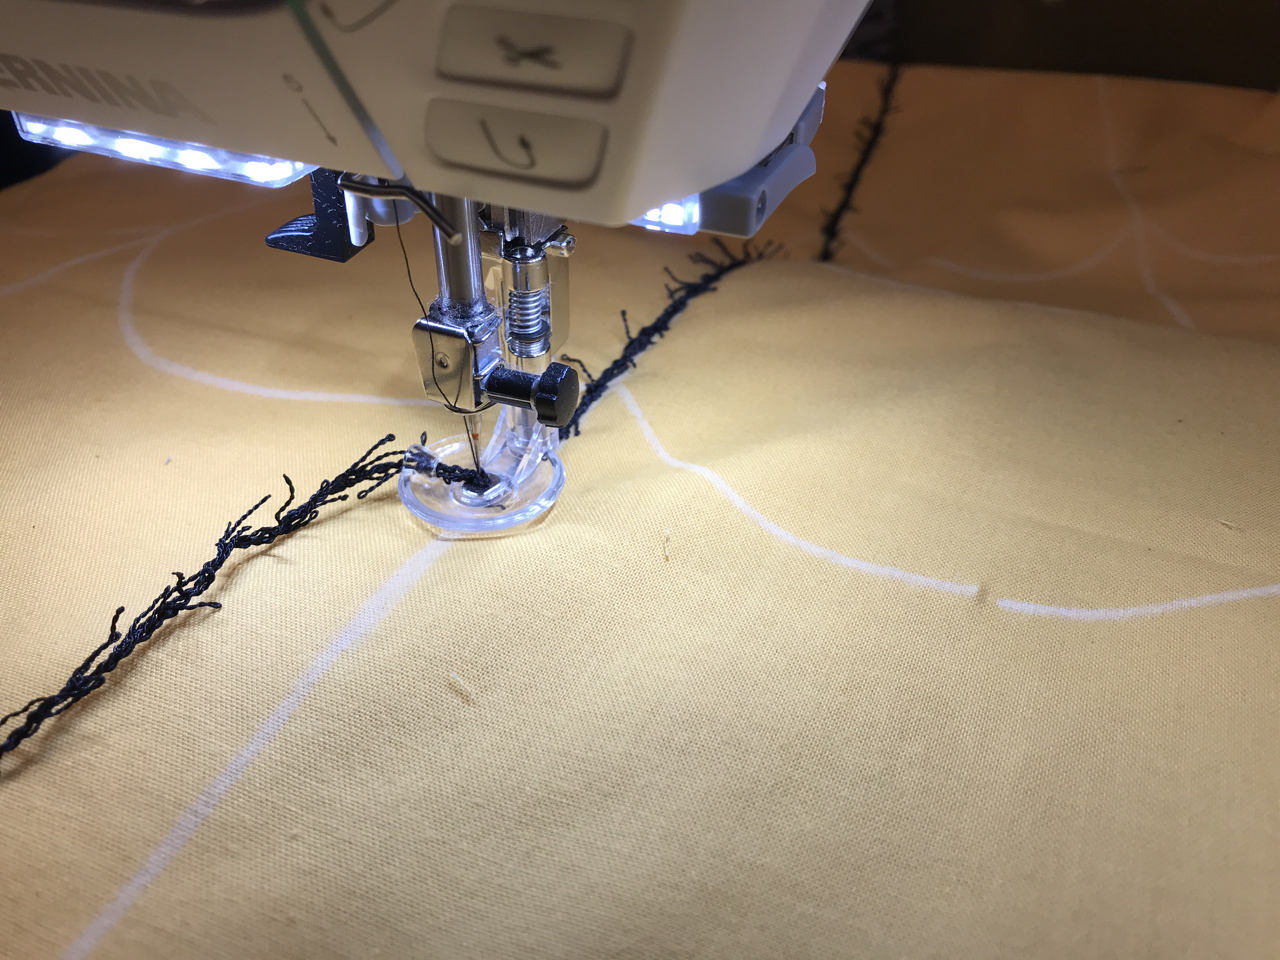
Make sure you are slowly and confidently moving your yarn with the couching foot. Go onto the banner when you are ready and start at the very top raw edge of the banner at the center vertical “web” line, drawing the vertical lines first.

Trace the chalk drawing with the yarn as it pulls through the foot. Add the curved lines (think of a smiley face motion) in between the vertical lines to make the web. The machine stitching allows the black yarn to flow and create the spider web lines.
Couching Decorative Yarns and Fibers
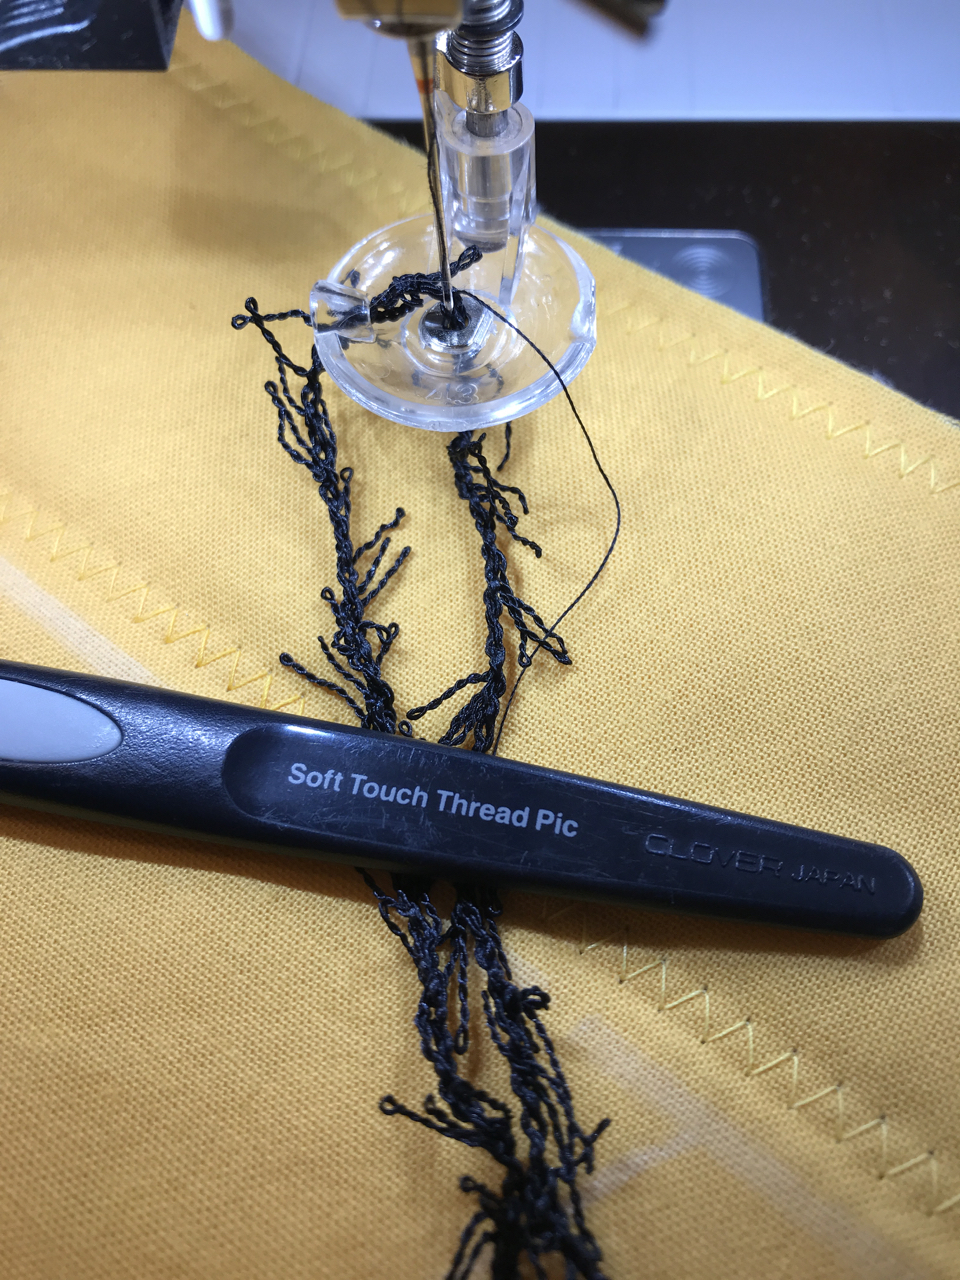
The BERNINA Couching Foot #43 foot guides thick fibers through the foot and the feed dogs enable the fabric in the direction you are moving. If your yarn or fiber is a little “challenging”, and a little too thick to pull through easily, use a thread pick to GENTLY push and pull the fibers through the guides on the foot.
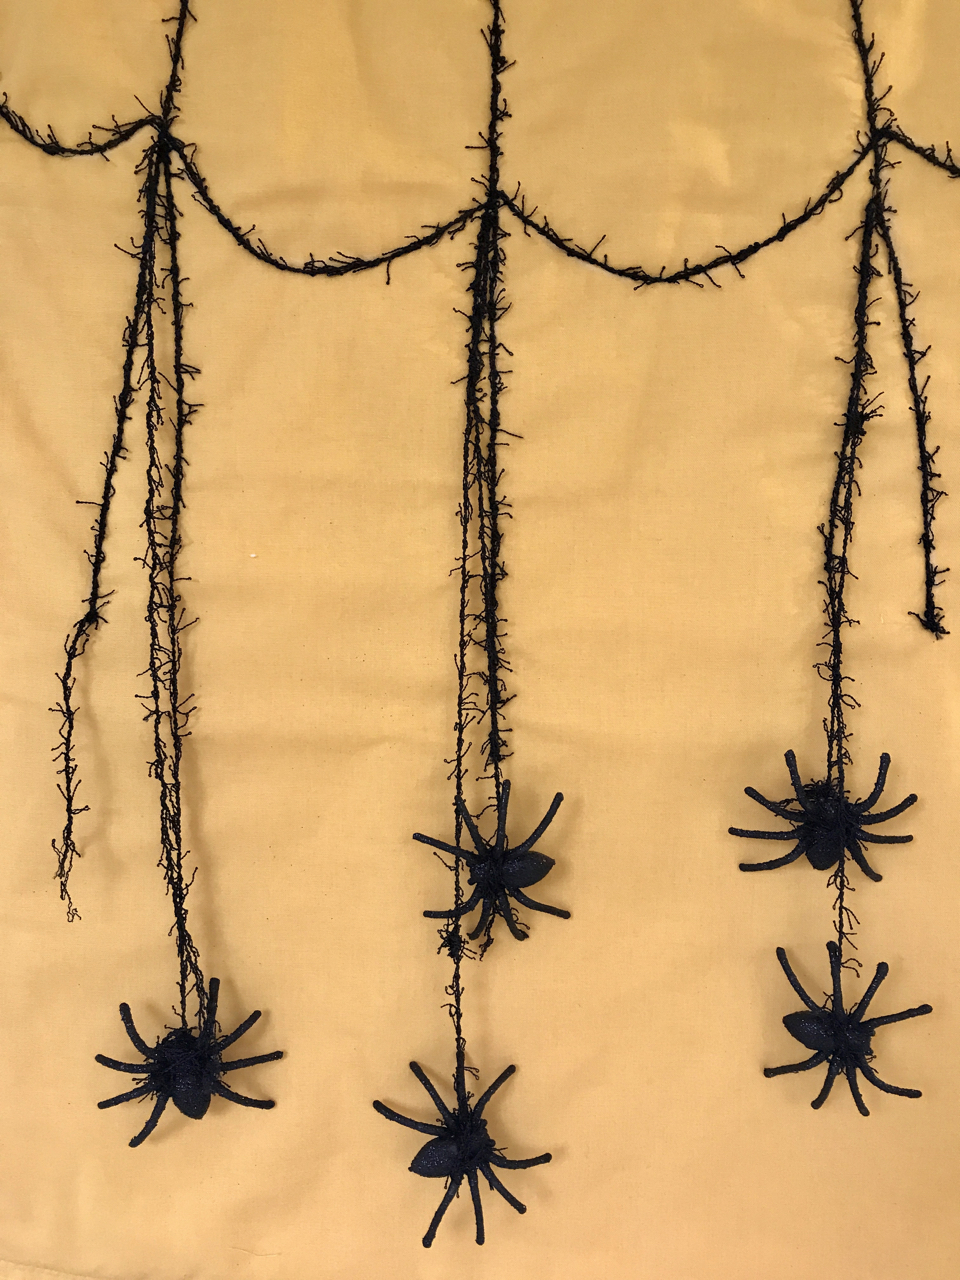
Extend The Web
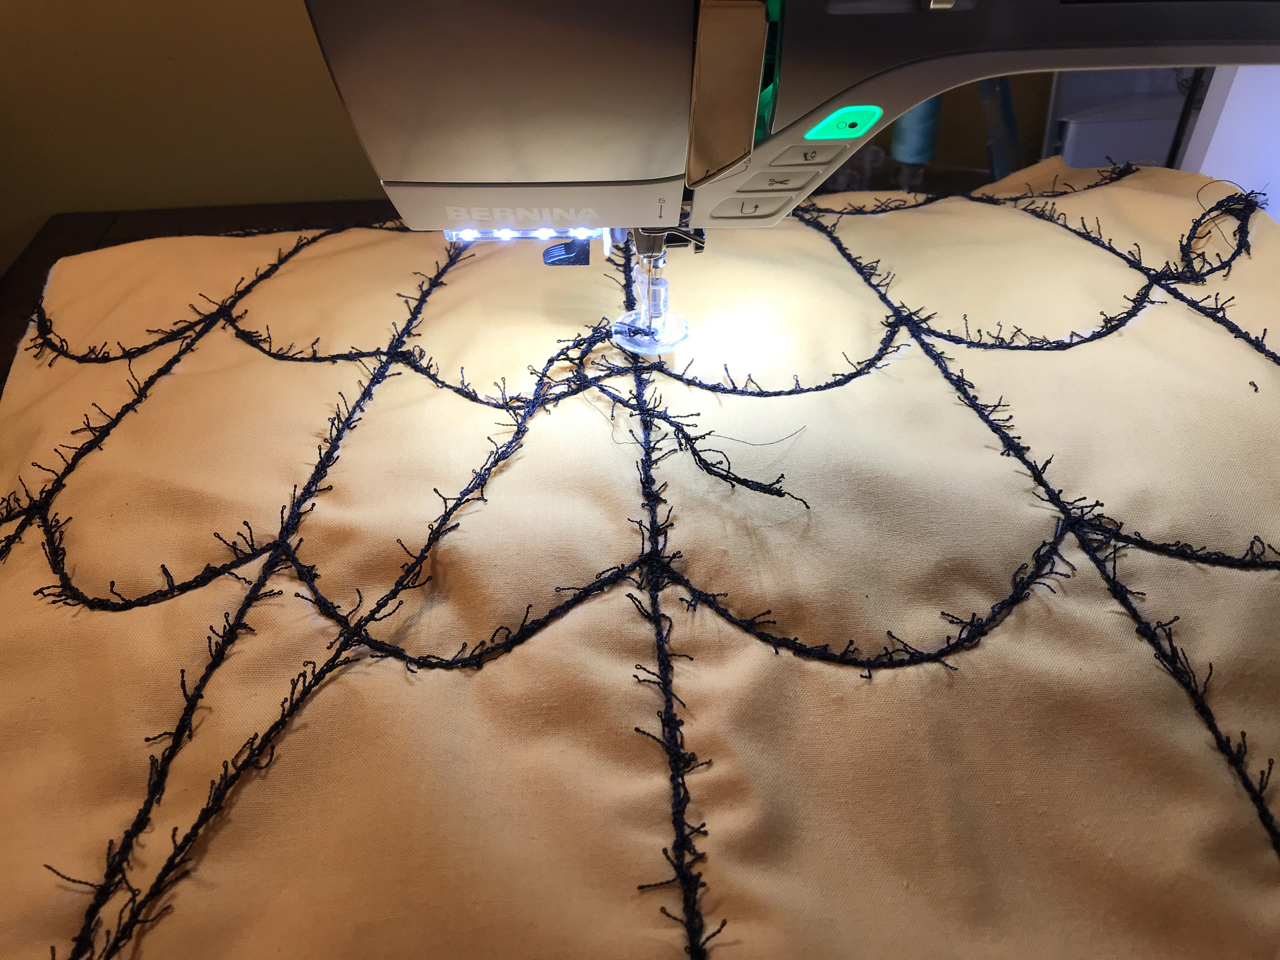
Add three long, stitched yarn lines and some extra lengths of yarn, cascading from the web to suspend the spiders, giving the illusion of them hanging down from the web. Let the yarn dangle off the sides of the banner to add more interest as shown in the photo.
Finish Sides and Bottom
Use the rotary cutter to trim off the excess batting around the edges of the banner if needed. With the straight foot and matching thread to background, use a zigzag stitch to sew up the sides and bottom of the banner leaving the raw edge. Caution! Start the edge sewing from the bottom of the top pocket seam. Don’t sew it closed!
Hand Stitch Embellishments

With a needle and thread, secure the spider embellishments onto the banner by simply tying the spiders onto the dangling yarns. Or hand sew them onto the background in strategic positions if you want them to stay in place on the black web.
Stick and Yarn Hanger

Slide a stick or dowel through the top pocket seam. Wrap approximately 1 yard of yarn four times to make a fiber hanger that is fastened to the side ends of the stick or dowel to create a hanger. Add a dab of white glue to the yarn on the ends of the stick to secure.
Welcome Critters!
Hang this whimsical spider banner over your front door to welcome festive Halloween guests and trick or treaters. Have a safe and spooky sparkly night!
For more creative inspiration, check out Joanne Sharpe’s website, joannesharpe.com

