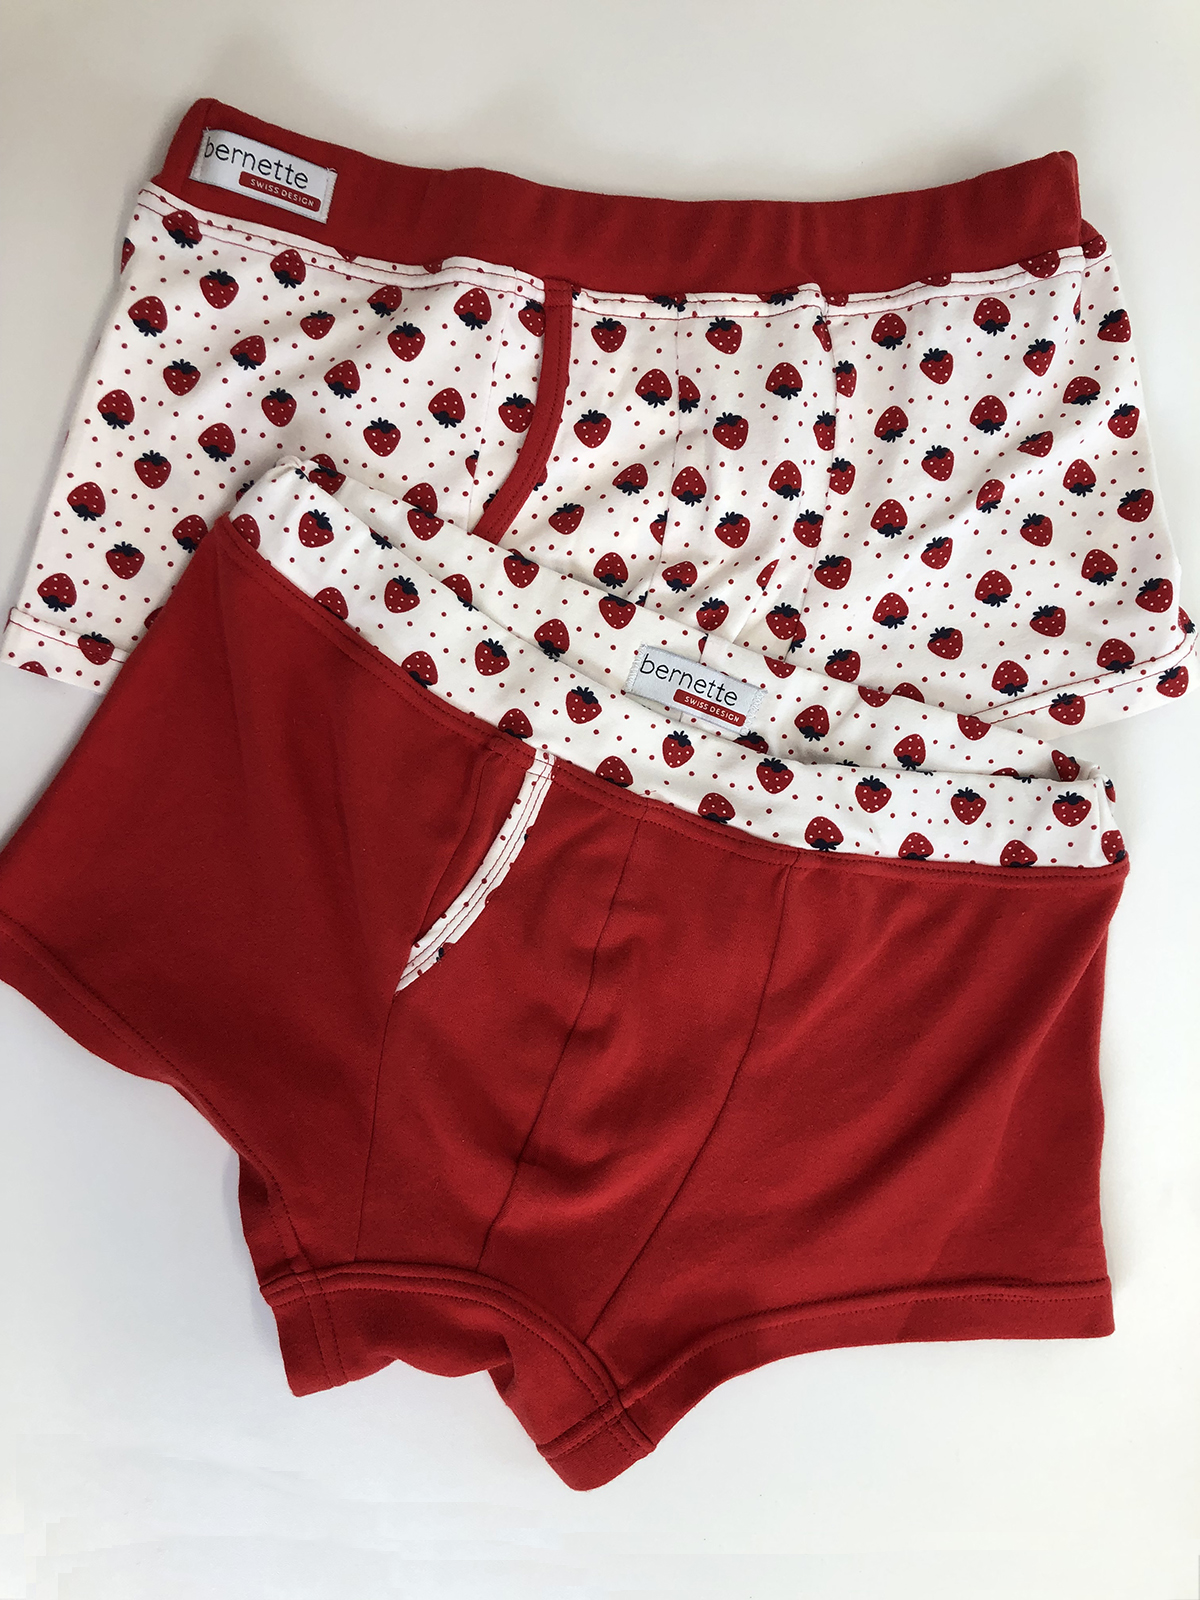
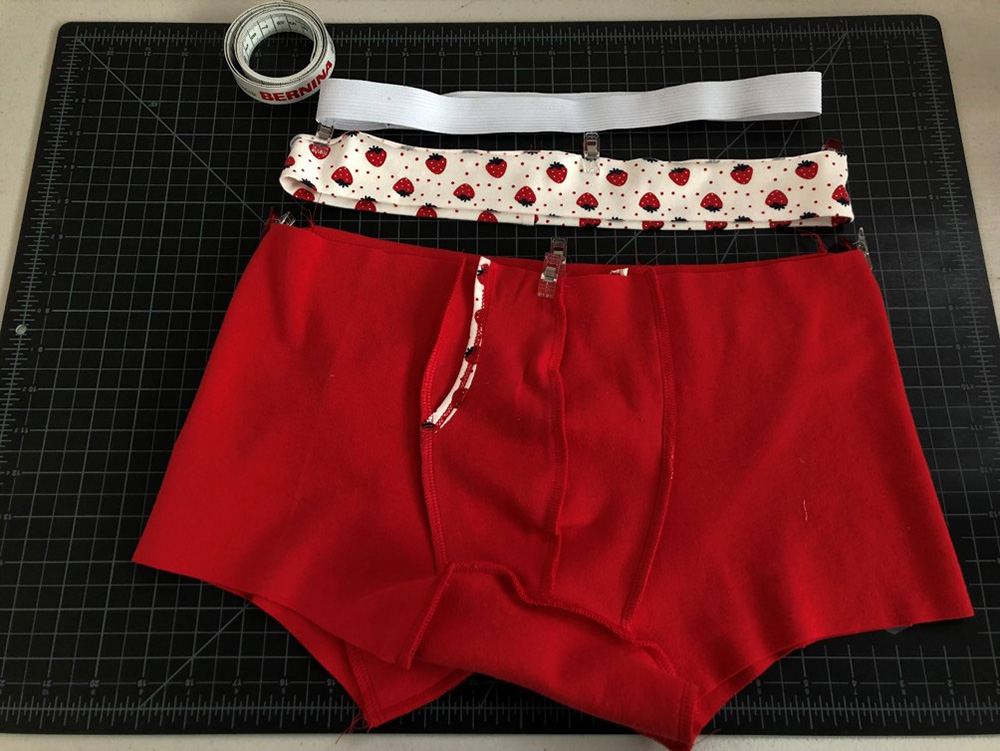
One of my favorite projects to make for the mister is boxer briefs. I love to make them a little surprising and maybe even from unconventional fabrics and elastics (when I can find a good one). Every guy needs some strawberries in their life, right? There is also an ease about sewing something that largely goes unseen. It allows for freedom to be a little less fussy about perfection, while exercising or learning new skills. This could include using a coverstitch machine. Whether you make these for yourself, your mister, your nephew or your brother, sewing boxer briefs is a great way to learn to work with knits.
Materials for Sewing Boxer Briefs
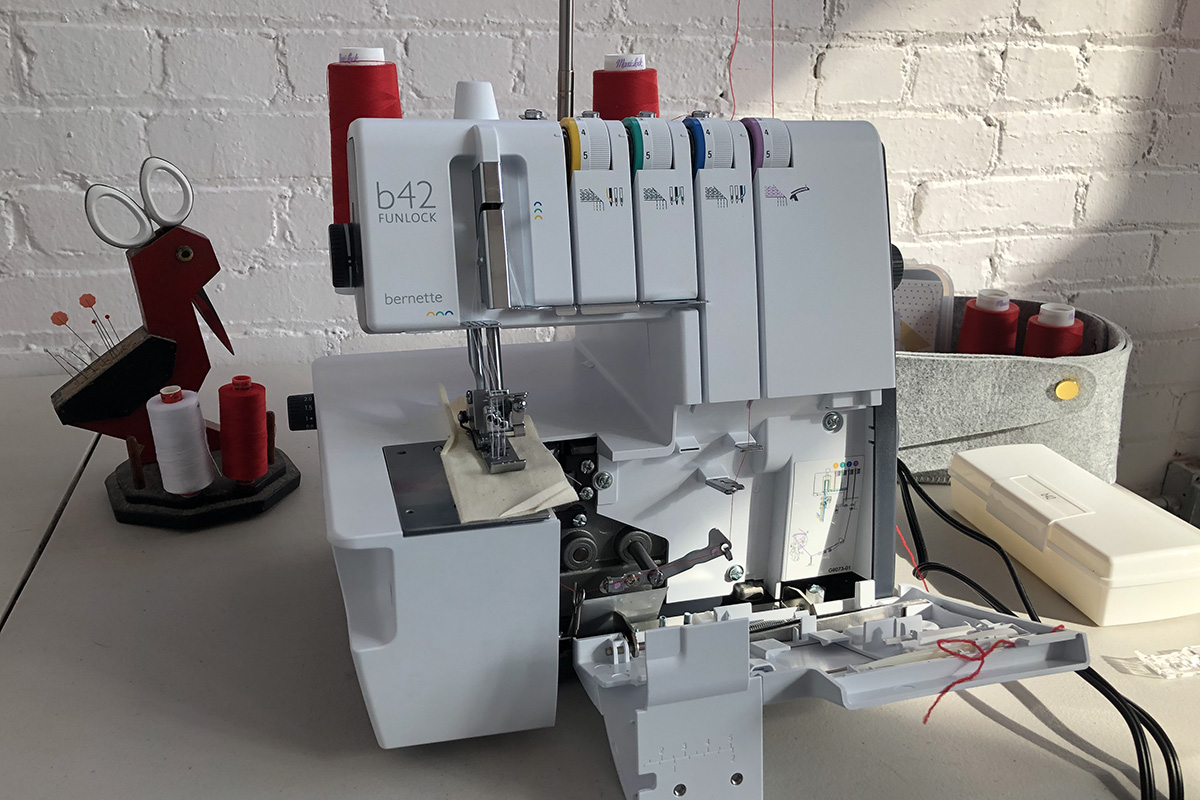
- bernette overlocker series: b44, b42 (or b48)
- Standard Presser Foot with Clear Sole (bernette coverstitch models: b42 or b48)
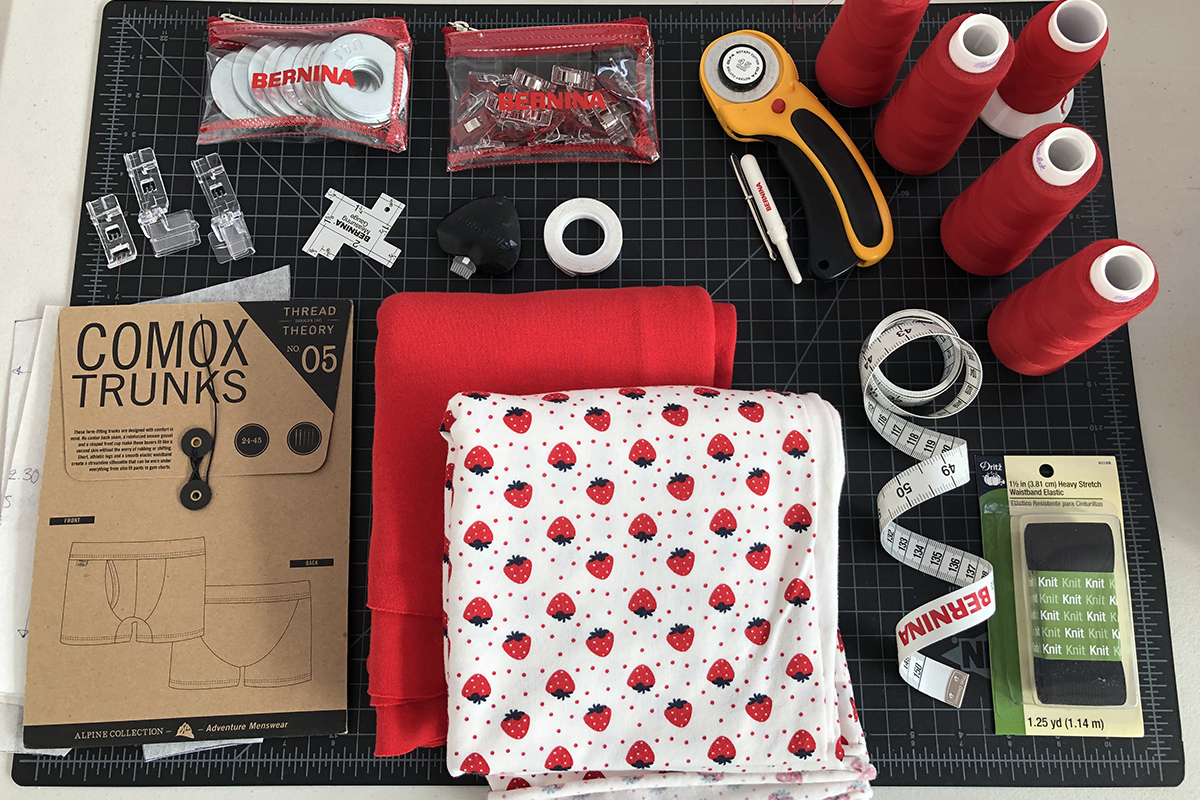
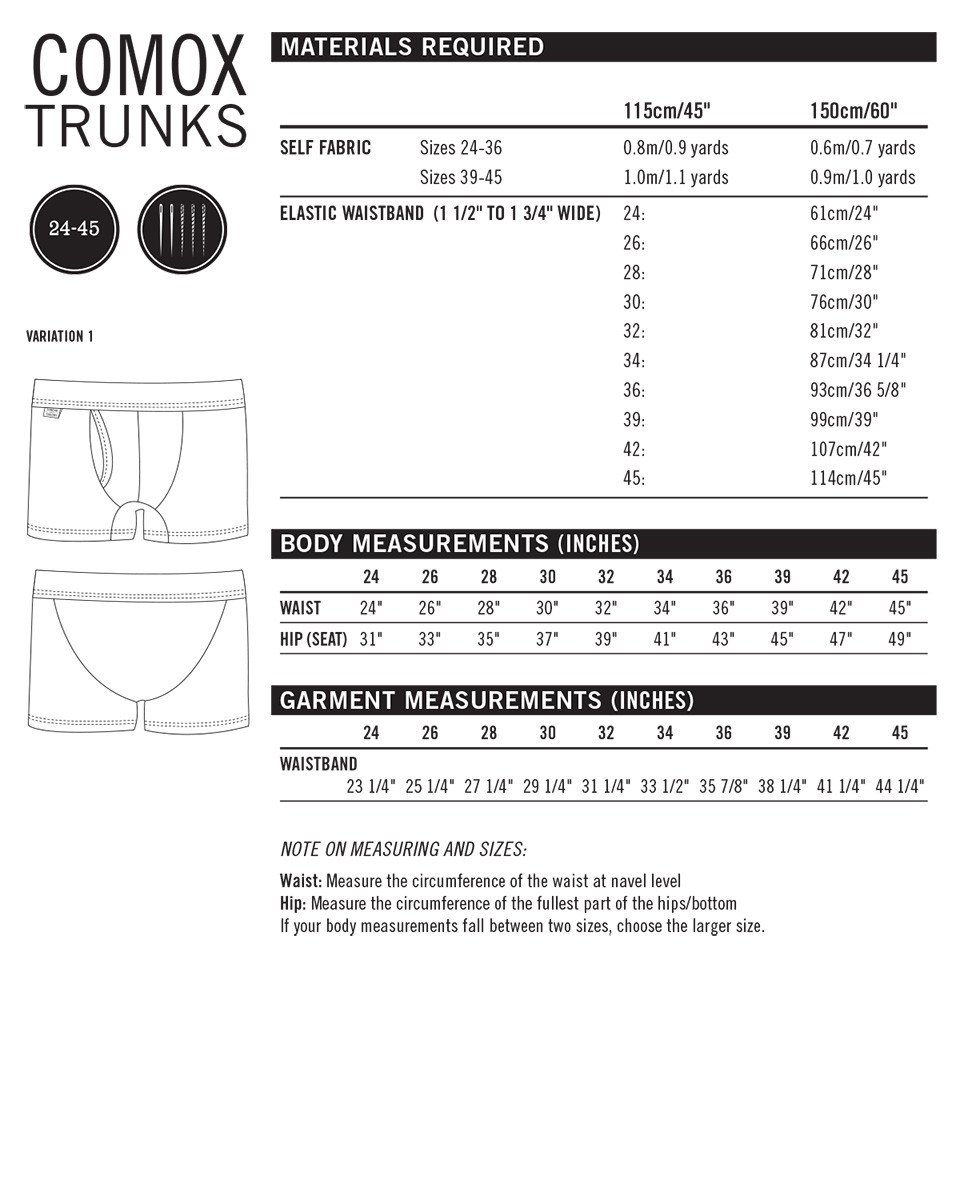
- Pattern: Thread Theory Comox Trunks
- Supplies:
- 4 Spools Serger Thread
- 1 Spool Textured Nylon Thread (Woolly Nylon)
- Knit Fabric with 60-70% stretch
- 1 ½” to 1 ¾” elastic for waistband (mine is covered)
- Rotary cutter 28mm recommended
- Cutting mat
- Iron
- 80/12 universal needle
- Swedish Tracing Paper
- Pattern Weights (heavy duty washers)
- Clover Wonder Clips
- Tips on making Boxer Briefs
- Pattern and Fabric
Pattern
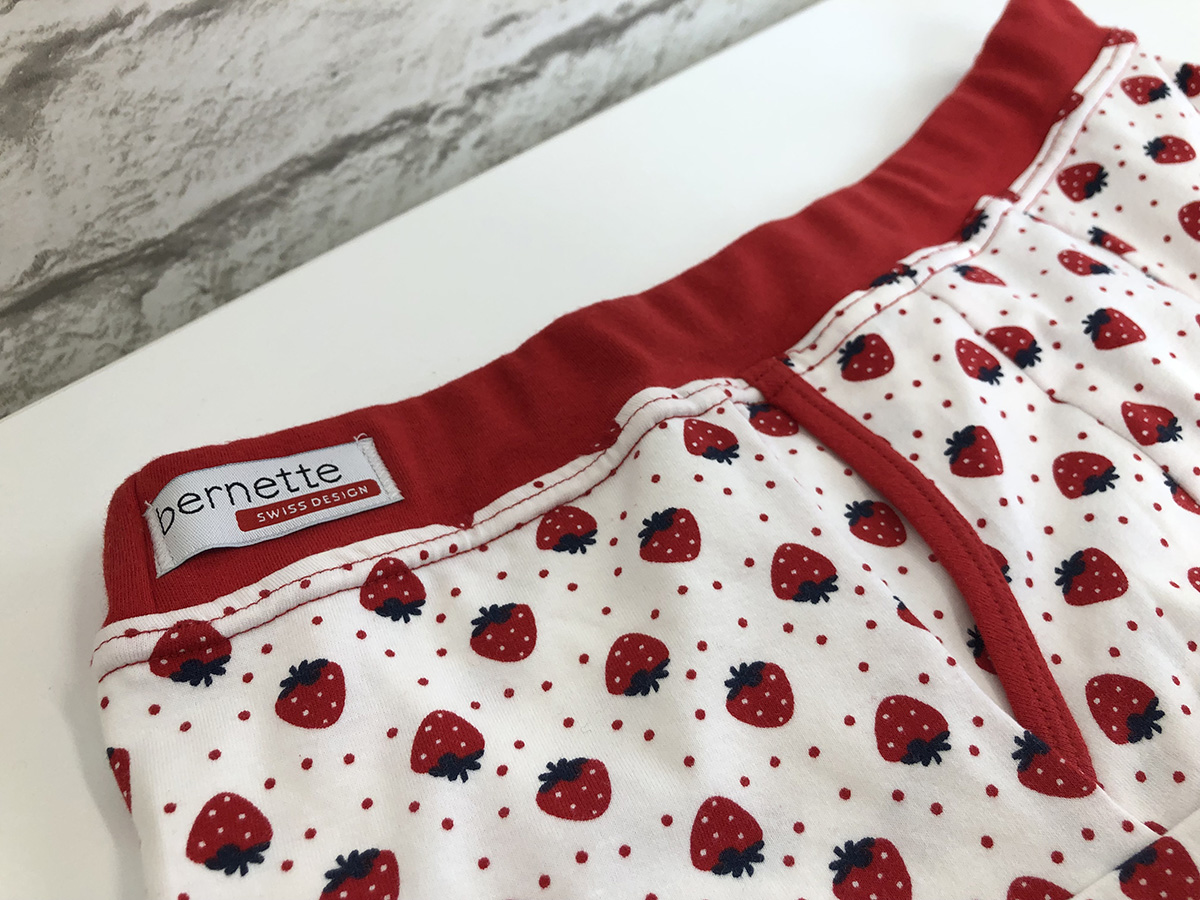
Thread Theory patterns aim is to bring menswear sewing to the forefront of DIY fashion by offering quality and stylish sewing patterns focused on menswear. They were founded in 2012 by Morgan and Matt Meredith in Canada. I have made the Comox Trunks several times and appreciate the details of the finished boxer briefs. These form-fitting trunks have no center back seam and have a short athletic fitting leg. The shaped front cup makes for an easy fit without shifting and additionally provides an opportunity for fun binding details.
Choosing the right fabric
Lightweight knits with some spandex and four-way stretch work best for this pattern. I have often used leftover knits from other projects and because they are undergarments, you can take creative liberties by combining fabrics too. The only fabric to avoid would be tissue weight knits or knits that do not have good recovery.
Tip: Always pre-wash and dry your garment fabrics when possible. Knits are especially prone to shrinking and it is best to start with the fabric pre-shrunk based on your laundering habits.
Cutting out knits
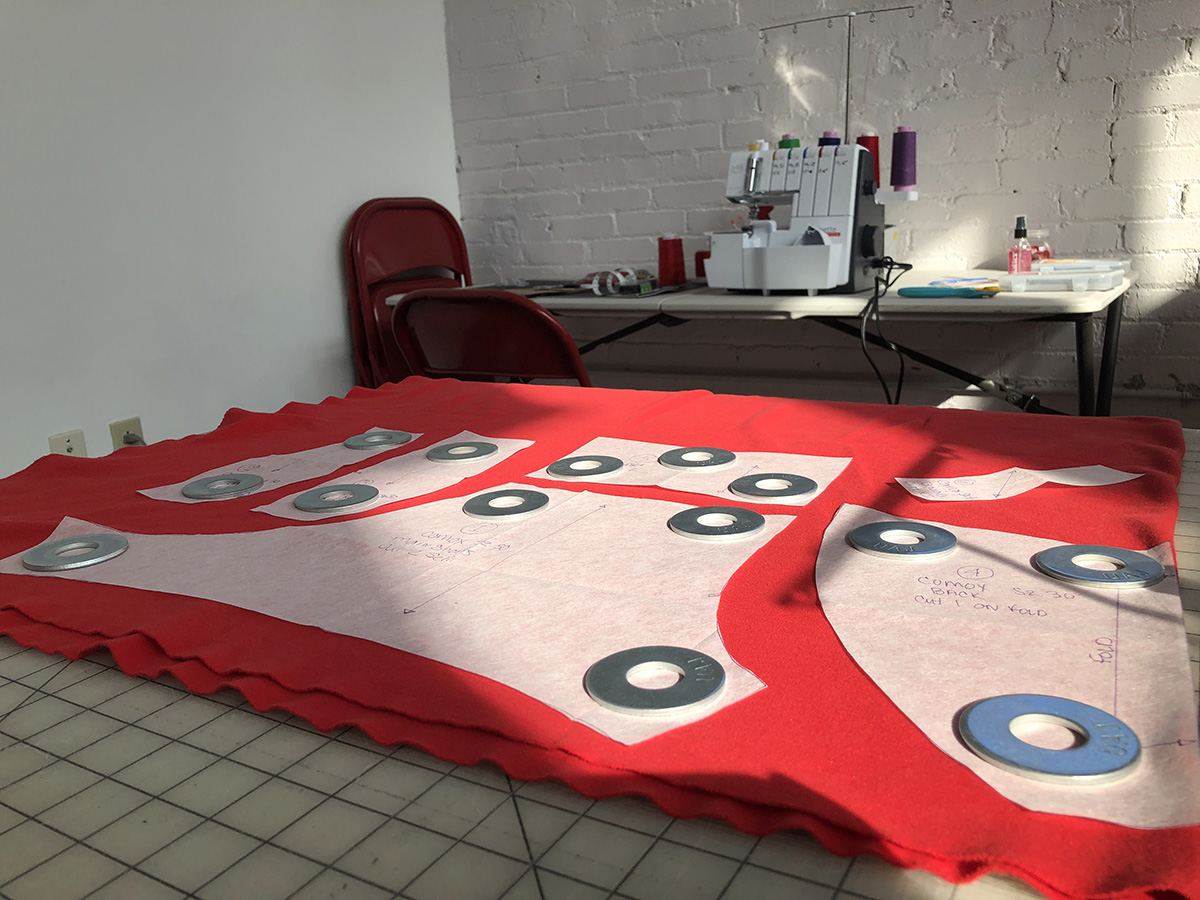
When cutting out knits, I prefer to use a rotary cutter and pattern weights as opposed to scissors and pins. Knit, especially with spandex, has the tendency to shift and distort out of position when being cut. Using a rotary cutter and pattern weights reduces this problem and makes quick work of the cutting. It does take some practice and although it is similar to using a rotary cutter for quilting, it is a bit nuanced. The pattern weights that I use are heavy duty washers that I picked up at the hardware store. I am a pattern tracer and use Swedish tracing paper to copy my pattern. Most often I cut my knits on the fold, taking time to align the grainline. The exception to this is if I am working with a striped fabric. Then I cut on a single layer to ensure that my stripes remain straight for both sides of the pattern.
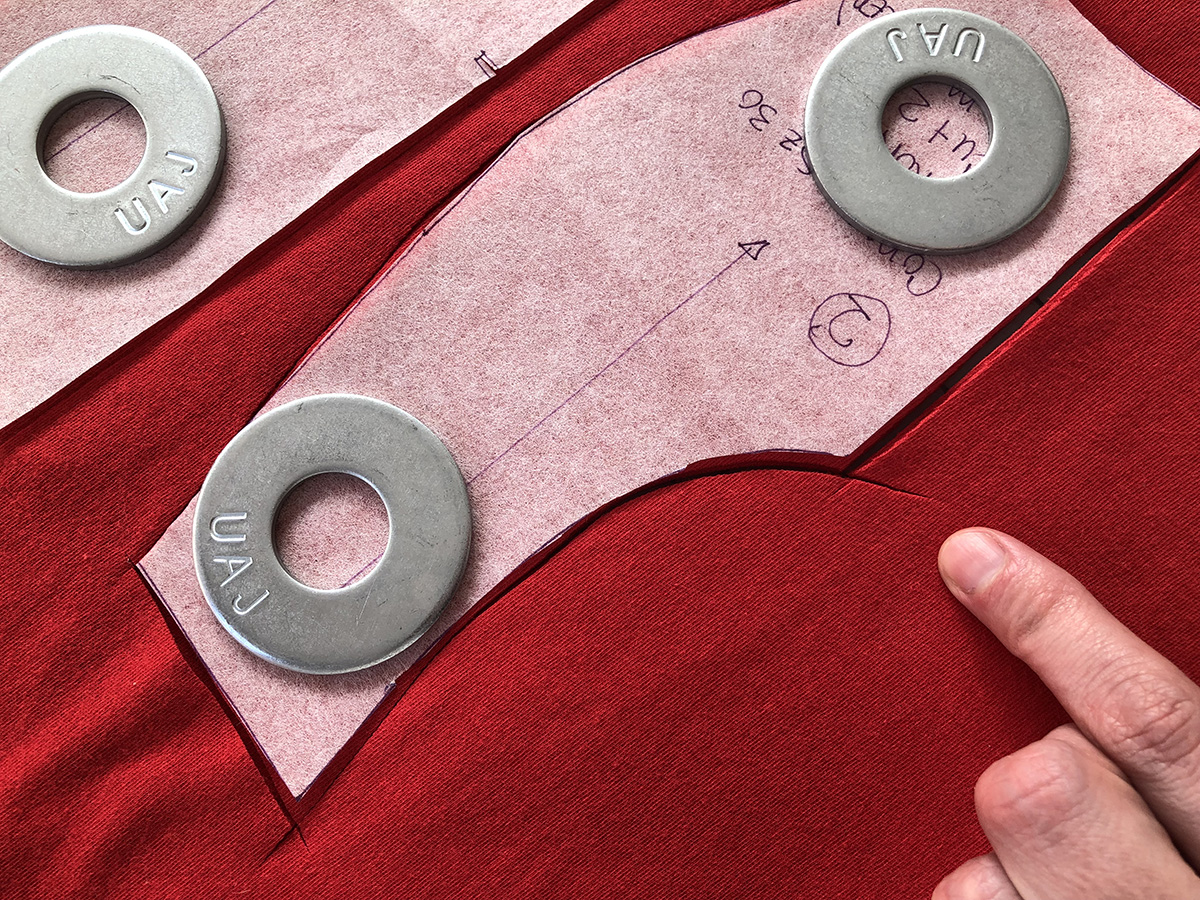
Tips for cutting with rotary cutter
• Practice moving your rotary cutter in one smooth motion, avoid moving back and forth as you would with a pizza cutter.
• Make cuts that extend beyond the pattern corners when starting and ending your cuts as this makes a clean cut corner.
• Move the rotary cutter away from your body providing even presser on the cutter.
• Once all cuts are made, remove the fabric around the pattern piece and trim and uncut fibers with snips. Try not to move the pattern piece until last.
• For garment patterns the smaller radius rotary cutter, 28mm, allows for easier movement around curved arms and neck seams.
Sewing
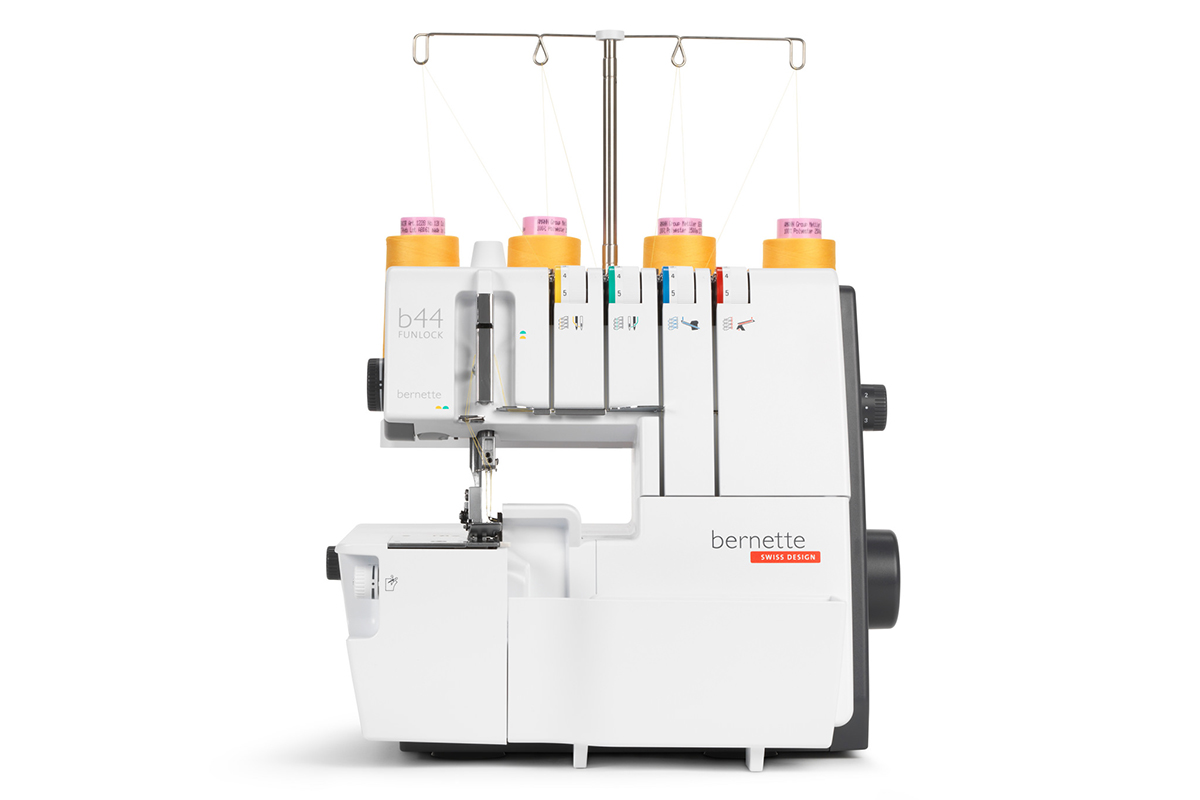
For this project I featured our newest overlocker machines in the bernette line. The b44 is a beginner friendly overlocker that has a great stitch quality. The b48 is a combination machine that can convert from overlock to coverstitch with a few basic set-up changes. And the b42 is a cover- and chainstitch machine for those looking to expand their finishing skills.
The b42 is an affordable and easy-to-use coverstitch machine. This machine has three- needle position options and has a looper that threads from the front of the machine. There are also several optional presser feet, including my personal favorite, the standard presser foot with a clear sole. For the small curved section for the front cup, I found that using a two-step binding method worked best for adding binding for this short section, but if you were doing a project with longer areas to bind you might try the binder attachment. Check out this helpful post about the attachment by my friend Doris. Yes! There is a binder attachment and many other accessories available.
Sewing a two-step binding with coverstitch
I have discovered that adding binding to a project using a two-step method on the coverstitch machine works well for most knit projects and the clear sole presser foot made it even simpler on the b42.
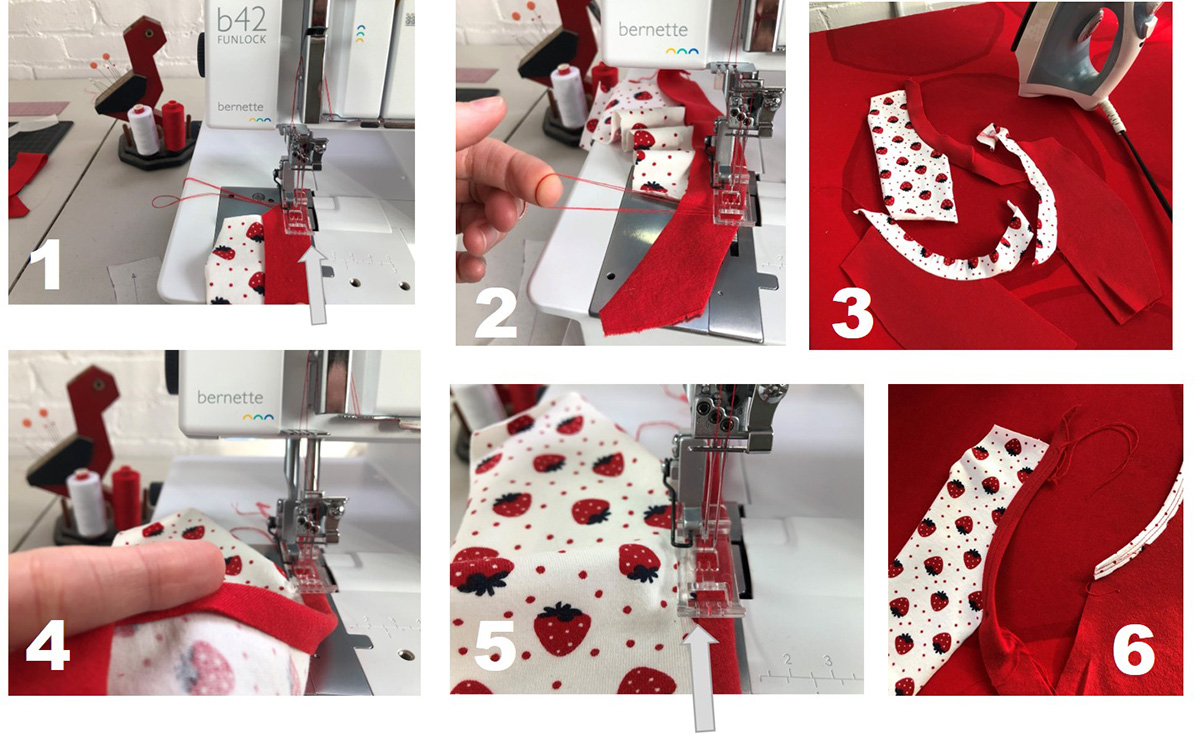
• Set the machine for narrow coverstitch using the center and right needles.
• Adjust the stitch length to 3.5.
• Align the fabric edge with the right side of the presser foot. (Step 1)
• Sew the binding to the fabric with right sides together using the coverstitch.
• End the stitch with fabric under the presser foot.
• Raise the needles and the presser foot, pull needle threads from under the presser foot and trim. (Step 2)
• Pull fabric from under the presser foot to the back to lock stitch, then trim the looper thread.
• Press the binding toward the seam allowance and fold the binding over the edge of the fabric and press in place. (Step 3)
• Align the left bound fabric edge with the left needle position on the presser foot. (Step 4)
• Sew coverstitch along the top edge of the binding, ending the stitch by trimming as before. (Step 5)
• Trim any excess fabric edge from the back side of the binding close to the stitching. (Step 6)
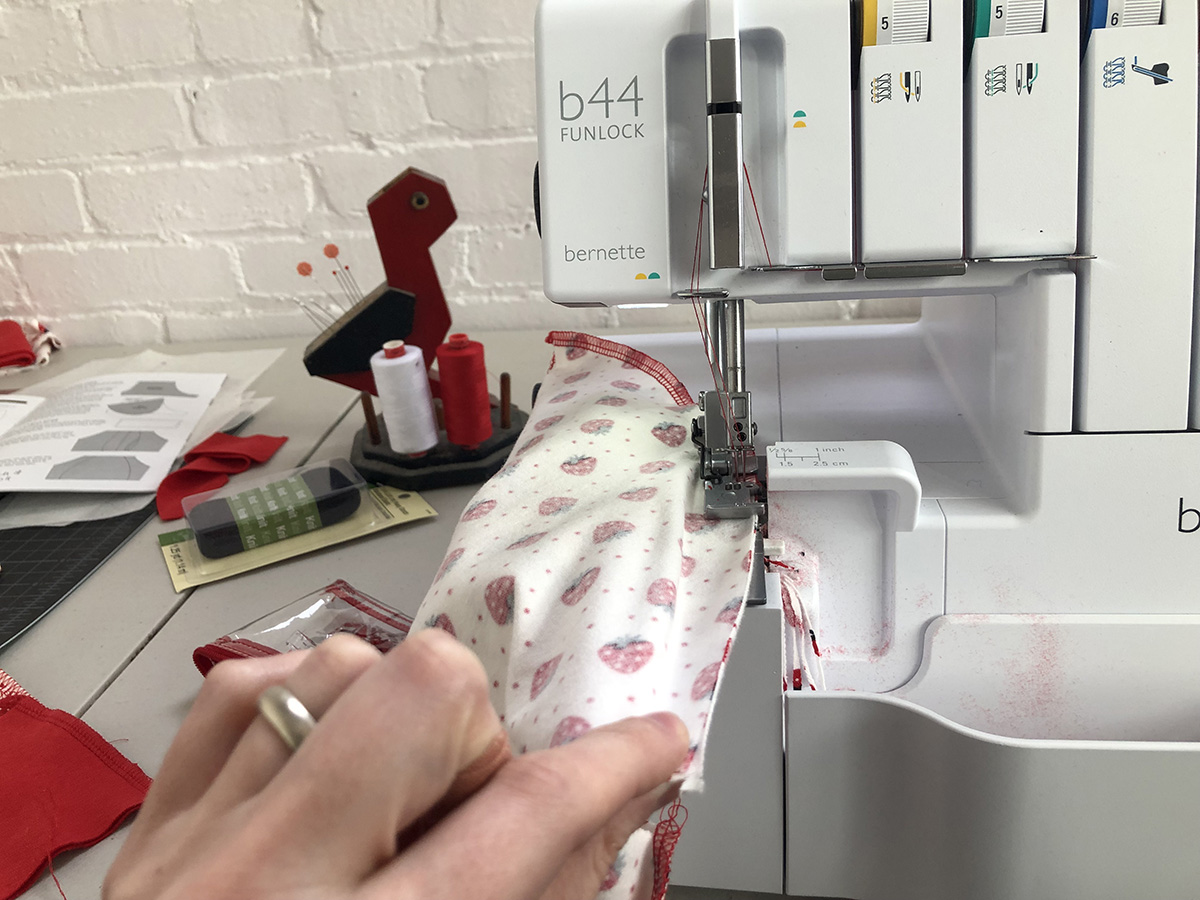
Overlocker construction tips
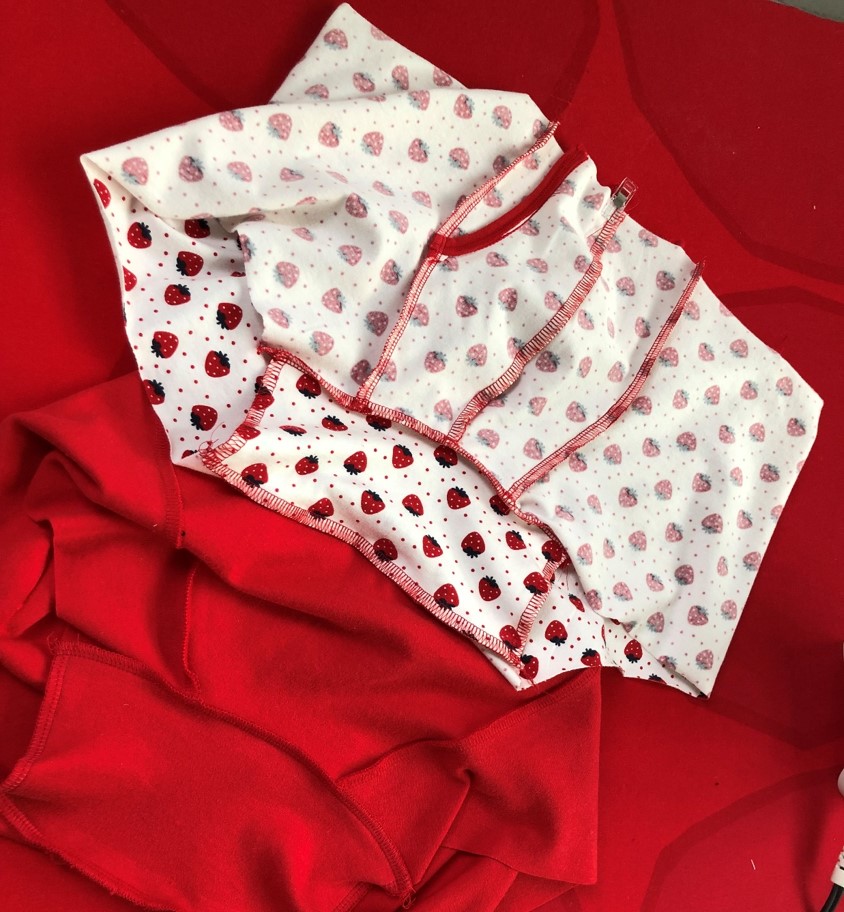
Now that the front cup is bound, the basic trunk construction can begin. It is very simple to do all the remaining construction sewing on the b44 overlock, using a 4-thread overlock stitch (Notice this is a different machine; if you are using the b48 you would convert the machine—check out this helpful video for converting). When sewing with an overlocker, it is important to learn to hold the fabric straight out in front of the presser foot, even when sewing a curve. This is different than how we are taught to sew wovens on a sewing machine, but it will create the cleanest and best seam on the overlocker.
Tip: Adjust differential feed to 1.5-2 if your seam sews with a wavy edge, this will help eliminate the stretch of the knit when sewn.
Add a covered waistband
Sometimes soft elastic is hard to find and an easy alternative is to create an encased waistband. To create an encased elastic waistband, I cut a 3 ½” wide strip of fabric to match the length of the finished trunks. Sew the short ends of the fabric together to create a loop and press the waistband in half lengthwise. Using a spray starch can help control any curling in the knit.

Divide the waistband and trunks into quarter sections and match the waistband to the trunks, with right sides together. Slip the elastic, sewn into a loop, into the waistband channel and clip all the layers together. You should not be sewing through any elastic when attaching the waistband. Begin sewing the waistband at the back or side seam with a 4-thread overlock, stretching to fit as necessary. When you come back to the beginning, move the fabric to the left and away from the presser foot, chaining off a small thread tail. Tuck the thread tail into the seam and press the waistband into place.
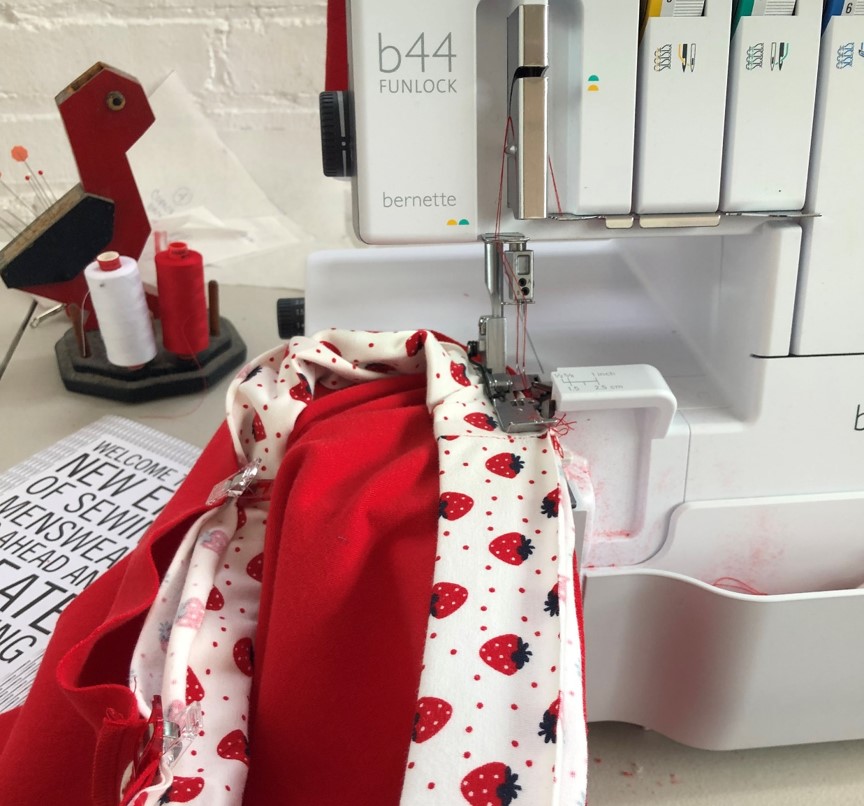

Now it’s back to the coverstitch machine, you are ready to add the finishing details and hem the trunks. I added the coverstitch to the gusset and waistband to hold the seams in place. When coming to bulky areas, like the binding, you might find it helpful to use the handwheel to help move through the unevenness of the seam with more control.
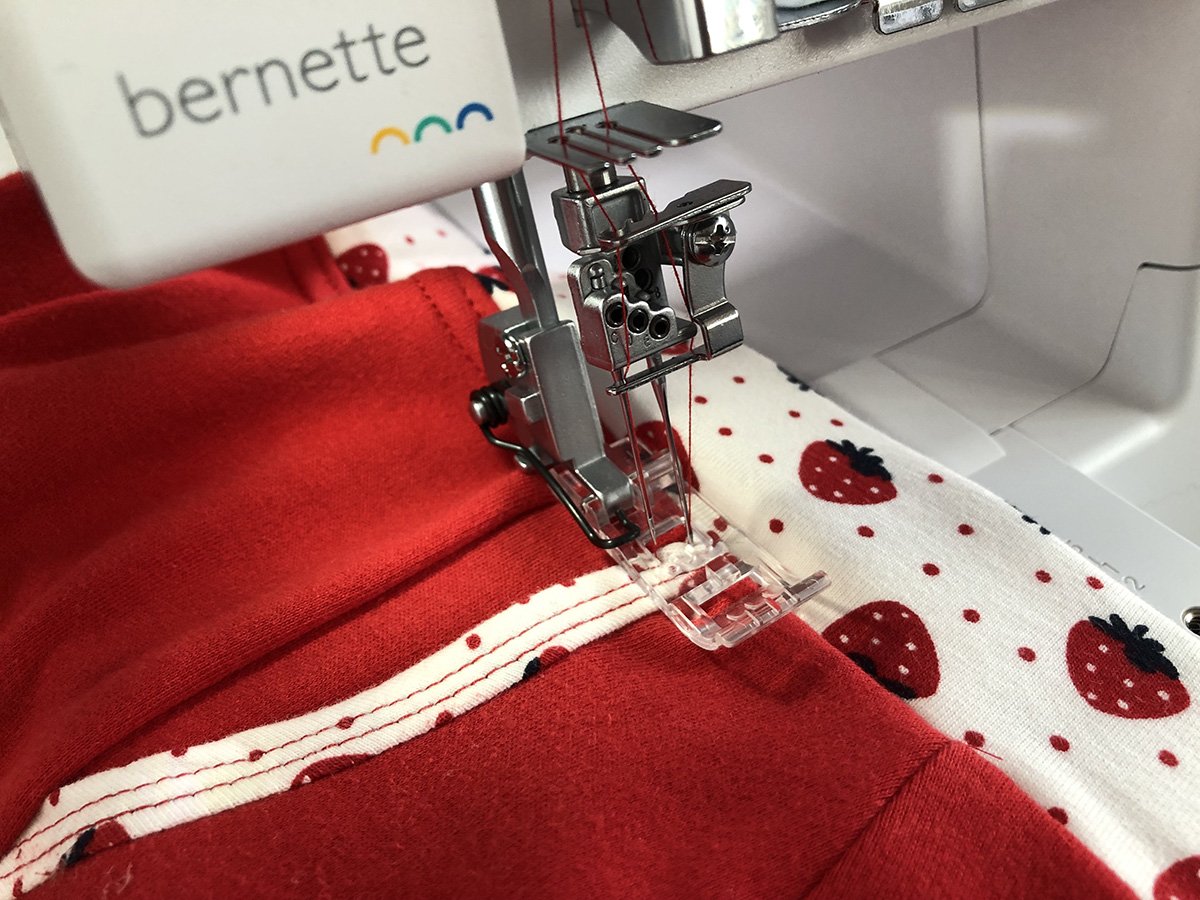
Tip: Use a textured nylon thread, like woolly nylon, in the looper for a soft finish against the skin.
Add your personal label and the trunks are ready to be his!