


Hello my Sewing Bees, my name is Sue O’Very-Pruitt owner of Sookie Sews and BERNINA Expert. You can find me on Instagram at @SookieSews and my website SookieSews.com where I have hundreds of machine sewing patterns, embroidery designs, and In-the-Hoop projects. Today I am teaching you how to use your serger to make the fastest project ever, the Serger Shoelaces! they are super cute and in just a few minutes you can doll up a pair of basic white sneakers. Let’s get stitching!
Materials to Make Fast and Easy Serger Shoelaces
Measurements are Width by Height
Fabric
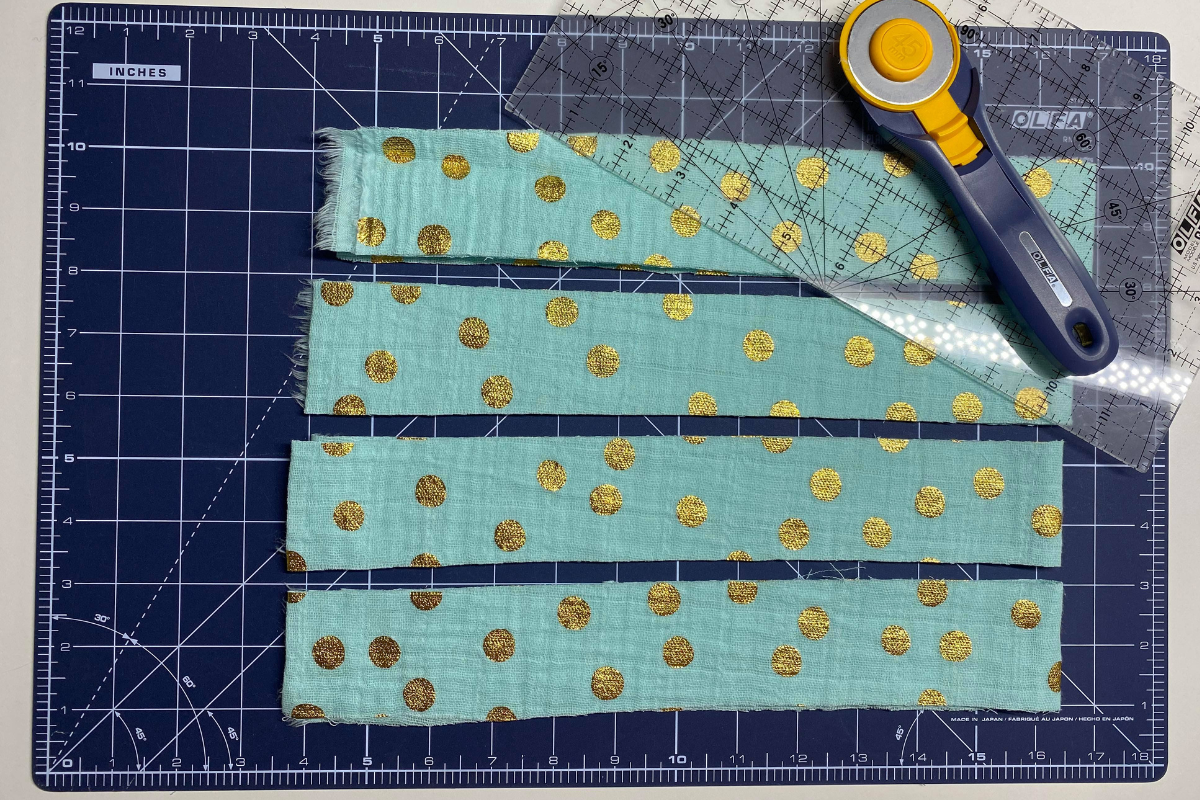
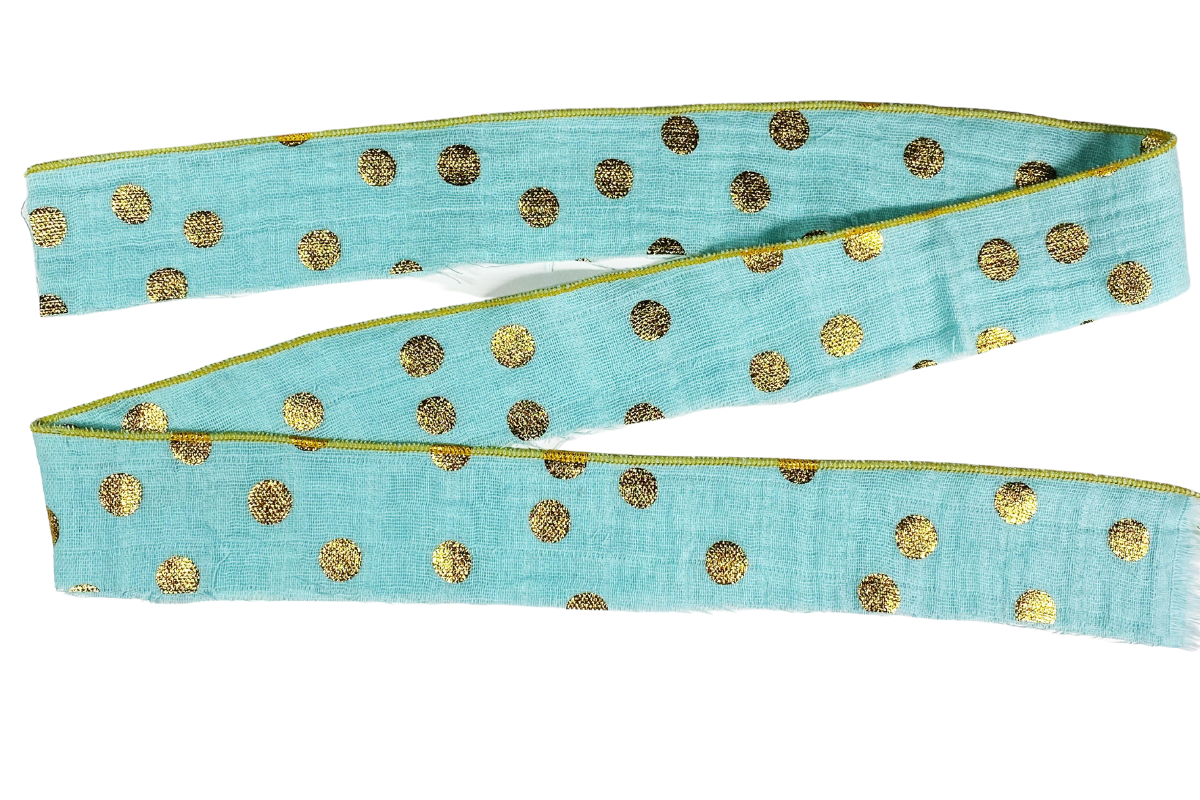
- (4) Shoelaces 2″ x 44″ (or width of fabric)
- (3) Mettler Seracor serger thread
Supplies
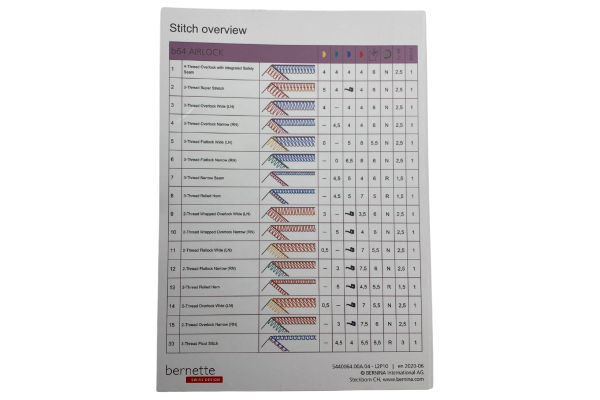
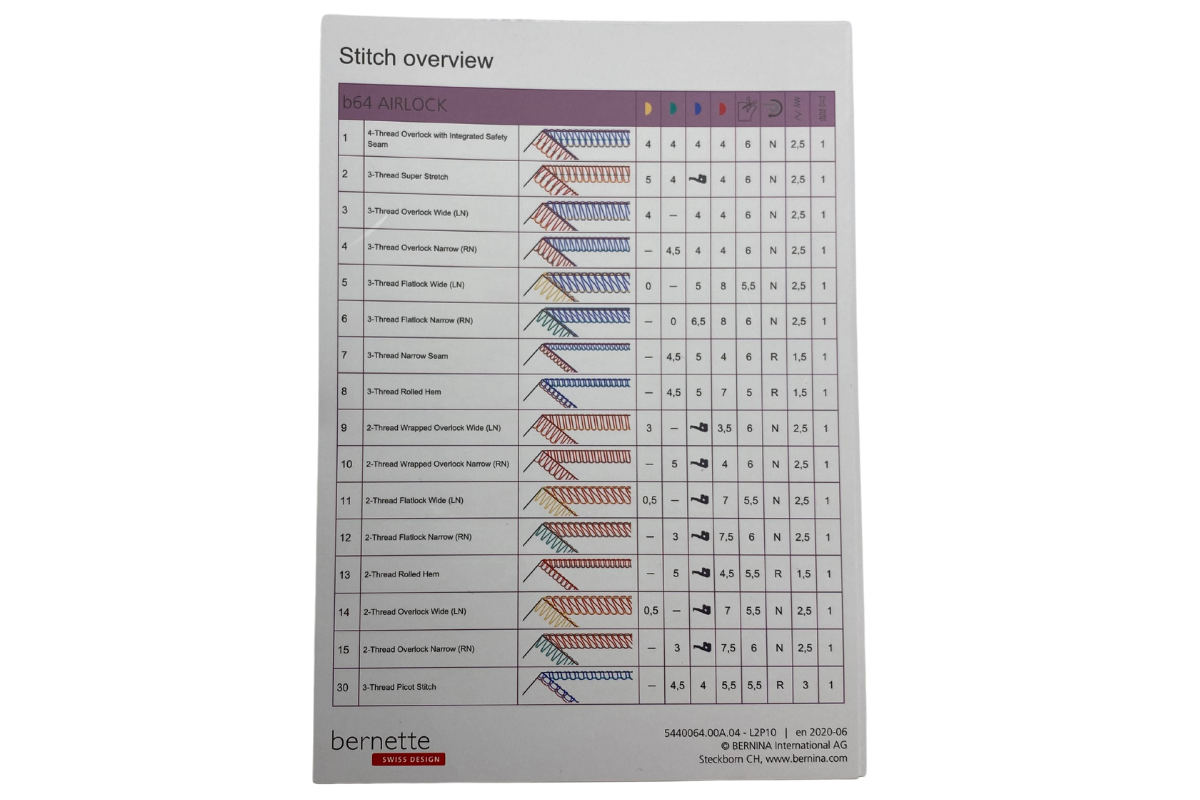
- Serger (I used my bernette 64 AIRLOCK)
- Rotary cutter, ruler and mat
- Thread cutter – Sookie Sews
- Marking pen
- Fray check
Steps to Make Fast and Easy Serger Shoelaces
- Cut the 4 shoelace fabric pieces and press any wrinkles out of the fabric.

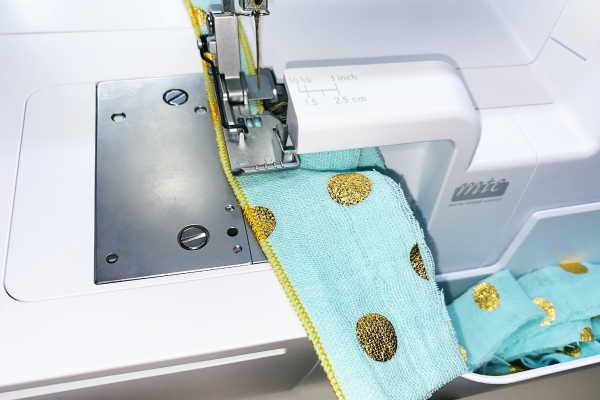
- Set serger up for 3-Thread Rolled Hem. Check the user manual for how to thread and the settings. On the bernette 64 AIRLOCK, the settings recommended from the manual were perfect.
- Test the stitch with two pieces of fabric with wrong sides together and place on the edge of the throat plate cutting off just a little of the raw edge, about 1/8″. Adjust tensions, length, and width as needed. Mine was perfect on the first try.
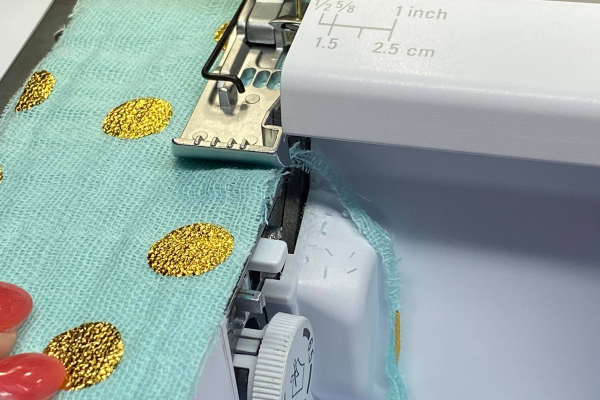
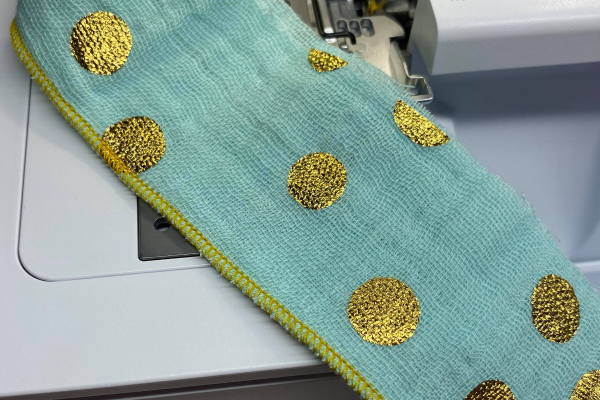
- Place 2 of the shoelace fabric pieces wrong side together and serge a little of the raw edge, about 1/8″, the entire length of the fabric strip, and clip threads at the end.

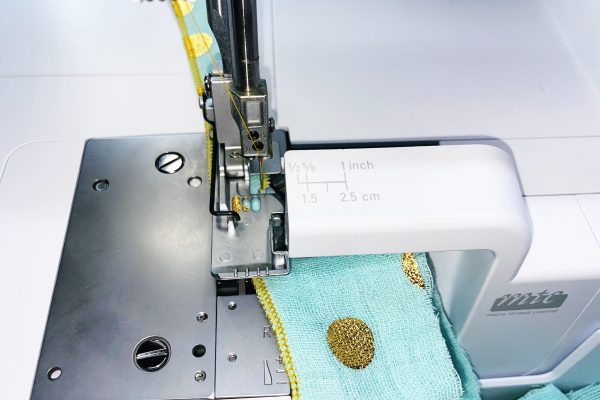
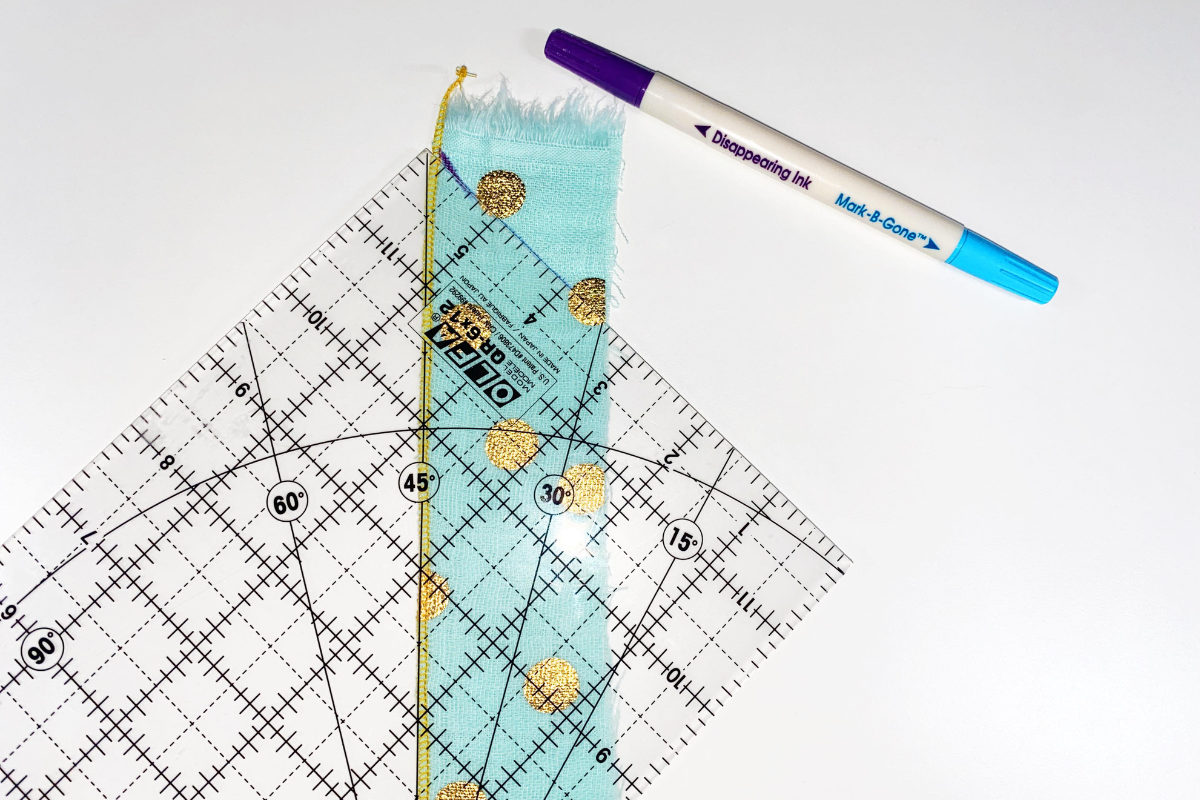
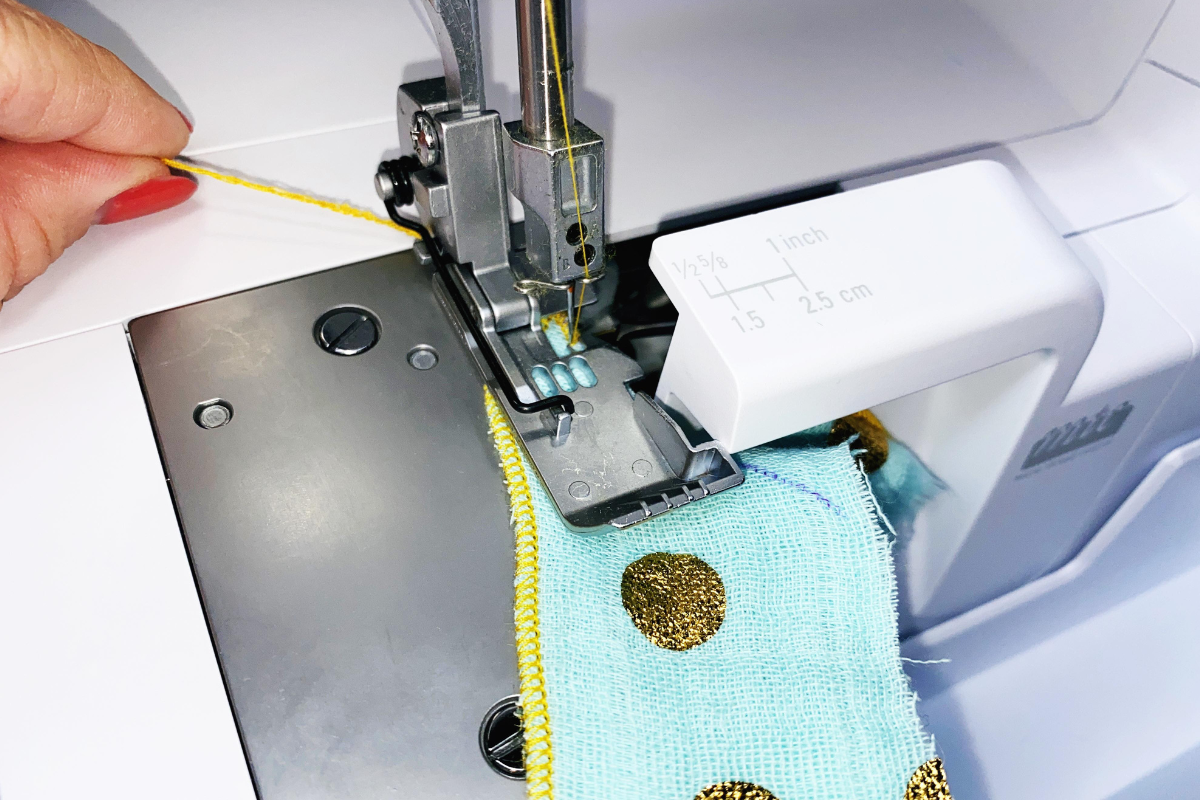
- Now it’s time to serge the other side. There will be a point at the beginning and the end of the stitch which will help the shoelace go into the holes and also finish off very nicely. To get the angled end started, find the 45-degree angle mark on the ruler and place the serged line and draw a line from the serged edge to the raw edge.

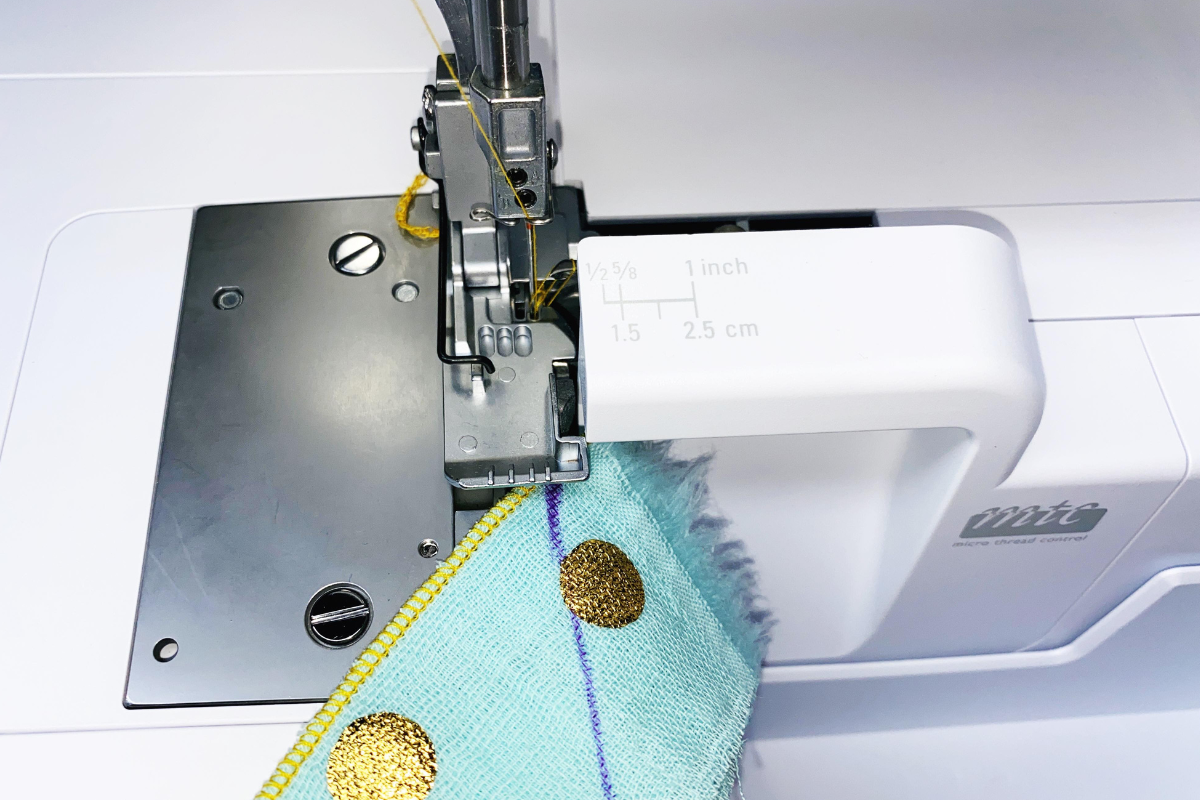
- There are notches on the front of the serger presser feet. They coordinate with the needles since the 3-thread rolled hem uses the right needle, that is the far-right notch. Align the marking with the notch and begin to serge.

- As soon as the thread tail in the back begin to coil up, grab a hold of it and gently guide the fabric to get straight.

- Straighten the fabric so the edge of the foot aligns with the presser foot essentially creating the width of the shoelace the width of the foot. Serge down the length of the shoelace but slow down at the end and guide the material on an angle at the end.
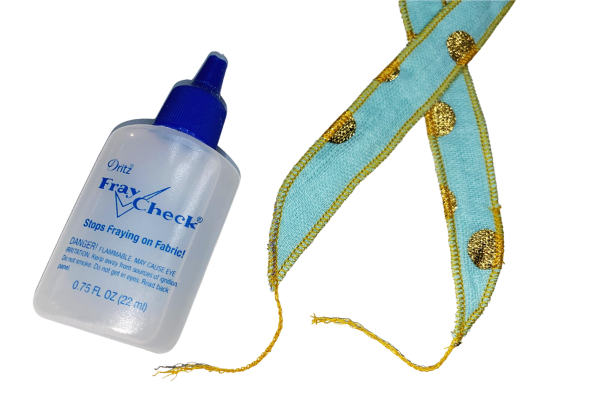
- Put a dab of Fray Check on the end of each shoelace and let dry, refer to bottle for the time it needs to properly dry. Then clip the thread tails.
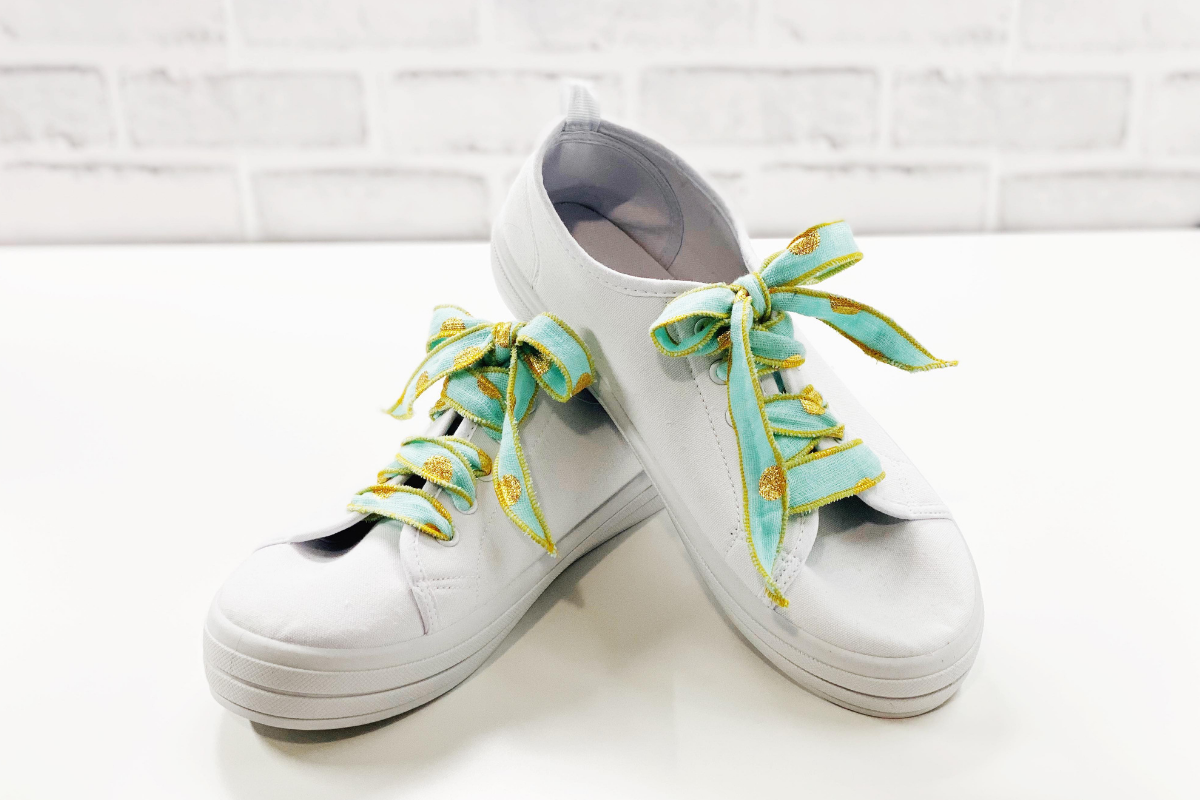
- Repeat the same steps for the second shoelace and thread shoes. You’re all finished!!


I hope you enjoyed this easy serger project, just think of the possibilities, holiday shoelaces, sports color shoelaces, and matching your outfits, and the list goes on and on! When you make yours, please snap a shot and be sure to tag me @SookieSews and @BERNINAUSA!!

