


![]()
Raise your hand if you have a bin of beautiful scraps from previous projects? I would imagine every type of sewist/quilter/crafter does! I recently decided to use some of my scraps to make this colorful quilted jacket and I want to walk you through my process in hopes it inspires you to do the same!
Materials to Make a Quilted Jacket with Scraps:
- Fabric scraps of all sizes
- Batting
- Lining (I used a Sherpa to make it extra warm!)
- Walking foot #50 (I don’t have one yet so I’ll give you a tip for those that don’t but I highly recommend getting one to make quilting life easier. Also many other projects!)
- Jacket/Coat pattern (suggestions below!)
Quilted Jacket Pattern Suggestions:
- Tamarack Jacket: I used the Tamarack Jacket and added a collar. This is a simple pattern with options to have closures or no closures (I used snaps). There are welted pockets but you could also draft your own patch pocket like I did on my first one!
- Ayora Jacket: This one has nice big pockets and closure options as well.
- Fibre Mood Molly: Very simple design with patch pockets.
- Wiksten Haori: Not meant for quilting but because it is a roomy jacket it looks great quilted!
How To Plan the Patchwork With Scraps
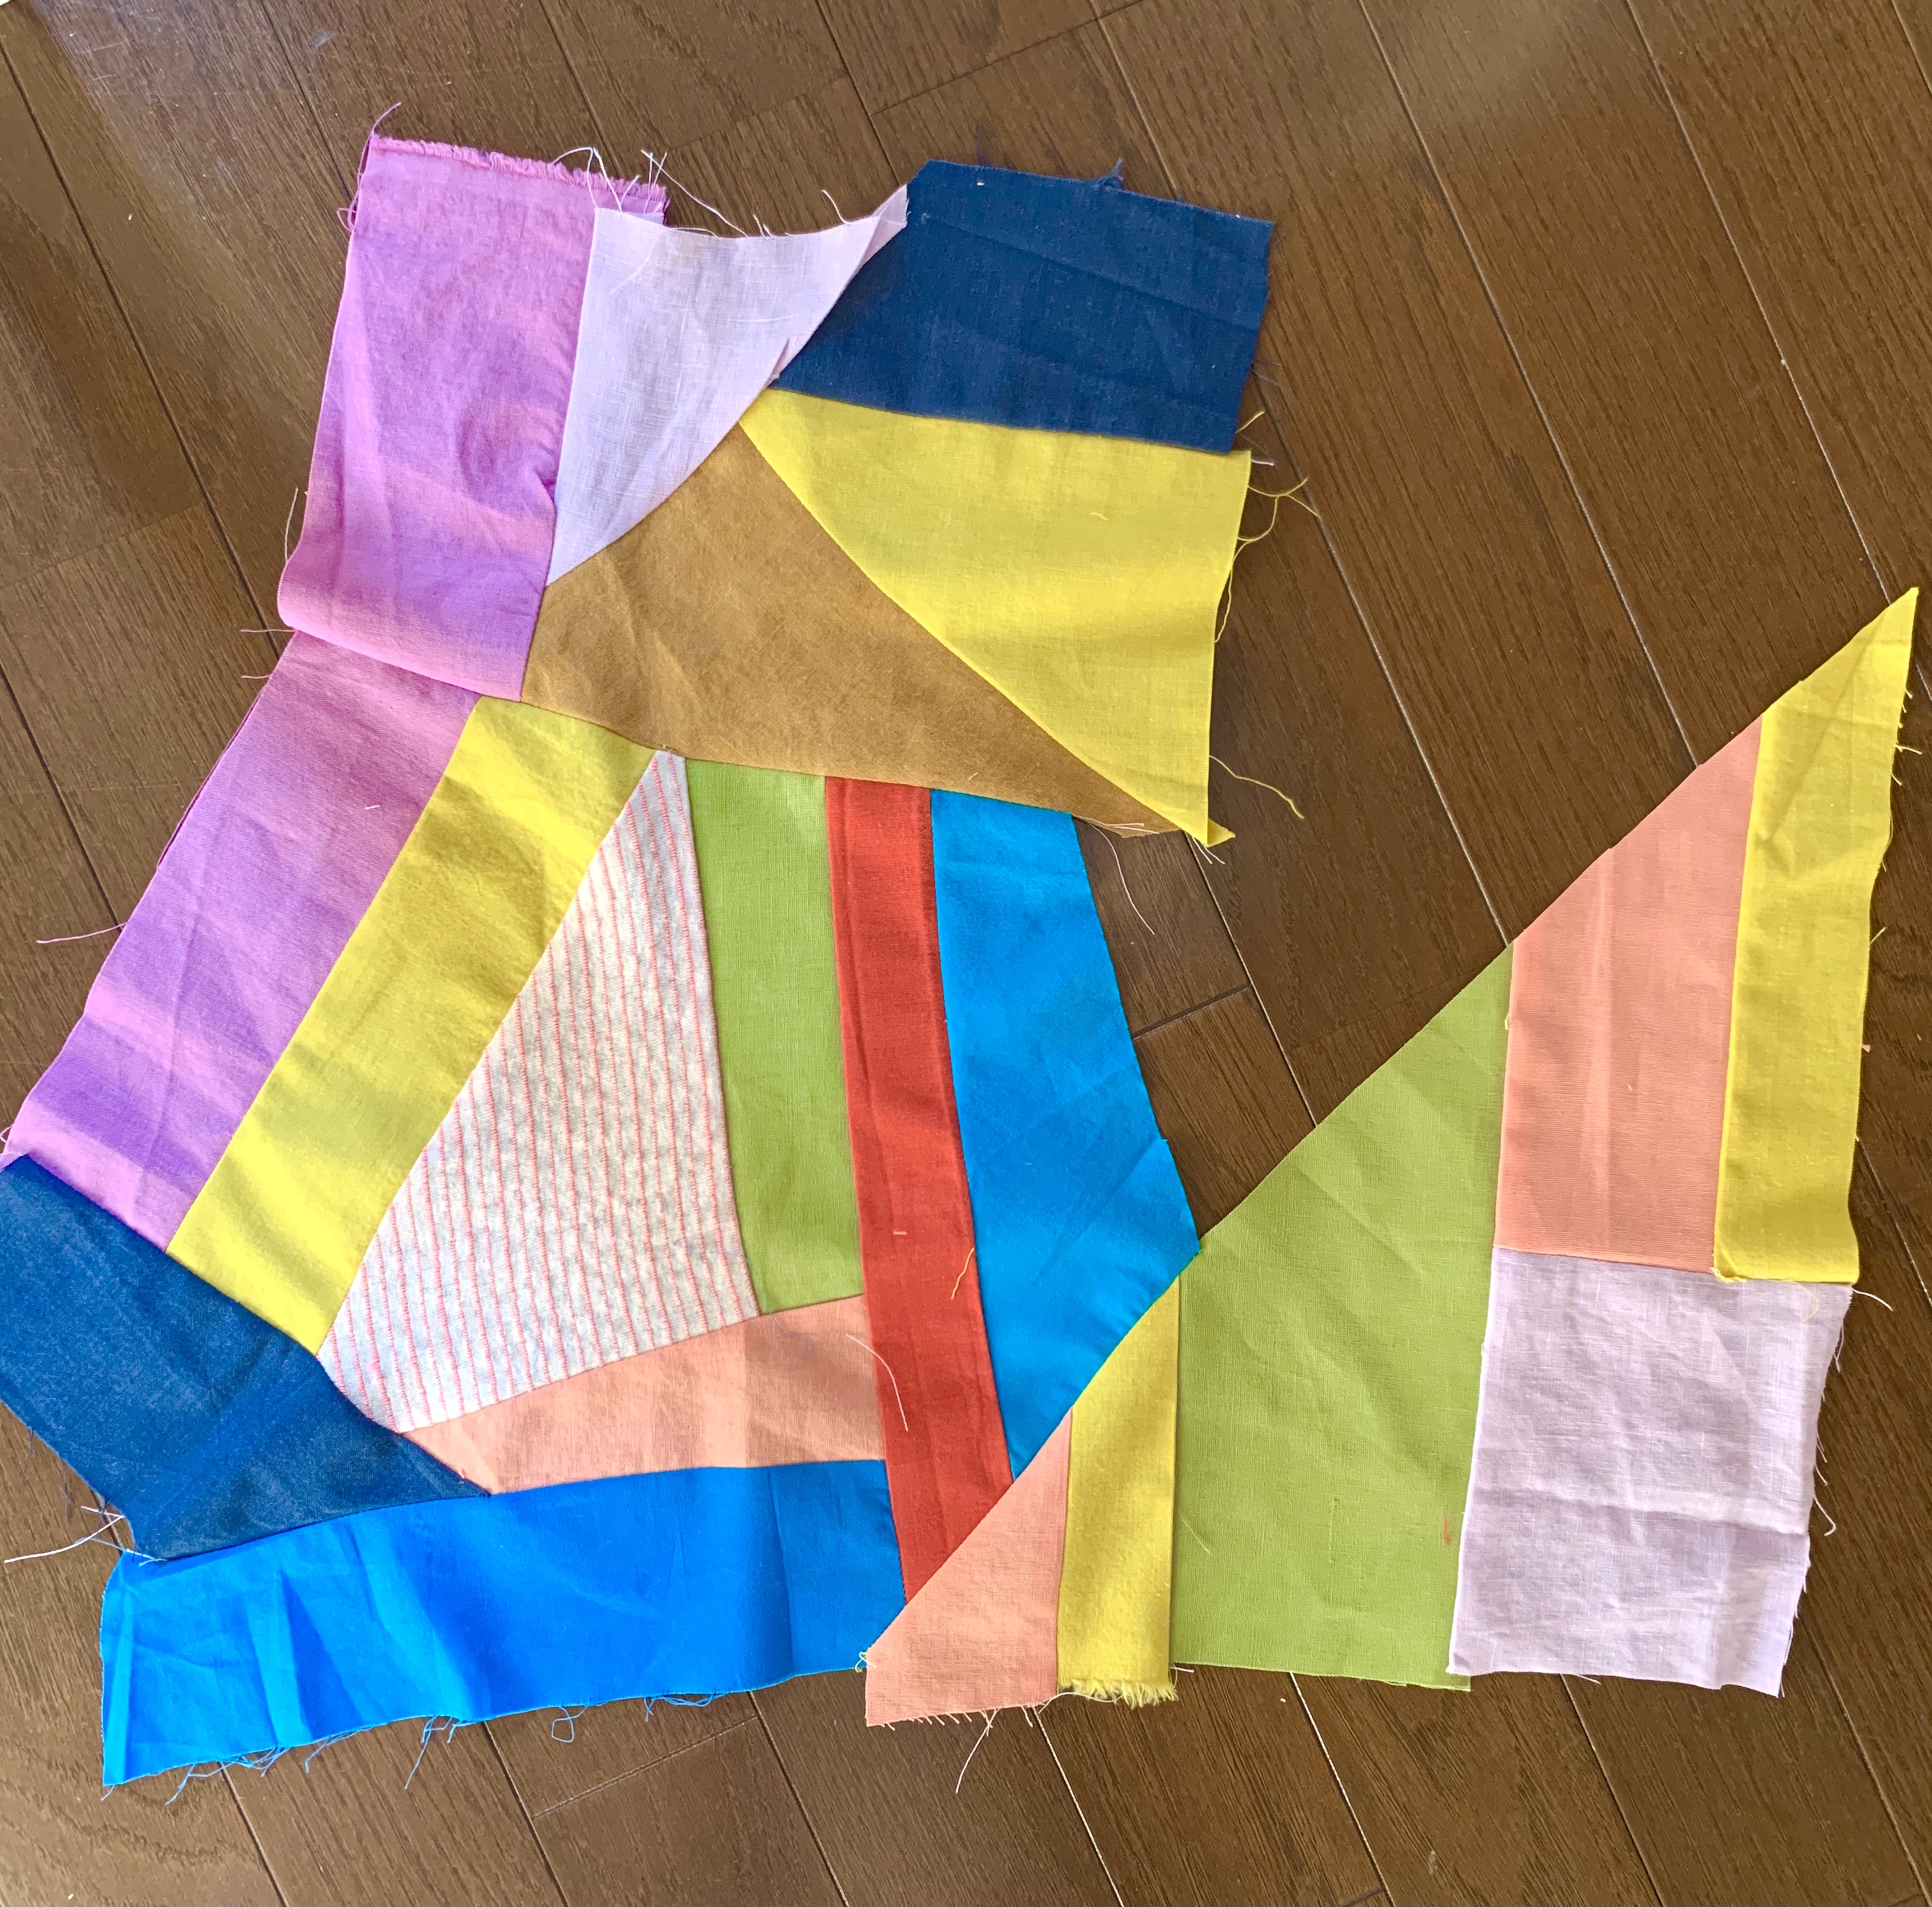
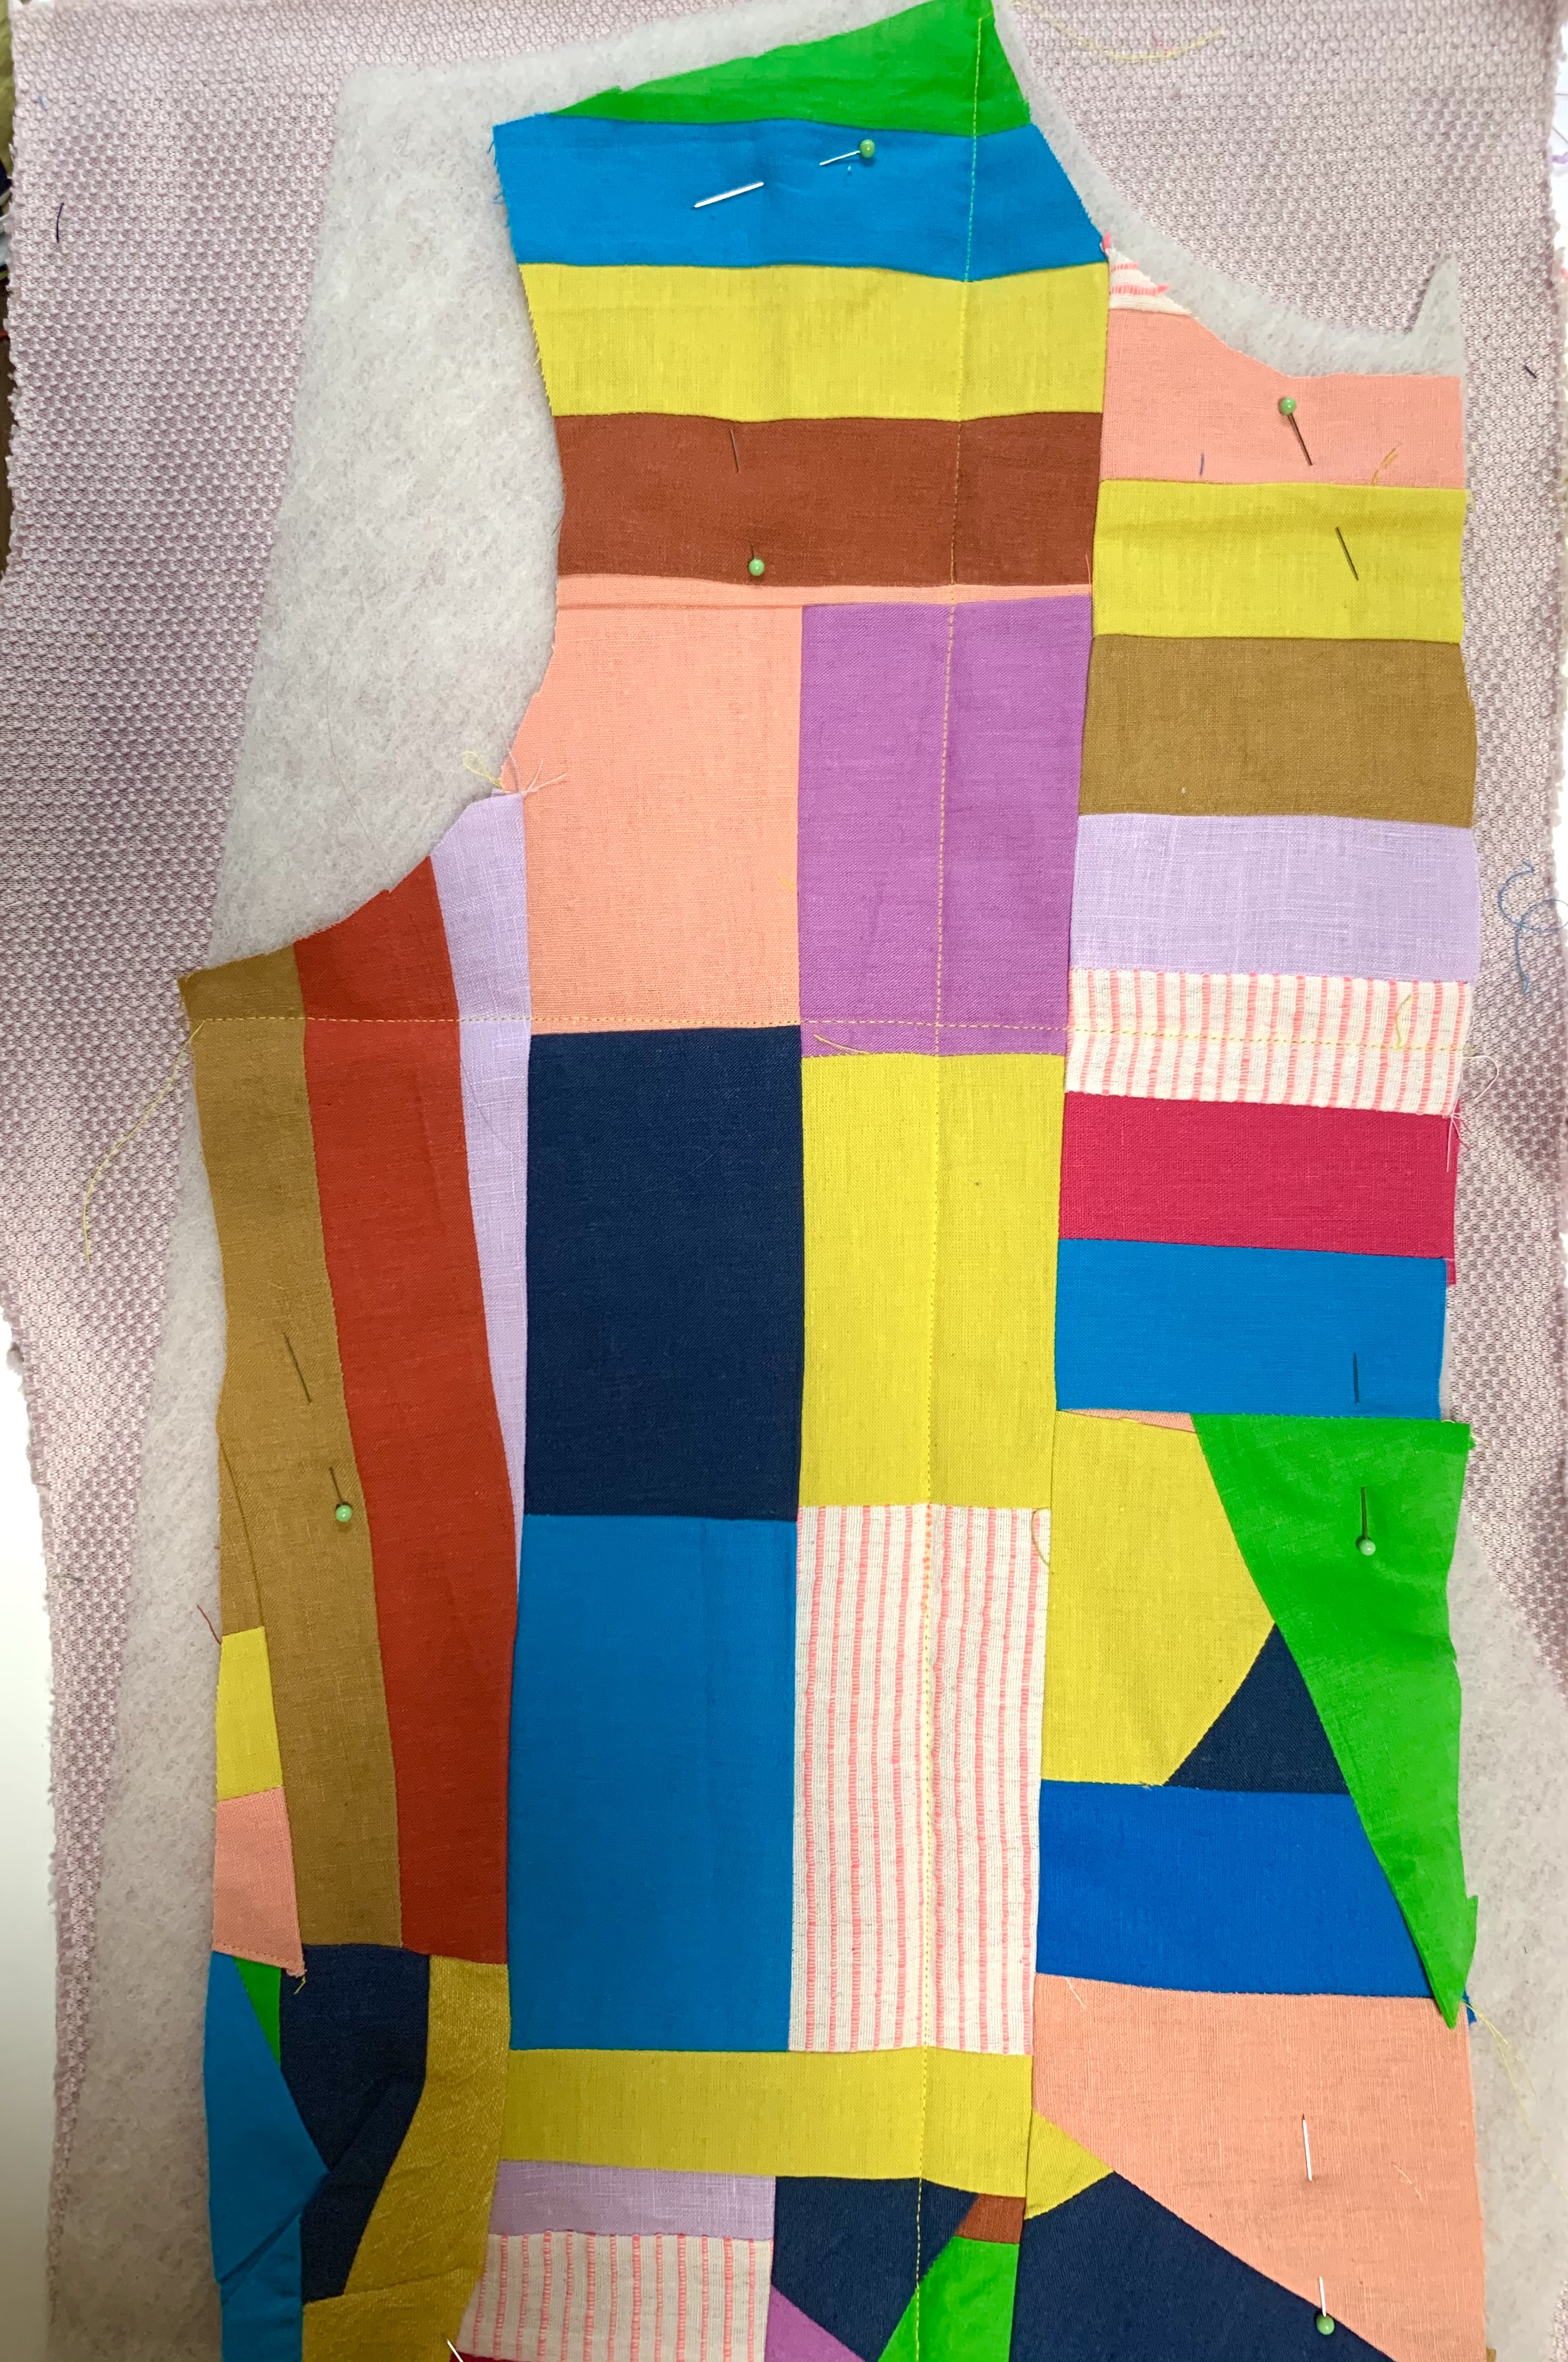
I first laid all my scraps out and found the colors I liked together (I know, from the looks of this jacket you probably think I didn’t limit the colors at all—- but I did!).
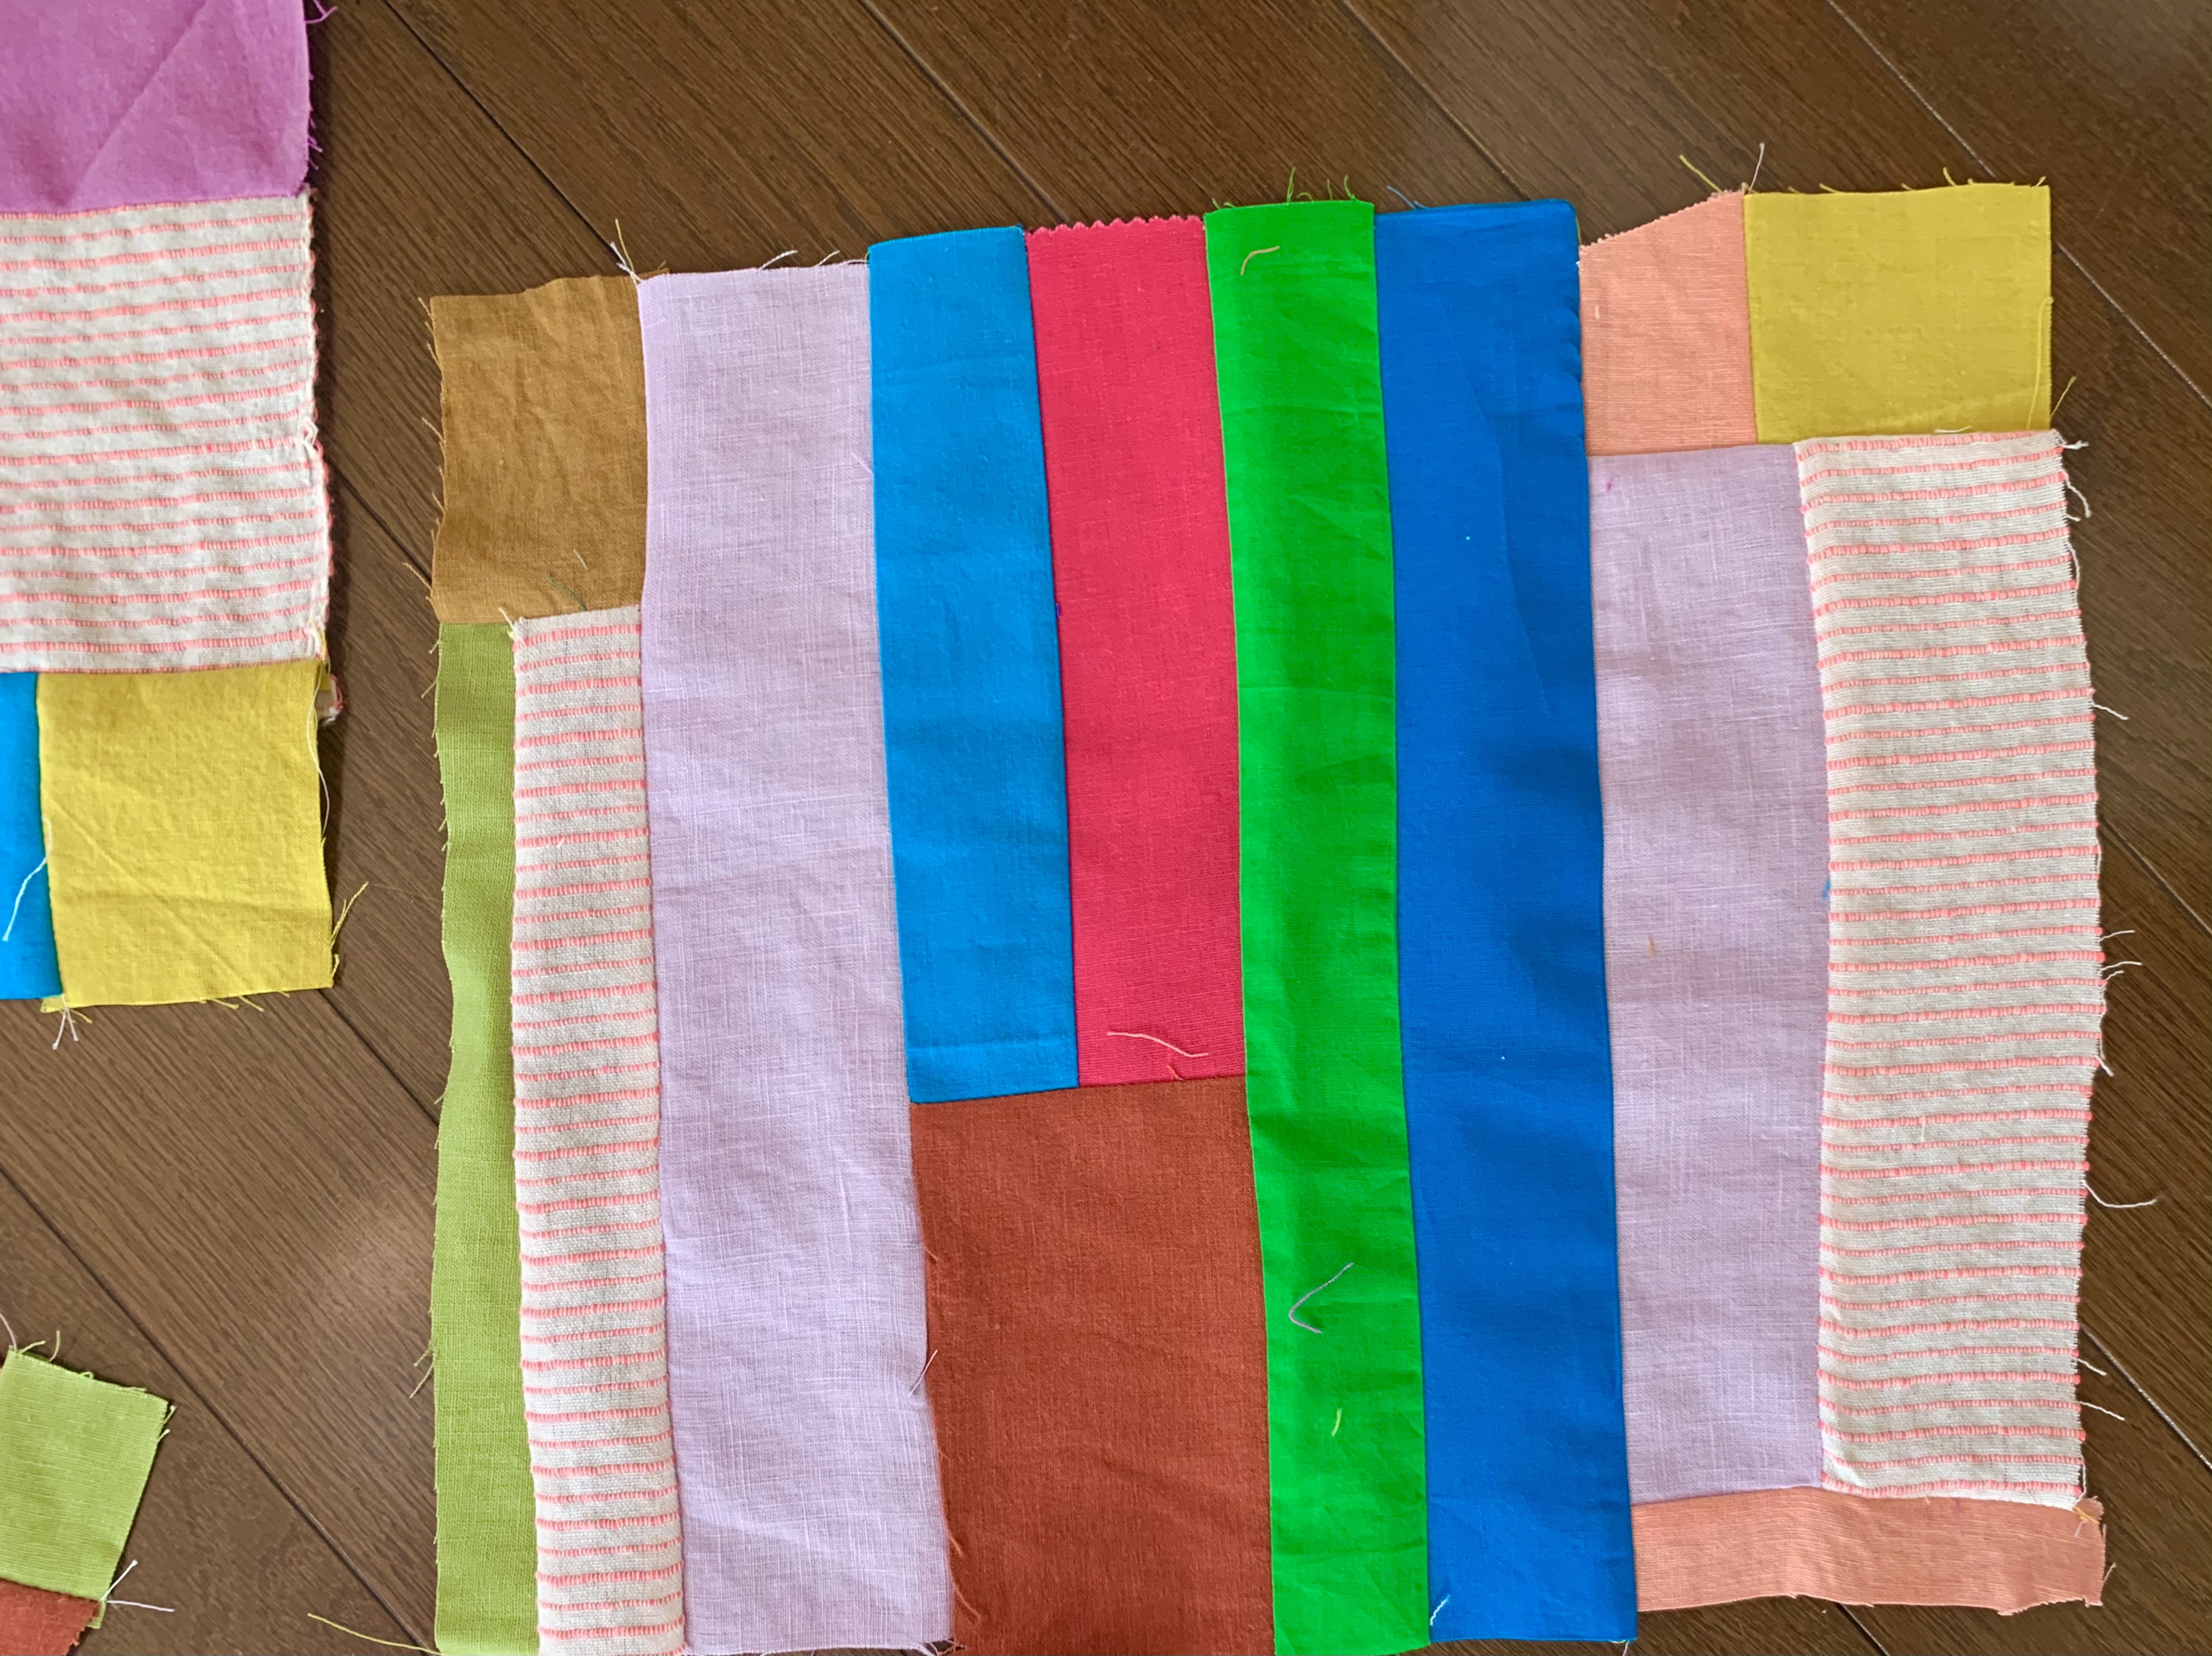
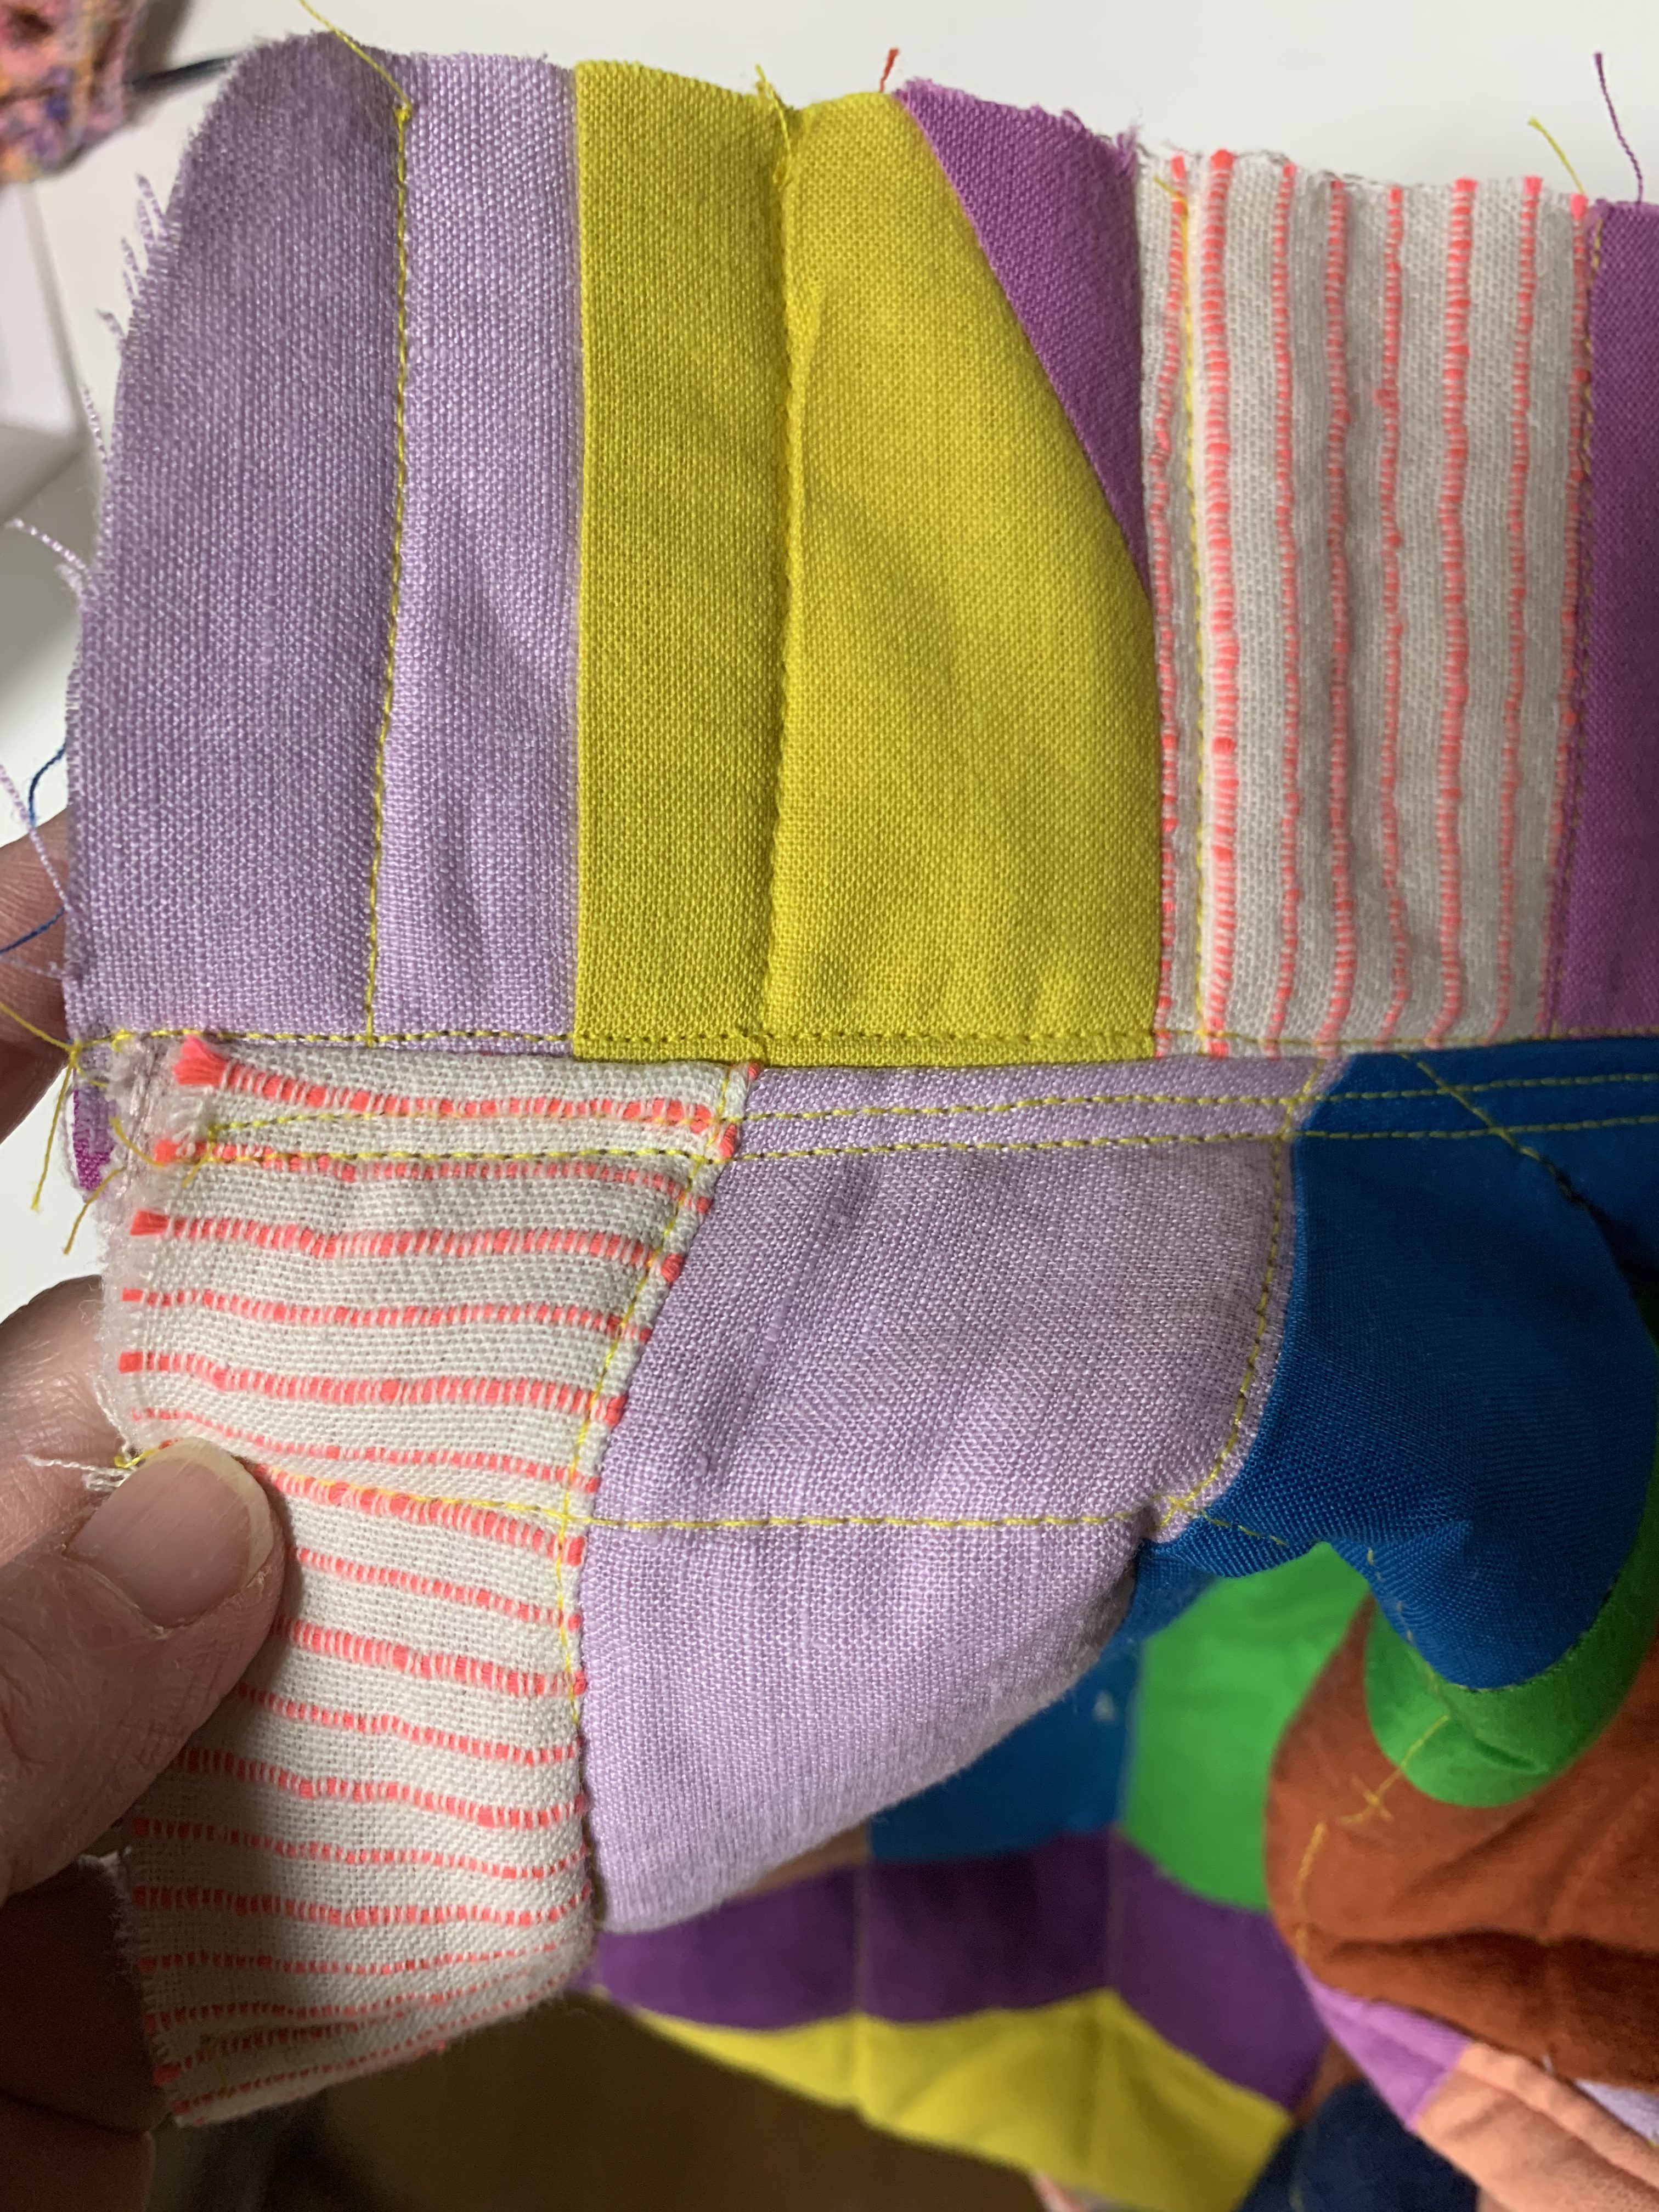
I cut some of the scraps into strips and then sewed the strips together as you see above.
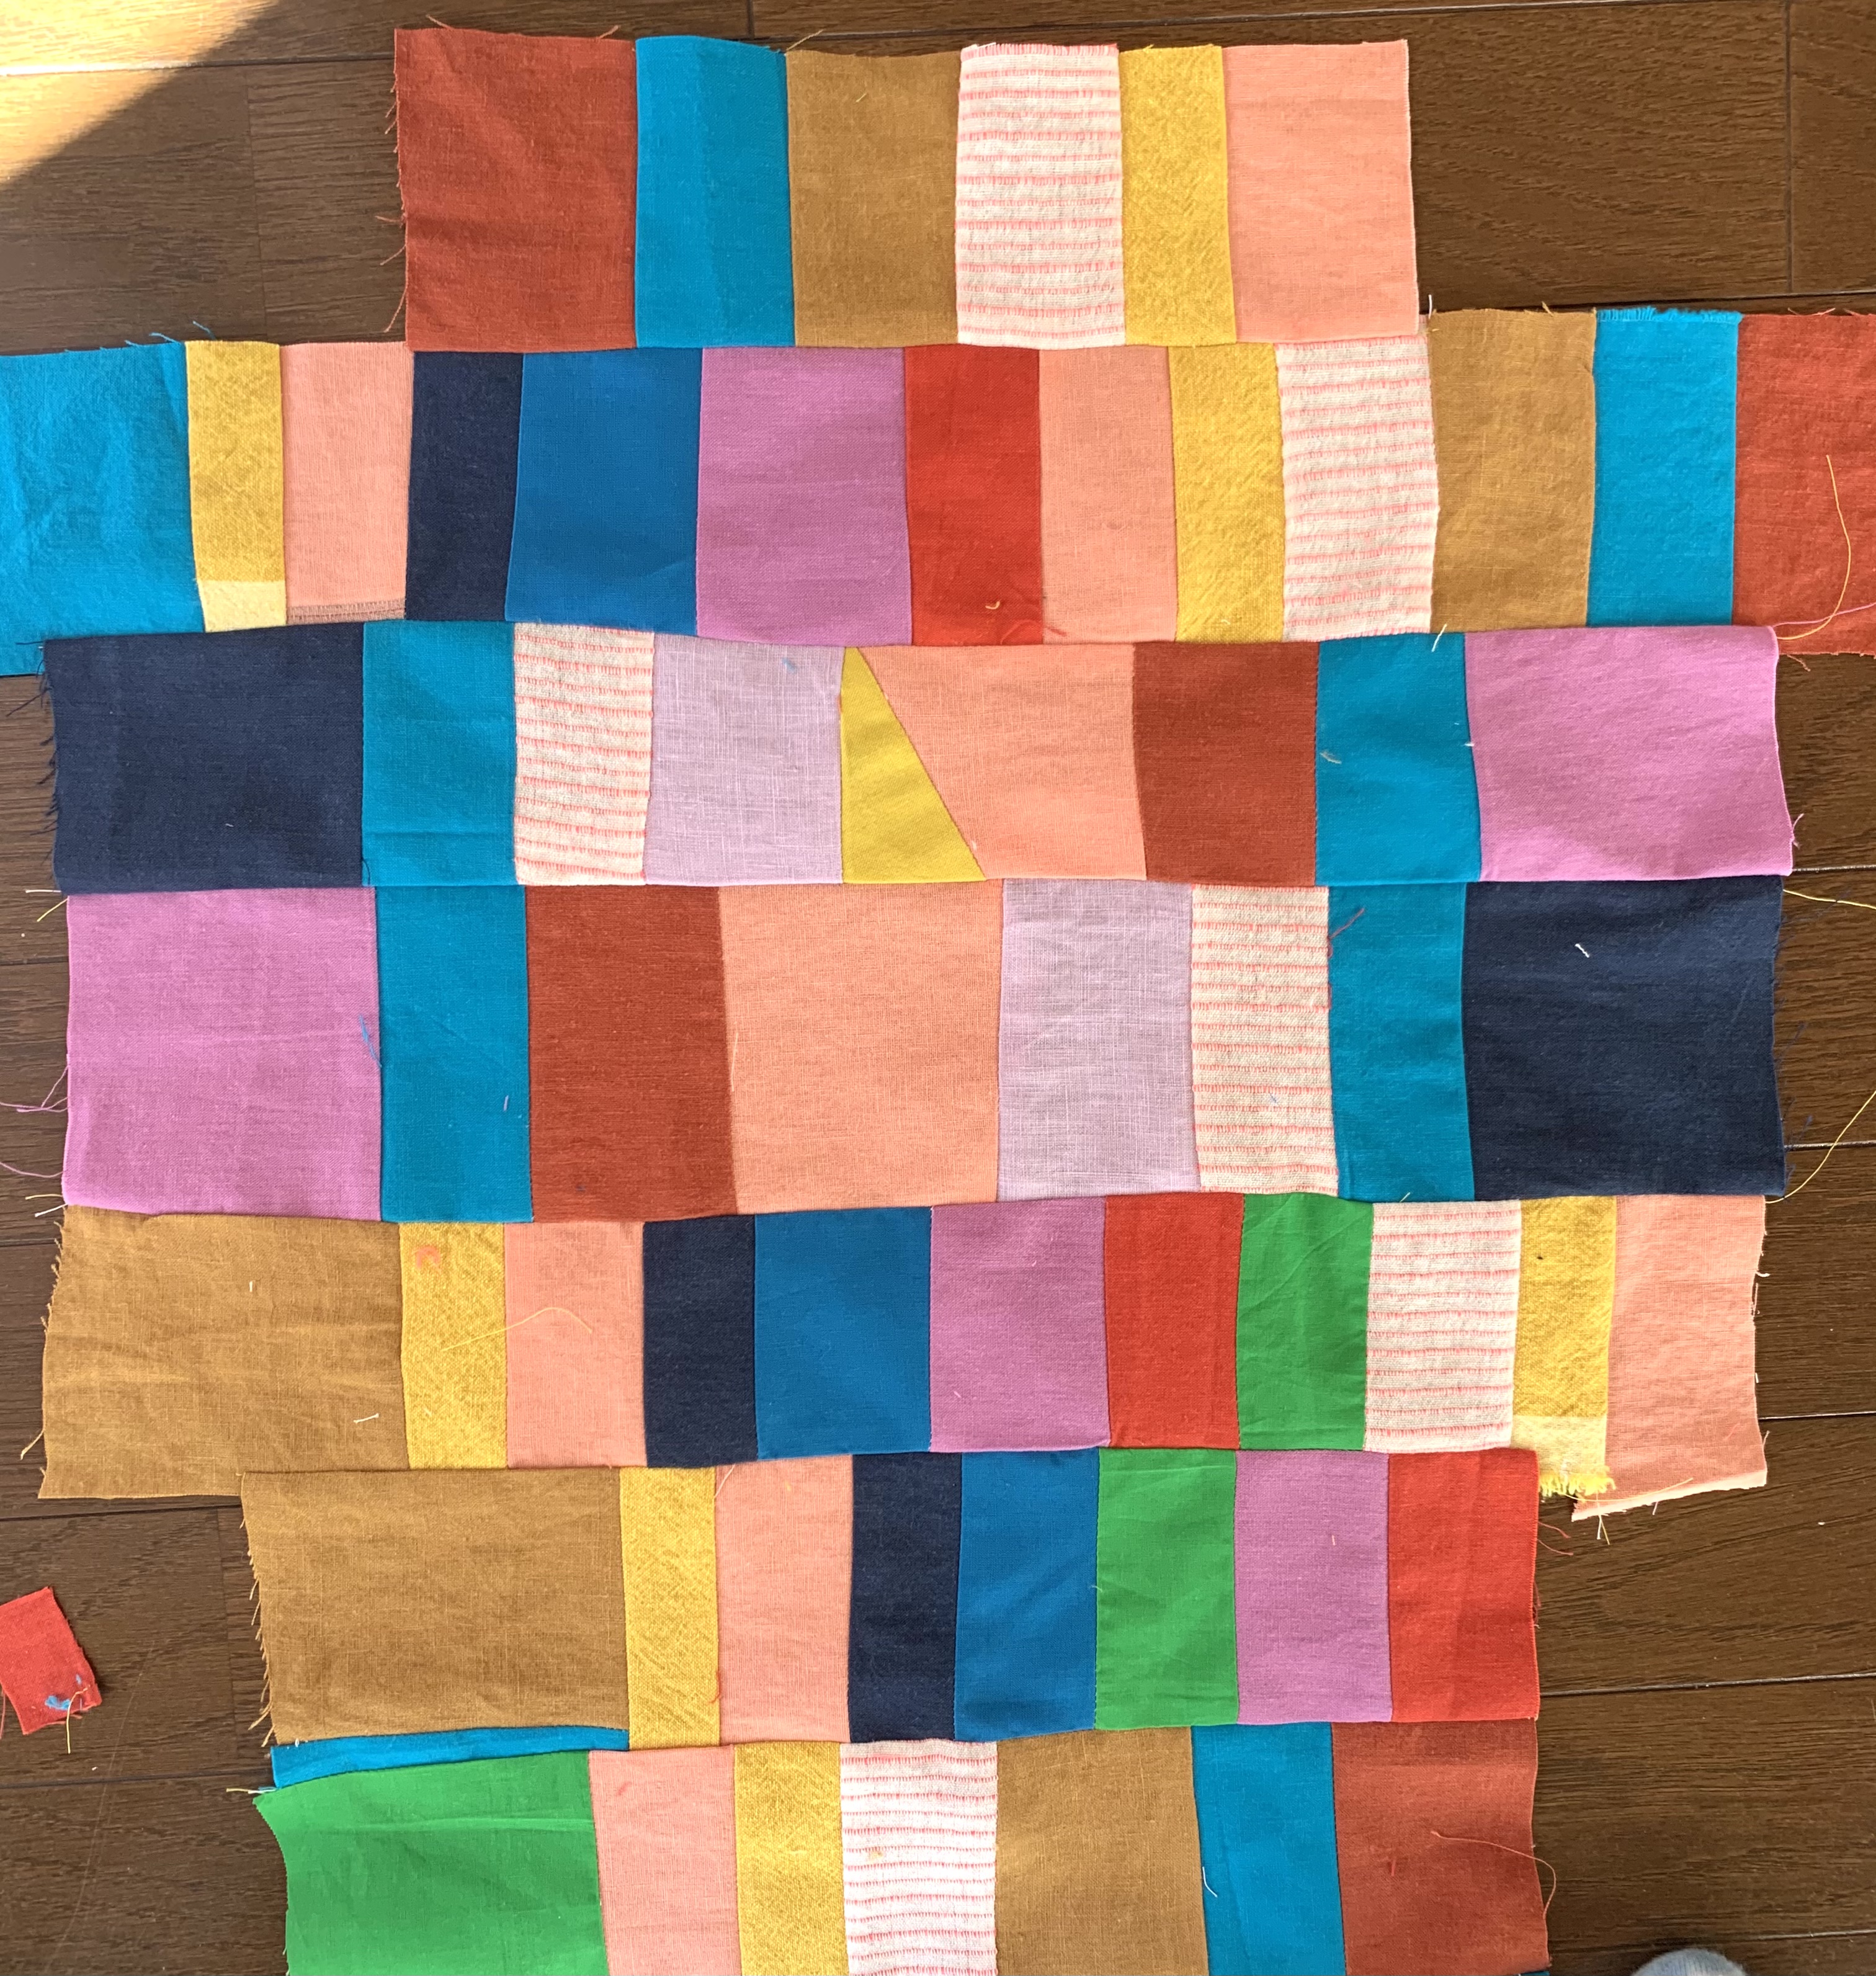
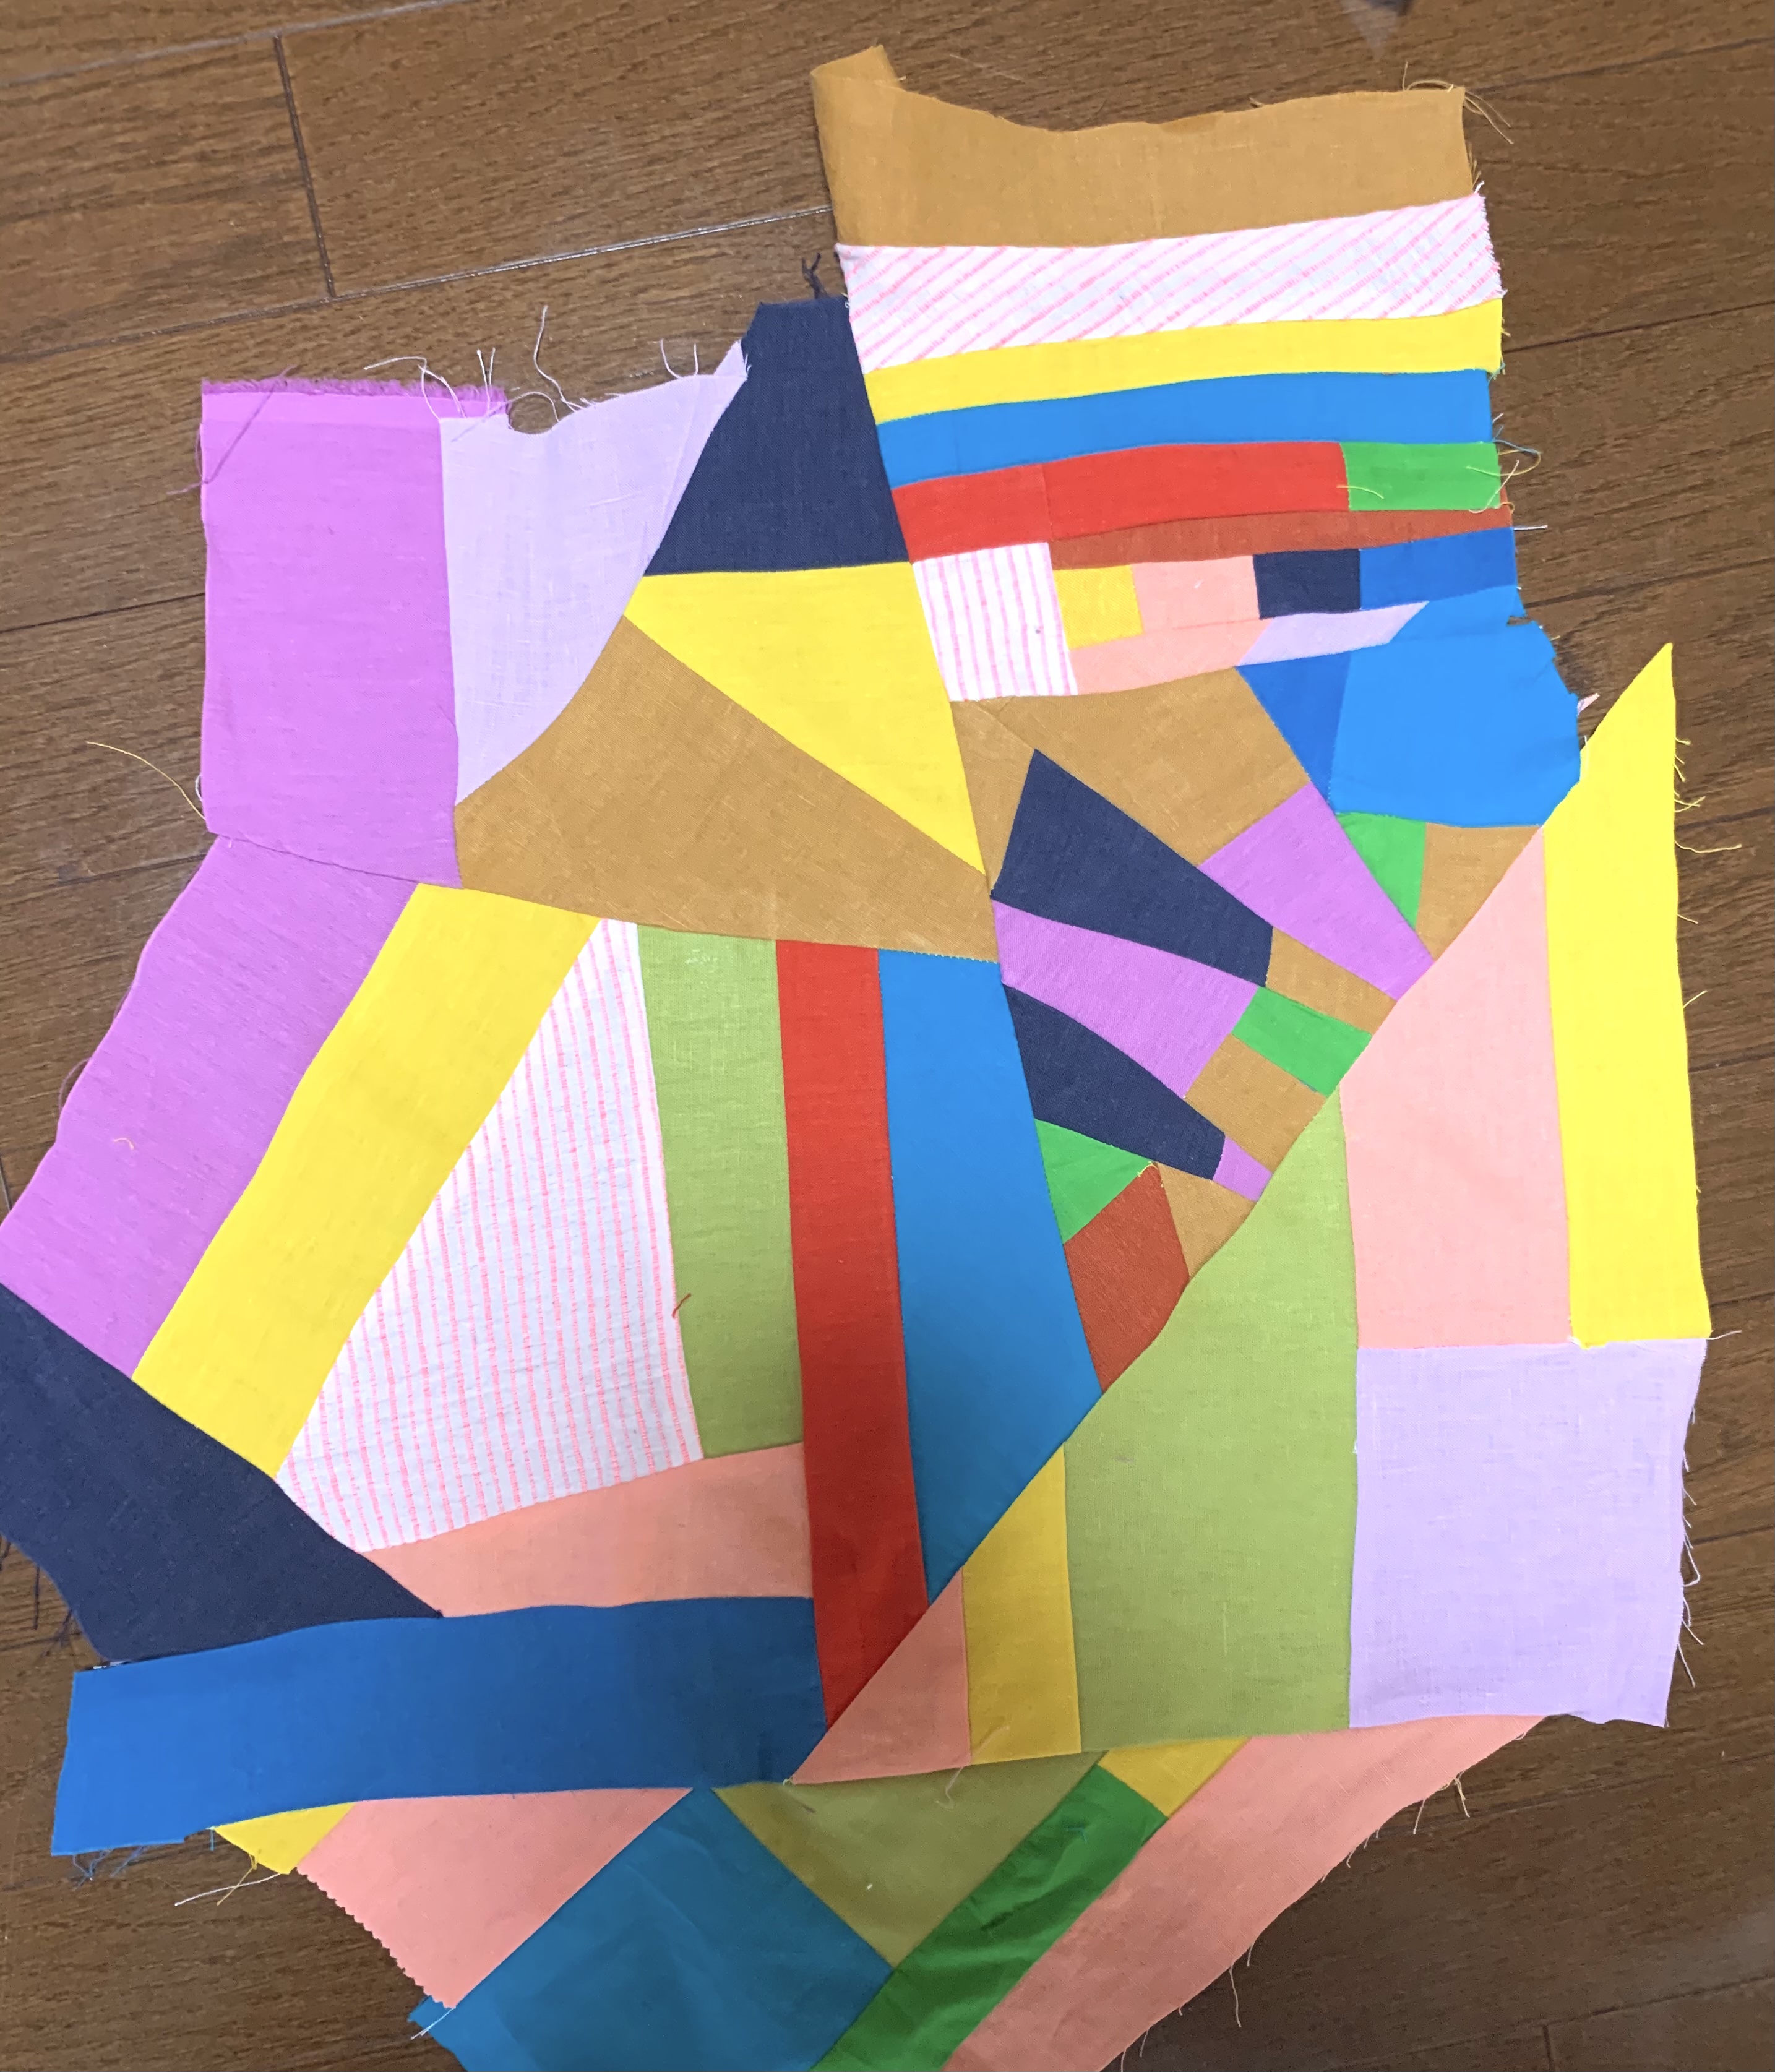
For the sleeves, I then cut those into new strips and sewed them together as you see here! You can do all sorts of things with those strips and I will show you more below.
Here you can see me piecing the strips plus other odd shapes of scraps together. It is fun to make it up as you go! If you ever get a weird section that doesn’t lie flat when you iron it (definitely iron sections as you go!!) all you need to do is:
1. Fold over that section that bubbles up and iron it flat
2. Flip the piece over and find the piece that you folded. In this spot just sew a seam to bring the extra fabric to the backside rather than the front.
Another option would be to stitch that section down on the top/right side.
In an effort to not waste time or fabric, I kept checking the size of my pattern pieces as I made the patchwork. More about that below!
Cutting the Jacket Pattern

As I made the strips and sewed them together, I would lie them on top of the pattern pieces to see how much more fabric was needed for that part of the jacket.
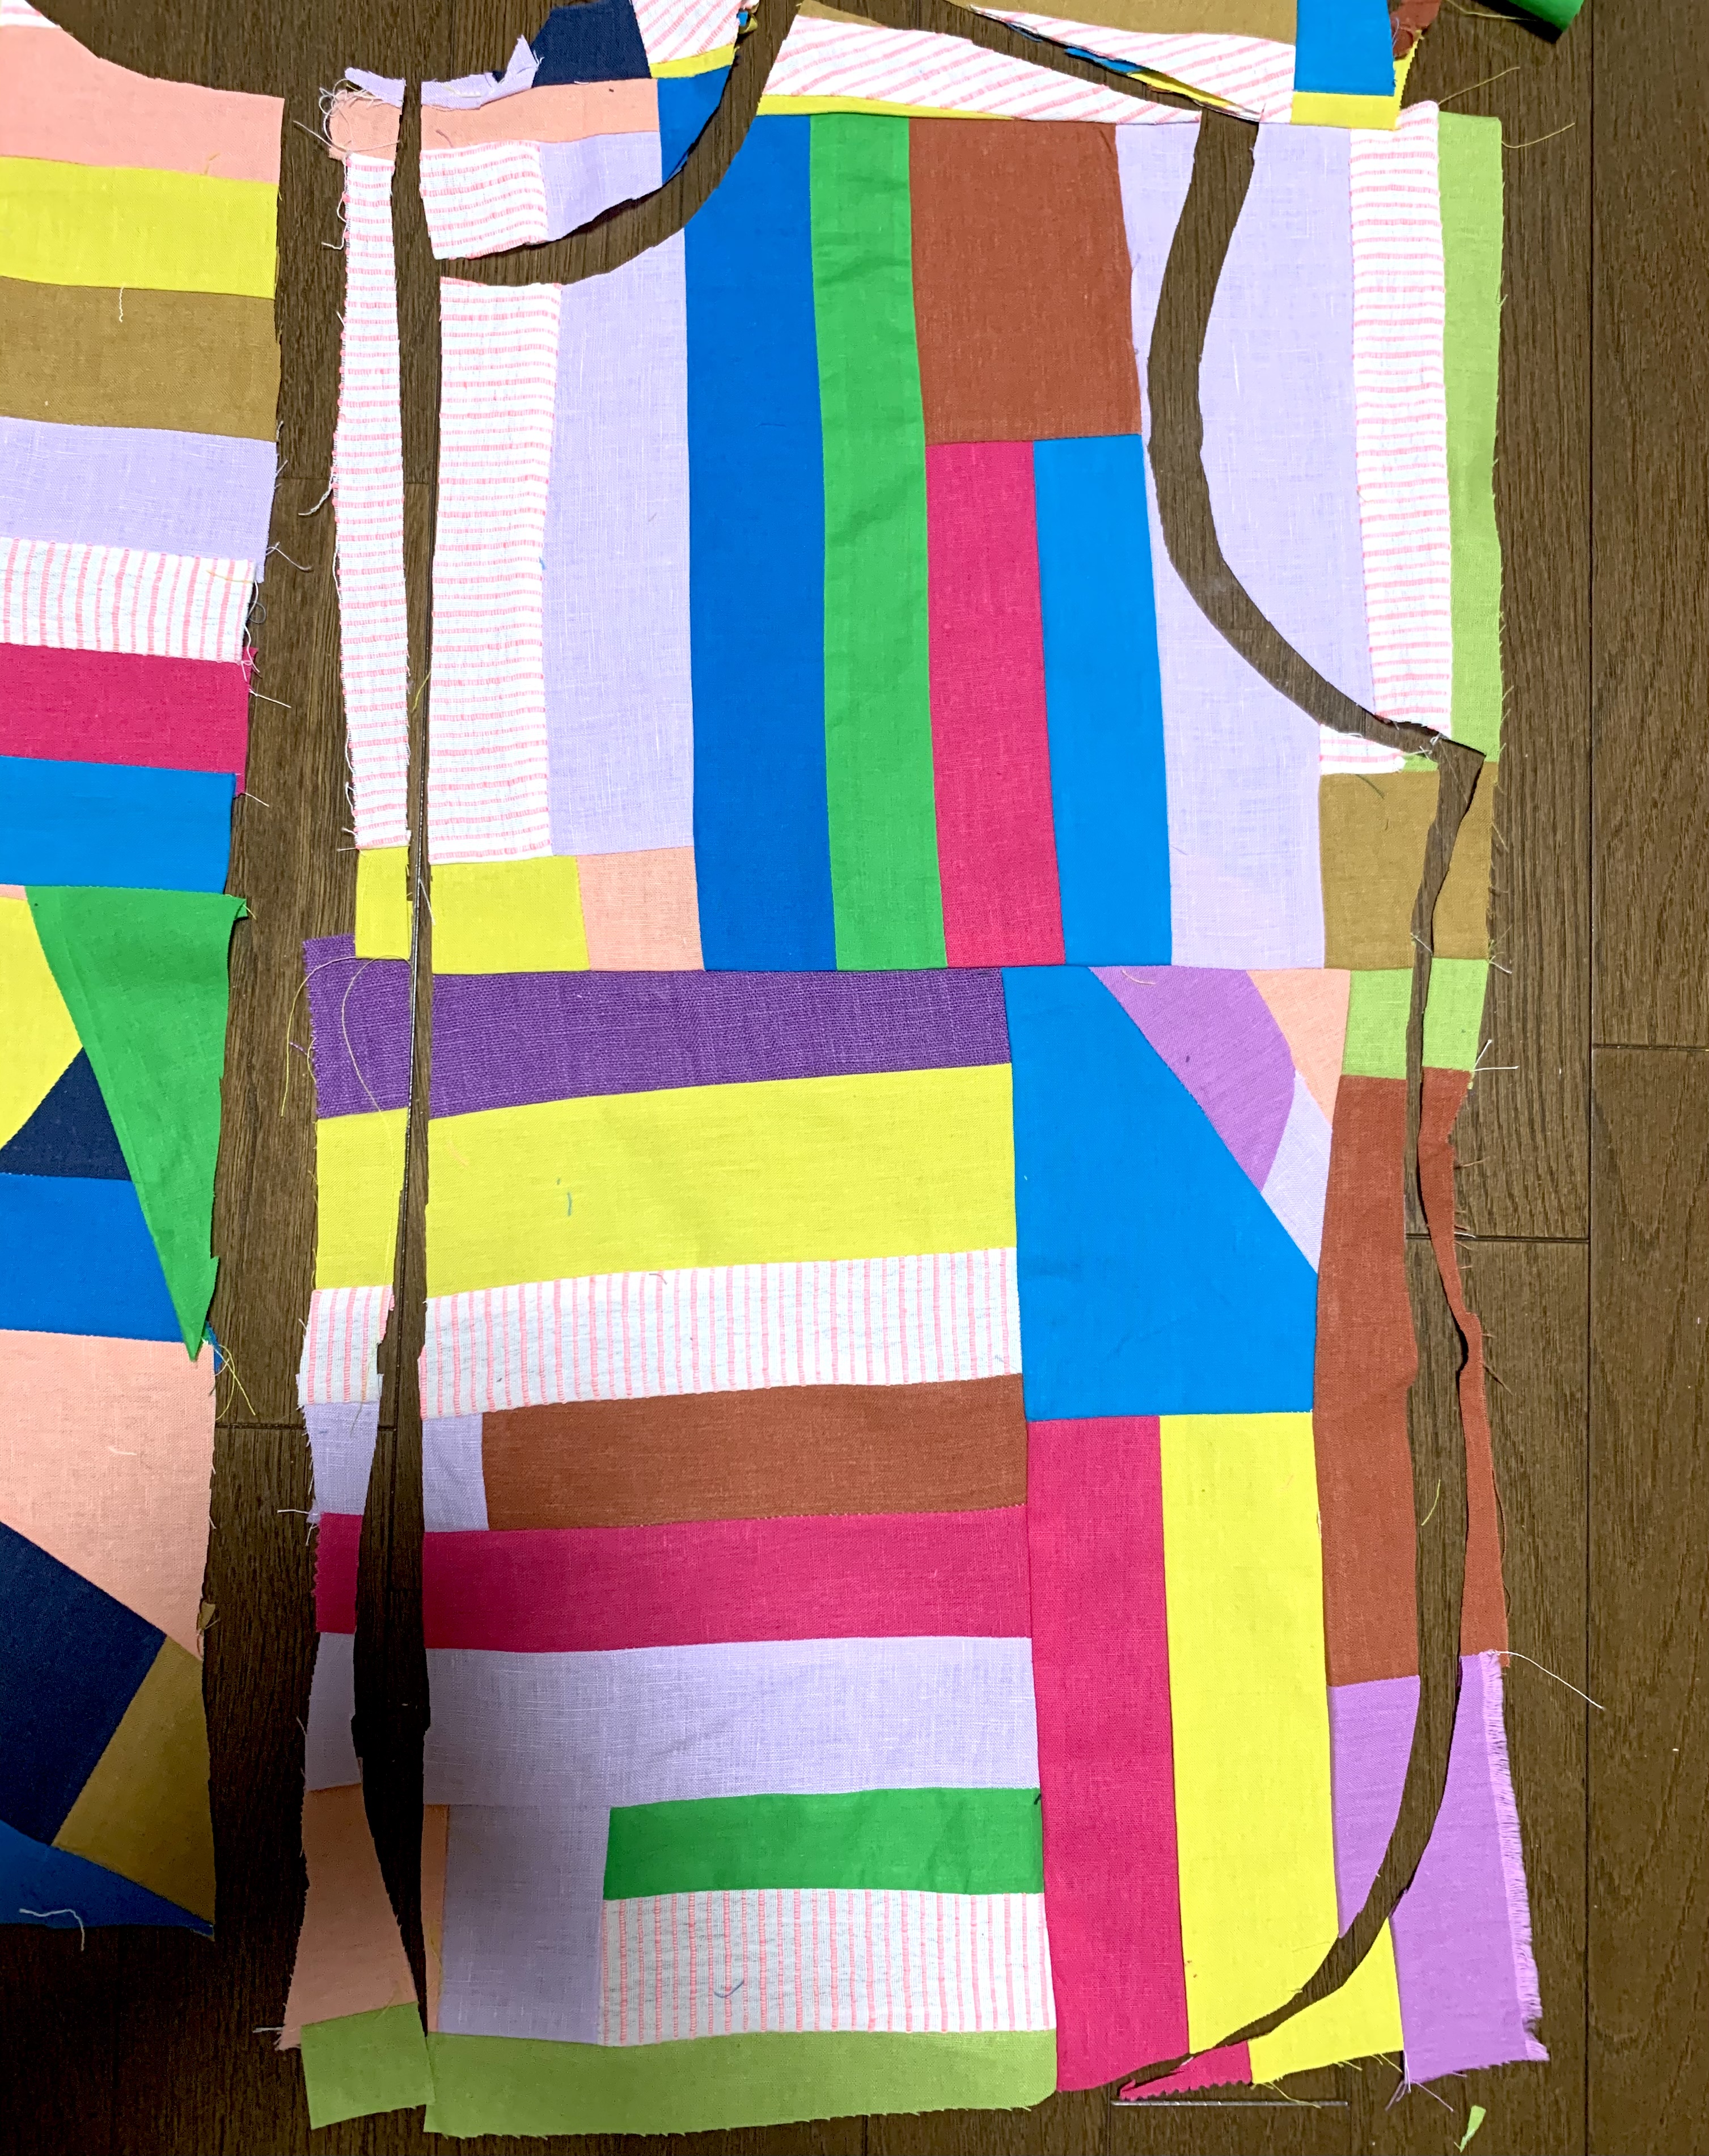
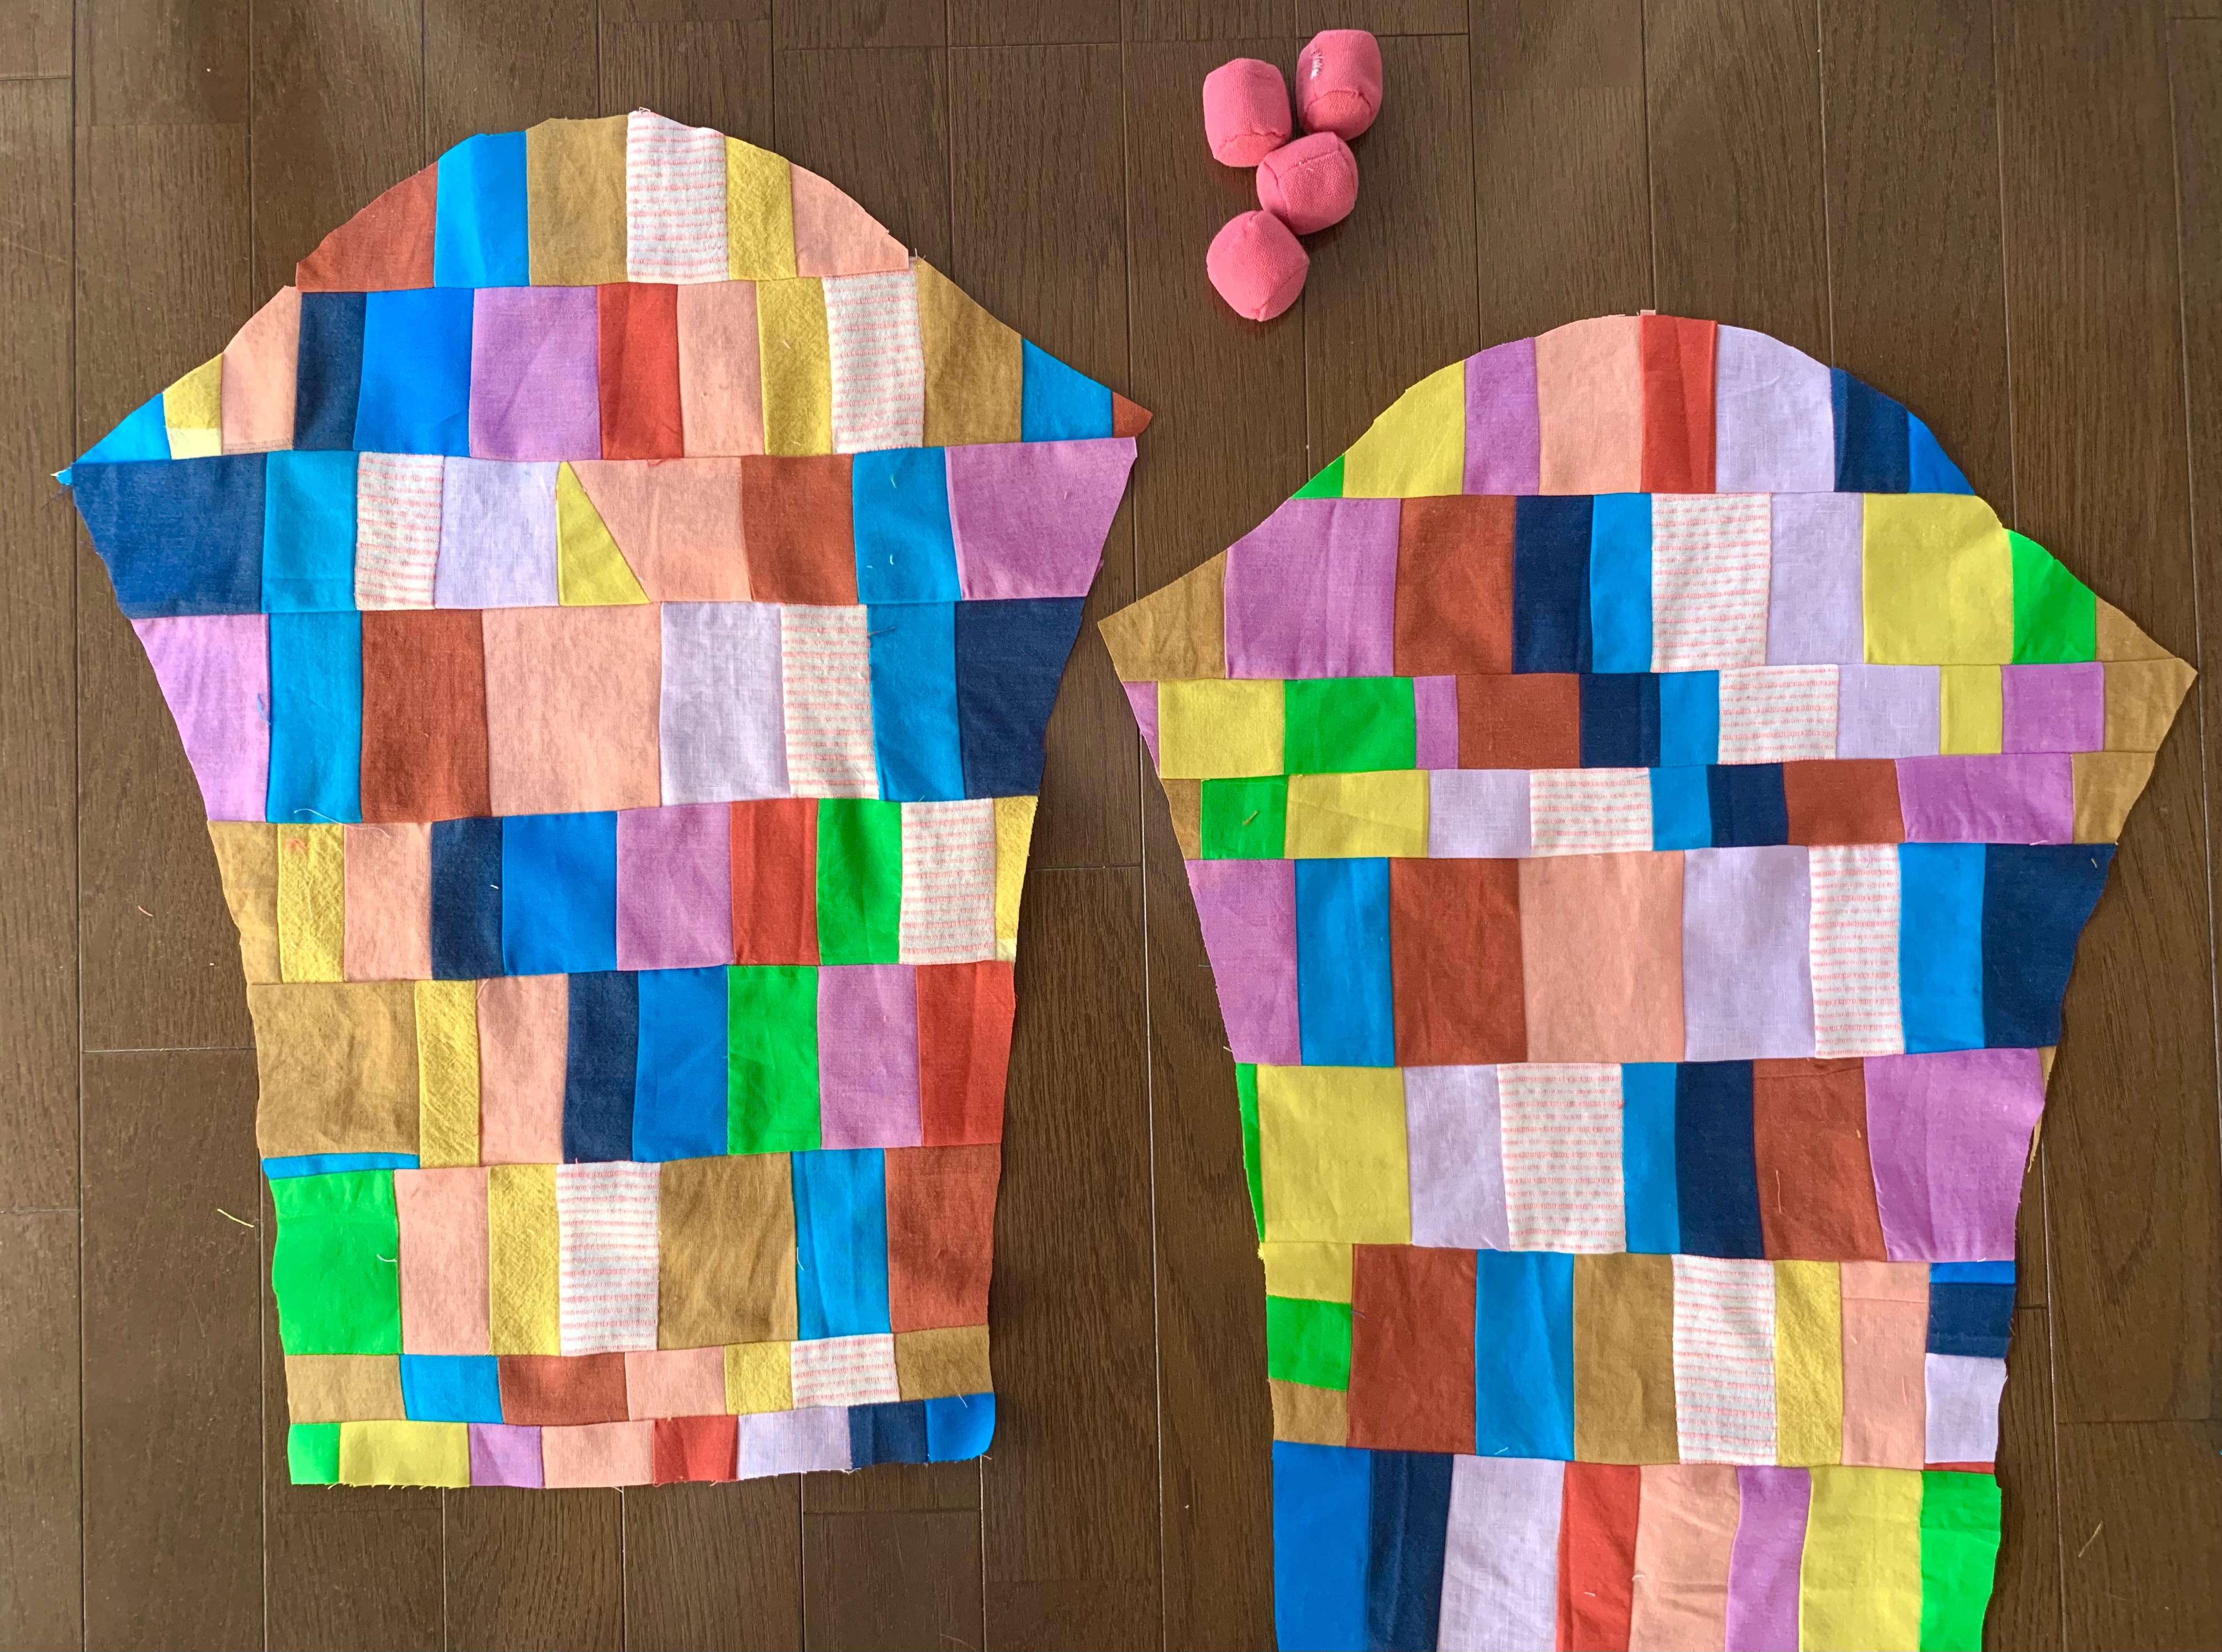
As you can see here it was helpful to do it this way, because there were very little scraps of my scrappy project left! I also liked being able to visualize how the front and back of the jacket would be as I continued to make scrap-piecing decisions.
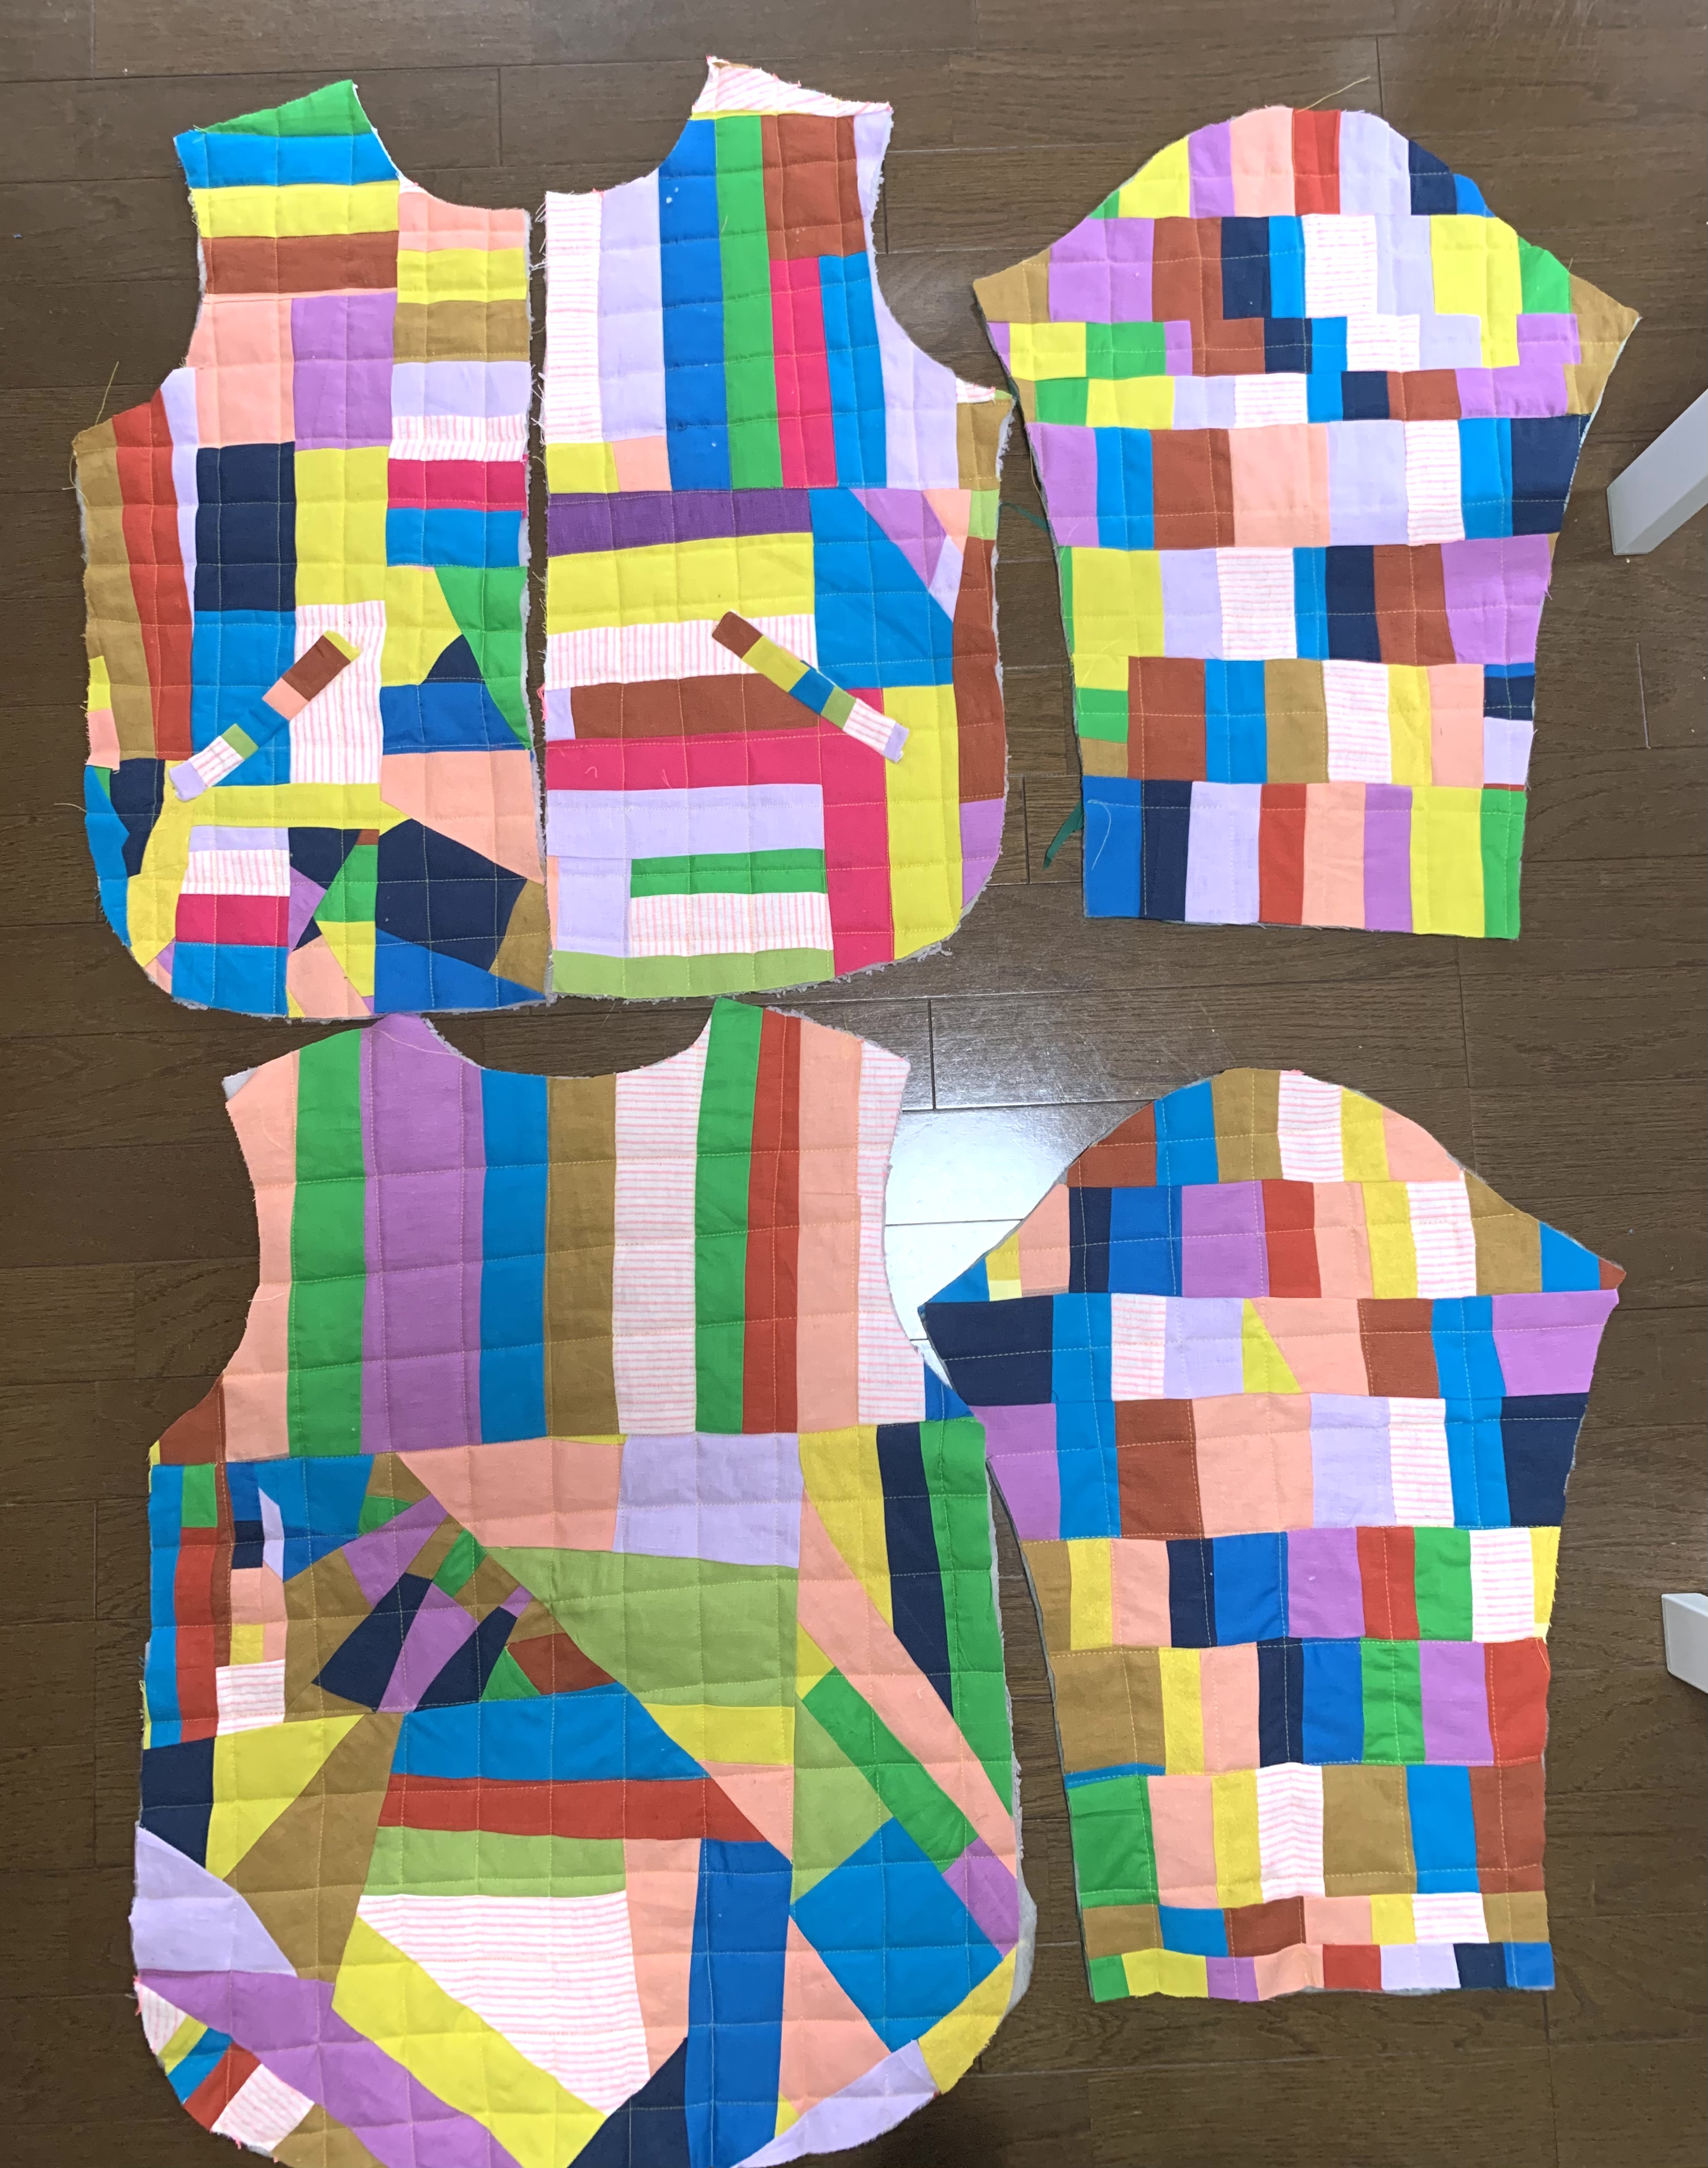
These 4 pieces of the quilted jacket are the result of lots of improv patchworking of my scraps, but also lots of lying them on the pattern pieces to see what I liked where! It’s a back and forth process!
Quilting the Jacket Pieces
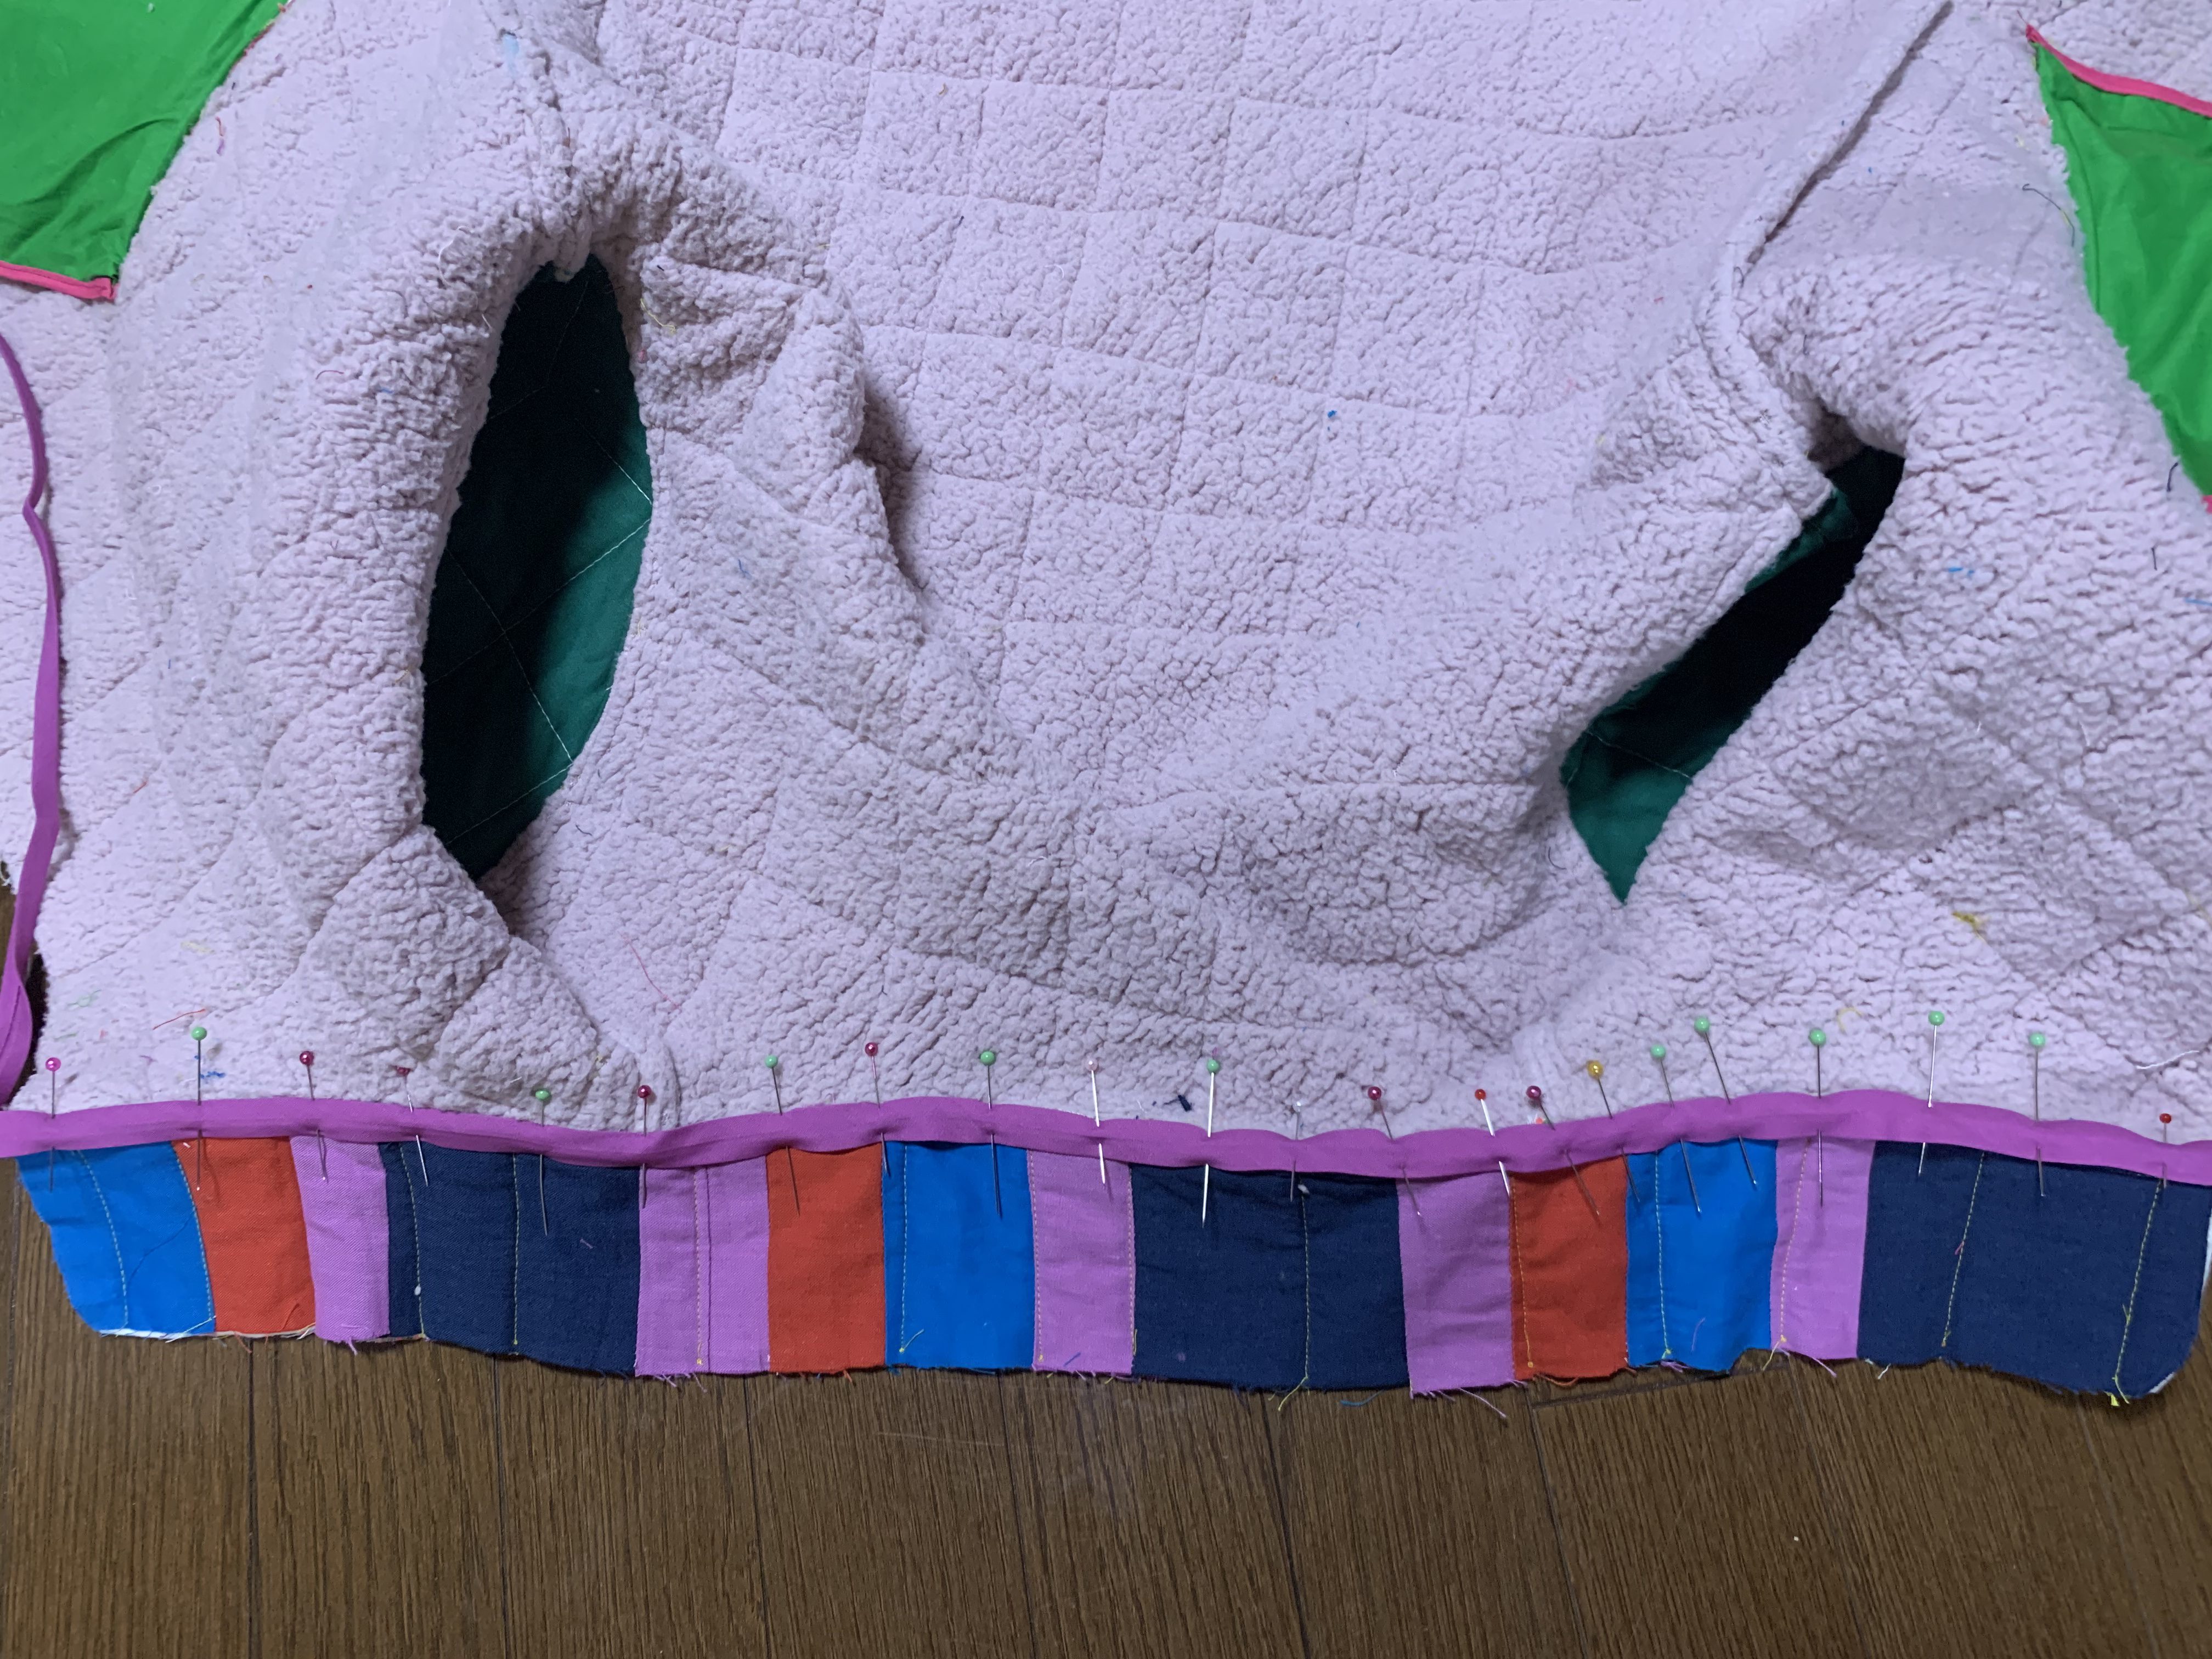
You will want to lie the layers flat together (I used low-loft batting in between the top and the Sherpa). Then straight pin or safety-pin them together. It is good to have the bottom layers extend a little bit past the edges of the pattern piece so that if anything moves (like if you don’t have a walking foot!!), you have room for error.
You can see it looks pretty thick with these layers in your jacket, but I have some tips if you also want to line your jacket with fleece or Sherpa for warmth!
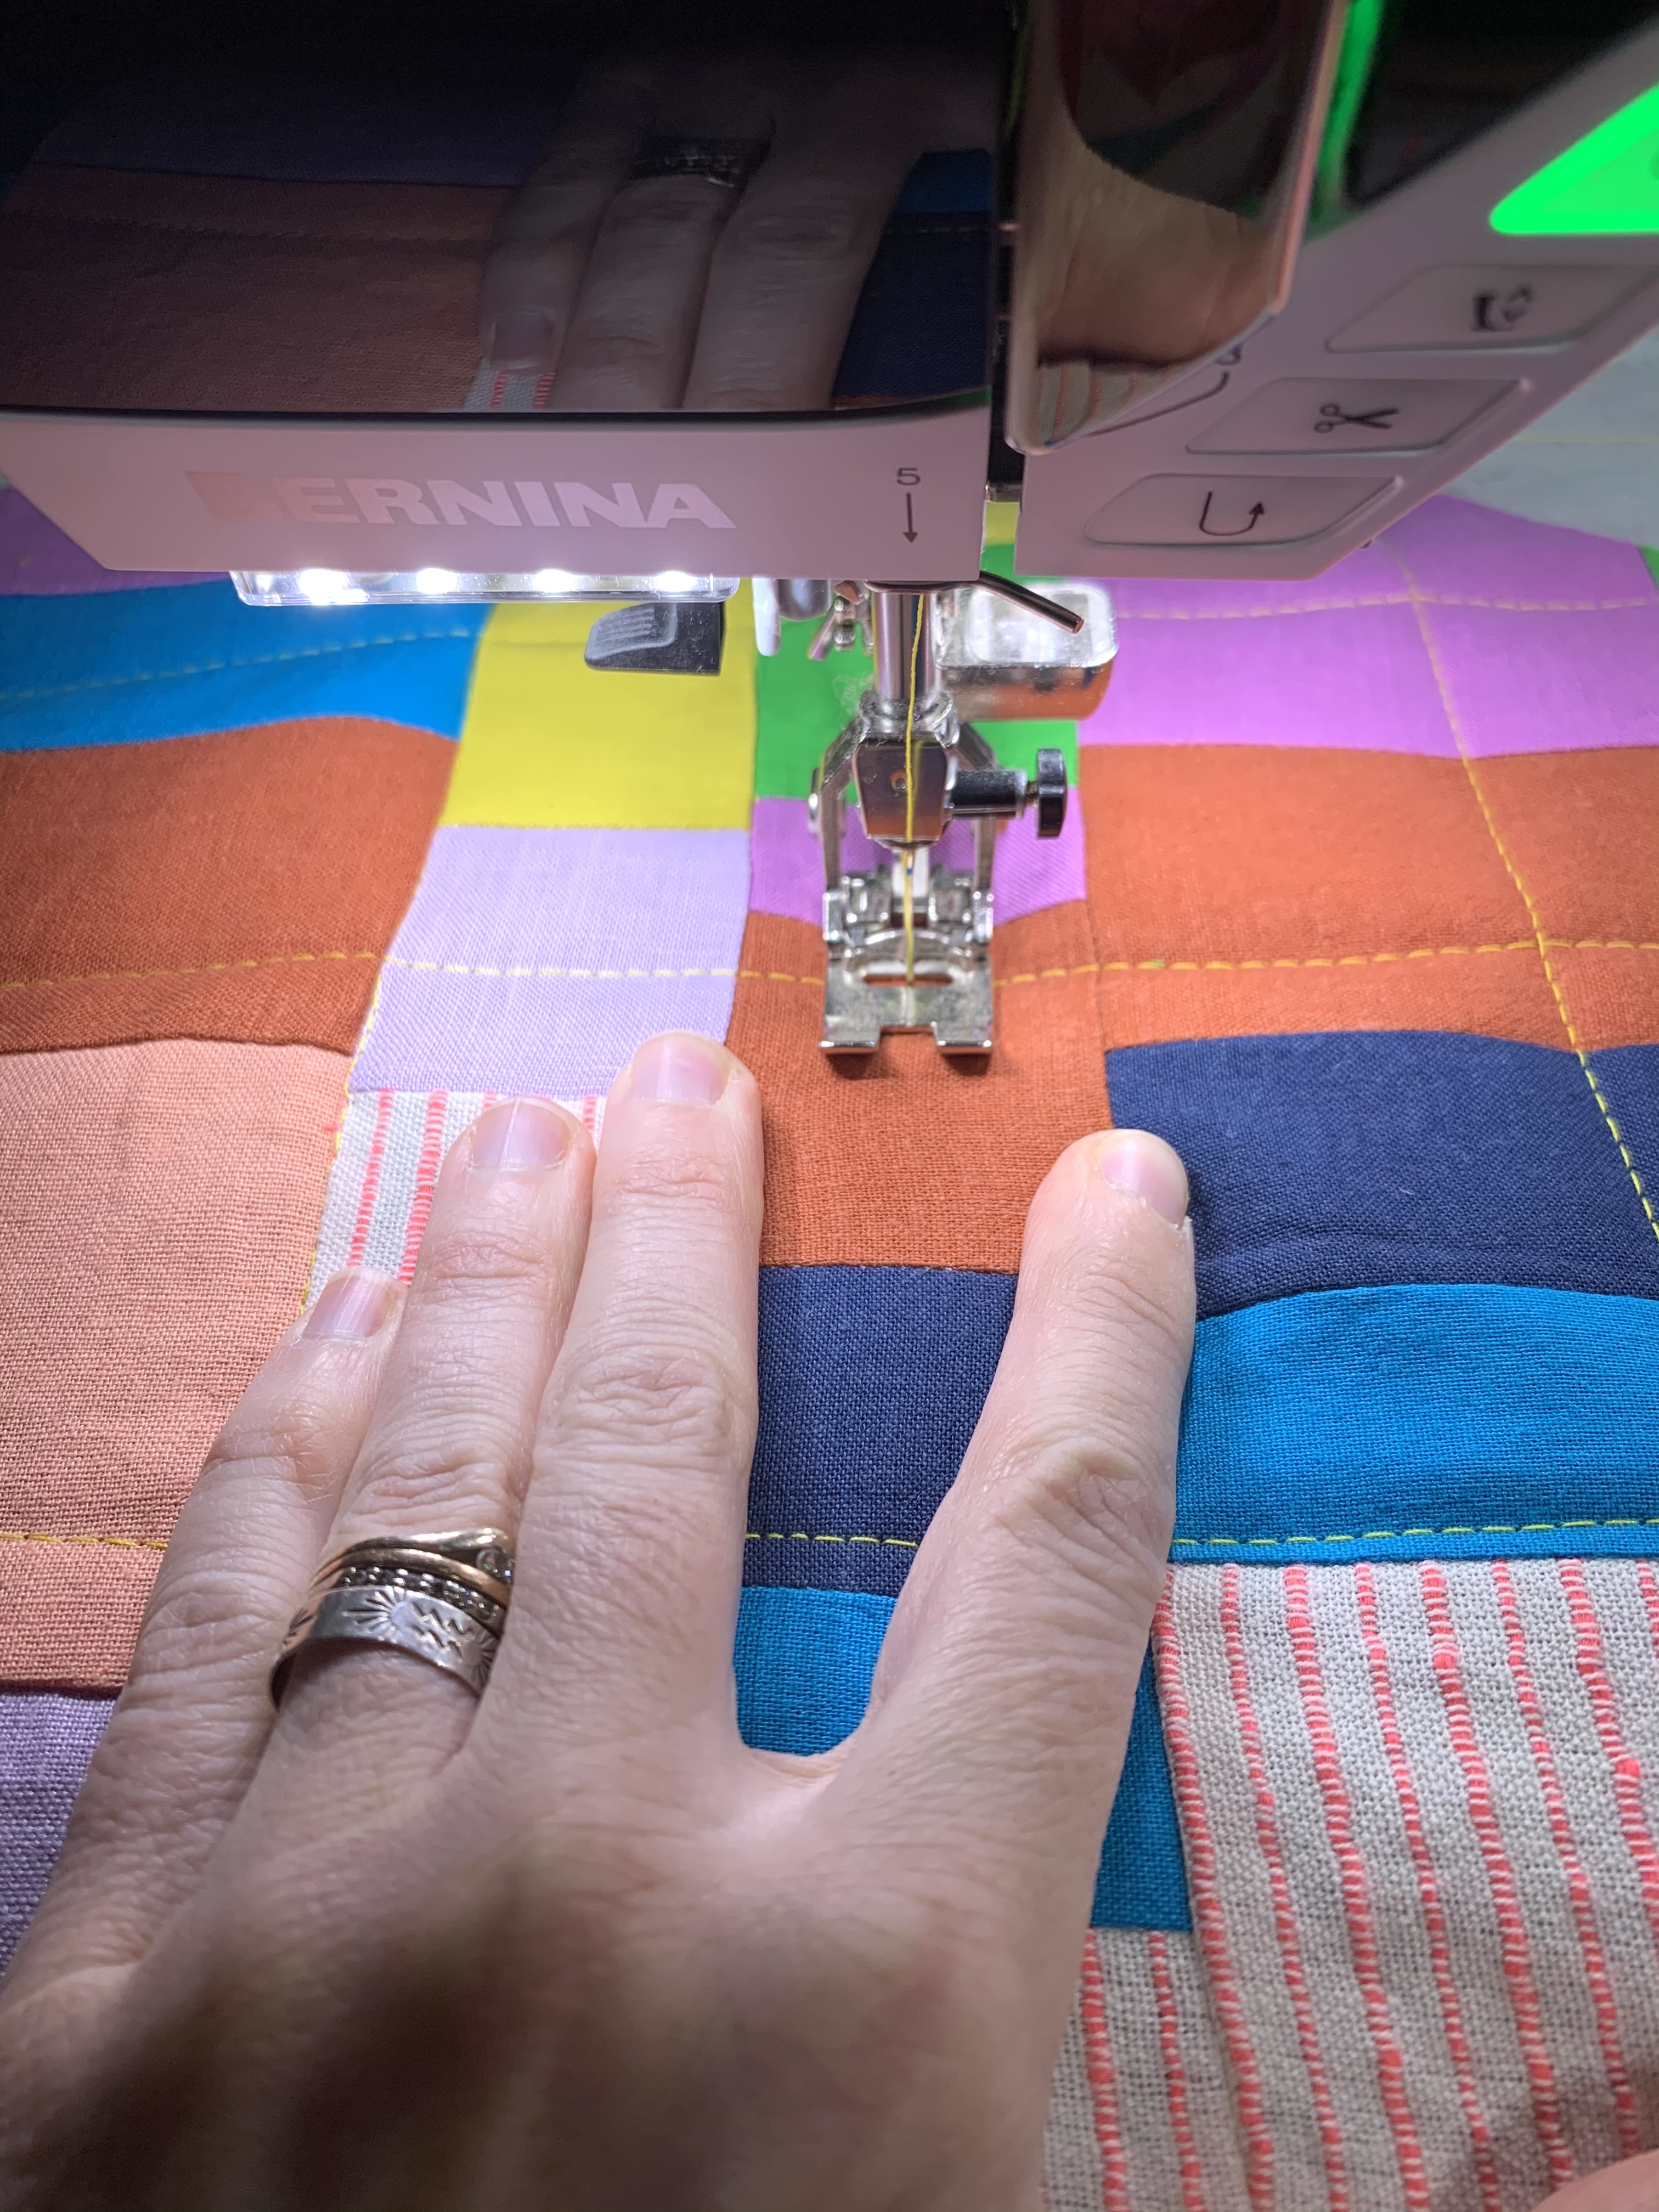
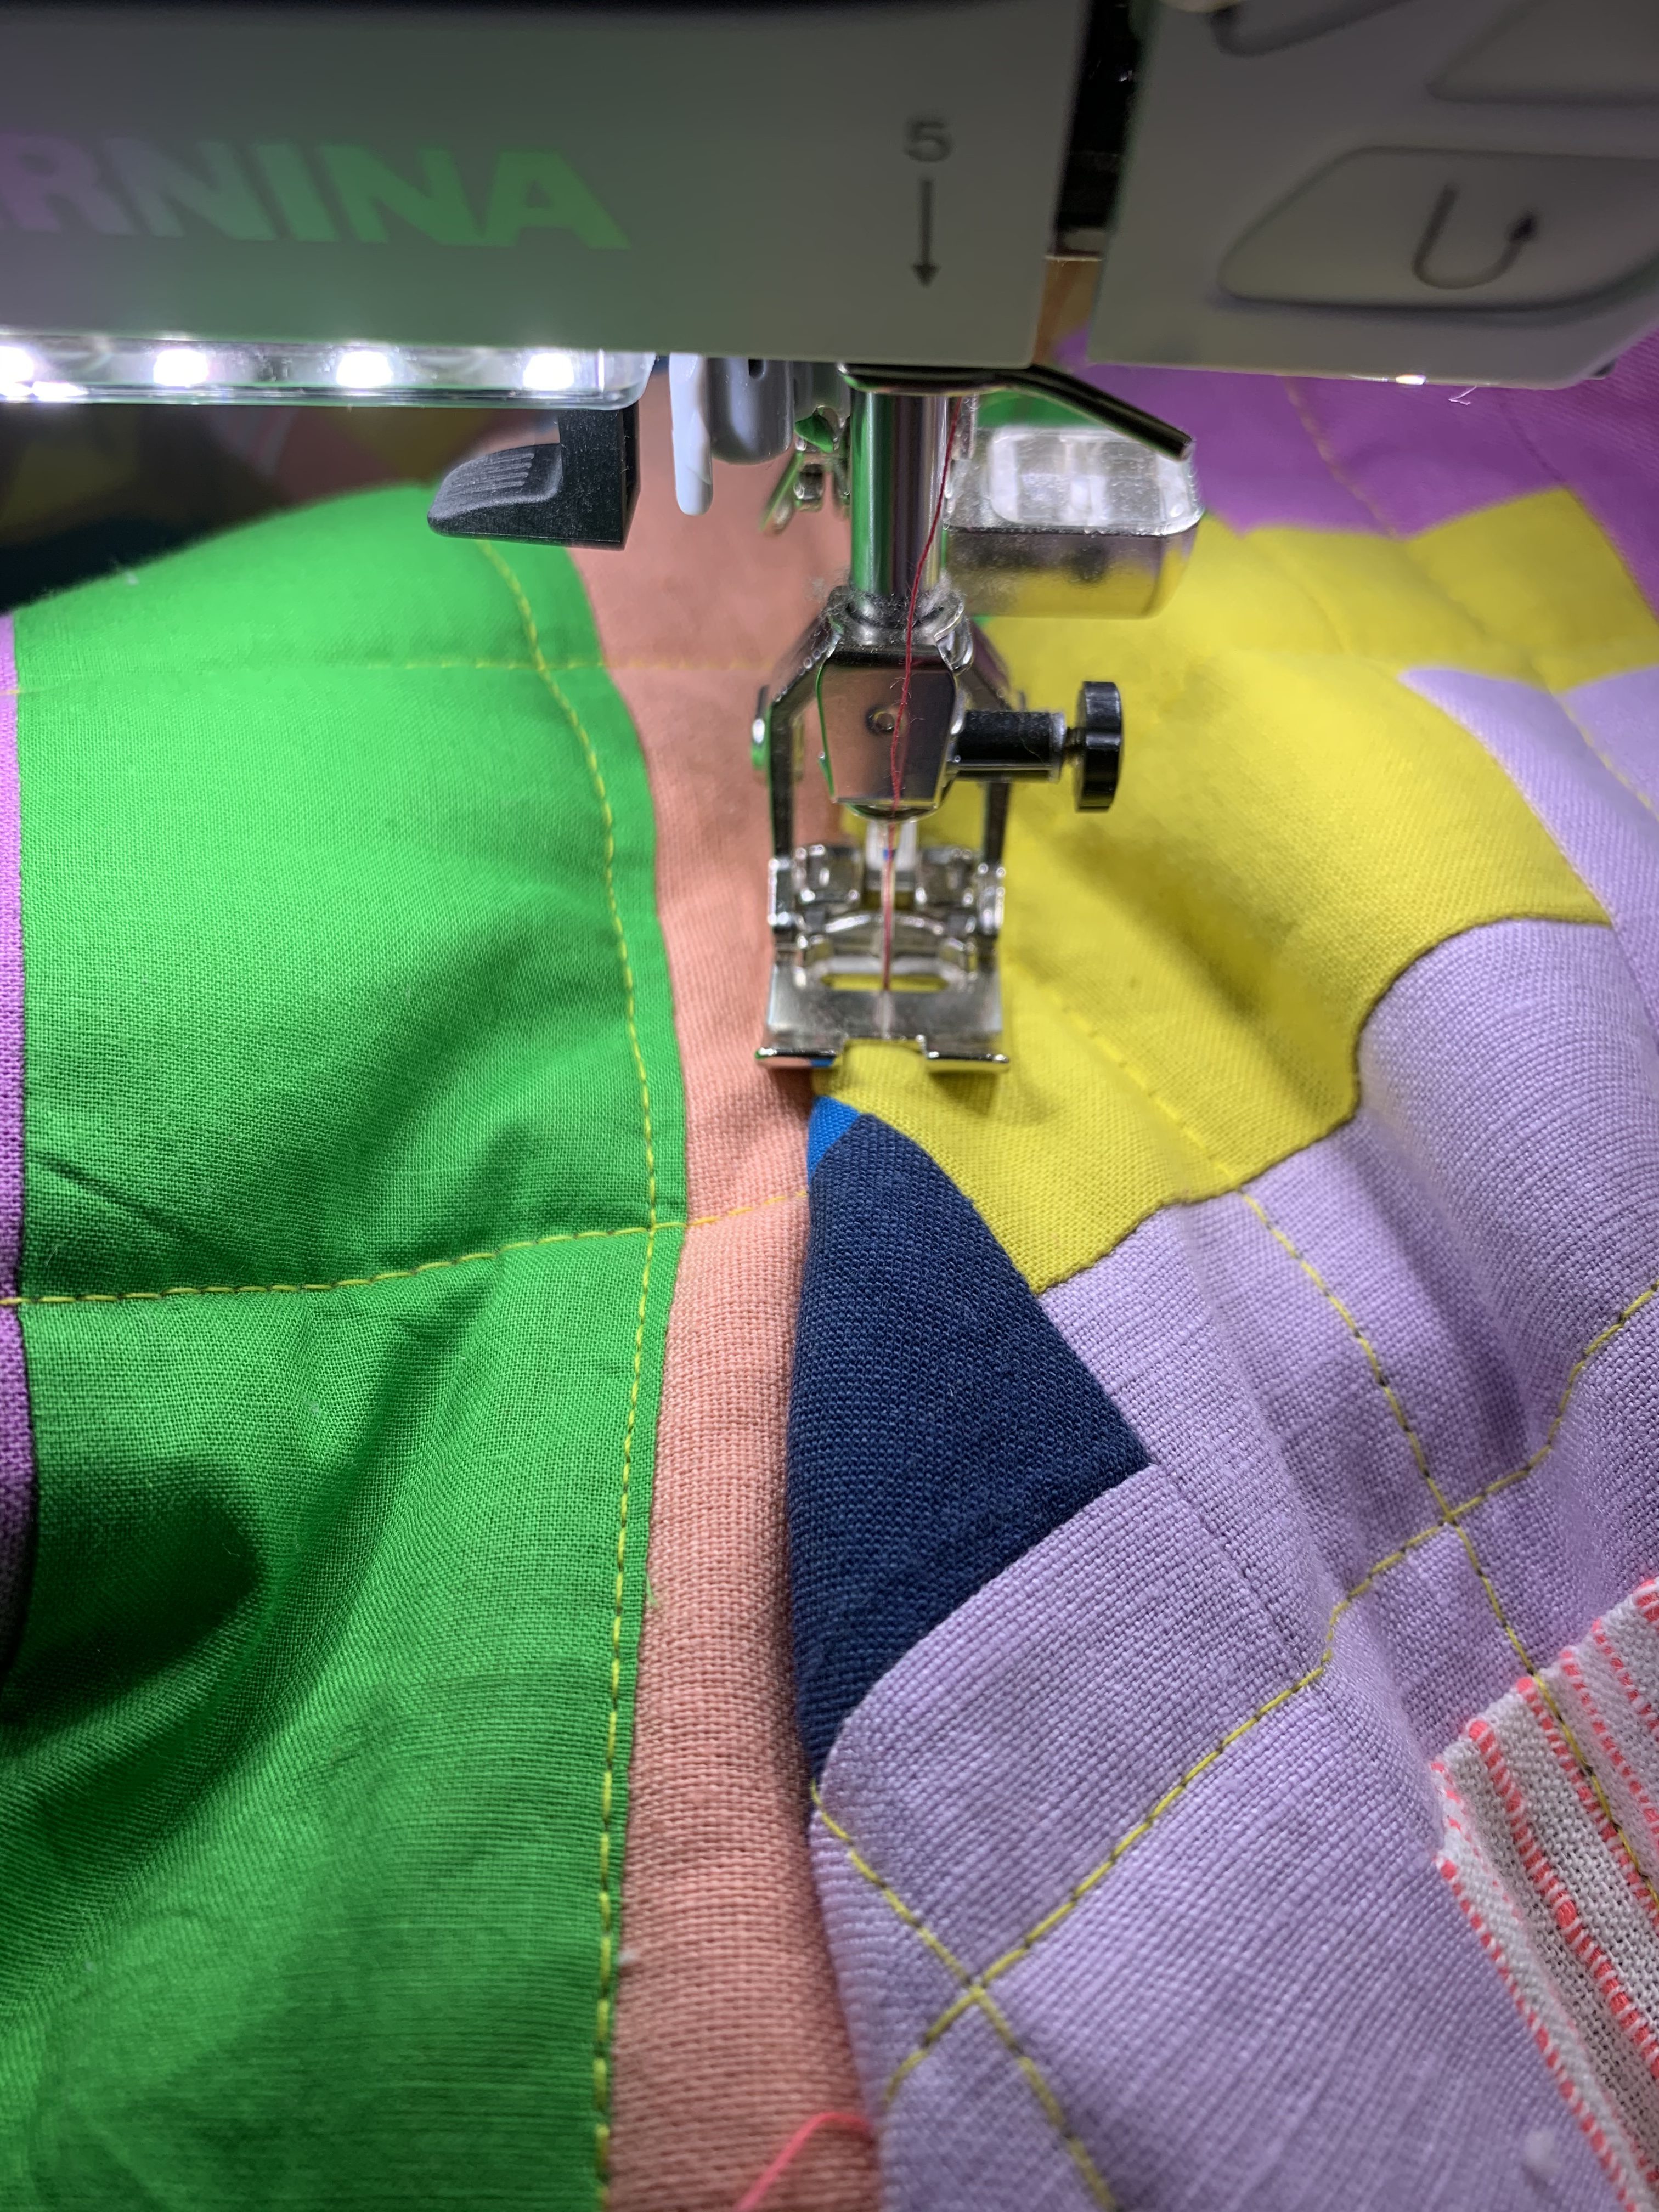
If you don’t have a walking foot yet and are trying to quilt all these layers together, here is what I did to minimize the fabric moving issues. You can see I pressed down and spread my fingers on the area of fabric about to enter the presser foot. It worked! I also used a longer stitch for my quilting which seemed to help as well. (You better believe I’m ordering a walking foot now though! haha)

For the sleeves, I went with regular quilting cotton (large scraps I had in my bin!) as the lining because I didn’t want it to be hard to slide my arms into the sleeves when putting it on. To all the quilters out there, please excuse the non-perfection of my lines! I prioritized the color and patchwork over the perfection of those lines! Ha!
Tips for Sewing a Jacket With a Thick Lining
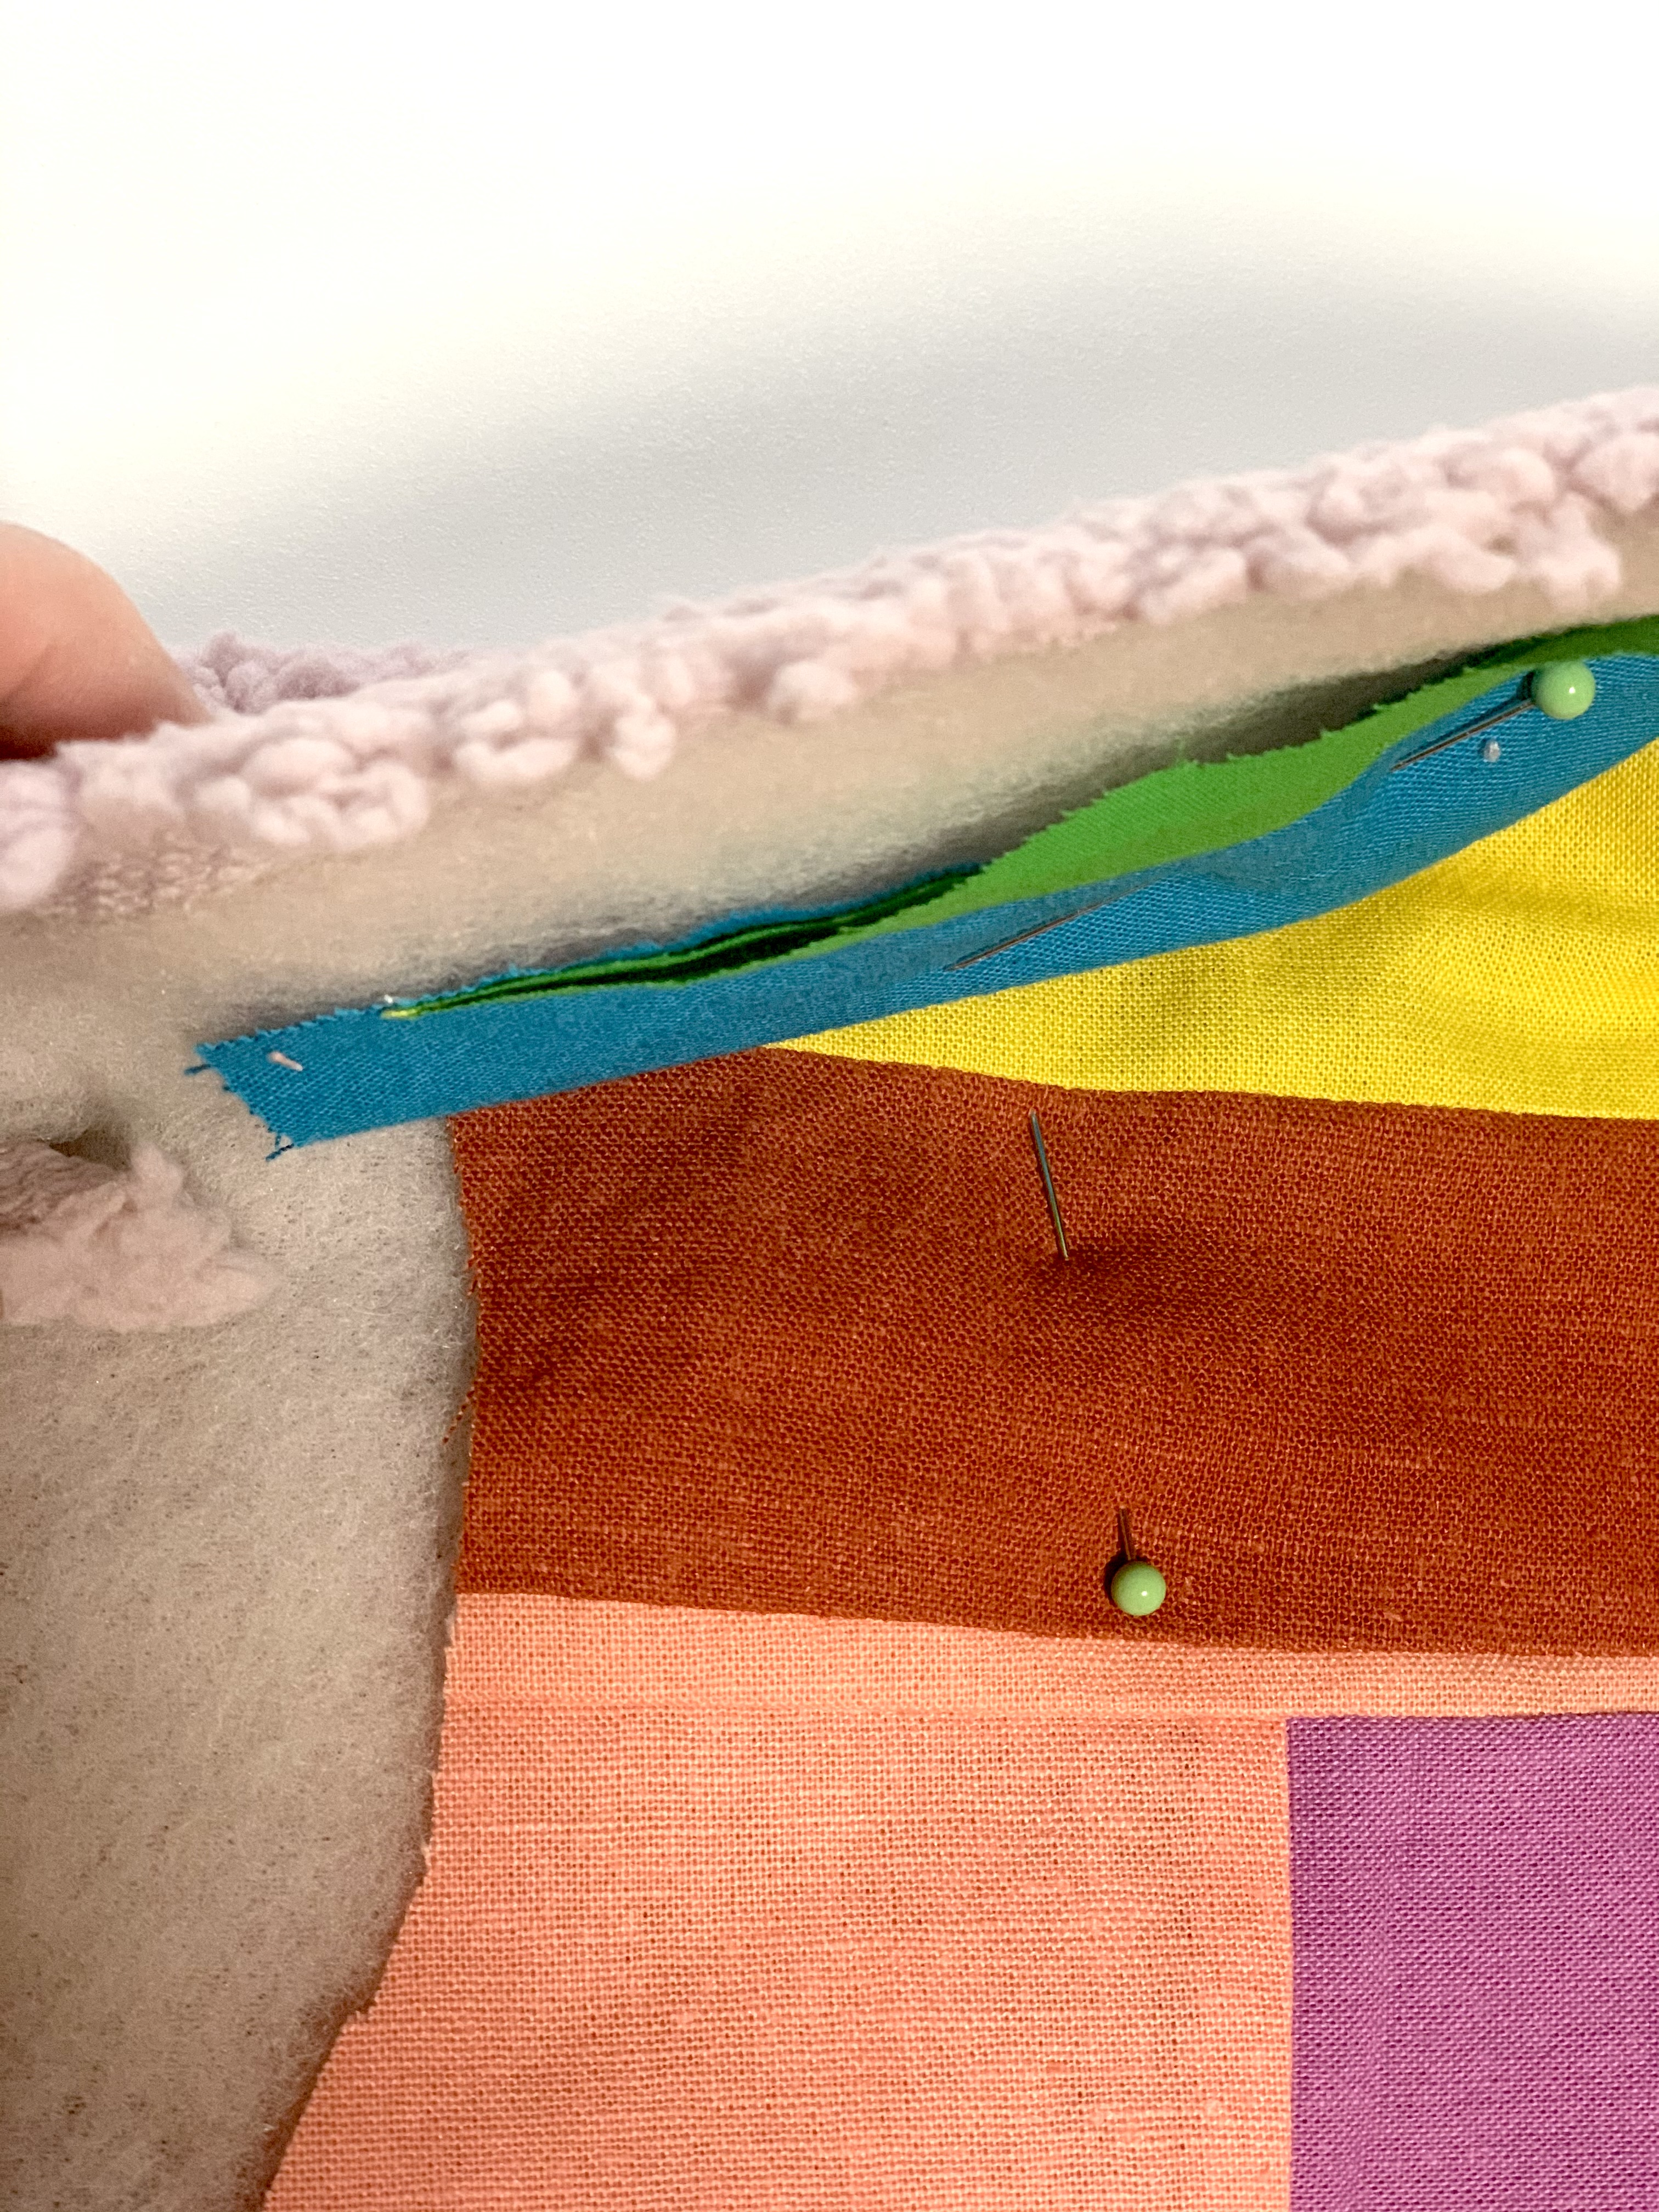
The seams of this jacket—especially if you line them with a fleece like I did—will be very thick. Here are some of the ways I flattened the seams and reduced bulk. In the photo above you can see the armscye. Here I trimmed the seams and then pressed them flat. I then went to the outside of the jacket and sewed them down.
I sewed down the SA on either side of the seam (kind of like a faux flat-felled seam). This made it nice and flat! Another tip: You can sew the sleeve in BEFORE you sew up the sides, so that its flat and not in the round! Much easier with all that bulk!
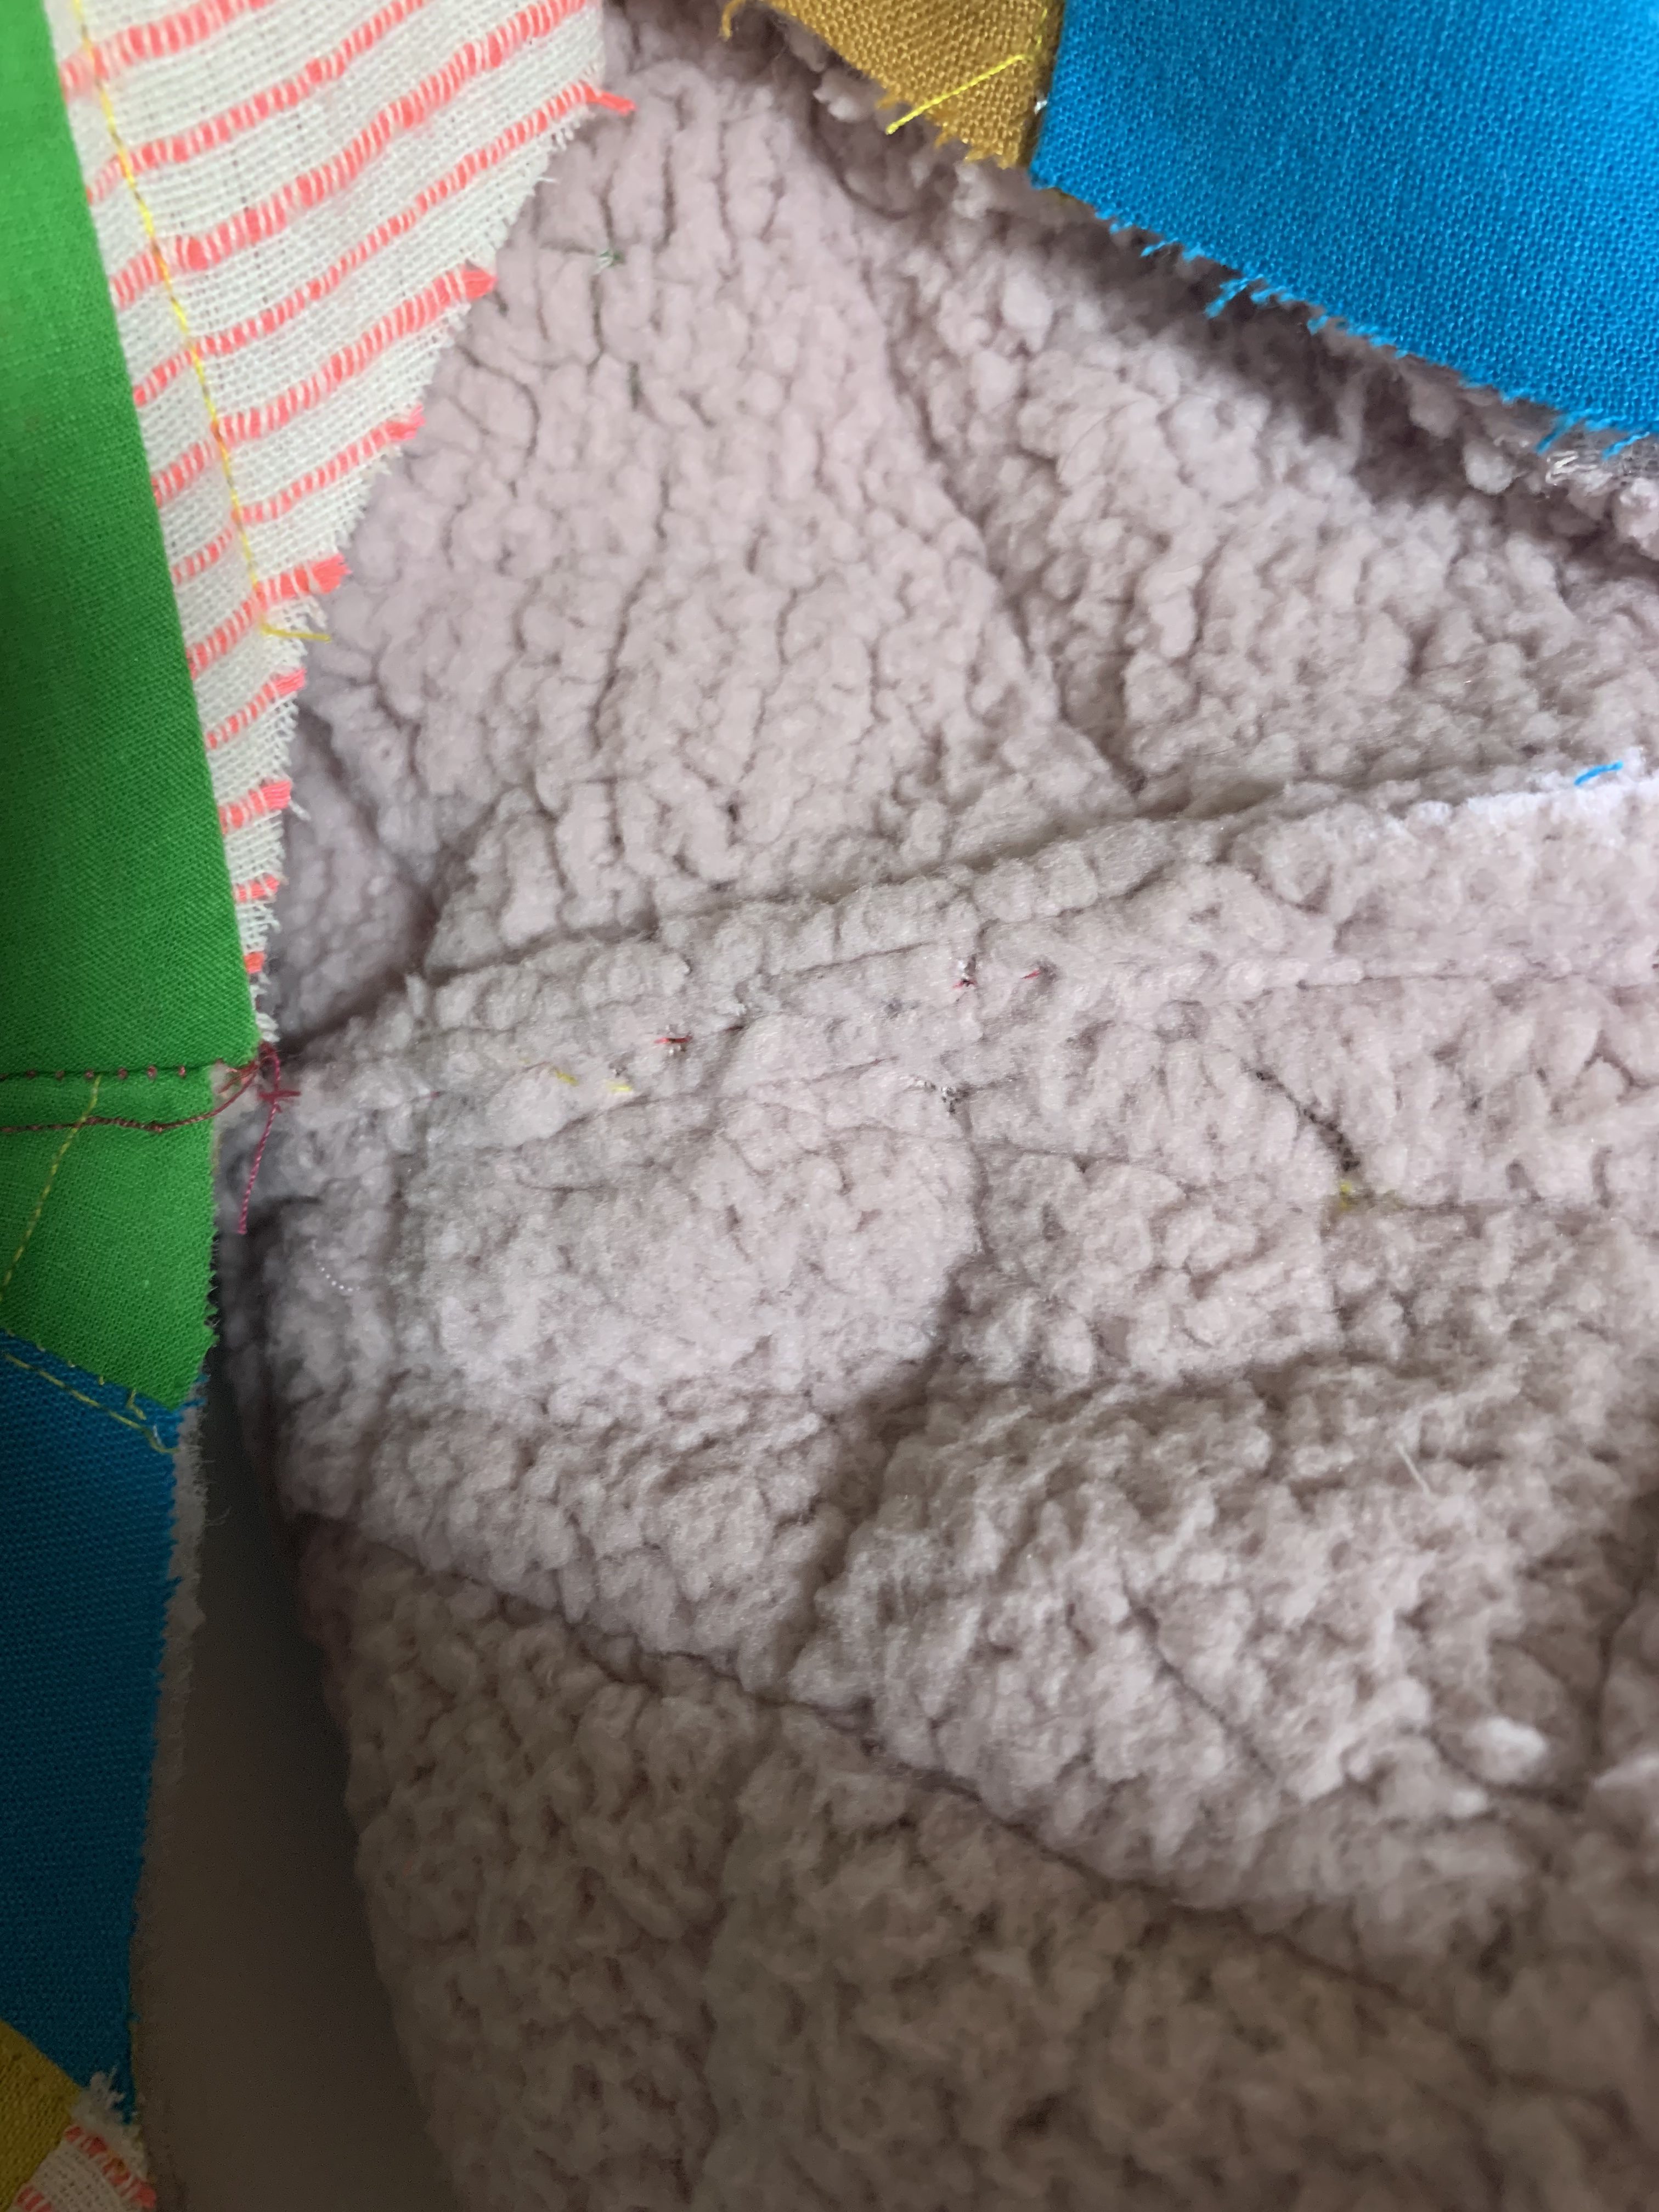
For the Collar (which I drafted and added myself) I did the same thing. I trimmed the SA, stitched the seam down (just to one side), and then I put bias tape on top to cover it. I then sewed down both sides of the bias tape.
You can see all the lines of stitching here. It made that seam very flat!
Finishing Touches to the Quilted Jacket
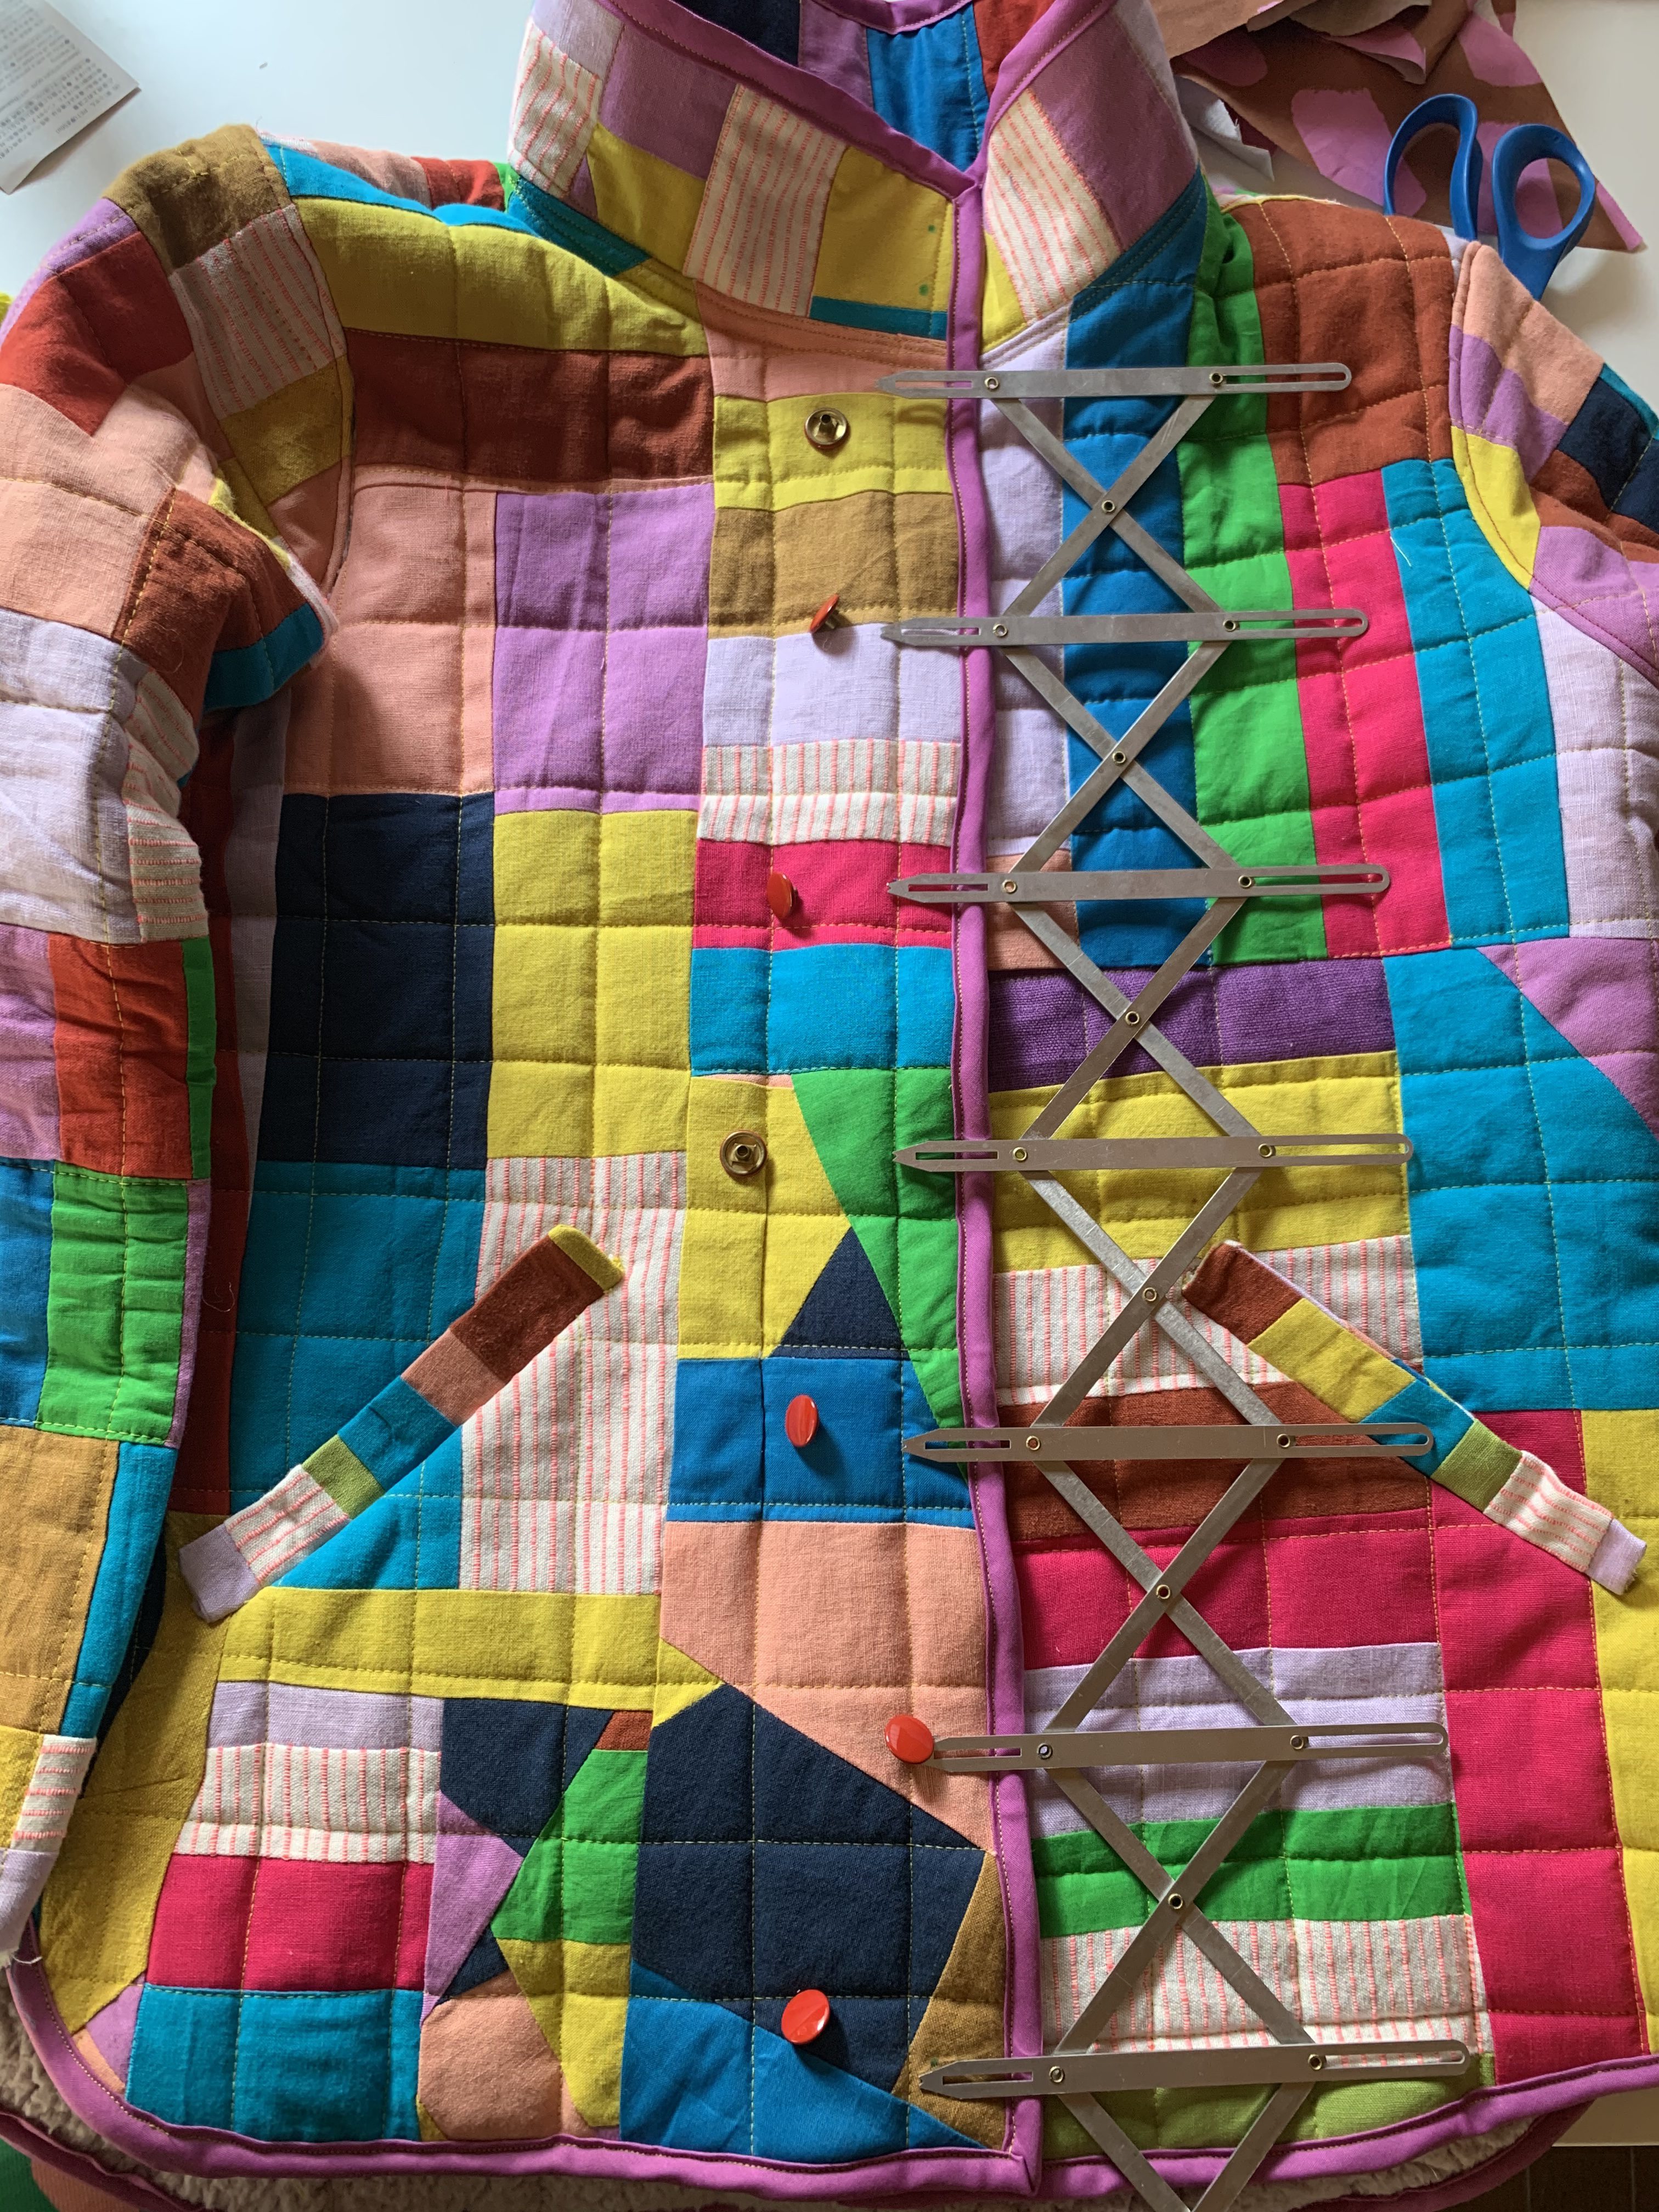
Once the jacket was constructed, I finished all the edges with bias tape, much like a quilt! Then it was time for closures (totally optional!). I used metal snaps because I like how they are with bulky fabrics, plus they’re fast! I used my Simflex gauge to figure out the spacing and my handy snap tool (available wherever you get snaps) to make it quick and easy to apply all these fun, red snaps!
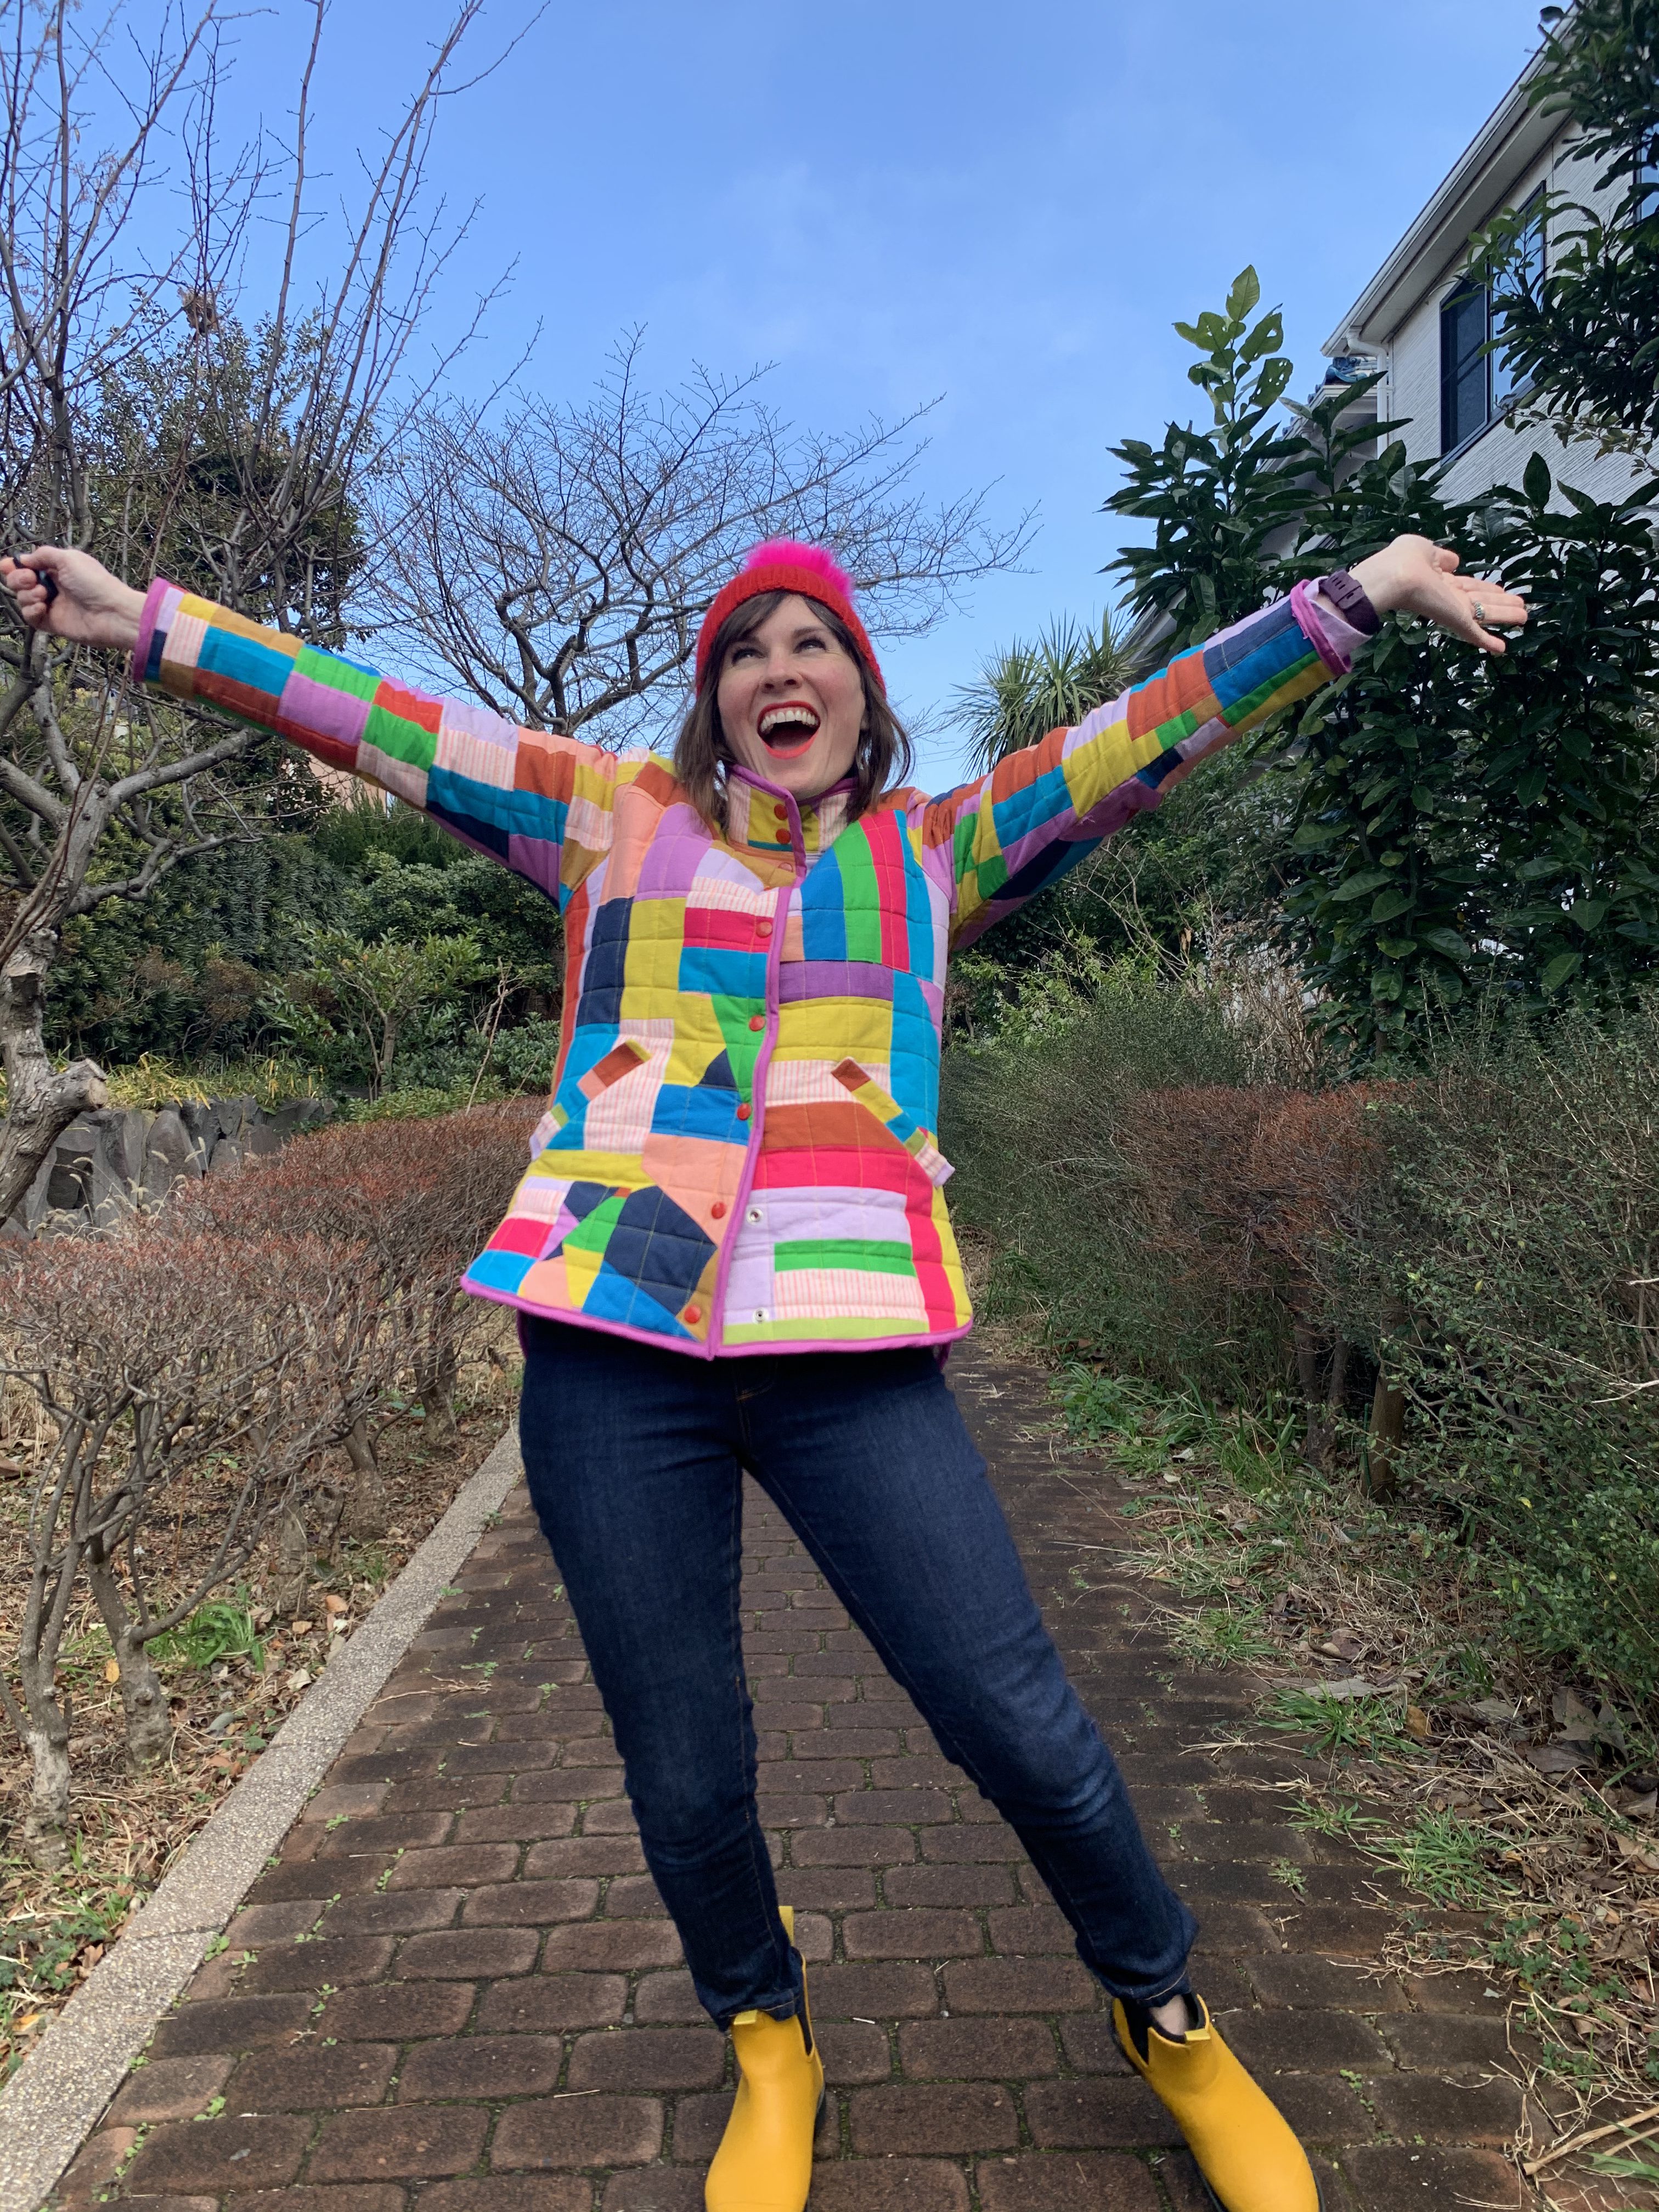
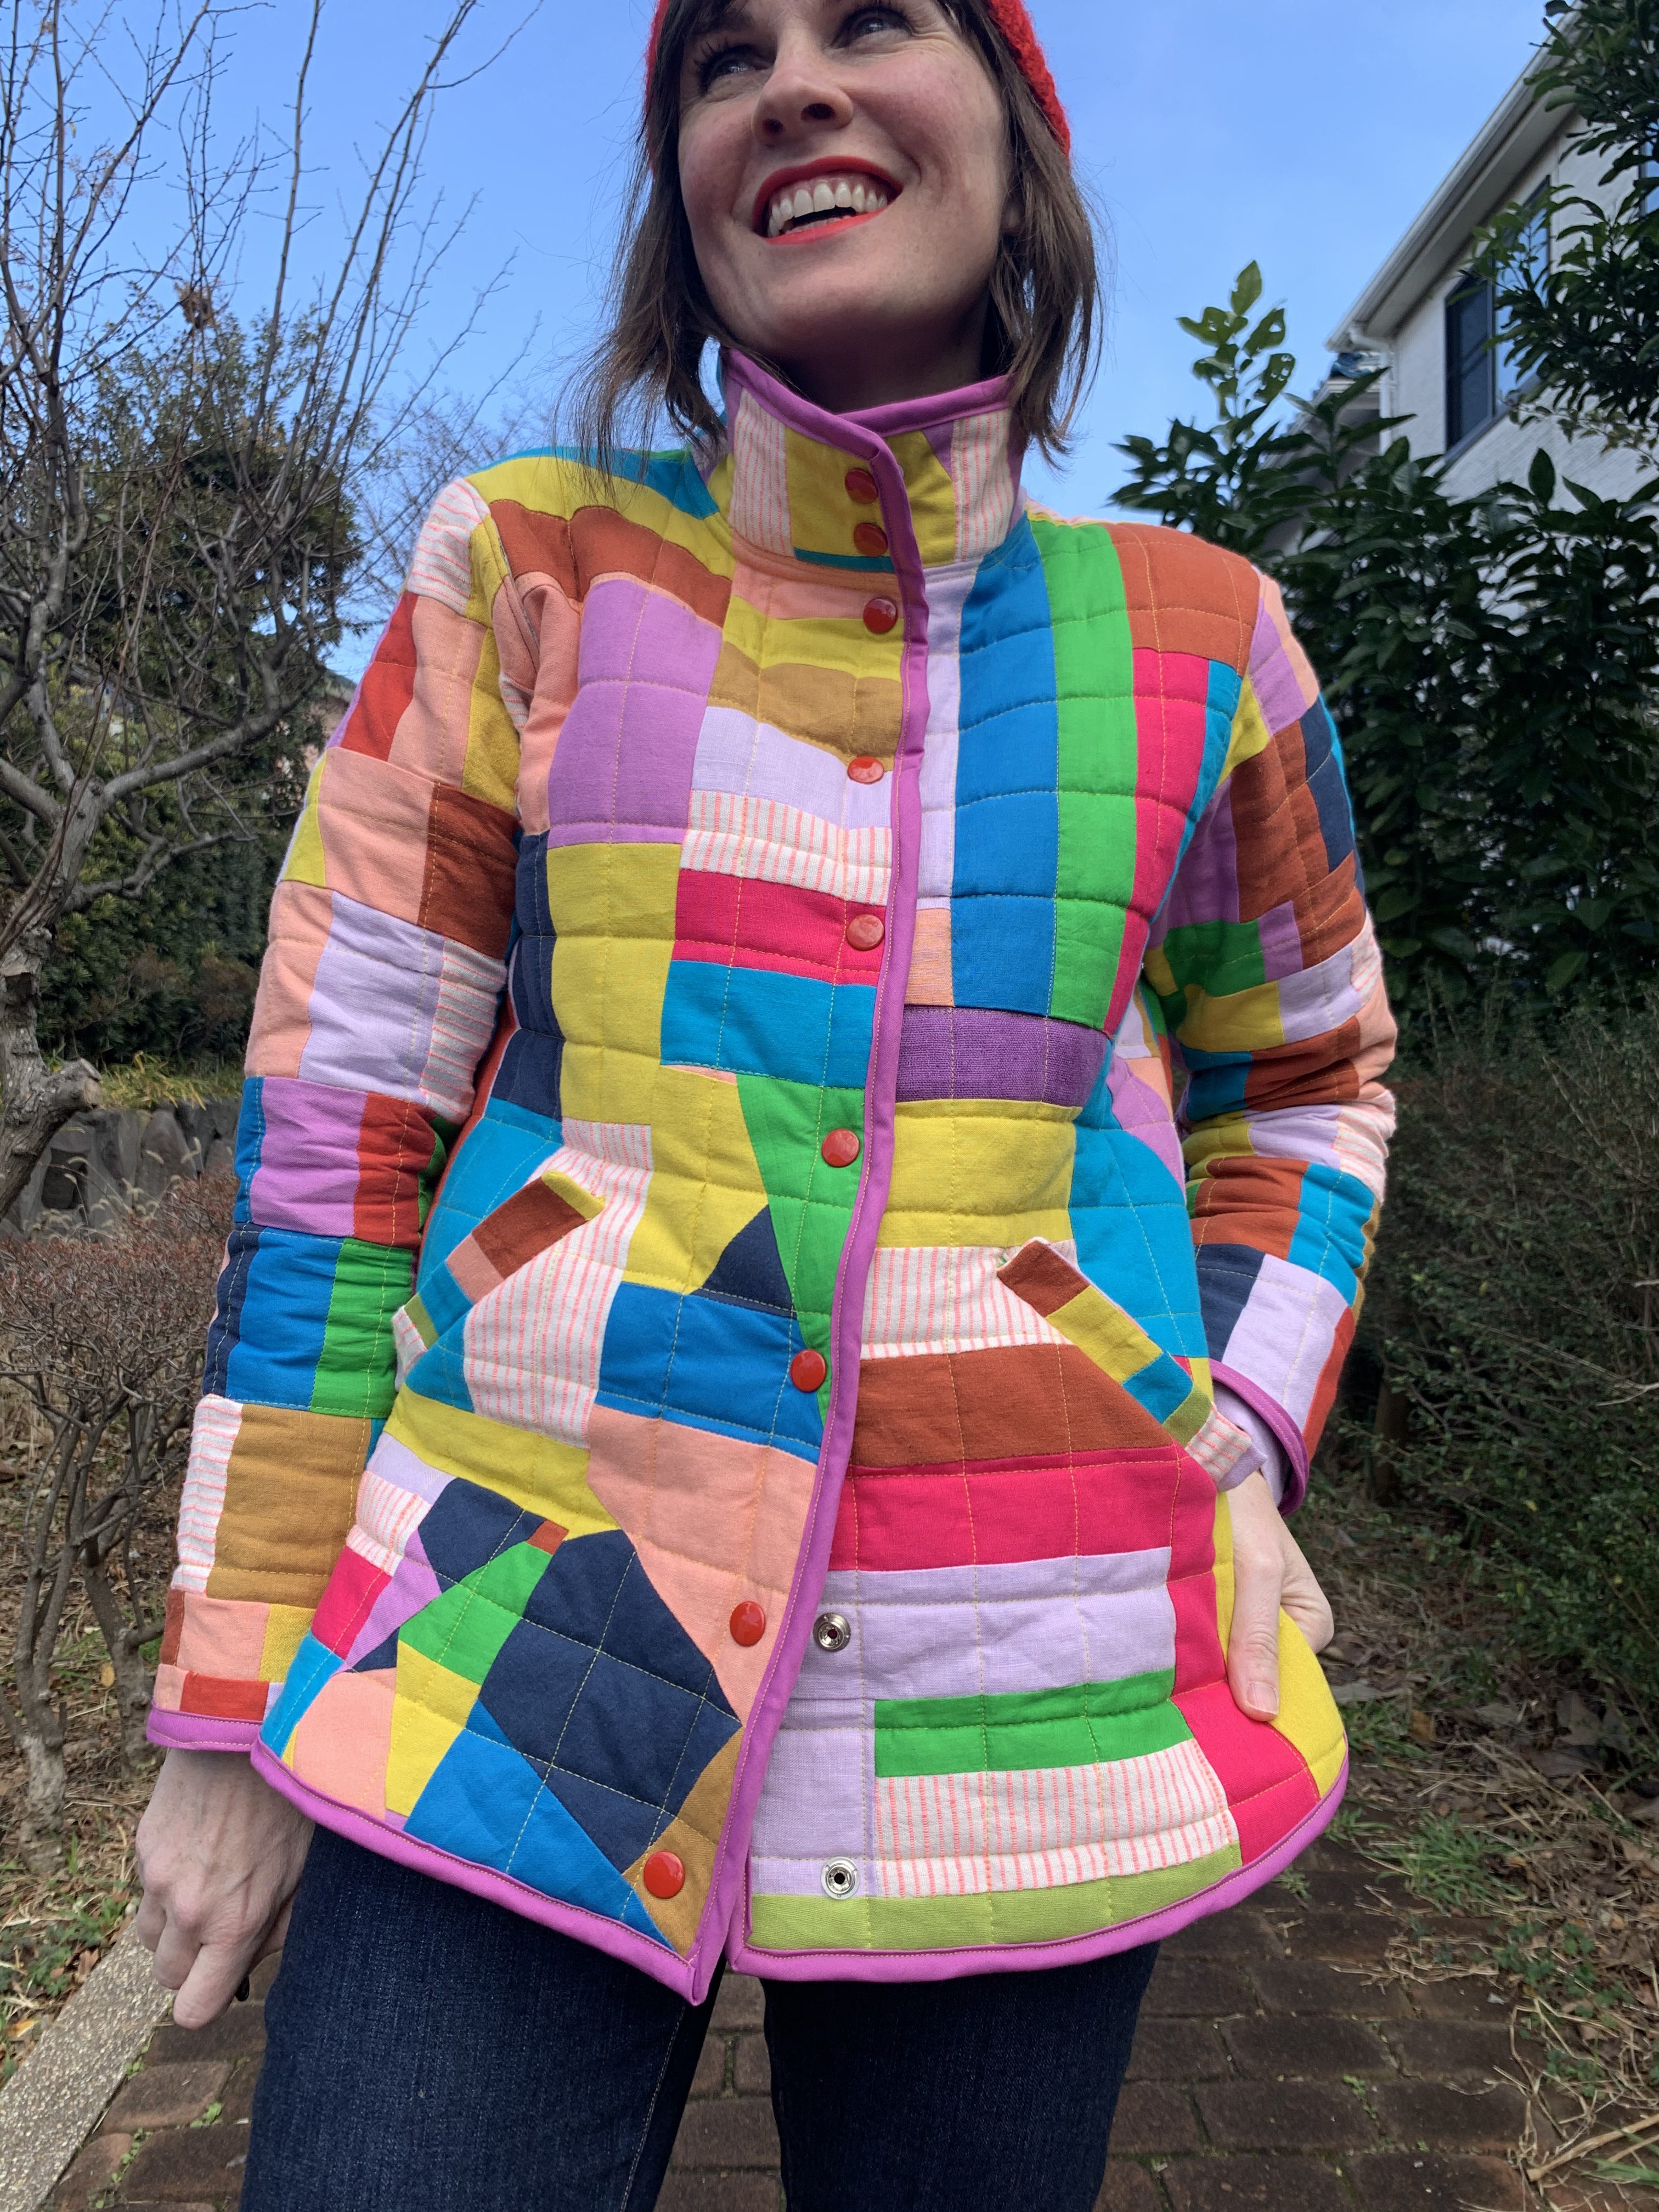
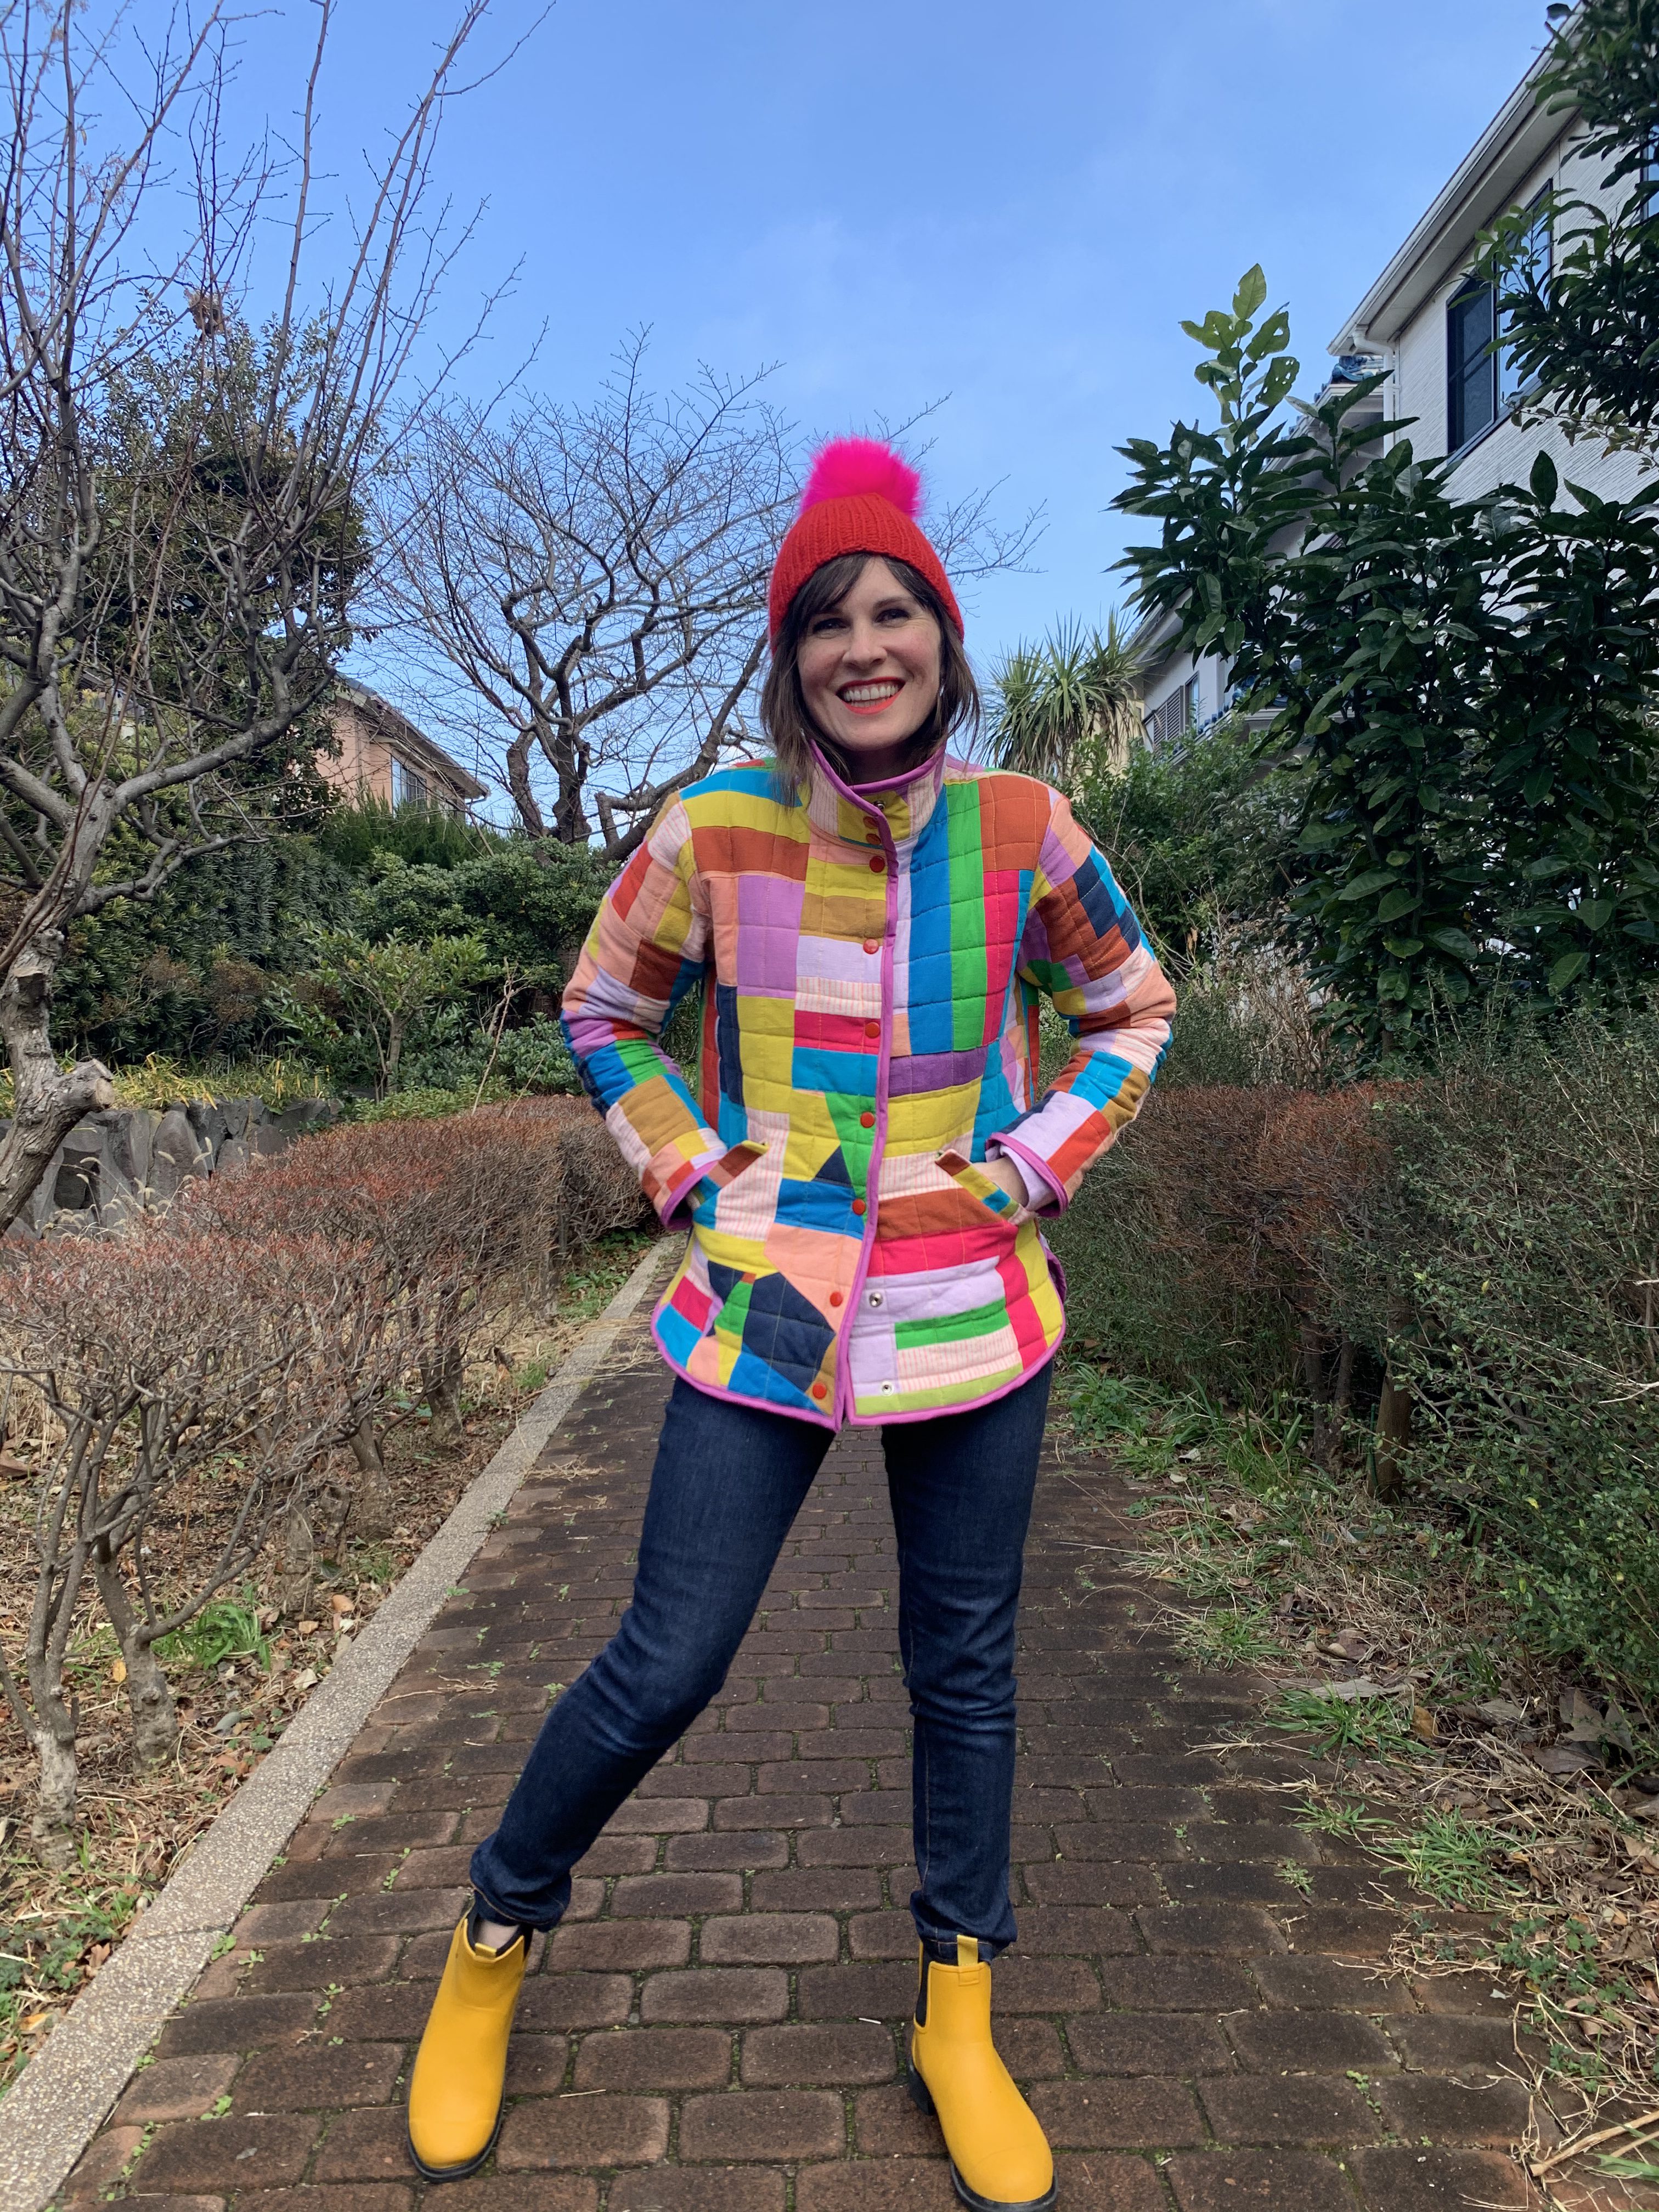
And this is how it feels to wear your super colorful, eco-friendly (reducing fabric waste!), warmmmmmmm quilted jacket! It feels like wearing a blanket and I haven’t worn any other jacket since!

