Add pizazz to a simple patriotic patchwork tablerunner by adding cording and buttons with the Knot-ical tablerunner by BERNINA Ambassador, Kari Carr.
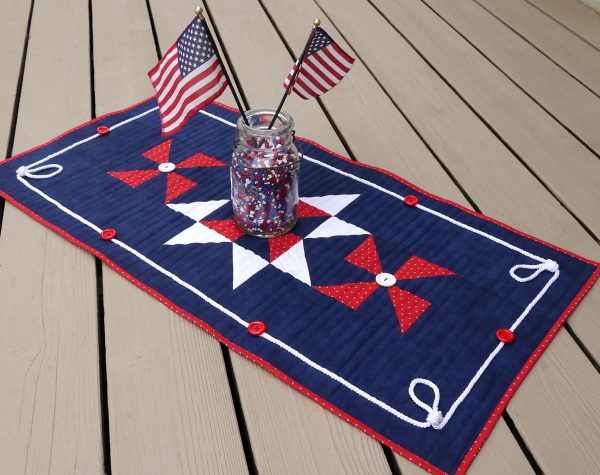
Very soon we will be celebrating the 4th of July and I wanted to have something fun for my table. I went to my stash and found some basic red, white and blue fabrics to create this embellished table topper. In a few hours, you too can have this quilt gracing your table.
As you can see with the following illustrations, the patchwork is pretty simple & the pizazz will come when you add the cording and buttons.
Materials:
- Blue fabric 7/8 yard
- Red fabric 1/2 yard (includes binding)
- White fabric 1 Fat Eigth (9″ x 21″)
- Backing fabric 5/8 yard
- White cording: 4 yards of 1/4″ diameter
- Buttons: 6 red (7/8″), 2 white (1 1/8″)
- Batting: 20″ x 40″
- Fabric basting glue
- Red embroidery floss for buttons
- Clearly Perfect Angles
Cutting:
Blue fabric:
Cut three strips, 6 1/2″ wide by the width of fabric.
Subcut:
Four 6 1/2″ x 15 1/2″ rectangles
Four 6 1/2″ squares
Two 6 1/2″ x 3 1/2″ rectangles
Two 8″ squares
Red fabric:
Cut two 8″ squares.
Cut three strips, 2 1/4″ wide by the width of fabric for binding.
White fabric:
Cut eight 3 1/2″ squares
Sew the patchwork:
Pinwheels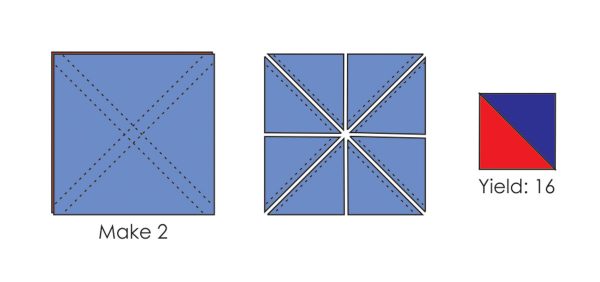 Using the angled green bands and “b” alignment on the Clearly Perfect Angles, sew the 8″ red squares and the 8″ blue squares together diagonally, 1/4″ from the points in each direction. Cut apart as illustrated. Press and square to 3 1/2″. You will have extras.
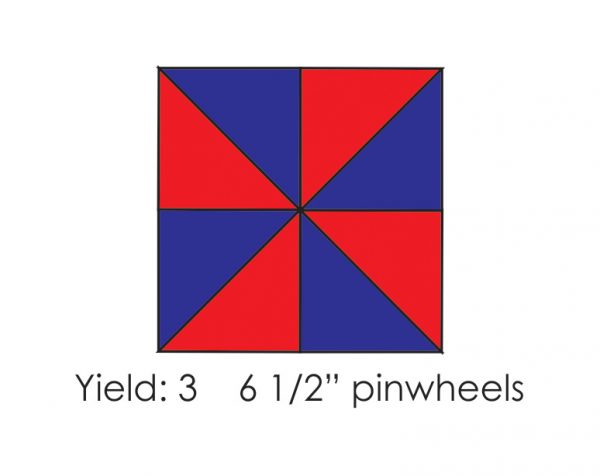 Sew four half-square triangles together to form pinwheels units.
Flying Geese Sew a white square to each end of the 3 1/2″ x 6 1/2″ blue rectangles as shown, using alignment “a” on the Clearly Perfect Angles.
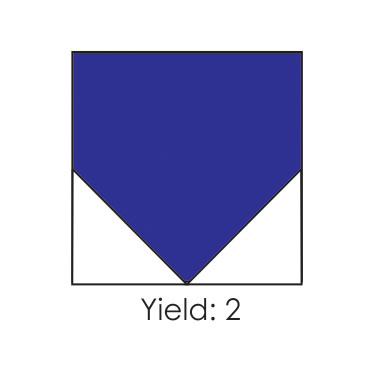 Repeat this same technique on one end of each of the blue 6 ½” squares.
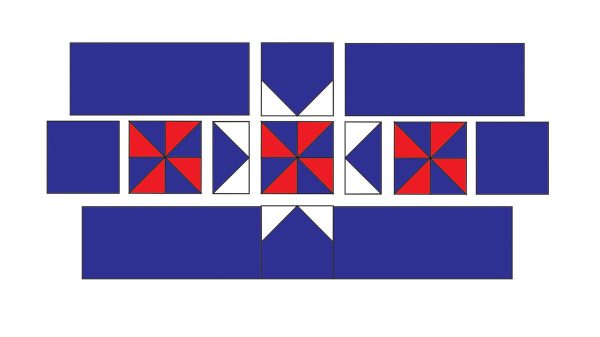 Assemble the pieces as illustrated.
Quilting:
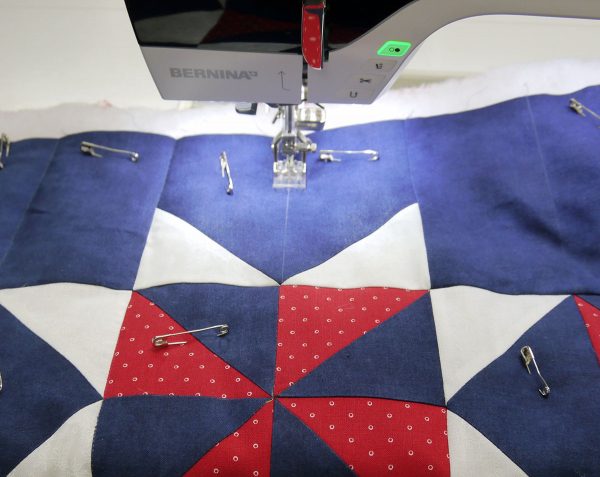
Now the topper is ready to be quilted. I used monofilament thread and did simple straight line quilting, using a dual feed foot, but you can certainly quilt the top as you would like. (Hint: use a white-print backing fabric to camouflage quilting and embellishment stitches.) You can see that I only marked a few lines.
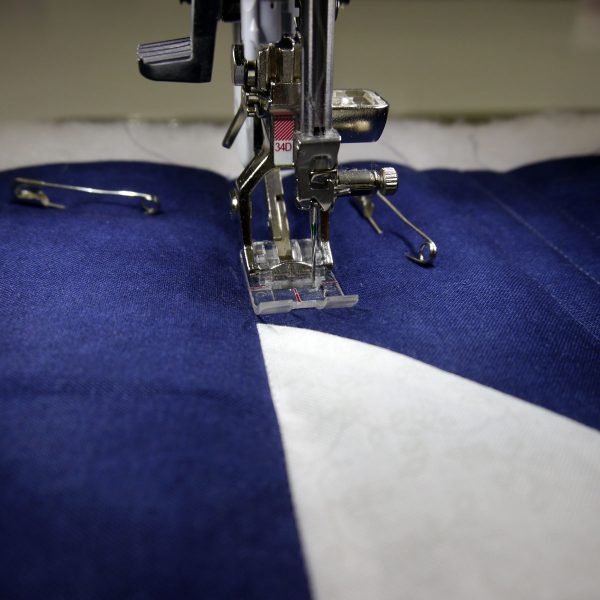
After stitching those, I simply moved my needle as far to one side as possible and used the edge of the foot and stitched line as my seam guide, working my way across the quilt.
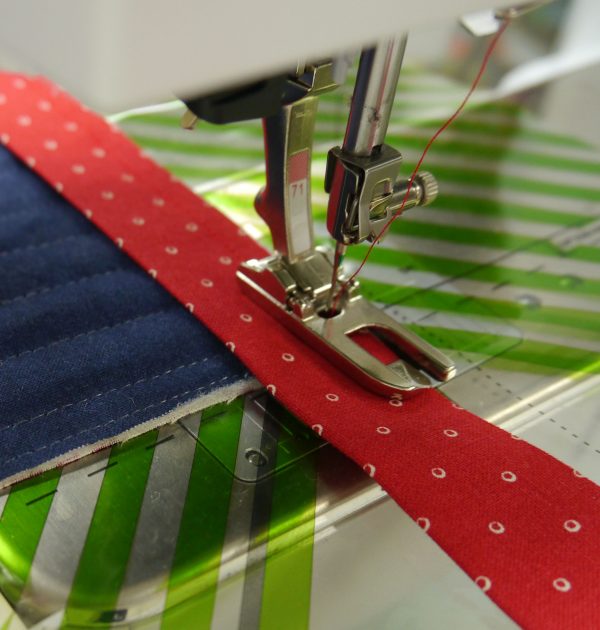
The binding was attached and stitched into place using the BERNINA Lap seam foot #71 that was demonstrated in this blog post. You can also see in this picture, how the dashed vertical line on the Clearly Perfect Angles helps you know when the quilt is ¼” from the corner.
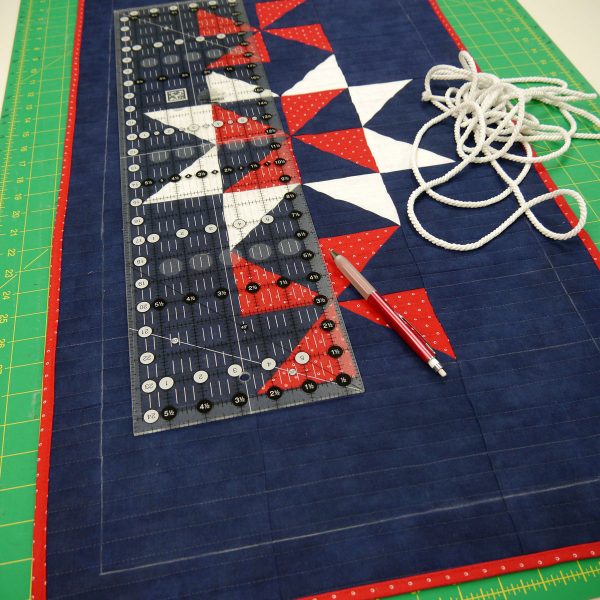
Now for the fun part, adding the cording. First, chalk placement lines that are 1.5″ from the binding all the way around.
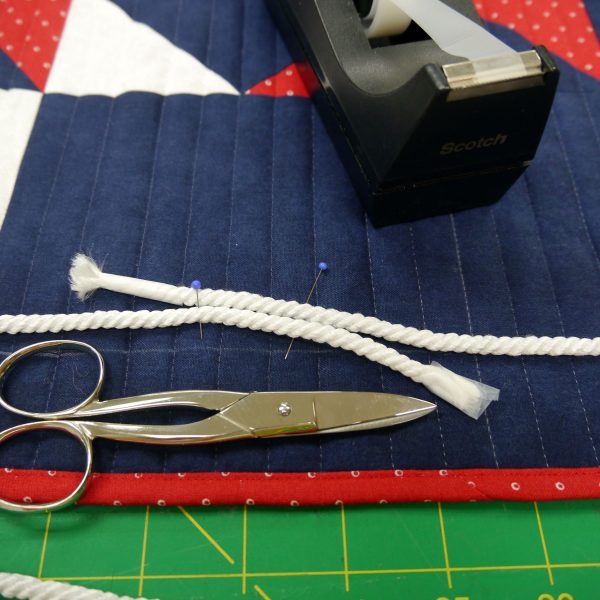
You will want to begin and end the cording where the joint will be hidden by a button. I left long tails until I knew I had everything where I wanted it.
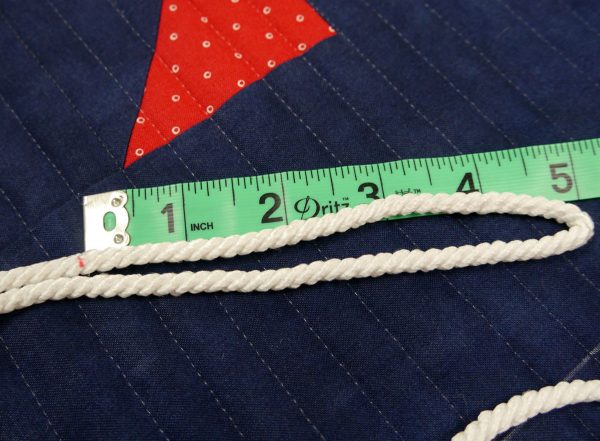
One of the most time-consuming parts of this project will be getting the knots to not only end up in the correct place, but making sure the loops are all the same size. Hopefully, this information will speed up the process for you. I put a little mark where I wanted the knot to fall in the corners. I then made a loop 5″ long to use to tie a simple knot. (You can use whichever type of knot you’d like.) Use pins to hold the cording in place as you work your way around the quilt.
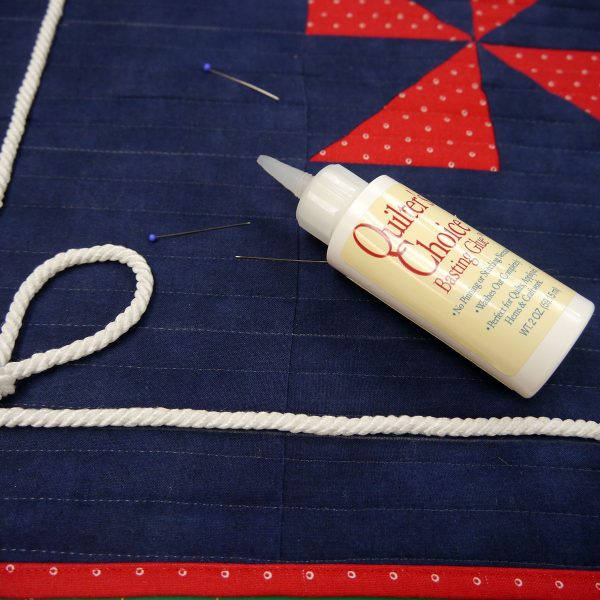
Use a glue baste to hold the cording in place (other than the loops) once you are happy with the placement.
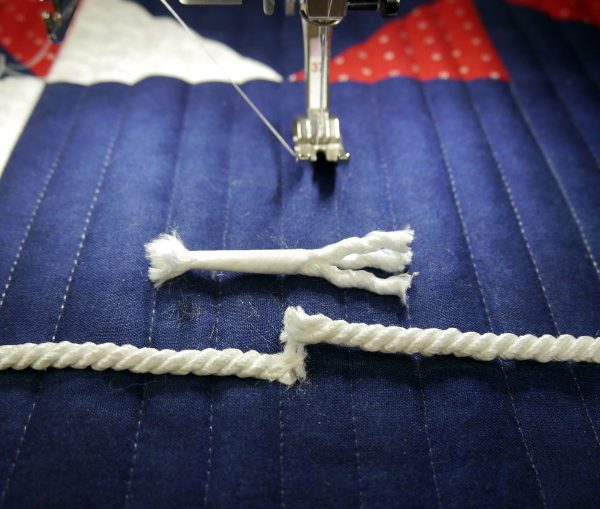
Trim the ends of the cording so that they butt up against each other.
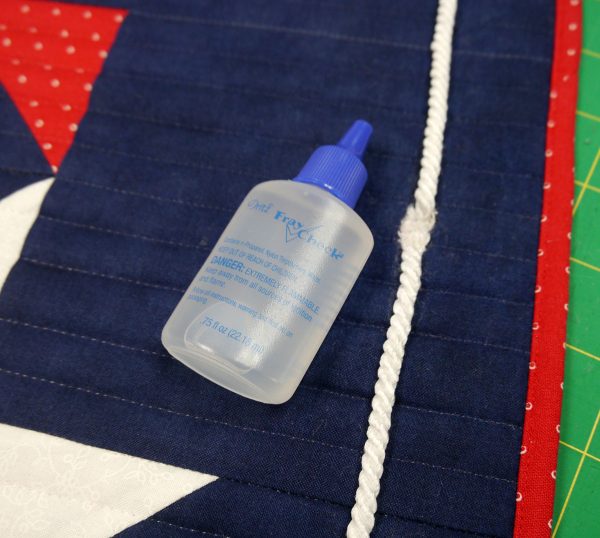
Stitch these to the quilt with small stitches, back and forth so that the cording doesn’t unravel. To give me a little more peace of mind, I used some fray-check. This will look a little messy, but remember that all of this will be hidden under a button.
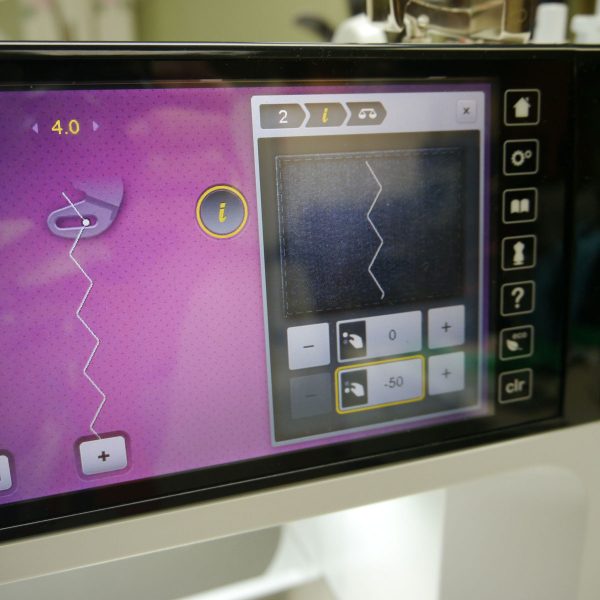
Without a doubt, having the BERNINA Bulky overlock foot #12C would have made this project a whole lot easier! But since I didn’t have one available, I experimented and ended up using my clear BERNINA Quilting foot #29. I used a simple zig-zag stitch, but changed the balance and decreased the presser foot pressure so that I could feed the cording easily through the machine.
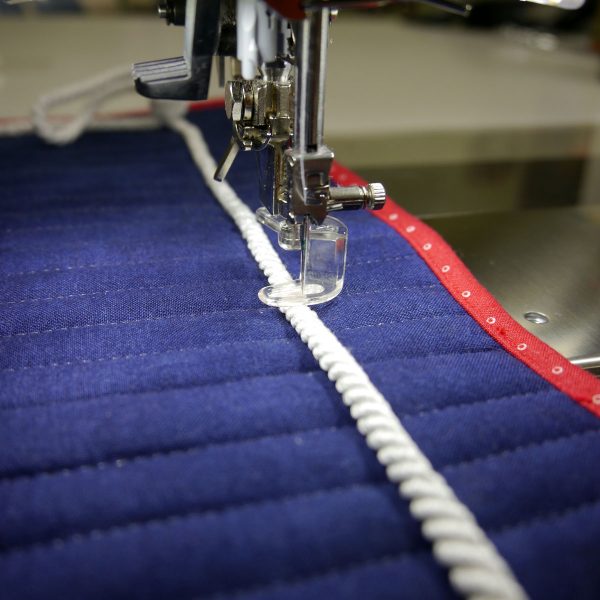
Start and stop each side as close to the knot as possible.
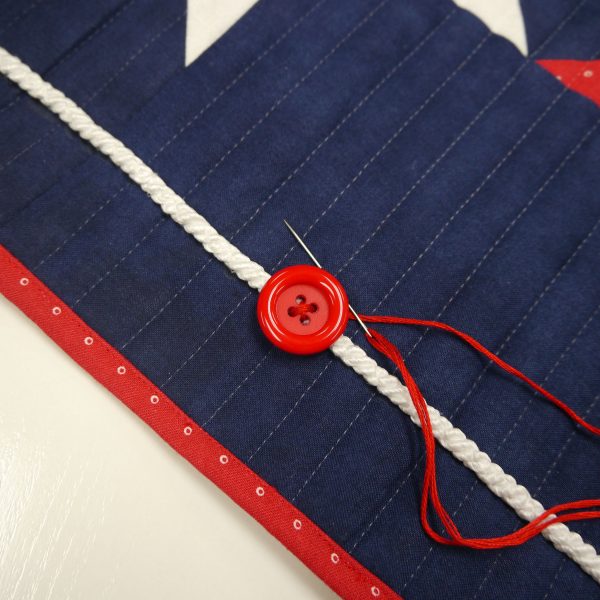
Using embroidery floss, stitch the buttons over the cording and also in the center of the two outer red pinwheels. Once the loops are hand-stitched into place you are ready to celebrate the holiday with this unique topper.


